Indoor Air Plant Care Misting Schedule And Light Needs
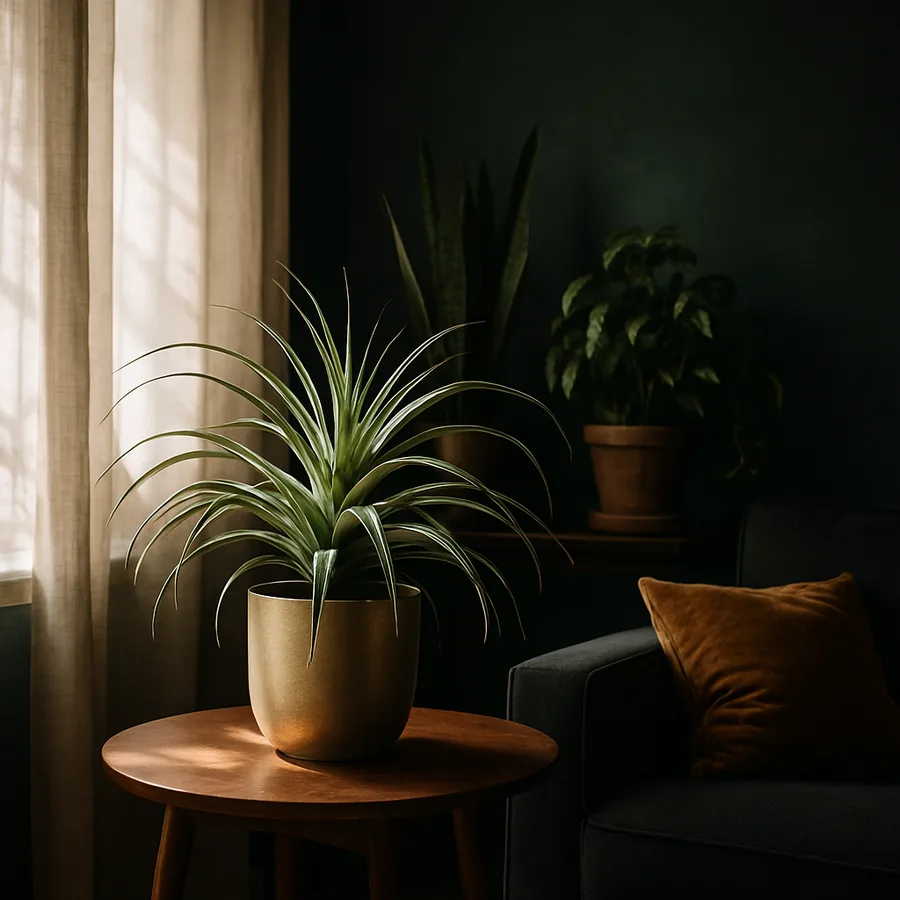
Air plants look like they should be easy. They sit on a shelf, drink from the air, and ask for nothing. That last part is a myth, and it is the reason most first-time growers lose their Tillandsia within ninety days. The plants are not low-maintenance. They are low-soil. Those are different categories, and confusing them is the single most common mistake I see among new collectors.
This guide walks through the watering rhythm, the light spectrum, and the small environmental adjustments that turn a fragile gift-shop air plant into a slow-growing, eventually-blooming houseplant. We will be specific about humidity numbers, distances from windows, and the difference between a misting and a soak. By the end you should be able to draw your own care calendar and trust it.
Why Air Plants Need More Water Than You Think
The first thing to know is taxonomic. Air plants belong to the genus Tillandsia, a group of roughly 650 species in the bromeliad family. They are epiphytes, meaning they grow attached to other plants in nature, not in soil. Their leaves are covered in tiny silver scales called trichomes, which absorb water and nutrients directly from the air during humid nights in their native cloud forests and tropical scrublands.
Here is the part people miss. Your living room is not a cloud forest. According to the U.S. Environmental Protection Agency, indoor relative humidity in heated or air-conditioned homes typically sits between 30 and 50 percent. Most Tillandsia species evolved in 70 to 90 percent humidity. That gap is the reason a plant that needs zero water in the wild needs regular intervention from you.
So when someone tells you air plants "drink from the air," they are technically right and practically wrong. The air in your home is too dry for absorption alone to keep them alive. You have to supplement, and the supplement schedule is the heart of the practice.
The trichomes themselves are fascinating little structures worth understanding. Under magnification they look like tiny umbrellas with multiple wing-like flaps that open when wet and close when dry. When water touches a trichome, it spreads out across the leaf surface and is drawn down into the cell through capillary action. This is why misting a Tillandsia until the leaves glisten is enough to deliver moisture - surface contact is all that is needed. But the absorption window is short. Within twenty to forty minutes, the trichomes have done their work and any remaining water just evaporates or sits dangerously in the crown. That short window is also why daily heavy waterings are not better than weekly soaks; the plant cannot absorb more than its trichomes can pass per unit time.
The Misting Versus Soaking Question
There are two ways to water a Tillandsia, and both belong in your rotation. Misting is a light spray with a fine-nozzle bottle, applied until the leaves glisten but do not drip. Soaking is full submersion in a bowl of room-temperature water for 20 to 30 minutes. Misting tops up surface moisture. Soaking rehydrates the plant from the inside out.
For a typical home with 40 to 50 percent humidity, the working rhythm is one soak per week plus two to three mistings between soaks. In drier conditions, like a Phoenix apartment in July with the AC running, push to one soak every five days and daily mistings. In a steamy bathroom with a south window, you might soak every ten days and skip mistings entirely.
The signal you actually want to read is leaf shape. A well-hydrated Tillandsia ionantha has flat, splayed leaves. A thirsty one curls inward and looks pinched at the tips. Have you ever noticed your air plant getting wrinkly along the leaf edges? That is the plant asking for a soak, not a mist. Mistings cannot reverse interior dehydration. Only soaking can.
There is also a small trick experienced collectors use: weight. Pick up your Tillandsia before and after a soak. A well-hydrated plant has noticeable heft compared to a dry one. After a few weeks of handling your plants, you can feel whether they need water just by lifting them. This is the same heuristic experienced houseplant growers use for potted plants, just applied to a different form factor. It works surprisingly well once the muscle memory builds.
One more nuance on technique. After a soak, do not place a wet Tillandsia upright in its display spot. Water trapped in the leaf rosette, especially in species with tight central whorls like T. ionantha, will pool at the meristem (the central growth point) and cause rot within days. Always shake the plant gently upside down for ten to fifteen seconds, then place it on a dry towel base-down for the drying period. This single habit prevents more deaths than any other piece of Tillandsia care advice.
Water Quality Matters More Than You'd Guess
The University of Florida IFAS Extension notes that bromeliads, including Tillandsia, are sensitive to dissolved salts and chemicals in tap water. Chlorine and chloramine, both common in municipal water, can damage the trichomes over time and leave the plant unable to absorb moisture efficiently. This is a slow problem, not a dramatic one. You will not see overnight damage. You will see a plant that slowly stops thriving over six months.
The fix is simple. Use rainwater, aquarium water, distilled water, or tap water that has sat in an open container for 24 hours so the chlorine off-gasses. I keep a one-gallon jug on a shelf and refill it the moment it gets low. The 24-hour rule does not work for chloramine, which is increasingly common - check with your local water utility if you are not sure which your city uses. If it is chloramine, distilled or rainwater is the safer default.
Temperature also matters. Cold water shocks the plant and slows absorption. Room temperature, ideally between 65 and 75 degrees Fahrenheit, is the sweet spot for both misting and soaking.
Light: Bright, Indirect, And Specific
The phrase "bright indirect light" gets thrown around like everyone knows what it means. Let me make it concrete. Bright indirect light, for a Tillandsia, means within four to six feet of a south- or east-facing window, with a sheer curtain or an obstruction between the plant and direct sun. The leaves should be illuminated enough that you could read a book held next to the plant without squinting, but the plant itself should not cast a sharp-edged shadow on the wall.
According to the Royal Horticultural Society, most Tillandsia species do best with 12 to 14 hours of bright light per day during the growing season. North-facing windows in the Northern Hemisphere generally do not provide enough. West-facing windows can work but the late afternoon sun is intense and you may need to pull the plant back from the glass by another foot or two during summer.
If you live in a basement apartment or your only window faces a brick wall, do not give up. A basic full-spectrum LED grow light, set on a timer for 12 hours per day at a distance of 12 to 18 inches from the plant, will keep Tillandsia happy. I use a clip-on light from a hardware store, costs about $25, and it has carried my collection through three winters.
Species-Specific Variations You Should Know
"Air plants" is a single common name that covers wildly different species. Treating them all the same is like treating all dogs the same - technically possible, but you are going to have problems with the chihuahuas and the great danes alike.
The silvery, fuzzy species like Tillandsia xerographica, T. tectorum, and T. caput-medusae come from drier, brighter habitats. They have more trichomes (the silver fuzz), need more light, and tolerate less frequent watering. Soak every 10 to 14 days, mist sparingly. Direct morning sun is fine.
The greener, smoother species like Tillandsia bulbosa, T. butzii, and T. brachycaulos are from wetter, shadier rainforest understories. They want more water, more humidity, and less direct light. Soak weekly, mist often, keep them out of strong sun. T. brachycaulos in particular will blush red just before blooming, which is one of the small joys of growing this genus.
If you do not know what species you have, the visual rule is reasonably reliable: silver and fuzzy means more sun and less water; green and smooth means more water and less sun.
A handful of species deserve specific callouts because they are common in big-box stores and have particular quirks. Tillandsia xerographica, the "king of air plants," is a slow-growing rosette species that can live for over a decade with good care but is intolerant of soaking longer than 20 minutes. Tillandsia caput-medusae has a bulbous base that traps water - never invert it for drying without thorough shaking. Tillandsia stricta is one of the most reliable for blooming indoors and produces a stunning pink-and-purple inflorescence about once every 18 to 24 months under good conditions.
There is also one species, Tillandsia usneoides (Spanish moss), that breaks all the rules. It does not have a rosette form, cannot be soaked the way other species are, and needs daily misting plus weekly dunking-and-shaking instead. If you have ever seen it draped over live oaks in the American South, you know what I mean - it is a completely different animal from the rosette species, despite being in the same genus.
Air Circulation: The Forgotten Variable
Here is something almost no beginner guide mentions. Tillandsia need air movement. In the wild they live on branches that sway, exposed to constant breezes that dry their leaves between rains. Stagnant air is the second-leading cause of death after underwatering, because it allows water to sit too long on the leaves after a soak. Sitting water on the crown of an air plant is how you get rot, and rot is almost always fatal.
After every soak, shake your Tillandsia upside down for a few seconds to dislodge water from the leaf bases, then place it somewhere with air movement for at least four hours before returning it to its display spot. A spot near a frequently-opened window works. So does a shelf in a room with a ceiling fan on low. So does just placing the plant on a paper towel on the kitchen counter while you make dinner.
What does a rotting air plant look like? The center pulls out cleanly when you tug it gently, and the inner leaves turn brown or black. By the time you see this it is almost always too late. Prevention is the only real treatment.
Feeding And Long-Term Health
Wild Tillandsia get nutrients from rainwater that has passed over leaf litter and bird droppings on its way down through the canopy. Yours will get nothing unless you provide it. Fertilizing is optional for short-term survival but essential for blooming and pup production.
Use a bromeliad-specific or orchid fertilizer diluted to one-quarter the recommended strength, added to soak water once or twice a month during the growing season (spring through early fall). Skip it in winter. The American Public Gardens Association notes that overfertilizing is a far more common problem in epiphyte care than underfertilizing, so when in doubt, less is more.
Healthy, well-fed Tillandsia will eventually flower. The bloom signals the end of that individual plant's life - but before it dies, it produces "pups" at the base, which are clones that will grow into the next generation. A single T. ionantha can produce three to eight pups over the months following its bloom. With a bit of patience, your collection grows itself. Has anyone in your life been begging for a plant they cannot kill? Pups make excellent gifts.
The pup-separation question is worth a paragraph of its own. Conventional wisdom says to wait until pups are at least one-third the size of the parent before separating. Practically, I have found that letting pups stay attached even longer - until they are half the size of the parent and the parent is beginning to brown - produces stronger independent plants. When you do separate, hold the pup base firmly and twist gently sideways; it should detach with a small popping feel. Cutting risks damaging the meristem. Once separated, treat the pup as a normal small Tillandsia and resume the normal care schedule. Within two to three years, a separated pup will reach blooming size itself, completing the cycle.
Common pests besides scale to watch for include mealybugs, which appear as white cottony patches at leaf bases, and rarely spider mites on plants kept in particularly dry, stagnant conditions. The University of California Statewide Integrated Pest Management Program suggests treating both with isopropyl alcohol on a cotton swab, applied directly to each visible pest, repeated every five to seven days for three cycles. For mealybugs, also check the leaf bases of nearby plants - they spread easily by contact.
Building Your Personal Care Calendar
The schedule that works in your home is not the schedule that works in mine, because your humidity, your light, and your species mix are different. The way to find your own rhythm is to start with a baseline and adjust based on what the plants tell you.
Here is the baseline I give new growers in an average climate-controlled home at 40 to 50 percent humidity: soak Sunday evenings for 25 minutes, shake and dry on a towel for two hours, place in display spots Monday morning. Mist Wednesday morning and Friday morning. Fertilize the first soak of each month, March through October. Move plants to brighter spots in winter when daylight shortens. Check leaf curl weekly - if leaves are curling between soaks, add a mid-week mist or shorten the soak cycle.
Track it for the first eight weeks. After that you will not need a calendar; the rhythm becomes muscle memory and the plants will tell you when something is off. Speaking of which - what is your home's humidity right now? A cheap hygrometer costs about $10 and answers the most important question in air plant care.
The Takeaway
Air plants are not the no-effort decor object the gift-shop label suggests. They are bromeliad epiphytes that evolved in humid forests and need active care to survive in a dry, climate-controlled home. But that care is genuinely simple once you internalize it. Weekly soaks, mid-week mistings, bright indirect light, good air circulation after watering, and occasional fertilizer will keep a Tillandsia collection alive and producing pups for years.
If you are starting from scratch, pick one silver species like T. xerographica and one green species like T. bulbosa, get a $10 hygrometer, and run the eight-week baseline schedule. Adjust from there based on what the plants show you. Your next move? Sketch out a watering calendar tonight, even if it is just a sticky note on the fridge. Written schedules survive busy weeks; mental ones don't. Drop a comment below telling me which species you are starting with - I will check in.
Authority references for further reading:
More Articles You May Like



Comments
Post a Comment