
Vertical Garden Wall Pocket Irrigation Spacing Rules
Vertical Garden Wall Pocket Irrigation Spacing Rules
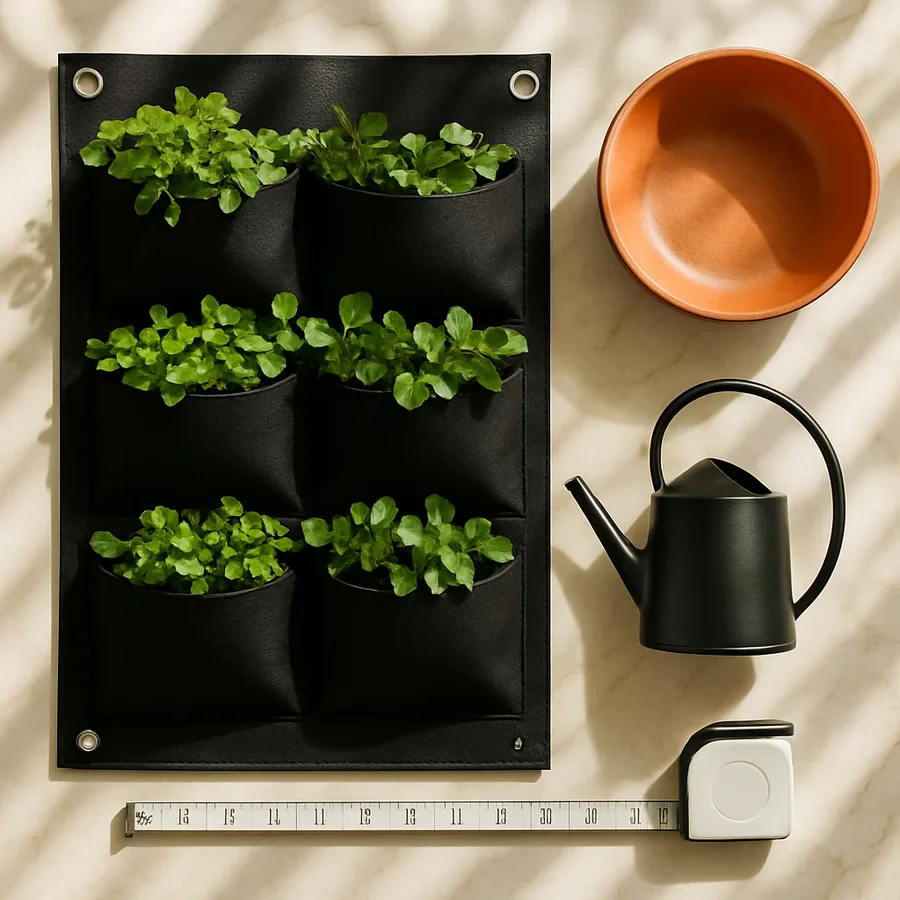
A wall pocket vertical garden looks deceptively simple in product photos. Fabric pockets attached to a frame, fill with soil, slot in plants, hang on a wall, water from the top. What the photos do not show is that roughly half of all DIY wall pocket installations fail within the first year. The failures are not random. They cluster around three specific design mistakes: bad irrigation distribution, wrong plant spacing, and underestimated water weight against the wall.
This guide is the planning document I wish I had read before my first install. We will walk through pocket geometry, irrigation flow logic, the spacing math that actually keeps roots from competing, and the engineering basics for hanging a saturated wall system safely. Whether you are buying a kit or building from scratch, the principles apply.
How A Wall Pocket System Actually Works
A wall pocket vertical garden - sometimes called a pocket planter, felt wall, or living wall pocket system - uses a panel of stitched fabric pouches as individual planting cells. The fabric is typically recycled PET felt, which is durable, holds soil, and allows roots to breathe. Pockets range from 6 to 10 inches wide and 6 to 8 inches tall, with a depth of 4 to 6 inches. Each pocket holds one to three plants depending on size.
Water enters at the top, either through drip irrigation, a soaker hose, or hand watering, and gravity carries it down through successive rows of pockets. The fabric wicks water between pockets in the same row, while drainage between rows depends entirely on how the system is designed. Bottom pockets receive runoff from everything above them. Top pockets dry out first.
According to research published by the American Society of Landscape Architects, properly designed living walls can reduce surrounding air temperature by 5 to 10 degrees Fahrenheit through evapotranspiration, while also filtering particulates from indoor air. But that performance depends on plants staying alive, which depends on getting the irrigation and spacing right from the start.
The materials matter beyond just looking like fabric. Quality wall pocket panels use UV-stabilized recycled PET that resists mildew and breakdown for five to ten years. Cheap knockoffs use lower-grade felts that begin to disintegrate within 18 months, especially in outdoor or high-humidity applications. The visible difference at purchase is small. The visible difference at month 30 is enormous. If you can hold the panel up to a light source, the better-quality material will look more uniform and less translucent - a rough but useful field test.
The Vertical Water Distribution Problem
The single biggest design flaw in DIY wall pocket installations is treating irrigation as a top-down dump. If you water heavily at the top, top pockets become saturated while bottom pockets either drown in runoff or stay surprisingly dry, depending on whether water channels down through the fabric or just falls off the front.
The correct approach distributes water at multiple levels. For walls taller than three feet, install drip irrigation at the top of every other row, with each emitter feeding one pocket. This typically means 0.5 to 1 gallon per hour emitters, run for 5 to 10 minutes per cycle, two to four times per day depending on plant choice and ambient humidity. The University of Florida IFAS Extension publishes drip irrigation guidelines that translate directly to vertical applications.
If hand watering, the rule is: water each row independently, top to bottom, allowing runoff between rows to settle before applying the next. Never just hose down the top and expect uniform delivery below. Have you ever noticed that the bottom row of a wall planter has either the lushest or the deadest plants? That bimodal outcome is the irrigation distribution problem in action.
For more sophisticated installations, consider a two-zone irrigation controller. Zone one feeds the top half of the wall on a longer, less-frequent cycle; zone two feeds the bottom half on a shorter, more-frequent cycle that accounts for runoff already arriving from above. This is exactly how commercial green wall installers like Patrick Blanc and the firms behind major projects at the Musée du Quai Branly and the Athenaeum Hotel solve the distribution problem at scale. The same logic works at residential scale, just with smaller emitters and shorter run times.
One question that comes up frequently: can you use soaker hose instead of drip? In theory yes, in practice not well. Soaker hose delivers water along its entire length, which means it does not distinguish between pocket positions. The result tends to be uneven delivery based on hose orientation and pressure. Stick with point-source drip emitters for predictable performance.
Pocket Spacing And Plant Density
Pocket spacing on a fabric panel is usually fixed by the manufacturer, but plant choice within pockets is up to you, and this is where overcrowding kills systems. Wall pocket planters look sparse when newly planted. The temptation to stuff three plants into every pocket is almost irresistible. Resist it.
For small leafy plants like Pilea peperomioides, Peperomia species, or Chlorophytum comosum (spider plant), one plant per pocket is the right density. For trailing species that will cascade like Epipremnum aureum (pothos) or Tradescantia zebrina, one per pocket gives the cascading effect within three to four months. For herbs like basil, parsley, or chives in an edible wall, you can do two per pocket but no more.
Crowding causes three problems. Roots compete for the limited soil volume in a pocket - usually 1 to 1.5 quarts. Leaves shade neighbors, causing leggy growth and uneven appearance. And dense planting holds moisture longer, which encourages fungal disease and root rot in fabric-confined root zones. The Royal Horticultural Society recommends giving vertical garden plants 25 to 50 percent more space than equivalent ground-planted specimens, because vertical roots cannot spread outward to find resources.
Choosing Plants For Vertical Position
Where a plant sits on a wall changes what it needs. Top-row plants get the most light, the driest soil, and the first dose of water. Bottom-row plants get less light, more sustained moisture, and runoff that may carry accumulated nutrients or salts. Designing for these zones is the difference between a wall that looks great and a wall that looks like a horticultural lottery.
Place sun-tolerant, drought-resilient species at the top - succulents like Sedum, sun-loving herbs, and structural plants like dwarf Carex. Place moisture-tolerant species at the bottom - ferns like Nephrolepis exaltata, Pilea, and ground-cover species used to consistent damp. Place balanced moderate-light, moderate-moisture plants in the middle band - pothos, philodendron, peperomia.
For an outdoor wall in temperate climates, native plant selection improves long-term success and supports local pollinators. The U.S. Department of Agriculture maintains a native plant database that lets you filter by region and growth habit. Has anyone you know put up a "living wall" only to see half of it die in the first season? Almost always, the cause was placing the same plant in every pocket regardless of vertical position.
Another underrated consideration is plant rotation. Some species - particularly small leafy ones like Pilea peperomioides - develop asymmetric growth toward whichever side faces light. On a vertical wall, this can produce dramatic leaning over a six-month period. Rotating individual plants within their pockets every four to six weeks (a 90 to 180 degree turn) keeps growth balanced. For panels that are mounted permanently and not easily accessible, choose species that grow more symmetrically: ferns, peperomia, and small ground-cover succulents tend to forgive the lack of rotation better than the more directional growers.
Irrigation Frequency And Cycle Timing
The irrigation schedule depends on five variables: plant choice, climate, indoor versus outdoor placement, sun exposure, and panel orientation. Here are working defaults you can adjust from.
For an indoor wall with leafy tropicals in a climate-controlled environment, drip irrigation at 0.5 GPH emitters, six minutes per cycle, twice daily (morning and afternoon) keeps most species adequately watered. Pockets dry out enough between cycles to prevent root rot but not so much that plants wilt.
For an outdoor wall in a temperate climate, increase to four cycles per day during summer heat, drop to once per day in spring and fall, and reduce to every two to three days in winter for evergreen plantings. Direct sun exposure on a south-facing wall can double water demand compared to a shaded north-facing wall.
For a wall with mixed herbs and edibles, lean toward more frequent, shorter cycles - three to four times per day for 4 to 5 minutes each. Herbs prefer consistent moisture without saturation, and short cycles deliver that better than long ones. The University of Maryland Extension has helpful charts on water demand by plant type that scale well to vertical applications.
Drainage And Catchment: The Floor Problem
Every wall pocket system produces runoff. Indoor systems require catchment - a tray, gutter, or drain pan at the base of the wall to collect water that exits the bottom row. Skip this and you will see floor damage within months. Outdoor systems can drain to soil or to a French drain, but the runoff path needs to be intentional.
Catchment trays should be at least as wide as the panel and 4 to 6 inches deep. They should slope slightly to one corner for drainage to a hose or a removable bucket. For systems with recirculating pumps that re-use the runoff, the catchment becomes the reservoir and needs to be larger - typically 5 to 10 gallons for a residential-scale wall.
Salt accumulation in recirculating systems is a real issue. The U.S. Geological Survey notes that recirculated irrigation water concentrates dissolved minerals over time, which can damage roots. The fix is to flush the system with fresh water every two to three weeks and refresh the reservoir entirely once a month. For non-recirculating systems, this is not a concern because runoff exits the system.
Weight, Walls, And Mounting Reality
A 4-foot by 4-foot wall pocket panel, when planted and fully saturated, can weigh 80 to 120 pounds. That weight has to go somewhere, and "somewhere" is almost always a vertical wall that was never designed to bear hanging loads.
For indoor installations, mount the panel frame to wall studs using lag bolts rated for at least 3 times the expected load. Drywall anchors alone are not adequate for anything larger than a 2-foot by 2-foot panel, regardless of what the product packaging claims. If you are unsure where studs are, a $25 stud finder is the right purchase before you start drilling.
For exterior walls, weather sealing around mounting points is essential. Water entering wall framing through penetration holes is a slow, expensive problem that you will not notice for months. Use exterior-grade sealant and stainless or galvanized hardware. The U.S. Department of Energy publishes building envelope guidance that covers exterior penetrations and is worth a skim before drilling into a finished wall.
For renters or those who cannot drill into walls, freestanding frames with their own footprint exist. They cost more upfront but eliminate the wall-attachment problem entirely. The trade-off is floor space - a freestanding vertical garden frame typically requires 18 to 24 inches of depth at the base for stability.
Worth knowing too: load distribution on the wall surface. Even when properly anchored, a heavy planted panel concentrates significant pressure at the mounting points. Drywall can deform around the bolts even when studs are properly hit, leading to visible bulging or cracking over time. The mitigation is to use a rigid back panel - a piece of marine-grade plywood or a metal frame - between the wall and the fabric panel. This spreads the load across a wider area and prevents point stress on the drywall surface. Most premium kits include this. DIY builders often skip it and regret the decision.
Maintenance Rhythm For Long-Term Success
Even the best-designed wall pocket system needs ongoing attention. The maintenance rhythm is less intensive than ground gardening but more frequent than houseplants on a shelf.
Weekly tasks include checking emitter function (a clogged drip emitter kills a row of plants within days during summer), trimming back overgrown plants that are blocking light to neighbors, and removing dead leaves that collect in lower pockets. Monthly tasks include flushing the irrigation system with clean water, checking for fabric wear at high-stress mounting points, and rotating or replacing any underperforming plants before they trigger pest outbreaks. Quarterly, refresh the top inch of soil in each pocket with fresh potting mix to maintain nutrient levels, and inspect mounting hardware for signs of stress.
Annually, consider full pocket repotting for any plant that has been in place more than 18 months. Roots eventually fill the fabric and exhaust the soil, and you will see declining growth as the signal. What is your current maintenance schedule for any plants you already have? If you cannot stick to weekly checks on a few pots, a vertical wall is going to be a stretch.
There is also a winterization protocol for outdoor walls in climates that experience freezing temperatures. Wet soil in vertical pockets expands when it freezes and can tear the fabric or split the irrigation lines. Before the first hard freeze, drain the entire irrigation system using compressed air, harvest any remaining edible plants, mulch the pockets with shredded leaves or straw to insulate any perennial roots, and disconnect the timer. Spring restart involves flushing the system with clean water, checking emitters for cold-cracking, and replanting cold-damaged pockets. Skipping this in zones below USDA hardiness zone 8 leads to expensive springtime repairs.
One additional maintenance task that many homeowners forget is checking the wall behind the panel. Once or twice a year, take down the panel or peek behind it with a phone camera if it cannot be moved, and look for moisture damage on the wall surface. Even with good catchment and well-sealed mounting, slow water migration can occur. Catching it early - a small discoloration on drywall, a faint mildew smell - prevents the kind of structural damage that requires opening walls to repair.
The Takeaway
A wall pocket vertical garden is achievable for any homeowner or renter willing to plan the irrigation, respect the spacing rules, and handle the mounting realistically. The systems that fail do so for predictable reasons - overcrowding, single-point top-only watering, ignored runoff, undersized mounting. The systems that succeed are the ones planned with vertical zones, distributed drip irrigation, plants chosen for their specific position, and a wall genuinely able to bear the wet weight.
Start small. A 2-foot by 3-foot panel with 12 to 15 pockets is the right scale for a first install. Run drip irrigation on a timer, plant for zones, and let the system mature for six months before deciding to expand. Your next move? Sketch the panel layout on paper this week, marking which pockets will hold which species. The visual plan catches density mistakes that a mental plan never does. Drop a comment with your wall dimensions and I will tell you whether the kit you are eyeing is the right size.
Authority references for further reading:
- American Society of Landscape Architects - Living Architecture Resources
- University of Florida IFAS Extension - Microirrigation in the Home Landscape
- USDA PLANTS Database - Native Plant Selection by Region
- Royal Horticultural Society - Vertical Gardening

Comments
Post a Comment