Kamado Grill Outdoor Kitchen Integration For Ceramic Cooking
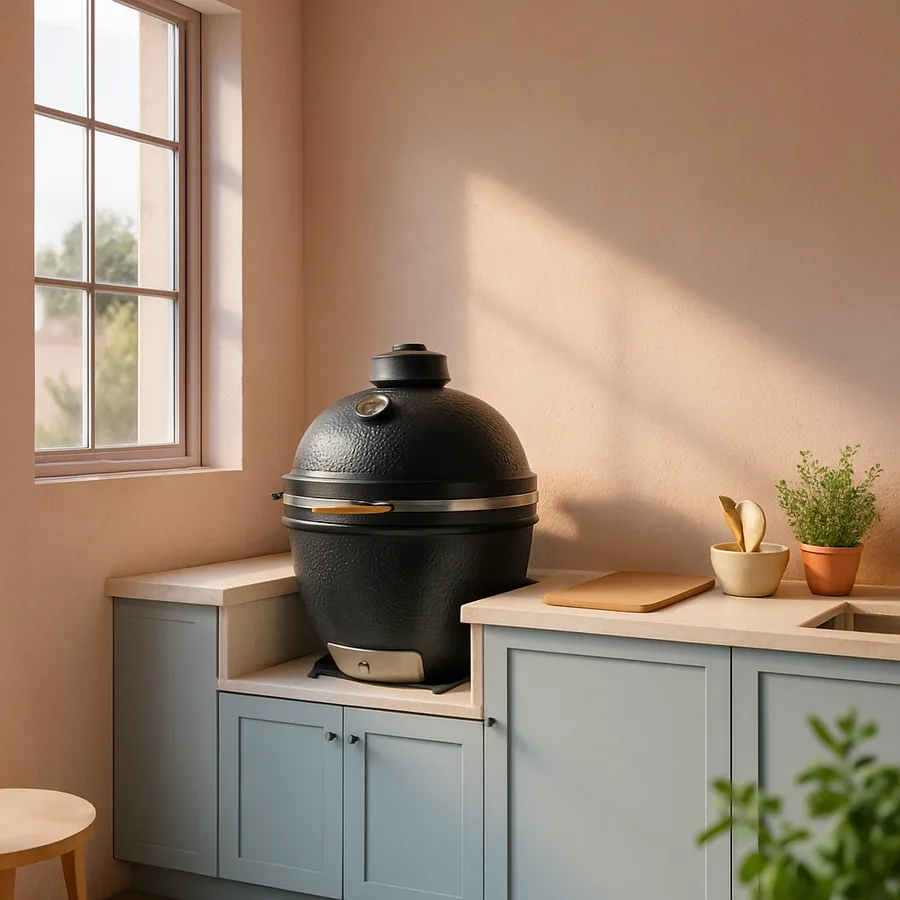
The ceramic kamado grill has graduated from a backyard curiosity into the centerpiece of many serious outdoor kitchens, and for good reason. Built from thick, kiln-fired ceramic and tracing its lineage to centuries-old Japanese mushikamado cooking vessels, the modern kamado holds temperature like almost nothing else on the patio. According to the Hearth, Patio & Barbecue Association (HPBA), outdoor cooking spending in North America has more than doubled over the last decade, and ceramic grills now represent one of the fastest-growing segments of the premium grill market.
Integrating one of these heavy, heat-retaining beasts into a built-in outdoor kitchen, however, is not the same as rolling a stainless gas grill into a pre-cut island. The ceramic body weighs anywhere from 150 to over 400 pounds depending on size, the exterior can reach surface temperatures of 400 degrees Fahrenheit during long cooks, and the airflow design demands very specific clearances. Done well, the result is a true outdoor cooking studio. Done poorly, you risk cracked countertops, scorched cabinetry, and a grill that never quite breathes the way it should.
Why Ceramic Cooking Belongs In A Built-In Outdoor Kitchen
The defining feature of a kamado is thermal mass. The thick ceramic walls absorb heat, then radiate it back into the cooking chamber in a steady, even wash that gas burners simply cannot duplicate. This is what allows a single load of lump charcoal to maintain 225 degrees Fahrenheit for a 14-hour brisket cook, or jump to 700 degrees in 20 minutes for Neapolitan-style pizza. Few outdoor cooking devices cover that range from one fuel load.
When that capability is paired with proper counter space, integrated storage for lump charcoal and accessories, and a stable, level masonry surround, the cooking experience changes dramatically. Have you ever tried to truss a chicken on top of a small folding side shelf while your charcoal chimney smokes nearby? An integrated installation eliminates that friction. You get landing zones for hot grates, a permanent home for the heat deflector and pizza stone, and ventilated cabinetry for fuel that keeps moisture out of the lump.
There is also a longevity argument. A kamado sitting on its standard rolling cart is exposed to weather, UV, and accidental bumps. According to manufacturer guidance summarized by the National Association of Home Builders (NAHB) outdoor living research, well-built outdoor kitchens regularly outlast 20 years of seasonal use when masonry surrounds protect appliances from direct exposure. A kamado nested into a stone or stucco island can realistically last decades, especially if the dome gasket and hardware are refreshed periodically.
Built-In Clearances And Thermal Considerations
The single most misunderstood detail in kamado integration is heat clearance. Unlike a gas grill, where heat exits primarily through the lid vent, a ceramic kamado radiates heat through its entire exterior body during long cooks. Every major manufacturer publishes a built-in clearance specification, and they vary enough that you should never assume a generic island cutout will fit your model.
As a general planning baseline, most ceramic grill makers call for:
- Side clearance: at least 6 to 8 inches between the ceramic body and any adjacent combustible material, often more for wood-framed islands
- Rear clearance: at least 8 inches for airflow and access to the lower vent
- Top clearance: nothing combustible directly above the open dome, with overhead structures at least 24 to 36 inches above
- Base support: a non-combustible, level platform rated for the full loaded weight, including charcoal, food, and accessories
Why so cautious? The National Fire Protection Association (NFPA) has long warned in its outdoor cooking safety bulletins that residential structure fires linked to grills are most often caused by inadequate clearance from combustibles. A built-in installation hides the grill body inside cabinetry, which means a heat-exposure problem may smolder unnoticed for hours. Following the manufacturer's clearance chart is not a suggestion. It is the difference between a beautiful cook and a homeowner's insurance claim. You can review general grill safety guidance from the NFPA at nfpa.org.
Countertop And Cabinetry Materials That Survive The Heat
Counter material selection is where a lot of otherwise-stunning kamado kitchens fail within a season. The cutout edge of the counter sits directly against, or within an inch of, the ceramic shoulder of the grill. That zone routinely sees 200 to 300 degrees Fahrenheit, and it experiences dramatic thermal cycling every time the grill heats and cools. Materials that handle this well share three properties: low thermal expansion, dense surface structure, and freeze-thaw stability if you live in a cold climate.
Real-world workhorses for kamado surrounds include:
- Honed granite: dense, affordable, holds up to direct heat exposure
- Soapstone: exceptional thermal stability, develops a handsome patina
- Porcelain slab: very low expansion, excellent stain resistance, lighter than granite
- Natural stone tile over cement board: classic look, easy to repair if a tile cracks
Quartz engineered countertops, despite their popularity indoors, are usually a poor choice here. The resin binder that holds the quartz aggregate together can yellow, blister, or even ignite at the temperatures a long kamado cook produces at the counter edge. Most major quartz manufacturers explicitly void warranties for outdoor or high-heat installations. Similarly, framed cabinetry should be masonry, concrete block, or stainless steel rather than treated lumber, even when the visible exterior is finished with stone veneer.
Ventilation, Drainage, And Charcoal Storage Details
A kamado does most of its breathing through a top vent and a bottom intake. When you bury the grill body in an island, the bottom intake becomes harder to access and, more importantly, easier to choke. Smart designers cut a ventilation panel into the rear or side of the surround, directly behind the lower vent, so combustion air flows freely and so the homeowner can reach the vent slider without leaning over a 600-degree dome.
Drainage is the next quietly important detail. Ceramic grills are remarkably weatherproof, but the cavity around the grill body in a built-in island is not. Without a sloped, sealed base and a small weep hole at the lowest point of the cavity, rainwater pools and sits against the back of the grill. Over many seasons, that standing water can compromise the gasket, corrode hardware, and accelerate any small crack in the ceramic. The fix is simple: slope the base pad a quarter inch toward a discreet drain, and use a polymer-modified mortar that tolerates the cycle.
Fuel storage deserves its own dedicated cabinet, and the cabinet needs to stay dry. Lump charcoal will not light reliably once it has absorbed humidity, and many cooks report stalled cooks and bitter smoke flavors from fuel that has been sitting open in a damp cabinet for weeks. A sealed bin with a tight-fitting lid, located in a compartment with louvered ventilation to prevent condensation, solves the problem cleanly. Where should you put the lighter cubes, gloves, ash tools, and pizza stone? Right next to the fuel, in the same cabinet, so the entire fire-management workflow lives in one spot.
Code, Permits, And Installer Selection
Many homeowners assume that because a kamado is a freestanding appliance, no permit is required when it is dropped into an outdoor kitchen. That is sometimes true and sometimes very much not. The International Code Council (ICC) publishes the International Residential Code adopted in most U.S. jurisdictions, and local amendments increasingly cover outdoor kitchens as a category, particularly when the project includes gas lines, electrical circuits for lighting and refrigeration, or attachment to a covered structure. You can review general code resources at the ICC at iccsafe.org.
If your kamado installation is purely solid-fuel and freestanding within a masonry island, you may only need a building permit for the structure itself. The moment you add a gas-assisted ignition, an electrical outlet for a rotisserie, or a roof over the cooking area, additional permits and inspections are likely. Covered installations are an especially tricky case. A kamado under a deep roof needs serious overhead clearance and, in many jurisdictions, a noncombustible ceiling material directly above the cook zone. Always confirm with your local building department before you pour a single bag of concrete.
Selecting an installer is just as important as selecting the grill. A certified mason or outdoor kitchen specialist with kamado experience will know the manufacturer's spec sheets cold, will plan ventilation and clearance from the start, and will document the installation in a way that protects your warranty. Have you confirmed your installer has done at least three similar built-in ceramic projects? Have you asked to see one in person? Both are reasonable requests, and any reputable contractor will welcome them.
Workflow Layout And Adjacent Zones
An integrated kamado is far more useful when the surrounding island is laid out around a real cooking workflow rather than dropped in as a stand-alone feature. The classic outdoor kitchen layout borrows from professional restaurant logic: a prep zone, a cook zone, a plating zone, and a serving zone, each with its own counter space and storage. For a kamado-centered island, the cook zone is the grill itself, and the question is what flanks it on each side.
A useful planning baseline is to provide at least 18 to 24 inches of dedicated landing counter on each side of the grill, with the side that faces your dominant hand getting the larger allocation. The landing counter on one side becomes the platter zone where raw food waits for the grill and finished food rests after coming off. The other side becomes the tool zone where tongs, gloves, and the lid-lift handle live within arm's reach. Splitting these functions onto opposite sides of the grill keeps raw and cooked surfaces separate, which matters for food safety during long cooks involving multiple proteins.
Beyond the immediate landing zones, useful adjacent features include a refrigerated drawer for marinated proteins, a trash and recycling pull-out for spent foil and packaging, and a sealed paper towel dispenser that does not blow open in the wind. A small bar sink or rinse station within a few feet of the grill, even if the main sink lives elsewhere on the patio, eliminates the temptation to track grease back into the indoor kitchen for a quick hand rinse.
Long-Term Maintenance Of An Integrated Kamado
An integrated kamado is more accessible in some ways and less accessible in others. On the plus side, you do not need to move the grill to clean it, and the surrounding counter space makes ash removal and gasket replacement easier. On the minus side, you cannot simply roll the grill into a garage for winter storage, so the surround design has to assume year-round exposure.
A simple seasonal routine keeps an integrated kamado happy. Once per quarter, vacuum out the firebox ash, inspect the gasket for compression and char, and check the hinge spring tension. Once per year, ideally in early spring, pull the firebox and fire ring to inspect for cracks, clean the lower vent screen, and re-seal any joints in the surround mortar. Once every three to five years, replace the gasket entirely. The cost is modest, and a fresh gasket dramatically improves low-and-slow temperature control.
Cover use is contentious in the kamado community, and the right answer depends on climate. In dry regions, a breathable cover prevents UV damage to exterior bands without trapping moisture. In wet or coastal climates, many owners skip covers and instead rely on the inherent weather resistance of the ceramic, on the theory that a wet cover trapped against the metal hardware is worse than direct exposure to rain. Whichever you choose, lift the cover and inspect underneath at least monthly. Mildew and spider nests are not a flavor profile anyone is chasing.
Conclusion
A well-integrated kamado grill transforms outdoor cooking from an occasional weekend ritual into a daily habit, because everything you need is at hand, the cooking surface stays clean and protected, and the ceramic is doing what it does best. The investment is not trivial. A serious built-in installation, including masonry surround, durable counters, ventilation, and storage, typically runs several thousand dollars beyond the cost of the grill itself.
That investment is worth making correctly, the first time. Cutting corners on clearance, choosing the wrong counter material, or skipping drainage are mistakes that announce themselves slowly, in the form of scorched cabinets, cracked stone, and stalled long cooks. The good news is that the principles are not complicated. Follow the manufacturer's clearance spec, choose heat-stable materials, plan for airflow and water, and store your fuel where it stays dry. Do those four things, and the kamado will reward you for decades.
If you are at the planning stage, the single best move you can make right now is to download your specific grill model's built-in installation guide, take it to a qualified outdoor kitchen designer, and have a candid conversation about your site, your climate, and your cooking goals before any concrete is poured. Talk to your local building department, get the spec in writing, and only then commit to the design. The kamado will be cooking for you long after the rest of the patio furniture has been replaced.
More Articles You May Like



Comments
Post a Comment