Smart Smoke Detector Replacement For Old Battery Units
Walking through a typical American home, you might pass three or four small white discs on the ceiling without ever giving them a second thought. Those battery-only smoke alarms have done quiet sentinel duty for decades, but most of them are now well past their useful life. The National Fire Protection Association notes that working smoke alarms cut the risk of dying in a reported home fire by roughly 55 percent, yet a startling share of the alarms inspected after fatal fires either had dead batteries or were missing entirely. Upgrading to a modern smart smoke detector is one of the highest-impact safety projects you can complete in a weekend.
This guide walks you through the full replacement process, from identifying the age of your existing units to programming your new interconnected network and confirming that everything talks to your phone. We will keep the focus on practical decisions homeowners actually face: which models to consider, how to handle ceilings without an existing 120V circuit, and how to keep nuisance alarms from training your family to ignore the system. By the end you will have a clear plan you can execute with a screwdriver, a stepladder, and a smartphone.
Why Old Battery Units Are Failing You Now
The first thing to understand is that smoke alarms expire. Sensing chambers, whether ionization or photoelectric, drift over time as dust and humidity accumulate inside the housing. The U.S. Fire Administration recommends replacing any smoke alarm that is 10 years old or older, regardless of how the unit appears or whether the test button still chirps. Flip your existing alarm over and check the manufacture date stamped on the back. If you see anything from before 2016, that alarm is past due.
Battery-only models compound the problem because they depend entirely on a single 9V cell that homeowners forget to change. Have you ever yanked a chirping alarm off the ceiling at 2 a.m. and never reinstalled it? You are not alone. Surveys by the Consumer Product Safety Commission have repeatedly found that disabled or missing batteries are present in a meaningful fraction of homes that later suffer a fire fatality. A modern unit with a sealed 10-year lithium cell and wireless interconnection eliminates the 2 a.m. ritual entirely.
There is also the interconnection problem. In a single-story home a single beeping alarm in the kitchen might be audible everywhere, but in a two- or three-story house the basement alarm may never wake an upstairs sleeper. Older battery units almost never communicate with one another. When one sounds in a smart network, every other unit in the home sounds with it, and your phone receives a push notification with the specific location of the triggered device.
Choosing The Right Smart Detector For Your Home
Smart smoke alarms generally fall into three categories. The first is the standalone Wi-Fi alarm, like the Google Nest Protect or the Kidde Smart Pro, which connects directly to your home network and to a companion app. The second is the hub-based alarm, which talks to a central panel through Z-Wave or Zigbee. The third is the smart smoke listener, a small device such as the Ecolink or the older Nest Tag that listens for the standard T3 fire pattern from any dumb alarm and forwards the alert to your phone. Listeners are useful in rental situations where you cannot replace the hardwired alarms, but a true smart alarm is the better long-term answer.
Pay attention to the sensor type. Photoelectric sensors respond faster to smoldering fires, the kind that start in upholstered furniture or mattresses. Ionization sensors respond faster to flaming fires. Dual-sensor units cover both. The NFPA 72 standard, the National Fire Alarm and Signaling Code, recommends having both sensing technologies present somewhere in the home, and most premium smart alarms include both in a single housing along with a separate carbon monoxide sensor.
Power source is the other big decision. If your existing alarms are screwed directly to a junction box with a red and white wire pair sticking out, you have a 120V circuit and should buy hardwired smart units that accept that supply with a battery backup. If your old alarms are pure battery surface-mount units, you can either run new wiring during the project or buy battery-powered smart alarms that use a 10-year sealed lithium pack and wireless interconnect. For most retrofits the battery-powered smart route is dramatically faster.
Mapping Locations Before You Buy
Walk every floor with a notepad and sketch a simple map. The required placements under most adopted codes are straightforward. You need a smoke alarm inside every sleeping room, one in the hallway or area immediately outside each separate sleeping area, and at least one on every level of the home including basements. Attics that are unfinished and crawl spaces are typically excluded. A 2,200-square-foot two-story home with three bedrooms usually ends up with six or seven alarms in total.
Avoid the dead-air zone at the peak of a vaulted ceiling. Smoke rising through a tall room tends to roll along the ceiling and can pocket short of the apex, so install the alarm at least 4 inches and no more than 36 inches down from the highest point of the ceiling. Keep alarms at least 10 feet from cooking appliances when possible to limit nuisance trips, and avoid mounting within 3 feet of a bathroom door because steam will set off photoelectric sensors. Have you mapped out where your shower vents discharge? That detail catches a surprising number of homeowners off guard.
Once you have a count, add one or two spares. Smart detector batteries are sealed and non-replaceable, so a spare on the shelf shortens any future swap. While you are buying, pick up the matching combination carbon monoxide units for the locations where code requires CO detection, which we cover in a separate guide.
The Step By Step Replacement Procedure
Start the actual replacement on a weekend morning when natural light is good. Turn off the breaker that feeds your hardwired alarms before touching any junction box. Even though battery backups will keep the alarms chirping briefly after a power cut, you still need the line de-energized before you unscrew the harness. For battery-only retrofits the breaker step does not apply, but you should remove the old battery from each unit you take down to prevent accidental discharge of nuisance noise into your scrap pile.
Twist the old alarm counterclockwise to release it from the mounting plate, disconnect the wiring harness if present, and unscrew the plate from the ceiling box. Most new smart alarms ship with their own plate and harness. Match the wires: black to black or hot, white to white or neutral, and the red or yellow interconnect wire only if you are keeping a wired interconnect topology. For wireless smart networks you can cap the red interconnect wire and leave it tucked inside the box.
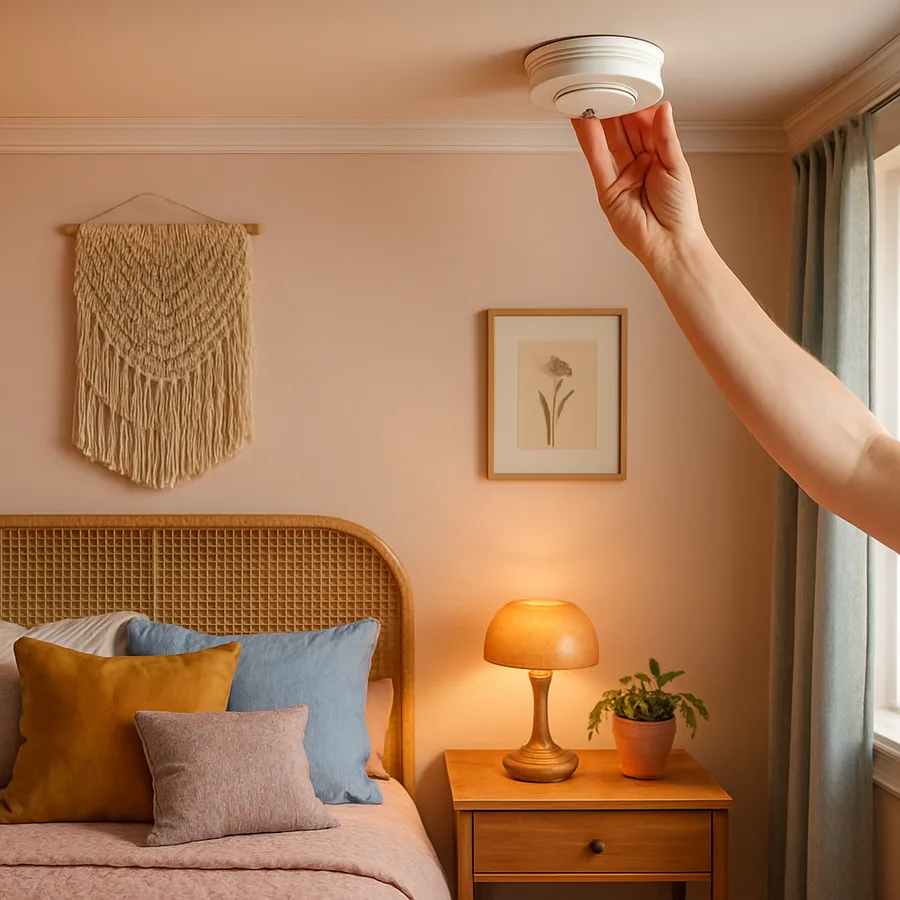
Snap the alarm onto the plate, twist clockwise until it clicks, and restore power at the breaker. The status LED should sweep through a startup sequence. Press and hold the test button for the recommended duration in the instructions, usually three to five seconds, until the alarm sounds its full siren. Repeat for every location on your map, and only then move to the app setup phase. Doing all the physical mounting first means you are not climbing up and down between phone screens.
Configuring The App And Interconnection
Download the manufacturer app and create or sign into your account before you begin pairing. Most smart alarms use Bluetooth for the initial handshake and then hand off to your home Wi-Fi for ongoing communication. Pairing usually involves scanning a QR code printed inside the alarm housing or on the original packaging, so resist the urge to recycle the boxes until every unit is online. Name each alarm by its room, not by a generic number, because the app will read that name aloud during alerts and your family needs to know which room to investigate.
For interconnection, the app will offer to add new alarms to your existing wireless mesh. Confirm each addition and then run a network test from the app. A proper test triggers every alarm in the mesh from a single test button press, and the app should log the response time of each device. If any unit fails to respond within a few seconds, move it closer to a neighboring alarm or to your Wi-Fi access point and retest. Mesh density is the single biggest predictor of reliable smart alarm performance.
Integrate the network with your broader smart home if you use one. Google Home, Amazon Alexa, and Apple Home all support most major smart alarm brands and can announce alerts through every speaker in the house. Set up at least two emergency contacts in the app so that a family member or neighbor receives a push if you are unreachable. Have you tested whether your alerts still arrive when your phone is on Do Not Disturb? Most apps support a critical alert override, but you usually need to grant that permission explicitly.
Maintenance, Testing And Long Term Care
A smart network needs less hands-on maintenance than a battery jungle, but it is not zero. Plan to press the physical test button on at least one alarm per month so that you confirm the audible siren still produces the standard T3 pattern. Many apps offer a remote self-test that runs the electronics through a simulation, and that is useful for the in-between weeks, but it does not replace the human-audible test. Dust the alarms with a vacuum brush attachment every six months to keep the sensing chamber clear, particularly in homes with pets or forced-air heating.
Watch your app history for false-trigger patterns. If a particular alarm trips repeatedly at the same time of day, look for an environmental cause: a sun-warmed wall pushing dust into the chamber, a bathroom door swinging open, or even a spider building a web inside the housing. According to data from UL Solutions, the safety certification body that publishes ANSI/UL 217, around 1 in 30 smart alarm trips reported in field studies is traced back to insects or dust rather than a real fire event. A quick cleaning resolves nearly all of them.
Track the manufacture date in your home maintenance log or in the app itself. Most smart alarms display a remaining-life percentage that ticks down predictably, and the unit will chirp and notify your phone when it has roughly 30 days of life left. Replace at that warning rather than waiting for end-of-life silence. Recycle the old units through a municipal hazardous waste program because the sensing chambers in ionization models contain a tiny radioactive source that should not enter normal trash streams.
Conclusion
Upgrading from old battery units to a smart, interconnected smoke alarm network is one of the highest-leverage safety projects a homeowner can take on, and it is realistically a one-weekend job for most houses. The hardware costs have come down dramatically in the past few years, the apps have matured to the point of being genuinely useful rather than gimmicky, and the integration with broader smart home platforms means your alarms can talk to your lights, your locks, and your speakers in ways that meaningfully change outcomes during a real event.
The most important shift is psychological. Once your alarms stop chirping at 3 a.m. about a low battery, your family stops viewing them as a nuisance and starts treating them as the life-safety equipment they actually are. Children learn the sound, sleeping adults wake up to it, and the entire household responds to a single trigger anywhere in the home. That cultural change in how the house treats its alarms is worth as much as the technology upgrade itself.
Set yourself a clear next step this week. Walk your home, count your alarms, check the dates, and order replacements for any unit older than 2016 or any unit that is purely battery-only without interconnection. Map your floors, schedule a Saturday morning, and commit to having every alarm online and tested by Sunday afternoon. Your insurance carrier, your local fire department, and most importantly your family will all benefit from that single weekend of focused work. Make the call today.
If you want a deeper dive into specific brand comparisons, app feature checklists, and code requirements in your state, browse our companion guides on carbon monoxide placement and whole-home indoor air quality. Reading them alongside this article will give you a complete picture of what modern residential life-safety should look like, and you will be able to tackle the full project with confidence. Reach out through our reader question form if you hit a snag during installation, because we read every message and update these guides based on what real homeowners run into in the field.
For the latest national guidance on installation locations and the formal interconnection requirements, consult the National Fire Protection Association, the U.S. Fire Administration, and the Consumer Product Safety Commission. Their resources are free, updated regularly, and worth bookmarking before you start the project.
More Articles You May Like

Comments
Post a Comment