Recessed Outlet Boxes For Flush Mount Wall Television
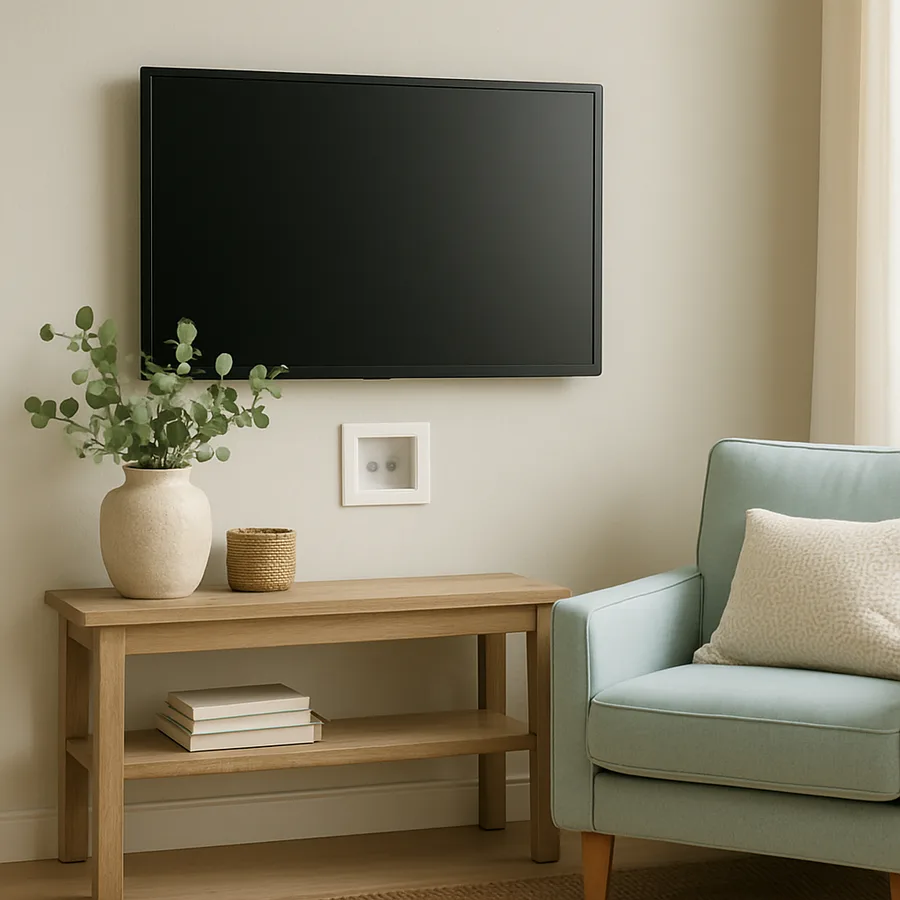
A flat-screen television mounted tight against a wall looks great in renderings and online product photos. In real homes, what almost always ruins the effect is the half-inch-thick plug that prevents the television from sitting flush, plus the visible cords snaking down from the mount to a power strip on the floor. Recessed outlet boxes solve both problems by creating a pocket inside the wall cavity where the plug and any low-voltage cables disappear behind the television entirely.
This guide walks through what a recessed outlet box is, the variations you will encounter, how to plan one into a new wall or retrofit it into existing drywall, the code rules that apply to both line-voltage and low-voltage wiring, and the small details that distinguish a clean installation from one that creates problems down the road. The market for recessed media boxes has grown steadily as flat-screen sizes have climbed past sixty-five inches, with industry tracking from the Custom Electronic Design and Installation Association showing that over sixty percent of new wall-mounted television installations now use a recessed cable management solution rather than running cords externally.
What A Recessed Outlet Box Actually Does
A standard wall outlet sits with the receptacle face flush against the drywall surface, which means a plug inserted into it extends out from the wall by half an inch or more. When a flat-screen television is mounted on a low-profile wall mount, that protruding plug forces the television out from the wall by exactly that distance, creating a visible gap on the sides and ruining the flush-mount aesthetic.
A recessed outlet box solves this by placing the receptacle inside a recessed cavity in the wall, typically one to two inches deep. The plug enters the box and sits entirely below the drywall plane, so the television can pull all the way back against the surface. Most recessed boxes also include a separate low-voltage compartment for HDMI, ethernet, optical audio, and other signal cables, often with a knockout for cable pass-through to a media console below.
The most common configuration is a single recessed box behind the television and a matching recessed box at media console height below, with a vertical cable conduit running through the wall cavity between them. The television plugs into the upper box, and HDMI or fiber optic cables pass through the conduit to the components below. The result is a wall with zero visible cabling between a wall-mounted television and a media console six feet below it.
Box Variations You Will Encounter
The simplest recessed outlet box is a single-gang or double-gang plastic or metal box with an offset rim, designed to mount in the same way as a standard old-work box or new-work box, but with extra depth that creates the recessed pocket. These work for the line-voltage outlet alone but do not include any low-voltage routing features.
The more common product is a combination recessed media box that includes a sealed line-voltage compartment for the receptacle and a separate low-voltage compartment for signal cables, with a code-compliant separator between them. These are listed by UL for both line-voltage and low-voltage use and are the easier choice for most television installations because they handle both wiring categories in one product.
A third option, less common in residential work, is a poke-through cable management system that routes cables through the wall using a flexible conduit and a low-profile cover plate, without using a recessed receptacle. These are useful when the existing wall has no convenient location for a recessed box, but they require a separate power source for the television, typically a power outlet behind or above the media console with a long, in-wall-rated extension to the television. This brings up a critical code point: standard appliance extension cords are not rated for in-wall installation, and using one inside a wall cavity is a code violation under the National Electrical Code (NEC). In-wall power kits use UL-listed in-wall rated power cables with proper connectors at each end.
Code Rules For Line Voltage And Low Voltage In The Same Box
The NEC, published by the National Fire Protection Association (NFPA), has specific rules about combining line-voltage and low-voltage wiring in the same enclosure. Section 800.133 prohibits running communication cables in the same compartment as line-voltage conductors unless they are separated by a permanent barrier. Combination media boxes satisfy this rule by including a built-in metal or plastic divider that creates two separate compartments, each accessed through its own opening in the cover plate.
Beyond the separator requirement, the line-voltage portion of the box must be wired to a normal twenty- or fifteen-amp branch circuit serving the room. The receptacle must be tamper-resistant per current NEC rules for dwelling units. The branch circuit is typically the same general-use circuit that serves the room's other outlets, and the receptacle must have arc-fault circuit-interrupter (AFCI) protection per Section 210.12.
For low-voltage cables, the rules govern cable type, not circuit protection. HDMI, ethernet, and optical audio cables routed through walls must be CL2, CL3, or plenum-rated as appropriate for the building location. Standard HDMI cables sold for short connections between components on a shelf are typically not rated for in-wall installation. The NFPA notes that using non-rated cables inside walls is one of the more common code violations in DIY home theater installations.
Choosing The Right Box Depth And Position
Box depth matters because the plug profile of your television varies by manufacturer and model. Most modern televisions use a right-angle plug or a low-profile straight plug, both of which fit within a one-and-a-half-inch recessed depth. Older televisions and some commercial-grade displays use a deeper standard plug that needs at least a two-inch depth.
Position matters even more. The recessed box should sit directly behind the wall mount itself, ideally within the mount's footprint so the box is fully hidden by the television. Most wall mounts have a vertical center hole pattern that aligns with VESA mounting standards, and the box should be positioned to land in the area covered by the mount's bracket but not block the mount's attachment screws to the studs.
Have you measured your television's exact mount point and confirmed where the studs sit in the wall behind it? The recessed box can sit in a stud bay between two studs, but the wall mount itself must anchor into studs, so the two locations need to be coordinated. Standard stud spacing in the U.S. is sixteen inches on center, which means the box has at most about fourteen and a half inches of horizontal clearance between studs.
Installation In New Construction Versus Retrofit
In new construction, recessed media boxes are installed during electrical rough-in, before drywall. The electrician runs Romex or BX cable to the line-voltage compartment and either pre-pulls the low-voltage cables or installs a smurf-tube conduit from the upper box to the lower box, allowing future cables to be pulled through. This is the cleanest scenario and adds minimal cost beyond a standard outlet installation.
In retrofit, the installer cuts a rectangular opening in the existing drywall, fishes new cable through the wall cavity from a nearby power source, and installs an old-work recessed box that clamps to the back of the drywall using internal tabs or wings. The retrofit version usually does not allow easy installation of a smurf-tube conduit between the upper and lower boxes, so installers typically run individual rated cables between them.
The retrofit difficulty depends heavily on wall construction. Standard drywall over wood studs is straightforward. Plaster over lath is significantly harder and risks cracking the surrounding plaster. Walls with horizontal fire blocking inside the cavity may require additional access points to fish cables vertically. Cost data from the NAHB shows that recessed media box retrofits in standard wood-stud walls typically run $300 to $600 per pair of boxes, while plaster or fire-blocked walls can climb above $1,000.
Common Mistakes In Television Wall Installations
The most expensive mistake is installing the recessed box in the wrong position, requiring the wall mount to be relocated or the box to be patched and reinstalled. This is preventable by holding the actual wall mount up to the wall during planning and marking the box location relative to the mount's footprint, not based on an abstract center line.
The second common mistake is forgetting to plan for sound systems. If a soundbar will mount below the television, its power cord and audio cable also need to disappear behind the wall, which means a third recessed box at soundbar height or careful planning to route the soundbar's cabling through the upper box. If a center-channel speaker will sit above a media console, its cabling needs a path too.
A third mistake, particularly in older homes, is overloading the existing branch circuit. A modern television draws relatively little power, but if the same circuit serves the room's lighting, other outlets, and a media console with multiple components, total draw can climb. Industry surveys suggest dedicated home-theater circuits are now installed in about thirty percent of new custom homes, separate from the general room circuit. Have you considered whether your home theater wall deserves its own dedicated circuit?
A fourth common mistake is overlooking heat. Modern flat-screen televisions run cooler than older plasma and rear-projection models, but recessed boxes can still trap warm air behind the television. Mid-range and larger displays may dump twenty to forty watts of waste heat from their power supplies, and that heat needs somewhere to go. Box manufacturers address this with vented covers or by positioning the box outside the central back panel of the television. If your television sits tight against the wall with no airflow gap, verify the manufacturer's clearance recommendations before specifying the box location.
A fifth mistake is forgetting future serviceability. Cables fail, signal standards evolve, and the components behind the television change every few years. Boxes with conduit pathways between the upper and lower locations support future cable pulls without opening the wall. Boxes with fixed, sealed pathways require more invasive work to upgrade. CEDIA-aligned installers typically default to smurf-tube conduit between the boxes for exactly this reason, and the modest extra cost during rough-in repays itself the first time you upgrade from HDMI to a newer signal standard or run a second fiber for a future receiver.
Conclusion
Recessed outlet boxes are the difference between a wall-mounted television that looks like a thoughtfully designed feature and one that looks like a hastily installed afterthought. The cost premium is modest, particularly in new construction, and the result is a clean, finished wall with no visible cords and no gap between the television and the wall surface. For homeowners and designers planning any kind of media wall, recessed boxes should be specified at the rough-in stage, not added later.
The technical choices come down to depth, configuration, and code compliance. Choose a UL-listed combination box that handles both line voltage and low voltage in separated compartments. Pair an upper box behind the television with a lower box at media-console height, with a conduit or fishable cable path between them. Verify that all in-wall cables are CL2, CL3, or plenum-rated as appropriate, and confirm that the line-voltage circuit has AFCI protection per current NEC rules.
Coordination with the wall mount is the detail most often overlooked. Hold the actual mount against the wall during planning, mark the stud locations, and place the box to sit within the area covered by the television without conflicting with mount screws. Plan for soundbars, center channels, and any other accessories that will share the wall. Consider whether the media setup justifies a dedicated branch circuit. None of these decisions are complicated individually, but together they separate a polished installation from a frustrating one.
Planning your media wall? Before your next electrical rough-in, lay out the full television, soundbar, and media console arrangement on paper or in a 3D model. Mark every cable path, every power location, and every recessed box. Bring that markup to your electrician and audiovisual installer before any drywall closes up. For code research, the National Fire Protection Association publishes the full NEC, and the National Association of Home Builders publishes residential design guides. For audiovisual standards, the Custom Electronic Design and Installation Association publishes residential AV best practices.
More Articles You May Like



Comments
Post a Comment