Garage Bike Rack Wall Mount vs Floor Stand Comparison
The bicycle in the garage is one of the great recurring problems of suburban life. Lean it against the wall and it falls over, scratches the car, or blocks the path to the workbench. Lean two or three of them against the wall and you've created an obstacle course that nobody wants to navigate. The two grown-up solutions to this problem are the wall-mount bike rack, which hangs the bike off the wall by the frame or the wheel, and the floor stand, which holds the bike upright on the ground using a clamping or cradle mechanism. Both work. They work differently, they cost differently, and they fit different garages and different rider mixes.
This comparison cuts through the marketing language and gets to the actual decision criteria: how much floor space each system frees up, how easy it is to grab a bike and ride versus put it back, what kinds of bikes each system handles cleanly, what the install requirements are, and what happens five years in when the rubber pads wear out or the kids have outgrown half the fleet. By the end you should know which system, or which combination, makes sense for your garage and your bikes.
The Core Difference: Floor Footprint vs Wall Real Estate
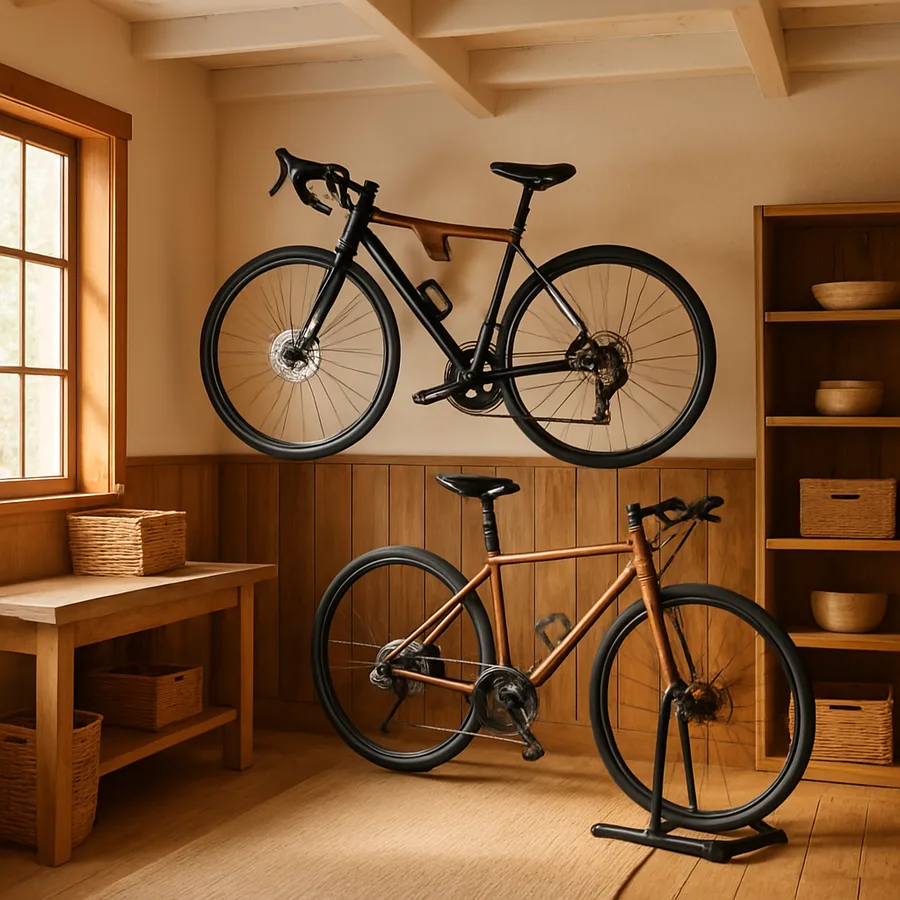
This is the heart of the entire comparison. Wall-mount racks trade wall space for floor space, the bike comes off the ground entirely and occupies an area of the wall roughly the size of the bike itself. Floor stands trade floor space for wall freedom, the bike stays on the floor in an organized, upright position, and the wall behind stays available for shelves, slatwall, tool storage, or whatever else competes for that real estate.
Which trade-off matters more depends on your specific garage geometry. In a garage with a workbench wall, a tool wall, and a single car, the wall space is precious because it's competing with several other functions. The floor space, by contrast, is mostly being wasted by the bikes leaning against the walls anyway. Floor stands win that comparison. In a garage with two cars, almost no clear floor space, but uncluttered walls along the sides, the math flips, the wall space is essentially free and the floor space is genuinely scarce. Wall mounts win that comparison.
The hybrid case is where most actual garages land: bikes on walls in the zones where the wall is otherwise empty (often the back wall and the area behind the open garage door), and floor stands in the zones where you need quick access (the bikes the kids ride three times a week, the bike you commute on every morning). The U.S. Census Bureau reports that the average new American garage is between four hundred and five hundred square feet, generous on paper, but rarely generous after you account for cars, storage, and circulation paths. Every square foot reclaimed matters more than you'd expect.
Wall Mount Styles: Vertical Hook, Horizontal Cradle, and Folding Arms
The wall-mount category isn't one product, it's three pretty different ones with meaningfully different use cases. The simplest is the vertical hook, a single padded steel hook that holds the bike by the front wheel with the bike hanging straight down against the wall. This is the cheapest option (often under twenty dollars per bike), the most space-efficient (the bike's footprint on the wall is roughly the width of the handlebars), and the easiest to install. The trade-off is the lift required: you have to hoist the front wheel above your head every time you put the bike away, which is fine for a thirty-pound road bike and miserable for a sixty-pound e-bike.
The horizontal cradle hangs the bike sideways with the top tube resting in two padded arms extending from the wall. This presentation is more bike-shop than utilitarian, and it works beautifully for road and mountain bikes with traditional diamond frames. The bike comes off the floor entirely but doesn't need to be lifted overhead, just hooked into the cradle at chest height. The downside is that the bike now extends three to four feet out from the wall, which essentially commits that section of garage to the bike. Bikes with step-through frames, full-suspension mountain bikes with awkward top tube geometry, and most kids' bikes don't fit cradles well.
Folding arm racks are the high-end option, with arms that pivot down out of the way when not in use, then fold out to hold the bike. These tend to be the most expensive (forty to one hundred dollars per bike), the most aesthetically polished, and the most flexible, many fold-arm designs can hold any bike geometry from a child's twenty-inch through a full e-cargo. Several brands like Steadyrack have built devoted followings in the cycling community for fold-arm racks specifically; Family Handyman has reviewed several in the category at familyhandyman.com.
Floor Stand Designs: Wheel Holder, Tray, and Gravity Stand
The floor-stand category breaks down by how the stand grabs the bike. The wheel-clamp stand is the most common: a low-profile metal frame with a slot or pair of arms that grip the front or rear wheel and hold the bike upright. These are inexpensive (twenty to fifty dollars per bike), easy to use (just roll the bike in), and work with any wheel size up to roughly twenty-nine inches with two-inch tires. The grip is friction-based, which means a hard nudge from the side can knock the bike loose, but for normal garage use that's rarely an issue.
The tray-style stand uses two molded plastic or metal trays sized to cradle the front and rear wheels with the bike rolled into position. These tend to look cleaner than wheel clamps, often hold the bike more securely, and accommodate a wider range of tire sizes including fat-tire bikes and kids' bikes. The trade-off is footprint, a tray stand is the full length of the bike on the floor, where a clamp stand is just the wheel.
The gravity stand is a vertical pole with adjustable arms that holds two or three bikes in stacked horizontal cradles, and it's the right answer when you need to store multiple bikes in a single floor footprint. A two-bike gravity stand uses roughly the floor area of a single bike but stores them with the upper bike's seat and pedals offset to clear the lower bike's handlebars. These run roughly fifty to one hundred dollars and require nothing more than tension between the floor and the ceiling, no wall mounting, no joist drilling, just twist the pole until it's snug.
Frame Compatibility: What Each System Handles Cleanly
This is where buyers most often get burned. They buy a perfectly nice rack designed for a standard road bike geometry, then try to hang their wife's step-through commuter or their daughter's twenty-inch wheel kid bike on it, and the rack just doesn't work. Frame and wheel compatibility varies widely across rack types, and matching the rack to the actual bikes in your garage is the single most important pre-purchase step.
Vertical hook racks work with essentially any bike that has a front wheel, which is to say all of them. This is the universal-fit option. The only constraint is wheel size, most hooks are sized for twenty-six to twenty-nine-inch wheels, so a sixteen- or twenty-inch kid bike may need a different size hook. Horizontal cradle racks require a relatively horizontal top tube, which excludes step-through frames, women's bikes with sloping top tubes, and most kids' bikes. Folding arm racks are typically more universal because the arms grip the wheel rather than the frame; check the specific model's wheel size and tire width range before buying.
For floor stands, the wheel-clamp style works with most bikes but struggles with fat-tire bikes (over three inches wide) and very small wheels. Tray-style stands are usually adjustable and accommodate the widest range. Gravity stands work with traditional diamond-frame bikes but often struggle with step-through frames where the cradle has nothing to rest against. The U.S. Bicycle Industry has tracked the dramatic shift in residential bike fleets over the past decade, toward wider tires, more diverse frame geometries, and rapidly growing e-bike share, and racks that worked for the average household bike a decade ago are increasingly the wrong tools for what families actually own now.
Install, Cost, and Long-Term Maintenance
Wall-mount racks require permanent installation, ideally into wall studs rather than drywall anchors. A typical hook or cradle install takes fifteen minutes per bike with a stud finder, level, drill, and lag screws. Drywall anchors will hold a static bike load but flex over time and may eventually pull out under repeated use; the conservative install always finds the stud. The Occupational Safety and Health Administration's general fall protection guidance is overkill for this scale of work but the underlying principle applies: anchor to structure, not to surface.
Floor stands require essentially no installation. A wheel clamp or tray stand sets on the floor and holds the bike by virtue of its own weight and geometry; a gravity tension stand expands between floor and ceiling with a twist. The portability is a real advantage if you rent your home or anticipate moving, wall-mount racks leave holes when you take them down, while floor stands leave the garage exactly as you found it.
Cost varies more within each category than between them. A budget vertical hook is fifteen to twenty-five dollars; a premium folding arm is sixty to one hundred. A budget wheel-clamp floor stand is twenty to forty dollars; a premium two-bike gravity stand is eighty to one hundred fifty. For a typical four-bike family garage, expect to spend somewhere between one hundred and three hundred dollars total on the storage system regardless of which category you choose. Maintenance is essentially zero on either, with the exception of the rubber padding on hook and cradle racks, which can dry out and tear over five to ten years and is usually replaceable.
Match the System to Your Riding Pattern
The smartest framework for choosing isn't about garage geometry or even bike type, it's about how often each bike actually gets used. The bike you ride every morning belongs in the most accessible storage you have, which is almost always a floor stand near the garage door. The bike that comes out for a weekend group ride twice a month can go anywhere, wall mount, gravity stand, even ceiling hoist. The bike that hasn't been ridden in two years and probably won't be ridden this year either is taking up space it doesn't deserve, and the honest answer is to sell it or donate it before you build storage for it.
For the daily commuter or fitness rider, friction matters. Anything that requires lifting the bike overhead or threading it through three other bikes adds enough resistance that on a borderline morning you'll just take the car instead. Wheel-clamp floor stands at the door, with the bike pre-positioned and ready to roll, eliminate that friction. For the weekend rider, the bike can live further from the door without affecting how often you ride. For the seasonal rider, vertical wall storage or a ceiling hoist makes the most sense, since the friction of retrieval doesn't matter when you're only doing it twelve times a year.
Have you actually counted how often each bike in your garage gets ridden? Most households dramatically overestimate the use of two or three bikes and dramatically underestimate the storage cost of the rest. The single biggest improvement most garage bike storage projects deliver isn't the rack itself, it's the audit that happens when you have to decide what's worth storing. Could you free up real space simply by being more honest about which bikes are actually part of your life?
Conclusion
The wall-mount-versus-floor-stand decision turns out to be less binary than the comparison frame suggests. Both systems work well within their domains, and most garages benefit from a mix rather than a single approach. Use wall mounts where wall space is plentiful and floor space is scarce, especially for bikes ridden less frequently. Use floor stands where wall real estate competes with other storage and where the bikes in question get ridden often enough that quick access matters more than maximum density.
The system you don't choose still works for someone, the comparison isn't about which is objectively better but about which fits your specific combination of garage geometry, bike fleet, and riding patterns. A road cyclist with a single carbon bike and a workshop wall full of tools probably wants a horizontal cradle on the wall above the workbench. A family with four bikes ranging from a kid's twenty-inch to a parent's e-bike probably wants a mix: gravity stand for the two adult bikes, wall hooks for the older kid's bike, and a floor stand for the daily kid bike. Match the storage to the use, not the other way around.
Whatever you choose, the install is straightforward enough that this is genuinely a weekend project, not a renovation. An afternoon of measuring, ordering, and assembling will hand you back floor space that's been wasted for years. The version of your garage where you can actually walk around the cars, reach the workbench, and grab a bike without moving three other things, that version is much closer than it feels when you're standing in the current chaos.
Ready to fix your garage bike storage this weekend? Pull every bike out, count the ones that have been ridden in the last six months, measure your wall and floor space honestly, and you'll know within twenty minutes exactly which system or combination of systems is the right answer. The bikes will still be there next weekend; the wasted space doesn't have to be.
More Articles You May Like


Comments
Post a Comment