Flush Mount Ceiling Lights for Low Ceiling Hallways
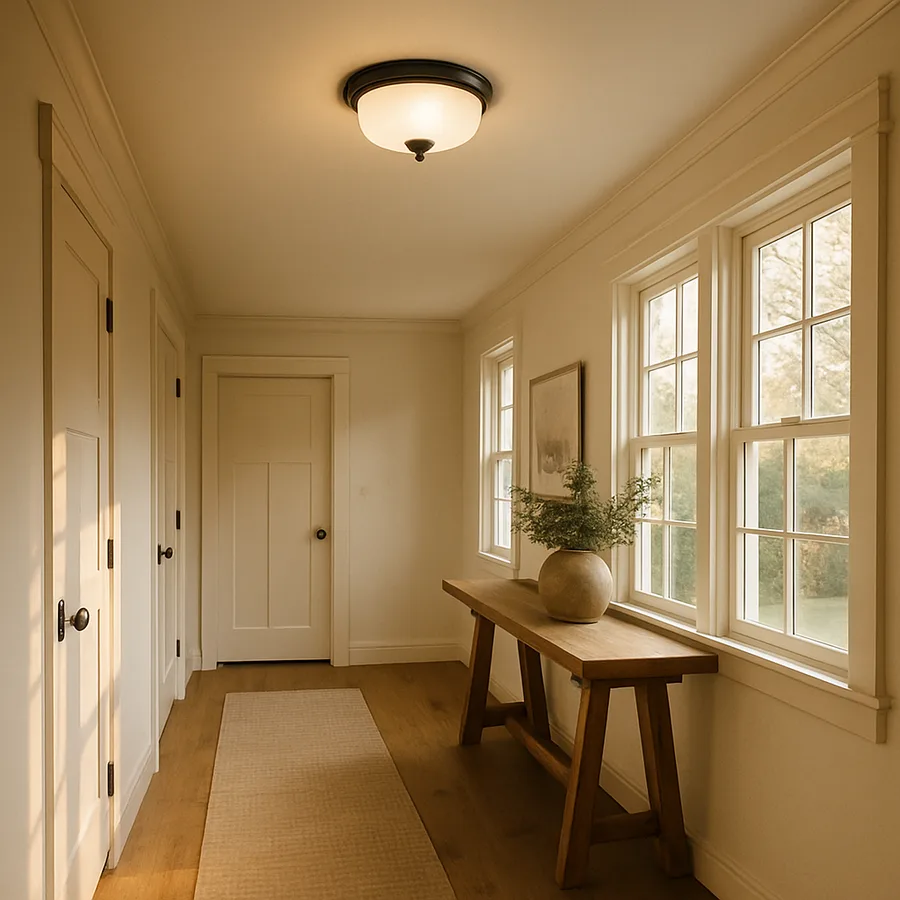
Flush mount ceiling lights are the workhorse of low-ceiling hallways, and choosing the right one is more nuanced than it first appears. The fixture has to clear standard head height, deliver enough light for safe passage, blend with the architecture, and avoid the dated look that older flush mounts often carry. Done well, a flush mount disappears into the ceiling while still doing its job. Done poorly, it announces itself with every glance upward.
The National Association of Home Builders reports that the average ceiling height in newly built homes is 9 feet, but a remarkable share of older homes, condominiums, and basement-level corridors still have 7-foot to 8-foot ceilings. In those spaces, a pendant or chandelier is rarely a viable choice. According to American Lighting Association consumer research, roughly 65 percent of homeowners with ceilings under 8 feet rely on flush or semi-flush fixtures as their primary corridor lighting solution. This guide walks through how to make that choice well.
What Counts As A Flush Mount In A Hallway Context
A true flush mount sits within roughly 4 inches of the ceiling, with no visible drop. A semi-flush mount drops between 4 and 12 inches, suspending the light source slightly below the ceiling for better light distribution. Both work in low ceilings, but the cutoff is different for each. A 7-foot ceiling almost always demands a true flush mount, while an 8-foot ceiling can accommodate a low-profile semi-flush in tight quarters.
The Illuminating Engineering Society recommends maintaining at least 7 feet of head clearance in any walkway, and a generous 7 feet 6 inches in residential hallways. That hard limit, combined with the fixture's profile depth, defines what is possible. A flush fixture with a 3-inch profile in an 8-foot hallway leaves 7 feet 9 inches of clearance, which is comfortable. The same hallway with a 6-inch semi-flush leaves only 7 feet 6 inches, still legal but tight for taller users.
Have you ever brushed your hand against a fixture while reaching up to a high shelf or carrying a tall object? That moment defines the practical comfort of a low-ceiling hallway. The general rule from the American Society of Interior Designers is that any fixture lower than 7 feet 6 inches will eventually be touched, dusted around, or bumped, and the design should plan for that reality.
Sizing Flush Mounts For Hallway Width And Length
Flush mount sizing follows a straightforward formula favored by interior designers. Add the room length and width in feet and convert that sum to inches for the fixture diameter. For a 4-foot wide by 12-foot long hallway, that calculation suggests a 16-inch fixture, which is appropriate for a single central installation. In longer hallways, the formula adjusts because you should be using multiple smaller fixtures rather than one oversized one.
For a hallway longer than 16 feet, plan two or three smaller flush mounts spaced evenly down the run. A common configuration uses 12-inch fixtures spaced 6 to 8 feet apart, with 3 to 4 feet from each end wall. The total light output should match what a single larger fixture would have provided, but the distribution is dramatically more even. Spacing math is the same as for recessed cans, with overlap of beam patterns ensuring no dark gaps.
Lumen output matters as much as fixture size. A typical residential hallway needs about 5 to 10 lumens per square foot at the floor. A 4 by 16-foot hallway, totaling 64 square feet, calls for between 320 and 640 total lumens. A pair of flush mounts at 400 lumens each meets the upper bound comfortably. Architectural Digest regularly profiles renovations where designers err on the higher end and add dimmers, giving the homeowner the full range from bright function to soft mood.
Profile, Style, And Material Choices
The visual profile of a flush mount carries weight in a low-ceiling space. A thin, low-profile disc reads as contemporary and disappears into the ceiling. A traditional dome with a metal frame and an opal glass diffuser carries more visual presence and works well in classic or transitional homes. A schoolhouse-style flush mount with a clear or frosted glass globe nods to early-20th-century craftsmanship and pairs beautifully with vintage homes.
Material choice influences how the fixture wears over time. Brushed nickel and matte black are the current popular finishes and resist visible fingerprints. Polished chrome and brass are dramatic but show every smudge, especially on a low ceiling within reach. Glass diffusers either soften light evenly when frosted, or transmit a sparkle pattern when prismatic, and the choice should match the desired ambient mood of the hallway.
What about the latest LED disc fixtures? These ultra-thin, edge-lit panels sit nearly flush with the ceiling and provide diffused, even light with no visible bulb. They are an excellent choice for minimalist hallways and modern condos with tight ceiling clearances. The trade-off is replacement, since most are non-relampable, integrated LED units with the entire fixture replaced at end of life. Choose a quality brand with a 5-year minimum warranty for confidence.
Color Temperature And Light Quality
Color temperature in a hallway is a subtle but important choice. For residential use, 2700K to 3000K is the warm, welcoming range that most designers recommend for circulation spaces. A 2700K source mimics the warmth of incandescent and creates a cozy, residential feel. A 3000K source reads slightly crisper while still feeling warm, and pairs well with cooler wall colors and contemporary architecture.
Avoid 4000K and higher in residential hallways unless the design is intentionally clinical or commercial. The American Lighting Association consumer research shows that color temperature is the single most common reason homeowners replace newly installed LED fixtures within the first year. The cool blue cast that reads as energetic in a kitchen feels harsh and unwelcoming in a corridor where the eye is searching for warmth.
Color rendering index, or CRI, is the second pillar of light quality. A CRI of 80 is acceptable for general use, but CRI 90 or higher is recommended for any hallway that displays artwork, family photos, or finishes you care about. The price difference between an 80 CRI and a 90 CRI fixture is usually 20 to 40 percent, but the visual difference is dramatic. The Illuminating Engineering Society highlights CRI as one of the most under-appreciated specifications in residential lighting.
Layering Flush Mounts With Other Light Sources
A single layer of flush mount lighting is functional but flat. Adding wall sconces, picture lights, or low-level accent lighting transforms the hallway from utilitarian to designed. Sconces mounted between doorways at 60 to 66 inches add vertical brightness and soften shadows on faces. They also provide a backup ambient layer for late-night navigation when the overheads feel too bright.
Picture lights or aimed accents add a third layer for any framed art, mirror, or wall feature. The American Society of Interior Designers emphasizes that accent light at roughly three times the ambient level creates a noticeable but balanced highlight. In a low ceiling hallway, an aimed picture light can be especially effective because the limited ceiling height keeps the source close to the artwork for crisp, focused illumination.
Have you walked a hallway where every layer felt necessary and intentional? That is the goal. A layered low-ceiling hallway with flush mounts, sconces, and one or two accents reads as a designed space rather than merely a corridor. Each layer should be on a separate dimmer or scene controller, allowing different combinations for different times of day. A morning scene might use only the flush mounts at full output. An evening scene might dim the flush mounts to 30 percent and bring the sconces and accents up.
Energy, Smart Controls, And Code Considerations
Modern LED flush mount fixtures consume between 9 and 18 watts each, a fraction of older incandescent or halogen equivalents. A typical hallway with three flush mounts running 5 hours per day uses about 80 to 100 kilowatt-hours per year. Adding a dimmer or motion sensor can trim that further, with the American Lighting Association reporting energy savings of 15 to 30 percent in hallways with smart controls.
Smart controls in a low-ceiling hallway are particularly useful because the fixture is close enough to be within wireless range of any hub or controller. A motion sensor at each end of the hallway can trigger a dim path light at night, then the full ambient scene during the day, then full off after a set vacancy timeout. The technology is mature, the apps are user-friendly, and the comfort improvement is significant for nighttime navigation.
Code clearances are minimal for flush mounts, but worth confirming. Any fixture in a closet must comply with NEC requirements for surface-mounted LED fixtures, with appropriate clearance from stored items. GFCI protection is required in damp locations, including hallways adjacent to bathrooms or laundry rooms. Always confirm code compliance with your local AHJ before specifying or installing, and use a licensed electrician for any new wiring runs.
Avoiding Common Flush Mount Mistakes
The most common mistake in flush mount selection is sizing the fixture for the wrong scale. A fixture that is too small reads as undersized and gets lost on the ceiling. A fixture that is too large dominates the corridor and feels out of proportion. The room-sum sizing formula in this guide gives a starting point, but always pull a paper cutout to actual size and tape it to the ceiling for a visual check before purchasing.
The second mistake is ignoring the fixture profile. A 6-inch deep fixture in a 7-foot ceiling reads as oppressive even if the head clearance technically meets code. The recommended approach for very low ceilings is to choose a fixture under 4 inches deep and to verify the visual presence by holding the actual product up to the ceiling before installation. The National Association of Home Builders design guidelines specifically caution against deep fixtures in low ceilings.
The third mistake is undersizing the lumen output. Many homeowners default to a single warm-glowing fixture and end up with a hallway that feels dim and cave-like. The fix is to specify dimmable, higher-output fixtures that can be turned down when desired but provide adequate brightness when needed. A 1,200-lumen fixture on a quality dimmer outperforms a 600-lumen fixture every time, because the user has full control.
Conclusion
A flush mount ceiling light is the right answer for the majority of low-ceiling hallways, and choosing the right one is a matter of paying attention to scale, profile, lumen output, color temperature, and layering. The fixtures available today are vastly better than what was on the market a decade ago, with thinner profiles, higher CRI, smoother dimming, and cleaner aesthetics across every price point.
Begin the process by measuring your hallway accurately, calculating fixture size with the room-sum formula, and selecting a profile under 4 inches deep for ceilings below 8 feet. Confirm color temperature in the warm 2700K to 3000K range, specify CRI 90 or higher, and plan for a dimmer at every switch location. Add layering with sconces or accent lights for any hallway longer than 12 feet or one that features artwork.
The result is a hallway that feels neither cramped nor underlit, with a ceiling that reads as clean and intentional. The total cost of a quality flush mount installation is modest compared to the daily improvement in how the home feels, and the fixtures themselves typically last 10 to 25 years before any maintenance is needed.
Ready to upgrade your low-ceiling hallway? Take measurements today, pull a sketch onto graph paper, and use the sizing and spacing rules in this article as your guide. If you want professional input, contact an American Lighting Association member or an ASID-affiliated interior designer for a one-hour consultation. The investment is small and the design payoff lasts for the life of the home.
Reference resources include the Illuminating Engineering Society recommended practices, the American Lighting Association consumer guides, and the National Association of Home Builders design standards.
More Articles You May Like



Comments
Post a Comment