Stripping and Refinishing Antique Wood Furniture at Home
Refinishing an antique is one of the most rewarding projects a homeowner can take on, but it is also one of the easiest to ruin. Most pieces that arrive on a workbench have already survived a century of fashion swings, basement floods, careless movers, and at least one well-meaning relative who thought a coat of latex paint would brighten things up. Your job, before you ever uncap a stripper, is to decide whether the finish currently on the piece is part of the story or simply in the way of it. The American Institute for Conservation (AIC) is firm on this point: every layer you remove is information you cannot put back, and the difference between a thoughtful refinish and an irreversible mistake is usually a single afternoon of patient testing.
This guide walks through a complete home workflow for stripping and refinishing antique wood furniture without damaging the patina, joinery, or resale value that gives these pieces their soul. We will cover product selection, surface prep, chemical and mechanical removal, color correction, and a slow, lightly built finish schedule that lets the wood breathe. Two reader questions will keep us honest along the way: what does it actually mean to "preserve patina," and when is professional refinishing the smarter call? By the end you will have a defensible workflow and a short list of tools that will serve you for decades.
Deciding Whether the Piece Should Be Refinished at All
Before any solvent enters the room, sit with the piece for a full hour. Look at it from across the room and from six inches away. Photograph every surface, including the underside of drawers, the back of the case, and the inside of the apron. The Smithsonian Institution publishes a free guide titled "Caring for Your Treasures: Furniture" that recommends documenting condition before any treatment, and that single habit will save you from regret later. Note where original hardware is intact, where there are construction marks, and where previous repairs have been made. These small details determine whether you have a refinishing candidate or a conservation candidate.
A refinishing candidate is generally a piece whose original finish is failing across a majority of the surface, has been recoated badly with modern materials, or has been painted in a way that is neither original nor desirable. A conservation candidate, by contrast, retains an honest aged finish that can be revived rather than removed. The line is not always obvious. A reader recently asked me whether a Victorian washstand with crackled but intact shellac should be stripped, and the answer was no. A clean, a wax, and a tiny amount of touch-up restored ninety percent of its visual appeal. According to a 2024 survey by the American Society of Interior Designers (ASID), roughly thirty-eight percent of homeowners who strip antique furniture later regret removing the original finish, citing loss of warmth and character. That number alone should slow your hand.
If you decide to proceed, define the goal in writing. Are you trying to return the piece to a usable family heirloom, to make it match a contemporary interior, or to prepare it for sale? Each goal implies a different finish, sheen, and color. Pieces destined for the auction market should usually be refinished as conservatively as possible, since collectors penalize aggressive stripping heavily. The American Home Furnishings Alliance (AHFA) reports that buyer demand for honest, lightly restored antiques has risen meaningfully over the last five years as younger buyers reject disposable particleboard and seek pieces with provenance.
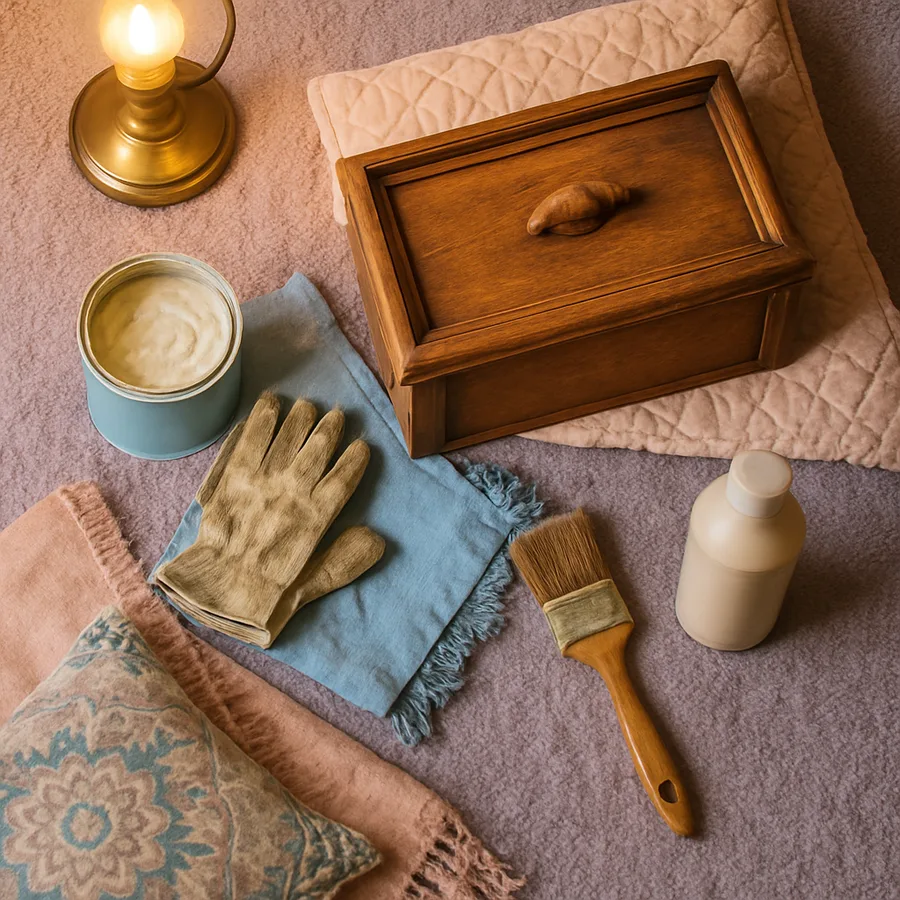
Setting Up a Safe and Effective Workspace
Stripping chemistry is unforgiving, both to your lungs and to your floor. Work outdoors when weather allows, or in a garage with the door open and a box fan in a window pulling air away from your body. Lay down a thick canvas drop cloth covered with a layer of cardboard, because plastic sheeting tends to trap stripper underneath and dissolve into a sticky mess. Wear nitrile gloves rated for methylene chloride alternatives, splash-proof goggles, and a respirator with organic-vapor cartridges that have been changed within the last six months.
Keep a metal trash can with a tight lid nearby, because rags soaked in oil-based finishes can spontaneously combust as they cure. The National Fire Protection Association documented more than 1,700 home structure fires per year attributable to spontaneous combustion of finishing rags between 2018 and 2022, and almost every one of those fires was preventable with a sealed metal container or a bucket of water. Lay out your tools before you start: plastic putty knives in two widths, brass-bristle brushes for carved areas, cotton rags torn into uniform squares, mineral spirits for cleanup, and a pump sprayer of clean water for emergency rinses on skin.
Lighting matters more than most people expect. A pair of clamp lights with daylight-balanced LED bulbs, positioned at a low rake angle across the surface, will reveal lap marks, missed spots, and tearout that overhead light hides completely. A north-facing window or a single warm work light overhead will fool you into thinking a surface is smooth when it is not. Keep one strong rake light burning at all times, and inspect after every step.
Choosing the Right Stripper for the Job
The stripper aisle has changed dramatically since the Environmental Protection Agency finalized restrictions on consumer methylene chloride paint removers in 2019. Most home users today choose between three families of products: benzyl alcohol blends, NMP-free citrus formulas, and caustic soda pastes. Each has a place. Benzyl alcohol blends are the closest modern analog to the old methylene chloride strippers, working in fifteen to forty-five minutes on most coatings. Citrus strippers are slower but gentler on veneers and on the operator. Caustic strippers are the most aggressive and are appropriate only for thick paint on solid wood, never on veneer, never on glued joints, and never on anything you care about.
Test on an inconspicuous area first. The underside of a tabletop, the back of a chair leg, or the inside of a cabinet door will tell you in twenty minutes how the finish reacts. Apply the stripper in a layer thick enough to hold its own weight, in one direction only, with a natural-bristle brush. Do not brush back over it, because that breaks the surface tension and lets the active solvents flash off. Cover with a sheet of plastic wrap to slow evaporation, and wait the full dwell time recommended on the can rather than checking every five minutes.
When the finish has lifted, scrape gently with a plastic putty knife held at a low angle and pulled toward you. Resist the temptation to dig. If the residue is stubborn, apply a second thin coat over the first rather than scrubbing. Carved areas come clean with a brass brush dipped in fresh stripper, and the deepest corners often need a sharpened wooden dowel rather than any metal tool. After the bulk of the finish is off, neutralize the surface with the wash recommended by the stripper manufacturer, usually mineral spirits or denatured alcohol, and wipe down twice with clean rags.
Sanding Without Erasing the Wood's History
This is the step where antiques die. Power sanders remove material at a rate that is wildly out of proportion to the thickness of the surface beneath. Most antique veneers are between one-fortieth and one-twentieth of an inch thick, and a random-orbit sander with eighty-grit paper can blow through a veneer in three seconds. Unless you are working on a thick, solid, secondary surface like a workshop tabletop, sand by hand with a cork or felt block.
Begin with one hundred fifty grit only if the surface demands it, then move to one hundred eighty, two hundred twenty, and stop. Going finer than two hundred twenty closes the grain so tightly that subsequent stains and finishes will not penetrate evenly. Always sand with the grain, never across it, and lift the block between strokes so that you do not create a slight roundover at the edges of boards. Pay special attention to the crisp arrises along edges and corners; a refinished antique with rounded edges looks unmistakably wrong, and that single detail is what separates a piece that reads as old from one that reads as a knockoff.
Dust matters. Vacuum every surface, then wipe with a tack cloth or with a microfiber dampened in mineral spirits. The wipe will also raise any glue squeeze-out, fingerprints, or oil contamination that would otherwise resist staining. Architectural Digest has noted in its annual restoration features that the single best predictor of a beautiful refinish is the time spent between the last sanding and the first finish coat, with most professionals recommending at least an overnight rest with the piece covered against airborne dust.
Color Work, Stains, and the Patina Question
If you have stripped to bare wood, the piece will look shockingly pale. Resist the urge to chase the original color with a single dark stain, because that almost always produces a flat, muddy, modern appearance. Antique furniture acquires its color through layers: the original stain, a sealing coat, decades of darkening shellac or varnish, and a final film of wax and oxidation. To rebuild that depth, work in thin glazes rather than one heavy coat.
Begin with a dilute water-based dye to set the underlying hue. Water dye penetrates deeply, raises the grain, and gives a clean foundation that pigment stains can sit on top of. After the dye is dry, sand lightly with three hundred twenty grit to knock down the raised fibers, then apply a thin coat of garnet shellac as a sealer. The orange-amber cast of garnet shellac is doing an enormous amount of the visual work that people associate with old wood, and a single thin coat will warm the piece more than any stain alone. Over the shellac, you can apply a gel stain or a glaze tinted to the exact tone you want, wiping back with a clean rag until the highlights and shadows feel balanced.
Readers often ask whether they should attempt to recreate distressing or wear marks. The honest answer is rarely. Faked wear almost always reads as faked, because real wear follows the actual paths of human hands and feet over decades. If your piece has lost its wear marks because of aggressive stripping, it is more honest to leave it cleanly finished than to invent a distress pattern. Better Homes & Gardens covered this question in a 2023 feature on furniture restoration and reached the same conclusion: a clean refinish wears authentically over the next ten years far more convincingly than any artificial distressing applied today.
Building a Finish That Will Age Beautifully
The finish you choose determines how the piece will look in two years, in twenty, and in two hundred. For antique furniture, three finishes earn their place: shellac, oil-and-wax, and traditional varnish. Polyurethane is excluded from this list deliberately. Polyurethane forms a thick plastic film that yellows unevenly, cannot be spot-repaired, and visually flattens the wood. It belongs on floors and on kitchen tables that see daily abuse, not on antiques.
Shellac is the workhorse of antique finishing. It is reversible with alcohol, easy to apply by brush or pad, and it builds depth quickly. Mix a two-pound cut from fresh flakes, never from old liquid shellac in a metal can, because shellac has a shelf life of roughly six months once mixed. Apply with a folded cotton pad in long, overlapping strokes, working with the grain. Three to five thin coats, each rubbed back lightly with steel wool grade 0000 between coats, will produce a finish with extraordinary depth.
For a piece that will see heavier use, follow the shellac with two coats of a hand-rubbed oil-varnish blend, then a final paste wax buffed to a soft sheen. Allow each coat to cure for at least twenty-four hours, and the final wax for a full week before the piece returns to service. The patience pays off: a properly built finish on an antique should last fifty years before it needs more than a wax refresh, and when it eventually fails, every layer can be removed and replaced without disturbing the wood beneath.
Conclusion
Refinishing an antique is, at its best, an act of stewardship. You are one custodian in a long line, and the choices you make this weekend will live on the piece long after you are gone. The framework above is conservative on purpose: test before you treat, document before you strip, hand-sand rather than power-sand, build color in glazes rather than chase it in one coat, and choose finishes that can be undone by the next custodian. Following that framework will not produce the fastest result, but it will produce a result that the piece itself, the people who made it, and the people who will own it next can all respect.
If you are uncertain at any point, stop. Conservators at AIC member institutions offer paid consultations, and many will review photographs by email for a modest fee before you commit to a treatment plan. The cost of a thirty-minute consultation is trivial compared to the cost of damaging a piece that has survived for a century. ASID also maintains a public directory of designers who specialize in heritage interiors and can point you toward trusted local restorers when a job exceeds your comfort.
For your next step, pick the smallest, least valuable piece in your queue and run the entire workflow above on it before you touch anything important. A fifty-dollar washstand from a flea market is the perfect teacher. Photograph every step, time each phase, and keep notes on which products performed as advertised. By the time you finish that one piece, you will have a workflow tuned to your hands, your shop, and your aesthetic, and the next refinish will be measurably better.
Ready to start your first project? Set aside one weekend this month, gather the short tool list above, choose a piece with low stakes and high learning value, and treat the experience as a paid apprenticeship to yourself. The skill compounds quickly, and within a year you will be the person friends call before they refinish anything they actually care about. For deeper reading, consult the American Institute for Conservation, browse Architectural Digest's restoration archive, and bookmark Better Homes & Gardens' refinishing tutorials for project-specific walkthroughs.
More Articles You May Like


Comments
Post a Comment