Sewing Room Layout With Cutting Table and Machine Stations
A well-laid-out sewing room is the difference between a hobby that flows effortlessly and one that fights you at every step. Most home sewing spaces evolve by accident: a machine on a desk, fabric in a closet, the cutting happening on the kitchen table because there is nowhere else for it to go. The result is a workflow that looks like an obstacle course. Fabric travels from one room to another between every step, the iron lives ten feet from the machine, and projects stall because clearing the kitchen table for dinner becomes more pressing than finishing the seam. A purpose-built layout solves all of that simultaneously, and it does not require a custom architectural intervention. With careful planning, a spare bedroom or even a generous corner of a basement can deliver studio-grade efficiency.
This guide walks through the logic of zoning, the dimensions that actually matter for cutting and sewing, the height calculations that keep your back from breaking, the lighting and storage strategies that separate a frustrating room from a satisfying one, and the small ergonomic details that compound over years of use. Whether you sew quilts, garments, costumes, or home decor, the underlying principles transfer directly. Have you ever stood at your machine, realized the seam ripper is across the room, and felt the project momentum vanish? The next sections are built to eliminate that exact moment.
Zoning the Room Around the Sewing Workflow
Every sewing project moves through the same fundamental sequence: design and measure, cut, sew, press, finish. A productive room is laid out so that fabric moves through those zones in a continuous loop rather than crisscrossing back and forth. The cutting zone needs the largest open footprint and the best overhead lighting. The sewing zone needs a stable, vibration-resistant surface, optimal task lighting, and storage for accessories within arm's reach. The pressing zone needs heat-tolerant flooring, a stable iron surface, and a parking spot for the iron that does not require carrying a hot appliance across the room. The finishing zone - for hand sewing, hardware installation, and garment fitting - needs comfortable seating and a mirror.
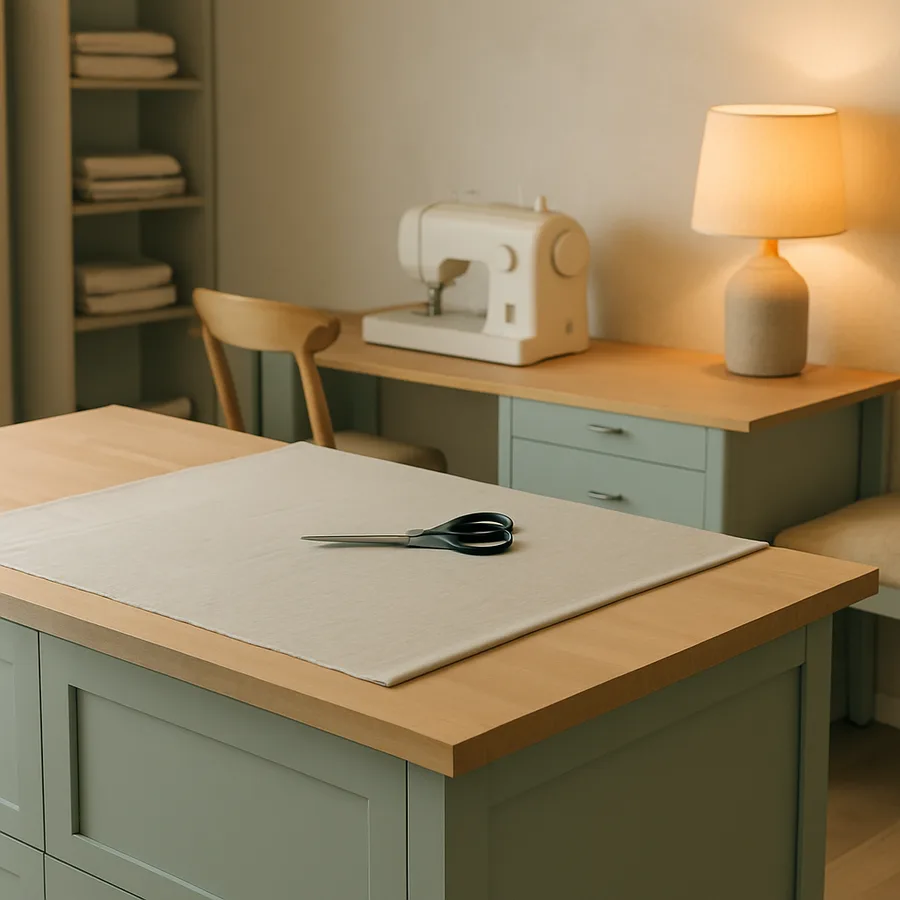
The classic studio layout places the cutting table in the center of the room because every other zone supplies fabric to it or receives fabric from it. The sewing station sits along one wall with the front of the machine facing into the room, ideally with a window providing daylight from the side. The pressing station occupies a corner with the ironing board parallel to one wall, and the finishing zone fits wherever a comfortable chair and floor lamp can land. Walk the workflow before you place anything: imagine cutting a simple pattern, walking it to the machine, walking the seam to the iron, and back. Every step that requires a turn, a duck, or a reach is a frustration to design out.
For smaller rooms where a centered cutting table is impossible, a wall-hugging layout works almost as well: cutting table along one long wall, sewing station along the perpendicular wall in the corner, pressing station tucked in the opposite corner. The trade-off is that you lose the ability to walk all four sides of the cutting table, which matters most for laying out large garment patterns. A 2023 survey of professional sewing instructors published in a quilting trade publication found that members who upgraded from a wall-bound table to a centered table reported a thirty percent reduction in cutting errors, primarily because they could see fabric grain from multiple angles.
Cutting Table Dimensions and Construction
The cutting table is the single most consequential piece of furniture in the room. Its dimensions and height directly shape every project's accuracy and your physical comfort over long sessions. The standard recommendation for garment sewing and quilting is a surface measuring at least 36 by 60 inches, with 40 by 72 inches being the sweet spot if the room can accommodate it. Quilters working on king-size projects often go larger still, up to 48 by 96 inches, which approaches the size of a standard sheet of plywood and lets you lay out an entire quilt top without folding.
Height matters more than width. A cutting table set at standard desk height of 30 inches forces you to bend forward for every cut, and after an hour of layout and rotary cutting, the lower back will protest. The ergonomically correct height is roughly 36 to 38 inches for most adults, which is approximately three to five inches below your elbow when standing relaxed with arms hanging. Adjustable-height tables are increasingly affordable and worth the premium because they let two people of different heights share the same surface comfortably. Standing-height cutting tables reduce back strain measurably; conservation guidance from OSHA on workstation ergonomics emphasizes that surface height should match the task, with cutting and assembly tasks specifically benefiting from elbow-relative heights.
Surface choice affects every cut you make. A self-healing rotary cutting mat covering the entire tabletop is non-negotiable; the standard 24-by-36-inch mat works for small projects but requires constant repositioning for larger ones. Custom-cut mats up to 72 inches long are available from quilting suppliers and pay for themselves within a year of regular use. Underneath the mat, a stable surface like a hollow-core door, a piece of MDF, or a reinforced plywood top provides the rigidity rotary cutters need for clean cuts. Floppy folding tables flex under cutting pressure and produce ragged edges. Storage drawers built into the base of the cutting table multiply the room's organizational capacity dramatically and turn dead space into project storage.
Sewing Machine Station Setup
The sewing station is where you will spend the majority of your studio hours, so the ergonomics deserve serious attention. The ideal machine surface is positioned so that when your hands rest on the bed of the machine, your forearms are roughly parallel to the floor and your shoulders are relaxed. For most adults, that translates to a surface height of 28 to 30 inches, which is below standard desk height. Sewing-specific tables often include a recessed platform that drops the bed of the machine flush with the surrounding work surface, which improves both ergonomics and fabric flow.
Behind and to the side of the machine, you need at least 18 inches of clear surface for fabric to gather as you sew. Without it, the weight of fabric pulling off the back of the machine creates inconsistent feed pressure and produces wavy seams. A small drop-leaf or extension behind the machine extends the support without permanently consuming floor space. To the right of the machine, allow another 12 to 18 inches for a small caddy holding the seam ripper, snips, marking pens, and bobbins in active use. Everything you reach for more than once an hour belongs within an arm's-length reach without standing up.
Chair height is the other half of the equation. Standard dining chairs sit at 18 inches and pair correctly with a 28-to-30-inch sewing surface, but the chair must offer back support and ideally adjustable height. A 2022 ergonomics survey by the American Sewing Guild reported that members who upgraded to a properly fitted chair reduced reported back and shoulder pain during long sessions by nearly forty percent. Chair, table, and machine should be specified as a system, not three independent purchases. Have you ever finished a session with a sore neck and shoulders? The chair-table relationship is almost certainly wrong.
Lighting for Cutting, Sewing, and Color Matching
Sewing rooms need three layers of lighting working together: ambient, task, and color-matching. Ambient lighting fills the room with general illumination, typically from ceiling fixtures providing roughly 30 to 50 lumens per square foot. Task lighting concentrates light on specific work surfaces - the cutting table, the machine bed, the pressing station - at much higher intensity, often 100 lumens per square foot or more. Color-matching lighting refers to high-CRI bulbs that render fabric colors accurately, which is critical when matching thread to fabric or coordinating prints.
The cutting table needs even, shadow-free lighting from above. A row of two or three LED panel fixtures or a long linear pendant centered over the table delivers the breadth of coverage that a single overhead bulb cannot. The sewing machine bed needs intense, glare-free task lighting, ideally an adjustable LED arm lamp positioned to throw light onto the fabric without shining into your eyes. Most modern machines include a small built-in LED, but it is rarely sufficient for dark fabrics or detailed quilting. The Illuminating Engineering Society recommends task lighting of 1000 to 1500 lux for fine assembly work, and a sewing machine bed under dark thread on dark fabric is exactly that kind of task.
For color matching, install at least one fixture with bulbs rated 90 CRI or higher and a color temperature around 5000K. Hardware-store bulbs labeled "daylight" rarely meet that specification, so verify the package data before buying. A small color-matching task lamp stationed near the cutting table lets you compare fabric and thread under standardized light, eliminating the frustration of discovering that the perfect thread match in the store reads completely wrong under your room lighting at home.
Storage Systems That Stay Organized
Sewing accumulates supplies faster than almost any hobby. Fabric, thread, patterns, notions, hardware, batting, interfacing, zippers, buttons, and tools each multiply over time, and a room without dedicated storage descends into chaos within a season. The key is matching storage type to supply type. Fabric is best stored on shelves in clear bins or rolled on cardboard tubes - never folded into deep drawers where the bottom layer disappears for years. Thread belongs on vertical thread racks where every spool is visible and reachable; horizontal drawer storage means you find the spool you need only after digging through forty others.
Patterns are a particular challenge because they come in irregular sizes and need to remain flat. Vertical hanging file cabinets with adjustable folders keep printed patterns organized by category, and pattern-making paper can be stored rolled in tall umbrella stands or vertical pipe storage. Notions - pins, snaps, hooks, eyes, elastic - belong in small clear divided organizers labeled by content, ideally on shelves or in drawers near the sewing station. Buttons collected over years deserve a dedicated jar or organizer near the finishing zone. Label everything: the time you save searching compounds across every project for the rest of your life with the system.
Pegboard above the sewing station is the secret weapon of efficient sewing rooms. A 4-by-8-foot pegboard panel with custom hooks holds scissors, rotary cutters, rulers, marking pens, small bins of pins, and seam guides - all visible at a glance, all reachable without standing. The American Sewing Guild has long recommended pegboard storage in published room layouts because it converts vertical wall space, which is otherwise dead, into highly accessible storage. Paint the pegboard a contrasting color so empty hooks visibly remind you what is missing.
Pressing Station and Final Workflow Polish
The pressing station is the zone most often shortchanged in home sewing rooms, and skipping it kills more projects than people realize. A wrinkled seam looks amateurish even on otherwise excellent construction, and pressing as you sew - rather than only at the end - is the single biggest sewing-quality multiplier. The pressing station needs three things: a stable iron surface, a heat-tolerant parking spot for the iron, and proximity to the sewing station so pressing does not require a long walk that breaks workflow.
The traditional ironing board works, but a wide, padded surface mounted on a sturdy table is far more useful for pressing yardage. A 24-by-48-inch padded board on top of a small folding table delivers double the surface area of a standard ironing board and doubles as a small assembly surface. The surface should be padded with one or two layers of cotton batting covered with a heavy cotton or linen ticking, which absorbs steam without scorching. A silicone iron rest mounted to the side of the table gives the iron a safe parking spot that protects the surface from heat damage. Position the pressing station within five steps of the sewing machine so pressing each seam is fast enough that you actually do it.
Finally, treat the room itself as a system that needs occasional resets. Every two or three months, take an hour to put every tool back in its dedicated home, dust off the machine and the cutting table, replace blades on rotary cutters, and toss thread snips that have lost their edge. The room rewards the discipline: a sewing space that gets reset stays productive for years, while one that only gets cleaned in emergencies slowly accumulates friction that makes you avoid the room entirely. Where do you currently keep your seam ripper? If the answer is "wherever I last used it," the room is asking for a system.
Conclusion
A sewing room laid out around a generous cutting table, an ergonomically correct sewing station, a thoughtfully placed pressing zone, and intelligent storage transforms hobby sewing from a series of small frustrations into a continuous flow that draws you back to the room every chance you get. The room itself becomes part of the craft. Every dimension, every height, every sight line either supports the work or quietly fights it, and the difference compounds dramatically across hundreds of projects.
The most common mistake home sewers make is treating the room as an inheritance - accepting whatever furniture and layout the previous setup left behind, rather than designing the space around the actual workflow. Spend a weekend with graph paper, measure the room, lay out the four zones, and only then decide what furniture you need. A 36-by-60-inch cutting table at 36-inch height, a sewing station at 28-inch height with a properly fitted chair, a pegboard wall, a pressing zone five steps from the machine, and 100 CRI lighting throughout will outperform a room full of mismatched secondhand pieces every time.
If you have been working in a compromised setup, start the upgrade this weekend. Move the cutting table to the center of the room. Raise it to elbow-relative height with risers. Install task lighting at the machine. Mount a pegboard. Empty one fabric bin, label it, and refill it. Each small intervention compounds with the others, and within a month, the room will be a different place to work in. Walk into your sewing space tonight and pretend you are visiting it for the first time. Ask yourself which step in your last project felt hardest, and start the redesign there.
More Articles You May Like


Comments
Post a Comment