Painting Radiators to Blend With Wall Color or Stand Out
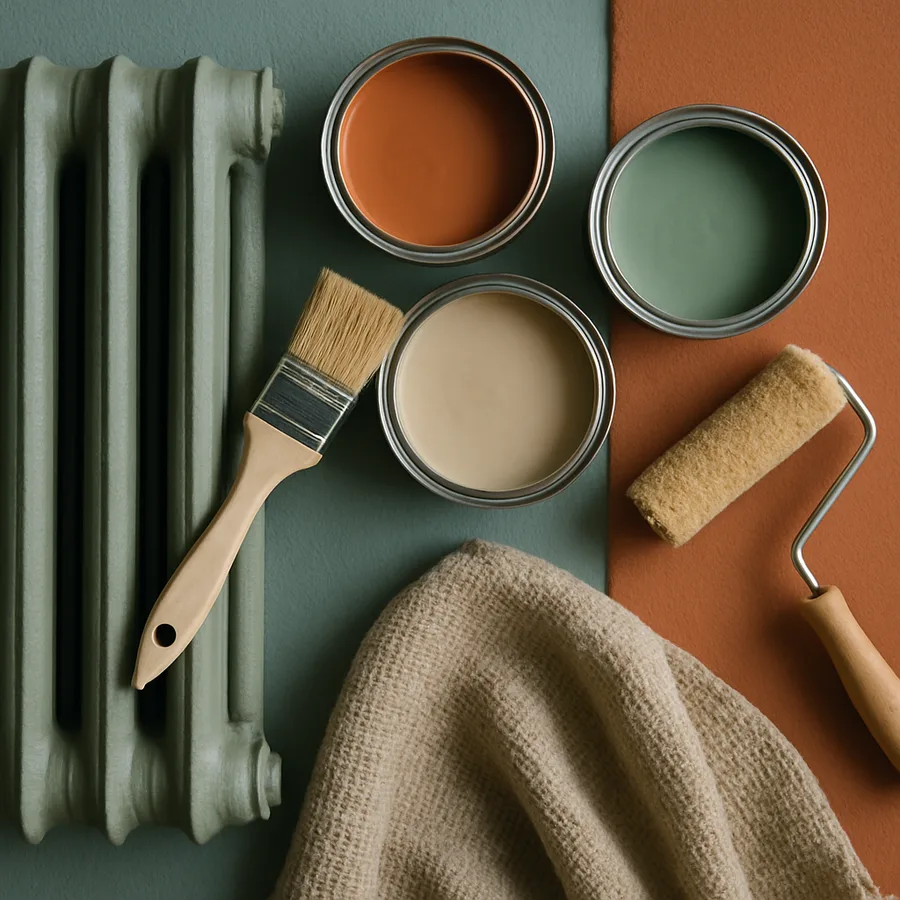
Of all the small interventions a homeowner can make to a room without spending serious money, painting a radiator might be the most underrated. A weekend, a few cans of high-temperature enamel, some careful prep, and a beat-up cast iron unit transforms either into invisible architecture or a deliberate sculptural moment. The choice between the two paths is more interesting than it sounds, because it forces a homeowner to think about what role the radiator should actually play in the visual life of the room.
The decision is not purely aesthetic. There is also a thermal consideration with surprising depth, and a paint chemistry question that catches a lot of well-intentioned painters by surprise. According to a frequently cited study referenced by the British government's energy efficiency program, certain paint colors and finishes can affect a radiator's heat output by between three and six percent, with metallic and gloss finishes underperforming flat and matte finishes in radiation efficiency. That is not a huge swing, but it is real, and it deserves a sentence in any serious conversation about radiator color.
The Case for Blending the Radiator Into the Wall
The default professional move in modern interior design is to paint the radiator the same color as the wall behind it, in the same sheen, with no visible transition between the two. The radiator effectively disappears. Eyes glide past it. The room reads as a clean architectural envelope rather than a series of objects competing for attention. According to design surveys conducted by the American Society of Interior Designers, color-matched radiators are the dominant treatment in roughly seventy percent of residential design projects published in the trade press over the past five years.
The technique works best in rooms where the radiator is awkwardly placed, oversized for the wall it occupies, or simply ugly in a way that no amount of polish will fix. Postwar steel panel radiators are the prime candidates. They are functional and reliable but visually unloved, and disappearing them into the wall color is almost always an upgrade. Pre-war cast iron radiators, by contrast, often deserve the opposite treatment because their ornate detailing rewards being seen.
The technical execution is straightforward but unforgiving. The wall paint and the radiator paint must match in both color and sheen. A flat wall in eggshell paired with a radiator in semi-gloss enamel will read as two different colors even though the swatches match, because sheen affects how light bounces off the surface and therefore how the eye perceives hue. Match both and the illusion holds. Match only one and the illusion collapses immediately.
The Case for Making the Radiator a Feature
The opposite move, treating the radiator as a deliberate feature in a contrasting color, has been quietly resurging in design publications over the past several years. The technique works particularly well with old cast iron radiators in rooms with otherwise neutral palettes. A dusty rose radiator in an off-white living room, an oxblood radiator in a sage green dining room, or a deep navy radiator in a pale linen bedroom can each become the visual punctuation that lifts an otherwise quiet room into something memorable.
The constraints on this approach are largely about commitment. A statement radiator color reads as deliberate when it is one of two or three accent moments in the room. It reads as a mistake when it is the only chromatic incident in an otherwise monochrome scheme, because the eye reads it as an accident. Pair the radiator color with at least one other element in the room, whether that is artwork, a throw pillow, a lampshade, or a vase, and the color suddenly looks intentional rather than random.
What separates a good statement color from a regretted statement color? In almost every case, the answer is restraint on the saturation. Highly saturated primary colors on radiators tend to age poorly. Muted, dusty, complex colors with grey or brown undertones age beautifully. A muddy ochre, a smoky teal, a bruised plum, a deep olive: each of these wears years of changing tastes around it without dating itself. A pure cherry red or a kelly green will look like a specific decade within ten years.
Surface Preparation That Determines Everything
Surface preparation is responsible for roughly eighty percent of the durability of any radiator paint job, and it is also the part most homeowners want to skip. The reward for skipping it is paint that flakes, peels, or yellows within two heating seasons. The penalty for doing it properly is a finish that looks factory-applied and lasts a decade or more.
The full preparation sequence has six steps and they all matter. First, turn off the heat and let the radiator cool to room temperature completely. Painting a warm radiator causes the solvent to flash off too quickly, leaving a brittle and uneven film. Second, vacuum and brush all the dust, cobwebs, and debris from between the fins, sections, or panels. A long-bristle brush meant for radiator cleaning costs about ten dollars and reaches places a vacuum nozzle cannot. Third, scrape and sand any flaking or blistered existing paint back to a stable substrate. For radiators painted before 1978, test for lead with a hardware-store test kit before any sanding, because old radiator paint can contain lead pigments at levels regulated by the Environmental Protection Agency.
Fourth, degrease the entire surface with mineral spirits or a TSP substitute, working in sections and wiping clean with a lint-free cloth. Skip this step and the new paint will fish-eye and pull away from contaminated areas. Fifth, spot-prime any bare metal with a high-temperature rust-inhibiting primer. Even small areas of exposed iron will telegraph rust through the topcoat within a year if left unprimed. Sixth, protect the floor and adjacent walls with rosin paper or canvas drop cloths, because radiator paint drips travel further than you expect. This Old House and other home improvement publications have repeatedly demonstrated that this six-step prep sequence is the single largest predictor of paint job longevity.
Paint Chemistry That Actually Survives Heat Cycles
Standard interior wall paint is not engineered for the heat cycles a radiator imposes. Within one heating season, ordinary latex paint on a hot radiator surface will yellow, soften, and develop a faint stickiness that picks up dust and lint. Within two seasons it will start failing at edges and corners. The correct product category is radiator paint or high-temperature enamel, and the labels matter.
The two dominant chemistries for residential radiator painting are water-based acrylic enamels rated for 200 degrees Fahrenheit and solvent-based alkyd enamels rated for 250 degrees and higher. Water-based products from manufacturers like Benjamin Moore, Farrow and Ball, and Rust-Oleum offer easier cleanup, lower odor, and color matching to standard wall paint fan decks, which makes them the obvious choice for blending into wall color. Solvent-based alkyd products offer harder, more durable films and richer color depth, particularly in deeper hues, which makes them the better choice for statement colors.
Sheen choice matters thermally as well as visually. Flat and matte finishes radiate heat slightly more efficiently than gloss finishes because the smoother gloss surface reflects a small fraction of the infrared radiation back toward the radiator. The difference, as noted earlier, is small, on the order of three to six percent. But it argues for choosing eggshell or satin sheens over high gloss when efficiency matters and the room's design language permits it.
Have you ever noticed that radiators in commercial buildings are almost always finished in flat or eggshell rather than gloss? Part of that is durability and ease of touch-up. Part of it is the heat output efficiency advantage, which adds up across hundreds of radiators in a large building. The same logic applies at residential scale, just at smaller numbers.
Application Techniques for a Factory-Smooth Finish
The application method determines the final visual quality of the finish almost as much as the prep work determines its durability. The three viable approaches are brush, roller, and spray, and each has a domain where it outperforms the others.
Brushing with a high-quality angled sash brush in two-inch width is the right choice for ornate cast iron radiators with extensive detailing. The brush reaches into recesses, follows scrollwork, and lays down a film thick enough to fill minor surface imperfections. The trade-off is visible brush marks, which are a feature on traditional radiators and a defect on modern panel radiators.
Rolling with a small four-inch foam roller produces a remarkably smooth finish on flat-faced panel radiators and modern column radiators. The foam picks up just the right amount of paint to avoid runs and lays it down in a fine orange-peel texture that flattens out as it dries. Rolling is also two to three times faster than brushing on the same radiator.
Spraying with HVLP equipment produces the smoothest possible finish and the most even coverage on complex shapes, but it requires masking off the entire room, ventilating during application, and accepting overspray on adjacent surfaces unless you remove the radiator entirely and spray it in a garage or workshop. For a homeowner painting a single radiator on a Saturday afternoon, spraying is rarely worth the setup time. For a contractor painting fifteen radiators in a renovation, it is the only sensible choice.
Drying, Curing, and First-Heat Procedures
The instructions on the paint can typically specify a dry time of four to six hours and a recoat time of twenty-four hours. What the can does not always make clear is the difference between dry to touch and fully cured. Most enamel paints require seven to fourteen days of curing at room temperature before they reach full hardness and chemical resistance. Turning the heat back on before full cure is the single most common cause of yellowing, blistering, and persistent paint odor in newly painted radiators.
The professional recommendation, repeated consistently across paint manufacturer technical data sheets, is to leave the heating system off for at least seventy-two hours after the final coat, then bring the system up gradually over the following day rather than firing it at full output immediately. This first-heat procedure allows the paint film to off-gas remaining solvents slowly, which prevents the bubble and pinhole defects that fast initial heating can cause.
You should expect a faint paint smell for the first two or three heating cycles after the radiator goes back into service. That smell is normal off-gassing of trace solvents and pigment carriers and dissipates completely within a week. If the smell persists beyond two weeks, the most likely culprit is incomplete cure due to high humidity during application or an incompatible paint product. Ventilate the room generously and let time do the work. The U.S. Environmental Protection Agency publishes detailed guidance on indoor air quality during and after painting projects that is worth reading before any major painting effort, particularly in homes with infants or anyone with respiratory sensitivities.
Conclusion
The choice between blending a radiator into the wall color and making it a deliberate statement comes down to what the radiator deserves. Beautiful old cast iron with ornate detailing wants to be seen. Awkward postwar panel radiators want to disappear. Pick the strategy that suits the radiator and the room, then commit to it fully rather than splitting the difference. A half-hearted color match reads as a mistake. A confident color contrast reads as design.
Whichever path you choose, the technical work is the same. Cool the radiator completely, prep the surface obsessively, prime any bare metal, use a paint product specifically engineered for radiator service, apply with the right tool for the radiator's geometry, and respect the cure time before turning the heat back on. Skip any of those steps and the project will need to be redone within three years. Honor all of them and the finish will outlast the next two paint refreshes of the surrounding wall.
Have you been staring at an ugly radiator for years and finally feel ready to do something about it? Pick a Saturday in late spring or early fall, when the heat will be off for a stretch anyway, gather your supplies the week before, and commit to the full prep sequence rather than the shortcut version. The total project cost for a single radiator typically lands between forty and ninety dollars in materials, including primer, paint, brushes, sandpaper, and drop cloths. The total time investment runs four to six hours of active work spread over two days. The visual payoff lasts a decade or more. Start by photographing your radiator in three lighting conditions today, sample a paint chip against the wall this week, and order your supplies before the heating season ends so you have a window to work without turning your home into a chilly construction zone.
More Articles You May Like


Comments
Post a Comment