Mudroom Bench Storage for Boots and Outdoor Gear Beneath Seats
Every busy household eventually arrives at the same conclusion: the floor near the back door becomes the unofficial home for boots, sports bags, and bins of mittens, no matter how often someone tells the kids to pick up after themselves. The cure is not better nagging. The cure is a well-designed mudroom bench with concealed storage that gives every loose item a designated, easy-to-reach home. When the bench works, the floor stays clear. When the bench is the wrong depth, the wrong height, or simply ornamental, the floor wins.
This guide walks through the structural decisions that turn a piece of bench furniture into the workhorse of an entry. We will cover seat height and depth, the geometry of boot storage versus general-bin storage, the materials that survive sand and salt, and the ventilation tricks that prevent damp boots from becoming the smell that defines your home in February. Take a tape measure into the mudroom, and we will design from there.
Sizing the Bench for Real Bodies and Real Boots
Bench dimensions have a tighter window than most homeowners realize. Seat height should land between 17 and 19 inches off the finished floor, the same range as a comfortable dining chair. Lower than that and adults need to drop into the seat awkwardly while removing a boot; higher than that and a child cannot get their foot up to untie a lace. The 17 to 19 inch sweet spot has been validated by ergonomics research for decades and remains the safest default unless a specific user has unusual needs.
Seat depth is where most builders go wrong. A bench used for putting on shoes only needs 14 to 16 inches of usable depth; a deeper seat forces users to perch on the front edge anyway, wasting the back of the cushion. If you also want the bench to function as occasional guest seating or a place to set down a grocery bag, push depth to 18 inches. Beyond 20 inches, the bench reads as an awkward platform rather than a seat, and the back of the cushion collects dust.
Now consider what lives beneath the seat. Adult winter boots are typically 12 to 14 inches tall, so the interior cavity needs at least 14 inches of clear vertical space if boots store upright. If you store them on a slatted shelf at an angle, you can compress that to 11 inches and gain pull-out drawer space below. Children's boots only need 8 to 10 inches and free up room for a second tier of hat-and-glove bins. Map your actual gear before you commit to interior dimensions.
Lift-Top Versus Drawer Versus Open Cubby
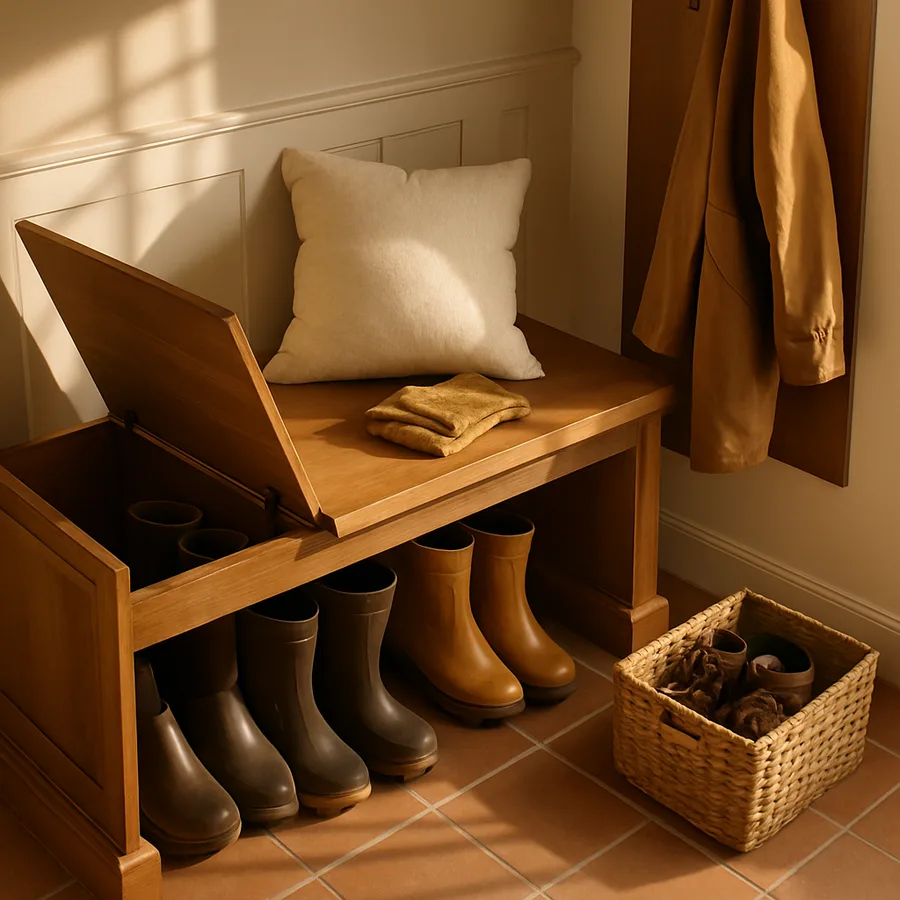
Three storage geometries dominate mudroom bench design, and each has a real-life trade-off. A lift-top bench uses the entire under-seat volume in one large compartment with a hinged cushioned lid. It maximizes raw cubic feet but requires the user to clear the seat, often of a sitting child, before accessing storage. Lift-tops shine for seasonal storage that you only access twice a year, like ice skates in summer or pool towels in winter.
Drawer benches replace the lift-top with one or more full-extension drawers that slide out from the front. Drawers cost more to build but are dramatically more usable for daily-access items. A child can pull a drawer with one hand while keeping the other on a backpack strap. The trade-off is wasted vertical space at the top and bottom of the drawer, plus the cost of heavy-duty 100-pound-rated slides that survive the abuse of damp boots and aggressive children.
Open cubbies eliminate the door entirely and present storage as a row of square or rectangular openings beneath the seat. They are the cheapest to build, the easiest to clean, and the most forgiving of muddy gear because dirt falls through to a removable tray. The honest cost is visual: a row of mixed boots and bags is never going to look as polished as a closed-front bench. If your mudroom is visible from the kitchen, factor in the sight line. If it is tucked behind a door, open cubbies almost always win.
Materials That Survive Salt, Sand, and Water
A mudroom bench operates in a punishing material environment. Wet boots drop snowmelt, road salt, and grit onto every surface for months at a time. Choose materials accordingly. The seat top and any hinged components should be either solid hardwood with a marine-grade finish or a high-pressure laminate over plywood substrate. Avoid solid surface tops in mudrooms; they scratch easily and develop a hazy surface that no amount of polishing fully restores.
Inside the storage cavity, line the floor with a removable rubber or PVC tray rather than relying on sealed wood. The tray catches melting slush, lifts out for emptying, and can be hosed off in the yard once a season. A simple cookie sheet or restaurant boot tray works for retrofits; new builds can specify a custom shaped insert that fills the entire bench footprint. Drainage holes in the tray should sit over a sealed drip pan rather than directly on the floor to prevent stains on tile or wood.
Wall-side construction matters too. Where the bench meets a painted wall, a bead-board or shiplap backsplash rising 12 to 18 inches above the seat protects paint from scuffs and absorbs the inevitable boot-toe kicks. Use a satin or semi-gloss finish that resists water spotting; flat paint will telegraph every bit of dirt within a season. Industry guidance from groups like the National Association of Home Builders consistently lists durable mudroom finishes among the highest-return remodeling investments.
Ventilation, Drainage, and the Smell Problem
Damp boots smell. The reason is biological: the mix of warm moisture and trapped organic matter is exactly the environment that mold and bacteria need to flourish. Engineering ventilation into the bench is therefore not a luxury, it is what separates a fresh-smelling mudroom from one your guests politely never mention. The simplest trick is a continuous slot or grille at the bottom of the bench front that lets air circulate beneath stored boots while keeping the contents visually concealed.
For more aggressive moisture management, install a small passive vent that ducts to either an exterior wall or to the home's main return-air system. A 4-inch round grille covered with insect screen handles a typical family bench. If your budget allows, add a low-watt circulating fan on a humidistat that activates whenever interior humidity inside the bench exceeds 60 percent. The components cost roughly 80 to 120 dollars and pay for themselves in saved boots, since wet boots that never dry break down at the welt within a single winter.
Have you ever pulled a forgotten gym bag out of a bench and immediately regretted it? That experience is the predictable result of poor ventilation paired with absorbent materials. Pair the airflow design with an interior surface that does not absorb moisture, like a sealed melamine panel or a thin stainless liner, and the smell problem largely disappears. Keep a small bag of activated charcoal or zeolite tucked at the back of the cavity as additional insurance, and replace it annually.
Built-In Versus Freestanding Trade-Offs
A built-in bench, framed into the wall and trimmed with cabinet-grade construction, looks the most architectural and uses every inch of available wall length. The trade-off is permanence. Once installed, a built-in is expensive to remove and impossible to take to a future home. For a forever home, built-ins are usually the right answer. For a five-year house, a freestanding bench is the smarter financial choice.
Freestanding benches have their own advantages. They allow the floor to be cleaned underneath, they can be repositioned when a renovation happens, and they can be sold or moved when life changes. Modern freestanding mudroom benches range from roughly 200 dollars for a basic model to 1,500 dollars for solid-wood pieces with cane-fronted drawers. According to a 2024 Houzz home renovation survey, mudroom benches were among the top three most-replaced furniture items during family transitions, suggesting flexibility has real value for many households.
If you want the look of built-in without the commitment, consider a shaker-style bench installed against a paneled wall with scribed trim that hides the gap. Done well, the eye reads it as built-in even though the bench is technically a freestanding unit screwed lightly to studs. Future owners can remove it without damaging the wall, and you get the architectural credibility during your tenure. The American Society of Interior Designers, accessible through ASID, publishes useful evaluations of when built-ins are worth the premium.
Making the Bench Part of a Larger System
A bench in isolation is just furniture; a bench integrated into a complete drop zone becomes the backbone of household flow. Pair the bench with a row of hooks above, an upper bin shelf at 76 to 84 inches, and a coir or rubber floor mat sized to catch debris before it reaches the bench. This layered system, which the National Kitchen and Bath Association describes in its mudroom design briefs at NKBA, gives every type of incoming object a clear destination.
Consider the household choreography. A child walks in, drops a backpack on the bench, sits down, removes boots into the under-seat tray, hangs the coat on a hook, and reaches for a snack. The whole sequence should take 30 seconds and require no parental supervision. If any step requires an adult to bend down, fish out a misplaced item, or remind a child where something goes, the system is failing somewhere. Watch your family use the space for a week and revise based on what you observe, not what you planned.
What does success look like a year after installation? Your floor is clear most of the time. The bench cushion shows wear in exactly the places where people actually sit. The drawers or cubbies hold what they were designed to hold, and the seasonal-storage compartment has been opened twice. If those things are true, the bench is doing its job. If they are not, the design needs another iteration; mudroom systems are rarely right on the first try and almost always benefit from a small tune-up after the first full season of use.
Conclusion
The mudroom bench is one of those quiet pieces of architecture that, when properly designed, makes a household measurably more pleasant to live in. The arithmetic is simple. Right-sized seat. Right-sized cavity. Right materials. Right ventilation. Right relationship to the rest of the entry. None of those requirements is exotic, but each one is non-negotiable; skip any of them and the bench reverts to a slightly more attractive version of the floor pile it was supposed to replace.
If you are starting fresh, prioritize the cavity over the cushion. The interior is what does the work; the cushion is what makes the work pleasant. A bench with a cheap cushion and a brilliant interior will serve you well for a decade. A bench with a beautiful cushion and a useless interior will frustrate you within a season. Spend the budget where the load lives, not where the eye initially lands.
If you are inheriting an existing bench in a new home, audit it. Measure the seat, the depth, the cavity, and the ventilation. Walk through a typical arrival sequence and note the friction points. You may need only a removable boot tray and a cleaner storage system, or you may need to replace the bench entirely. Either way, the diagnostic exercise costs nothing and reveals exactly where the next 100 dollars of improvement will deliver the most return.
Take this weekend, sketch your bench dimensions on paper, walk through the daily arrival routine in your head, and identify the single weakest point in your current setup. Then commit to fixing only that point in the next two weeks. A focused, small upgrade beats an unbuilt grand renovation every time, and within a month you will be living in a quieter, cleaner home that simply works.
More Articles You May Like


Comments
Post a Comment