Guitar Wall Display That Doubles as Storage and Decor
A wall-mounted guitar display turns an awkward instrument storage problem into the most arresting design moment in the room. Most players cycle through the same exhausting routine: cases stacked in a closet, stands cluttering the floor, dust dulling the finish, and humidity quietly warping necks while nobody is looking. A thoughtful display fixes all of that simultaneously. It frees floor space, keeps each instrument visible and inviting to play, protects finishes and structural wood, and transforms a blank wall into a curated gallery that feels like the work of a design-savvy collector. Have you ever counted how many hours pass between picking up a guitar and putting it back in a case? If the answer is "more than two," your instruments are almost certainly being underplayed. A wall display reverses that habit overnight.
This guide walks through everything that separates a working storage system from a styled, gallery-worthy installation: hanger selection, anchor logistics, humidity and temperature control, lighting, layout composition, and the protective routines that keep finishes pristine. Whether you own a single boutique acoustic or a rotating quiver of fifteen electrics, the principles below scale up and down. The goal is to design the display so a stranger walking into your home reads "this is the room of someone who plays" rather than "this is a storage closet that escaped."
Choosing Hangers That Actually Protect Your Instruments
The hanger is the single most consequential component in your entire display, and it is also the part most people get wrong. A cheap rigid hook concentrates the entire weight of the instrument on a small contact patch at the back of the neck. Over months of summer-winter humidity swings, that constant pressure can dent finishes, compress nitrocellulose lacquer, and in extreme cases create a slight neck deformation visible in the right light. The fix is straightforward: choose hangers with self-locking yokes that pivot to match the neck profile and use a foam or rubber sleeve that does not react with nitrocellulose.
Self-locking yokes use the weight of the guitar itself to gently close around the headstock so it cannot be jostled off the wall by a curious child, a vacuum cord, or a rambunctious dog. This is non-negotiable for anything more valuable than a beater. For acoustic guitars heavier than seven pounds, look specifically at hangers rated for at least fifteen pounds of static load, which gives you a comfortable safety margin. Nitrocellulose-safe foam is the second feature to verify. Many older yoke pads use plasticizers that chemically react with vintage nitro finishes, leaving a permanent dull haze where the foam touched the neck. Replacement sleeves in pure rubber or hypoallergenic silicone solve the problem for under twenty dollars.
For permanent displays of valuable instruments, consider the cradle-style mount that supports the guitar at the upper bout rather than the headstock. These are common in museum installations and are recommended in conservation literature similar to guidance from the American Society of Interior Designers regarding load distribution on suspended objects. They cost more, but they distribute weight across a wider surface area and eliminate the headstock pressure point entirely.
Anchor Hardware and Wall Construction Realities
A guitar weighs between four and twelve pounds, but a wall mount must survive someone bumping the instrument, a child grabbing for it, or seismic vibration. Treat every anchor like it must hold five times the static weight of the heaviest instrument you plan to mount. In standard residential drywall framing, that means hitting a stud whenever possible. A 16d nail in a 2x4 stud will hold a guitar; a plastic anchor in half-inch drywall will eventually pull free, often at three in the morning when the house settles.
If your layout requires a hanger between studs, use a heavy-duty toggle bolt rated for at least fifty pounds of pull-out load, not a plastic expansion anchor. A 2017 study cited by the Drywall Finishing Council found that snap-toggle hardware retains pull-out strength roughly four times higher than typical butterfly anchors of comparable size, which matters when summer humidity swells the wall and weakens any friction-fit fastener. Stud finders with deep-scan modes are worth the forty-dollar investment because they reveal not only studs but also pipes and wiring that should never become accidental anchors. Mark every stud with painter's tape before you start drilling.
For masonry, brick, or plaster-on-lath walls common in older homes, use a properly sized masonry bit and a sleeve anchor or wedge anchor, never a tapcon-style screw on its own. Plaster walls in particular crumble around small holes, so drilling oversized and filling with a structural epoxy gives a far more permanent grip. Where do you live in the house most often? If it is a region prone to earthquakes or even passing freight trains, add a secondary safety strap that loops behind the headstock and ties into a separate anchor - redundancy that costs ten dollars and prevents a five-thousand-dollar disaster.
Humidity, Temperature, and Finish Protection
Wood is hygroscopic, which means it constantly absorbs and releases moisture in response to the surrounding air. A solid-wood acoustic guitar held at thirty percent relative humidity for a week will visibly dry out: the top sinks, frets start to feel sharp at the edges, and in severe cases the bridge can lift. Held at seventy percent, the same instrument swells, action rises, and glue joints start to soften. Most luthiers and conservation guides recommend forty-five to fifty-five percent relative humidity as the safe target for displayed instruments, mirroring environmental controls used by museum-grade storage.
Mount a digital hygrometer on the same wall as your display, ideally within three feet of the instruments. Cheap analog gauges are typically off by ten to fifteen percent, which is the difference between safe and damaging. If your home swings outside the safe range seasonally, add a small room humidifier in winter and a dehumidifier in summer, or use case-style soundhole humidifiers when a guitar will hang for more than a week. Avoid mounting any guitar above a heating register, beside an exterior door, or on a wall that gets direct afternoon sunlight, because rapid temperature swings stress finishes and can crack tops along the grain.
UV exposure is the silent killer of vintage finishes. A 2019 review published by the National Park Service Conservation Center confirmed that nitrocellulose lacquer yellows measurably under as little as forty hours of direct summer sunlight per year. Position your display on a north-facing wall when possible, or use UV-filtering window film on any glass within ten feet of the instruments. Picture-light fixtures with LED bulbs rated below 3000 Kelvin produce minimal UV and add a warm museum-quality glow without the heat damage of incandescent fixtures.
Composing the Layout for Visual Impact
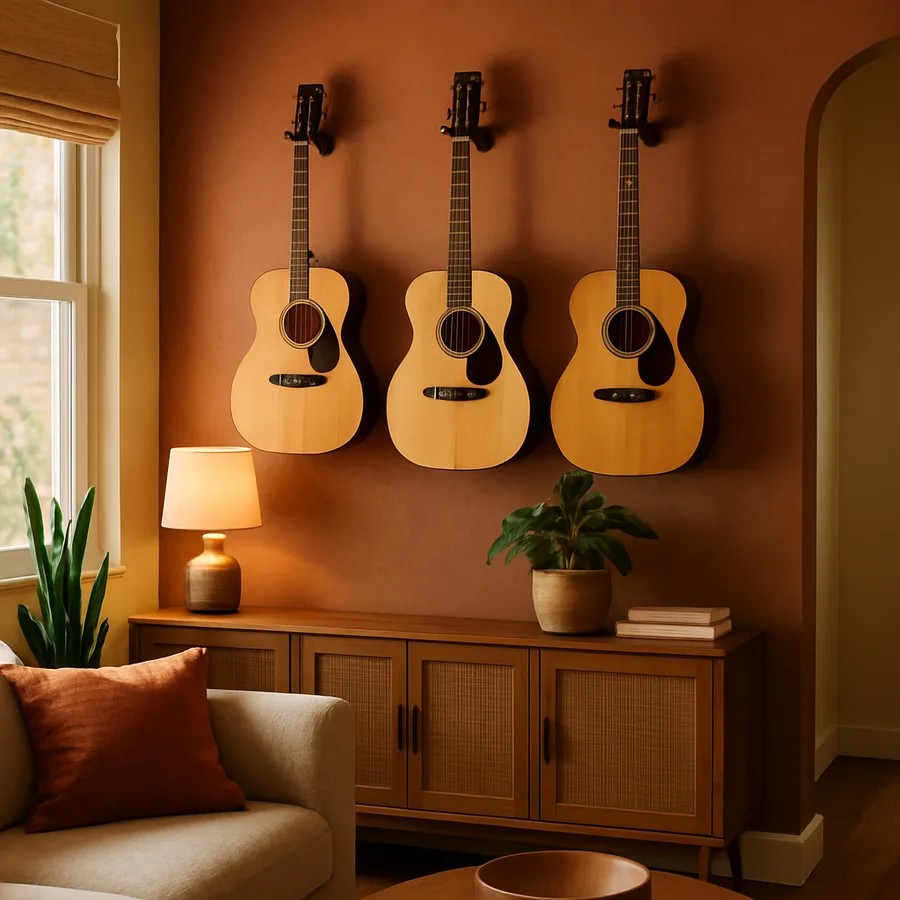
A row of identically spaced guitars at identical heights reads as inventory. A composed display reads as design. The trick is to think like a gallery curator: vary heights slightly, alternate body shapes and finish colors, and let one instrument anchor the composition as the visual focal point. A 2024 Architectural Digest survey of designer-styled music rooms noted that the most visually successful displays kept instruments at a roughly seven-to-three ratio of dark-to-light finishes or vice versa, which prevents the eye from getting overwhelmed by visual noise.
Start with the largest, most ornate, or most personally meaningful instrument and place it slightly off-center as your anchor. Build outward in pairs, alternating body shapes - a dreadnought beside a Telecaster, a parlor beside a Les Paul. Keep at least eight inches of breathing room between headstock and tuners on adjacent guitars so the layout never feels crowded. Vertical spacing matters as much as horizontal: stagger heights by three to six inches across the wall to create visual rhythm, similar to how galleries hang paintings in a salon style. Sightline planning is the secret weapon - sit on the couch where you actually use the room and confirm each instrument is visible from that vantage point.
Background matters more than most people expect. A flat white wall makes every guitar look like inventory in a music shop. A dark, moody color - deep forest green, charcoal, navy, or even a wood-paneled feature wall - makes finishes pop and turns the display into a signature design element. Wallpaper with subtle texture works beautifully behind acoustics; brushed-metal panels or reclaimed wood read perfectly behind electrics. The wall is the canvas, and treating it as background design rather than blank drywall elevates the entire installation.
Lighting That Flatters Wood and Finish
Lighting transforms the display from "guitars on a wall" into "guitars worth photographing." General room lighting is rarely sufficient because overhead fixtures cast top-down shadows that hide finish details and flatten three-dimensional curves. The fix is dedicated picture lighting tuned for the warm tones of wood and lacquer. Adjustable picture lights mounted above each instrument or above the cluster create directional highlight that brings out grain figure, flame, and binding detail.
Color temperature is the single most important specification. The Illuminating Engineering Society recommends warm white in the 2700K to 3000K range for residential display lighting because it flatters wood tones and avoids the cold sterile look of office lighting. Lumens matter too: aim for roughly 200 to 400 lumens per instrument for ambient glow, more if you want each guitar individually spotlit. LED strip lighting recessed into a small ledge above the display delivers even, low-heat illumination and lets you dim the entire wall on a single controller.
Avoid colored accent lighting unless you genuinely want a moody nightclub vibe. Saturated reds and blues distort the perceived color of the finish, making sunburst guitars look muddy and natural maple look greenish. CRI ratings of 90 or higher on every bulb in the display ensure colors render accurately, which matters as much for display as it does for any work area. Run the wiring through the wall during installation so visible cables never compete with the instruments for attention.
Maintenance Routines That Keep the Display Working
A wall display is only an upgrade if the guitars stay clean, tuned, and ready to play. Without a maintenance routine, instruments accumulate dust on the soundboard, hardware tarnishes, and strings oxidize until you reach for the guitar and discover it is unplayable. Build a simple weekly routine into your habits: a soft microfiber pass over each instrument, a glance at the hygrometer, and a quick visual check of every hanger anchor for any movement or settling.
Keep a small grooming kit on a nearby shelf - microfiber cloths, fingerboard oil, polish appropriate for the finish type, a string winder, and a tuner. The closer the kit is to the wall, the more likely you are to use it. Restring instruments on a rotating schedule rather than waiting until each one sounds dead; for a five-guitar display, restringing one guitar every six weeks keeps the entire collection sounding fresh without overwhelming any single afternoon. Rotation is also the secret to playing them all: physically swap positions on the wall every few months so the instruments at eye level get rotated into prominence.
Finally, document the installation. Photograph the layout, measure stud positions, note which anchors hold which hangers, and save the receipt for every piece of hardware. If you ever move, sell the home, or replace a hanger, that documentation saves hours of guesswork. A small notebook tucked behind a record-shelf is enough. Have you ever moved a piece of art and needed to remember which anchor it used? Future-you will be grateful for the five minutes spent writing it down today.
Conclusion
A guitar wall display done well is one of the rare design moves that pays back across multiple dimensions simultaneously. It frees floor space, protects finishes, keeps instruments tuned and inviting to play, and turns an empty wall into a centerpiece that announces who lives in the house. The hardware costs are modest - a few hundred dollars for high-quality hangers, anchors, lighting, and a hygrometer - and the installation takes a single weekend if planned carefully. What you get back is a room that pulls you toward the instruments instead of letting them gather dust in a closet.
The single biggest mistake people make is treating the project as pure storage. Storage thinks about quantity; design thinks about composition, lighting, background, and how the display reads from across the room. Spend an extra hour on layout, an extra forty dollars on warm-tone picture lights, and an extra five minutes calibrating a digital hygrometer, and the same instruments suddenly look like a curated collection rather than gear shoved against a wall. The investment is small; the daily payoff is enormous.
If you are ready to start, pick one wall, count your instruments, sketch a layout on graph paper, and order the hangers and hygrometer this week. The hardest part of any home project is the first cut, and the rest follows naturally once the layout is committed. Walk into your music room tonight, look at where the guitars currently live, and ask yourself if that arrangement makes you want to play more or less. If the answer is less, the wall is calling.
More Articles You May Like


Comments
Post a Comment