Door Hardware Backplate Sizing for Existing Holes Without Patching
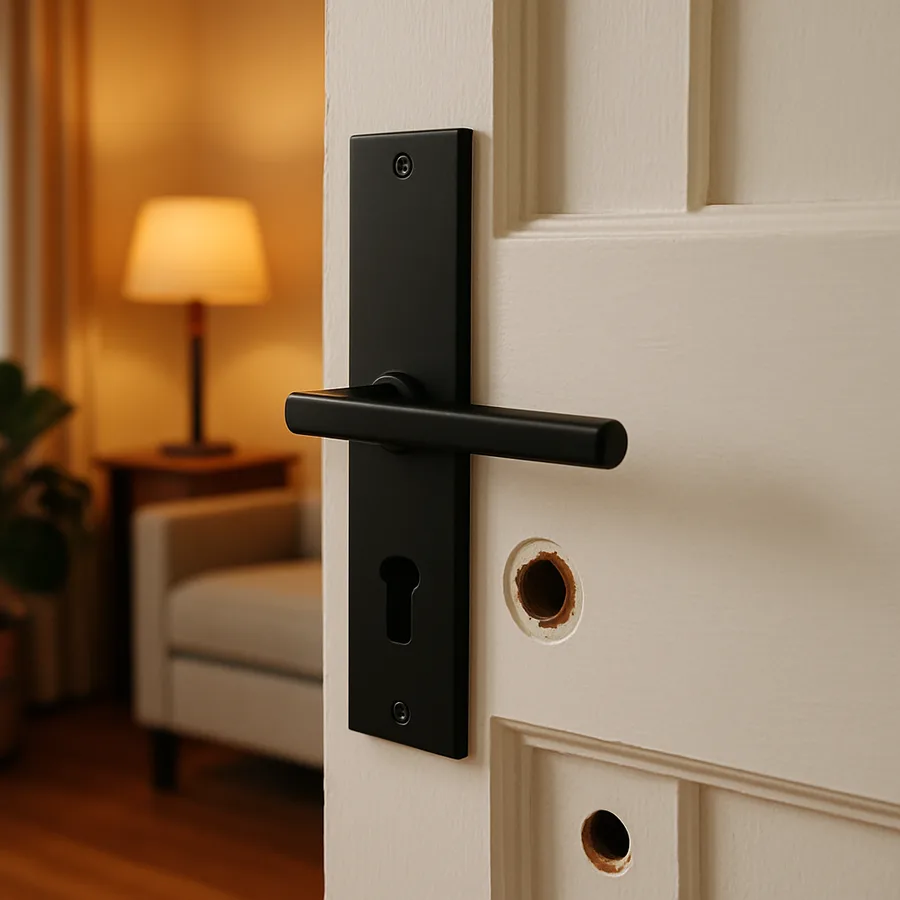
The Most Common Door Renovation Headache
You unscrew an old doorknob to install a new lever set, and the moment the existing hardware comes off, the truth becomes visible: the new escutcheon is a quarter-inch smaller than the worn ring on the door, and the previous owner's mounting holes are off-center by three-eighths of an inch. The new hardware will not cover the old marks. The choices are immediate and uncomfortable: patch and refinish the door, return the new hardware and search for something larger, or find a backplate that bridges the gap.
This problem is more common than most renovators expect. According to the National Association of Home Builders, residential door hardware has trended toward smaller, sleeker rosettes and escutcheons over the past two decades, while doors that were drilled in earlier construction eras typically used much larger backplates of three and a half to four inches in diameter. A homeowner upgrading from old to new is fighting a thirty-year shift in industry standards.
Have you ever stared at the indentation rings around your doorknob and wondered whether you are committed to that exact knob style for life? The good news is that you are not. A correctly sized backplate, sometimes called a rose plate, hardware plate, or hole-cover plate, can bridge between modern hardware and legacy holes without patching, refinishing, or special tools. The challenge is sizing the backplate correctly the first time.
Why Backplates Exist in the First Place
The backplate has two jobs. The first is mechanical: it provides a wider mounting footprint for the door hardware, distributing the load from the lever or knob over a larger area of the door face. This matters most on hollow-core doors, where the hardware is supported by a thin face skin and small wood blocks at the lock location. A larger backplate prevents the screws from pulling out under repeated load.
The second job is cosmetic: the backplate covers the door face in the area immediately around the lever or knob, hiding any prior installation marks, finish wear, or imperfect drilling. This second function has become the dominant reason backplates are specified in residential renovations, where the door itself is original and the homeowner wants to upgrade the hardware without refinishing.
The trap is that not every backplate matches every hardware family. Modern lever sets are designed around a narrow range of fastener spacings, and the backplate must align with both the new hardware and the old holes. If the alignment is off by even an eighth of an inch, the backplate either fails to cover the old marks or fails to mount properly on the new hardware. NARI remodelers regularly identify this as one of the top three sources of door-hardware reinstallation rework.
Measuring Existing Holes Accurately
The measurement step is where most backplate selections succeed or fail. The relevant dimensions are not just the diameter of the existing wear ring, but also the bore size of the latch hole, the center-to-center distance from the latch to any auxiliary hardware mounting holes, and the distance from the door edge to the bore center, called the backset.
The standard residential backset in the United States is two and three-eighths inches, with a secondary standard of two and three-quarters inches in some regional and commercial markets. A backplate designed for a 2-3/8 backset will not align correctly on a 2-3/4 door, even if every other dimension matches. The first check on any old door is therefore to remove the existing latch and measure from the door edge to the center of the bore. The Builders Hardware Manufacturers Association publishes these dimensions as standards, and any reputable backplate vendor publishes the supported backset on the product page.
The wear ring diameter is the second critical measurement. Lay a ruler or caliper across the discolored or worn area on the door face, where the previous backplate or rose pressed against the finish. Measure the maximum diameter of this region. The new backplate must exceed this diameter by at least a quarter inch on all sides to fully cover the wear and provide a clean shadow line.
Finally, measure any mounting screw hole locations. Remove the old hardware completely and identify any holes that are not covered by the new hardware's screw pattern. These holes must fall within the footprint of the chosen backplate, or they will remain visible as small dimples in the finished door.
Backplate Sizing Categories: Small, Medium, Large
The market organizes backplates into three rough size categories, each appropriate for a specific renovation scenario.
Small backplates, between two and a half and three inches in diameter, are designed primarily for new construction or for matching modern hardware on undamaged doors. They are insufficient for most retrofit applications because they barely exceed the size of the new hardware itself and do not cover legacy wear marks.
Medium backplates, three to three and a half inches in diameter, cover most residential retrofit situations on doors originally installed in newer construction. They handle modest off-center holes, the wear from a single previous hardware swap, and the small finish discoloration typical of fifteen to twenty years of normal use.
Large backplates, three and a half to five inches in diameter or, for full escutcheon plates, up to ten inches tall, cover virtually any legacy installation on residential doors. These are the right choice for doors that have been through multiple hardware swaps over fifty or more years, where the cumulative damage extends well beyond what a smaller plate can hide.
Full escutcheon plates that incorporate both the lever and the deadbolt into a single elongated backplate are particularly useful on entry doors with pre-bored holes for separate lever and deadbolt hardware that has since been replaced with combination units. This Old House hardware reviews note that escutcheon plates also signal a more formal, traditional aesthetic appropriate for Colonial, Victorian, and Craftsman door styles.
Material and Finish Selection
Backplate material and finish must coordinate with the hardware itself, not with the door. A polished brass backplate behind a satin nickel lever looks like a manufacturing error. The general rule is to specify the backplate from the same manufacturer as the lever or knob, in matching finish and material, even if the price is higher than third-party alternatives.
Solid brass and bronze backplates outlast their hardware, hold finish well, and develop a patina over decades that integrates with quality entry doors. They are the appropriate choice for high-traffic and exterior applications, and for any door where the hardware will be in service for thirty years or more.
Stamped steel backplates with applied finishes are common in mid-tier residential hardware. They cost less than solid brass but are more vulnerable to finish wear at edges and around fastener locations. They are appropriate for interior doors with light to moderate use.
Cast zinc backplates with plated finishes dominate the entry-level market. They are dimensionally accurate and visually acceptable when new but show wear faster than steel or brass. They are the right choice when the budget is tight and the door is in a low-visibility location.
Finish coordination matters as much as material. The contemporary finishes, satin nickel, oil-rubbed bronze, matte black, and brushed brass, each have several variants across manufacturers, and what one manufacturer calls oil-rubbed bronze can read distinctly different from another manufacturer's version of the same name. Buying backplate and lever from different sources, even in nominally matching finishes, often produces a visible mismatch under typical interior lighting. AAMA finish standards document this variation in the context of exterior applications, but the interior version of the problem is equally real.
Installation Without Patching: The Step-by-Step
The whole point of backplate selection is to avoid patching, and a careful installation preserves that result.
Step one: full hardware removal. Remove the existing knob, latch, strike plate, and any decorative trim. Mark the orientation of any non-symmetrical pieces with a piece of painter's tape so that re-installation, if needed, is straightforward. Inspect the door face under raking light to identify all marks that the new backplate must cover.
Step two: dry-fit the backplate. Before installing the new hardware, hold the backplate in position over the existing bore. Check that all wear marks fall within the backplate footprint, that the bore aligns with the central hole in the backplate, and that any prior screw holes are either covered by the backplate or fall within the area where the new hardware screws will pass through the backplate itself.
Step three: clean the contact area. Wipe the door face within the backplate footprint with a slightly damp microfiber cloth to remove dust, then with a dry cloth. Any debris under the backplate creates a slight gap that allows light to escape and undermines the appearance of a clean installation.
Step four: assemble in the correct order. Most backplate-equipped hardware assembles in a specific sequence: backplate first against the door face, then the new hardware threaded through the backplate's central opening, then the through-bolts that secure the lever or knob from the opposite side. Reversing this sequence, installing the hardware first and then trying to slip the backplate over it, does not work for most modern lever sets and produces the kind of mounting problem that ends in returning hardware to the store.
Step five: torque to specification. The mounting screws should be tight enough to prevent rotation but not so tight that they crush the backplate against the door face. Stamped steel backplates can deform under excessive torque and develop a slight cup that creates a visible rim of light around the perimeter. The International Code Council publishes hardware installation references in commercial contexts that suggest hand-tight plus a quarter turn as the right target.
Step six: verify and adjust. Operate the lever or knob through its full range of motion and confirm that the backplate does not rotate, shift, or develop a gap. Check the perimeter of the backplate for any escaping wear marks and reposition if needed before fully tightening.
When Patching Is Unavoidable
Some legacy installations cannot be covered by any reasonably sized backplate. The most common are doors where a previous resident drilled a non-standard hole, an oversized peephole, a chain lock, or a security viewer, that falls outside the footprint of any commercial backplate. A second category is doors with damage extending well beyond the immediate hardware area, such as kick marks, finish failures, or splits in the door face.
In these cases, patching becomes necessary. The technique varies by door material. Solid wood doors accept a wood-plug repair: drill out the offending hole to a clean, oversized diameter, glue in a face-grain plug of matching species, and refinish. Hollow-core doors are harder because the face skin is thin and there is no solid material behind it; a fiberglass body filler bonded to the face skin from the back is the most reliable approach.
Are you facing a door with multiple non-coverable holes and significant finish damage? At some point, the labor cost of repair plus refinishing exceeds the cost of replacing the door slab entirely with a new pre-bored slab in matching style. This crossover point usually arrives around three hours of skilled labor, which is roughly the cost of a builder-grade replacement slab. Beyond that, replacement is the rational choice.
Conclusion
Backplate sizing is a small detail that determines whether a hardware upgrade reads as a thoughtful improvement or as a half-finished project. The whole purpose of the exercise, covering legacy holes without patching, succeeds or fails on dimensions measured in fractions of an inch, and the discipline required is mostly patience with a tape measure rather than any specialized skill.
The four steps that consistently produce a successful outcome are accurate measurement of the existing wear marks and bore, selection of a backplate large enough to cover those marks with margin, finish coordination between backplate and lever, and careful installation in the correct sequence. Skip any of these and the result is the kind of small visual flaw that the eye keeps returning to, year after year, every time the door is used.
The economic case for backplate-based renovation is strong on legacy doors. A fifteen-dollar backplate plus a forty-dollar lever delivers a fully refreshed door look without the four-hour patching and refinishing project that the alternative would require. Across a house with twelve interior doors, this represents a saving of roughly forty hours of skilled labor, an entire renovation week recovered.
This weekend, walk through your house and identify every door whose hardware predates the current century. Photograph the existing knob, measure the wear-ring diameter, and check the backset on the latch. Then sit down with a hardware catalog and match each door to a backplate in your preferred finish before ordering. For deeper guidance on door hardware standards and selection, consult the NAHB residential renovation resources, the NARI remodeling reference library, and the This Old House hardware archive.
More Articles You May Like



Comments
Post a Comment