Cutting Board Storage Slots Built Into Kitchen Counters
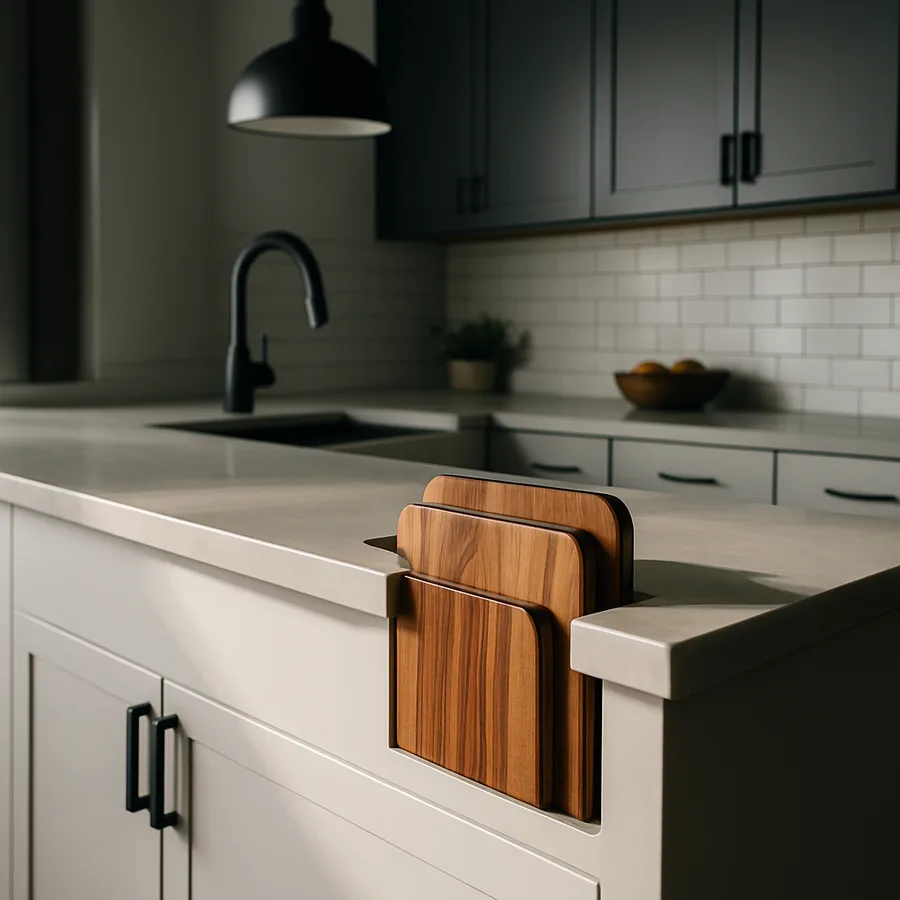
The cutting board is the single most-used tool in a home kitchen, and yet most cooks treat it as an afterthought, propped behind the toaster or shoved into a deep drawer where it has to be wrestled out for every salad. A countertop-integrated storage slot solves this in a way no other approach does: the board lives inside the counter itself, vertical, hidden, and one fingertip motion away from being on top of the counter ready to use. Once you have cooked with the board literally at your fingertips, every other storage method feels primitive.
This article covers the full design language of integrated cutting board slots, from the substrate prep that prevents moisture damage to the precise slot dimensions that work for the most common board sizes, to the sleek brass or steel pull tabs that turn the slot into a designed feature rather than a utilitarian afterthought. According to a remodeling cost report cited by the National Association of Home Builders (NAHB), custom millwork details like integrated cutting board storage are increasingly cited by appraisers as value-adds in the $400 to $1,200 range per kitchen, far exceeding their material cost.
Where the Slot Belongs in the Counter Layout
Placement matters more than you might think. The wrong location turns a clever feature into a useless novelty. The right location turns it into the most-used spot in the kitchen. The optimal placement is directly adjacent to the primary prep zone, which in a typical kitchen is the counter run between the sink and the cooktop, ideally within 18 inches of either side of the sink. That is where you slice produce that needs immediate rinsing and where you slide chopped vegetables straight into a hot pan.
Avoid placing slots over a dishwasher (the cabinet below cannot be opened while the slot is in use), over a trash pull-out (the geometry never lines up), or near the refrigerator (humidity differential warps wood boards over time). The American Society of Interior Designers (ASID) has a kitchen layout standard that specifically recommends prep-tool storage within arm's reach of the prep zone without requiring a turn, which is exactly the access pattern an integrated slot delivers.
Have you ever counted how many steps you take just to fetch and put away a cutting board during a typical dinner prep? For most home cooks the answer is somewhere between eight and fifteen. An integrated slot reduces that to zero. The board comes up out of the counter, the prep happens, and the board goes back. No walking, no door swing, no drawer drag.
Slot Geometry and Standard Board Sizes
The slot itself is a vertical pocket cut through the countertop into a hollow chase below. For wood boards, the typical board is 12 to 18 inches long, 8 to 12 inches wide, and 3/4 to 1.5 inches thick. The slot opening on the counter surface is just slightly larger than the board's thickness and length, with about 1/8 inch of clearance per side for easy insertion. So a 1-inch thick board lives in a slot that measures roughly 1.25 inches wide by the board length plus 1/4 inch.
The depth of the slot determines how the board is retrieved. A slot that drops the board 80 percent of the way into the counter leaves a 2-3 inch tab visible above the surface that you grab to lift. A slot that drops the board entirely flush with the counter requires a recessed pull tab or a side-mounted finger groove. The flush approach is more visually elegant; the tab-up approach is faster to use. Pick the one that matches your cooking style.
The chase below the counter (the hollow space the board slides down into) needs to be at least 2 inches taller than the board to allow ventilation. A board put away wet would otherwise sit in stagnant air and develop mildew. Build the chase as a sealed wood box lined with food-grade marine varnish, and drill four small ventilation holes (1/4-inch) through the back of the chase into the cabinet space behind, each covered with a brass mesh insect screen.
Substrate, Sealing, and Moisture Defense
This is the detail that determines whether your integrated slot is a beloved feature in ten years or a delamination disaster in two. Wet cutting boards introduce water directly into the countertop substrate every time they are put away, and most counter materials (laminate, wood, even some engineered stones with porous epoxies) cannot handle repeated water intrusion at a cut edge.
The right substrate sequence: a quartz, granite, or solid surface countertop with an epoxy-sealed cut edge; a stainless or solid brass slot liner that the board actually slides against; and a 4-inch deep drip tray at the bottom of the chase, removable for cleaning. The slot liner is critical. Without it, even a sealed countertop cut edge will eventually wear from board friction and start absorbing water. With the liner, the board never touches the counter material at all.
For wood countertops (butcher block prep zones), the rules tighten. Use a brass or stainless slot liner without exception, seal every interior surface of the chase with at least three coats of marine-grade polyurethane, and inspect the seal annually. Many countertop fabricators offer pre-fabricated slot inserts; the National Kitchen and Bath Association (NKBA) has published detailed installation specifications for integrated millwork features, including moisture defense protocols. Their NKBA design standards portal is the canonical reference if you want the technical bulletins.
The Pull Detail That Makes It Look Designed
A great integrated cutting board slot is invisible until you want to use it. The pull detail is what makes the difference between an obvious functional cutout and a piece of furniture-grade craftsmanship. Three pull options are common in current kitchen design.
The first is a flush-mounted brass or stainless finger ring, set into the counter at the front edge of the slot. You hook a finger into the ring, lift the board partially out, and grab the exposed tab. The hardware itself can be specified from architectural fittings catalogs; the Häfele specialty hardware catalog lists several countertop-grade options.
The second is a side-mounted finger groove cut into the cabinet face below the counter, hidden from above but accessible from below. This option is the most visually clean (zero hardware on the counter surface) but requires the deepest detail work to execute well.
The third, and the easiest DIY, is to leave the board itself slightly proud of the counter, with a 1-inch tab always visible. The tab can be styled into the board (a notched end-grain detail) so it reads as part of the design rather than an oversight. Many handcrafted board makers will produce custom boards sized to your slot for $80 to $200, with the tab integrated into the board itself.
The Build Sequence for an Existing Counter
Retrofitting a slot into an existing countertop is doable but exacting work. The cleanest approach is to remove the relevant section of countertop, take it to a fabricator with diamond-tipped tooling, and have them cut the slot under controlled conditions. Field-cutting quartz or granite with a handheld diamond blade works but produces an enormous amount of dust and the risk of cracking the slab is real.
Once the slot is cut, the under-counter chase is built from 1/2-inch Baltic birch plywood, sealed with marine polyurethane, and screwed up to the underside of the counter through corner blocks. The chase footprint should match the slot opening exactly with a 1/4-inch wider perimeter for the slot liner flange. Insert the brass or stainless liner from above, with the flange resting on the counter surface, and seal the perimeter with food-grade silicone.
Finally, install the drip tray at the bottom of the chase. The tray should be removable and dishwasher-safe; most kitchen suppliers sell stainless drip pans in standard widths, and a 4-by-12 inch pan is the right size for most slot configurations. Total build time for a confident DIYer with the right tools is one weekend; budget two if you are field-cutting the counter yourself.
Care, Cleaning, and Long-Term Reality
An integrated slot needs more attention than a freestanding cutting board does, but not much more. The basic discipline: never put a soaking wet board into the slot. A few seconds of towel-drying eliminates 90 percent of the moisture risk. Beyond that, the drip tray comes out monthly for a quick rinse, and the slot liner gets a wipe-down with a damp cloth at the same interval.
Once a year, do a full inspection. Pull the board out, shine a flashlight down the slot, and look for any sign of moisture pooling or finish breakdown on the chase walls. If you see anything, refresh the marine polyurethane on the affected area before the damage spreads. This is the same level of vigilance that a wood countertop owner already practices on the surface itself.
The boards themselves benefit from a monthly oil treatment with food-grade mineral oil, applied generously and wiped off the next morning. The oil keeps the wood from drying and cracking in the conditioned air of the slot. This is a habit you should already have for any wood board, integrated or not, but the slot environment makes it slightly more important.
For homes considering this feature during a counter replacement rather than as a retrofit, the timing is significantly easier. Communicate the slot specification to your fabricator before they cut the slab; most premium fabricators have done this kind of integrated detail many times and will dimension everything correctly the first time. Confirm the slot location relative to the sink, the cooktop, and the seam in the slab if any seams will be cut. The slot should never sit on a slab seam, both for structural reasons and for aesthetic clarity. Plan the chase under-counter framing into the cabinet base before the cabinet is installed, since accessing the area for a clean chase build is far easier with the counter not yet in place.
Have you considered how many cutting boards you actually use in a typical week? For most home cooks the honest answer is one or two. That makes the slot system more practical than it might first seem; you do not need a slot for every board you own, only for the ones in active rotation. Specialty boards (the bread board, the fish board, the cheese-serving board) can live in a more conventional storage location, leaving the integrated slot for the daily-driver boards. This selectivity actually improves the visual design too, since fewer boards in fewer slots reads as more intentional than every board crammed into the counter.
Conclusion
Integrated cutting board storage is one of those rare kitchen details where form and function meet without compromise. The board is faster to deploy than any other storage method, it disappears from the counter visually when not in use, and the detail itself reads as serious craft to anyone who notices it. For homeowners who cook daily, the slot becomes a quiet daily pleasure: a tactile, satisfying motion that turns a tedious tool retrieval into a gesture that feels like part of the cooking ritual.
The installation is not trivial, especially if you are working with stone or quartz, but it is well within reach for a determined DIYer or a moderately budgeted contractor. The materials cost is modest compared with the perceived luxury of the result, and resale appraisers consistently flag custom millwork features like this one as positive differentiators in mid-to-high-end kitchen markets. There are very few kitchen details that deliver this much daily satisfaction for this little long-term cost.
If your kitchen is in the planning phase or coming up for a refresh, mark the prep zone counter on your floor plan right now and ask yourself whether a board slot belongs there. If your kitchen is already built and you have been propping that cutting board behind the toaster for years, it might be time to call a stone fabricator and ask about retrofit pricing. Pull out a tape measure, measure your most-used cutting board, and sketch the slot dimensions on graph paper today. The result will earn its keep every meal for the next twenty years.
More Articles You May Like


Comments
Post a Comment