Beadboard Wainscoting in Bathrooms: Height and Material Guide
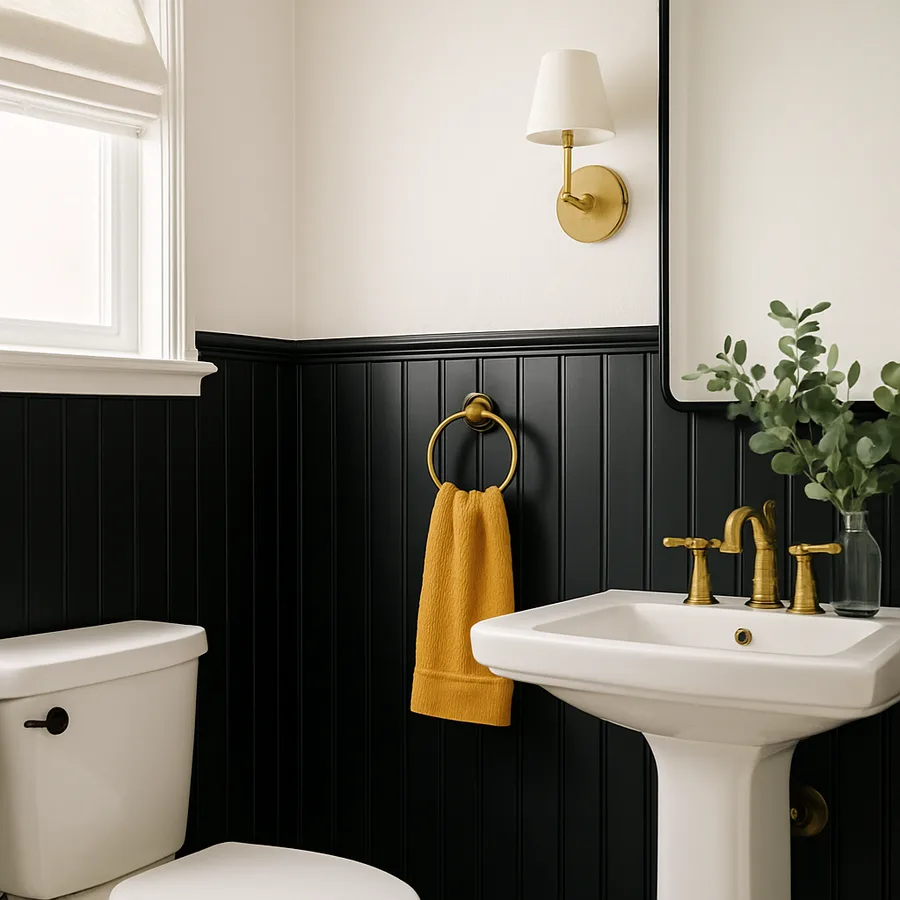
The bathroom is where beadboard wainscoting proves its worth. The vertical grooves diffuse splash, soften the acoustics of hard-surfaced rooms, and add the cottage character that pure tile and drywall cannot replicate. Yet beadboard in bathrooms also fails more often than any other wainscoting application, almost always because of two preventable mistakes: the wrong material and the wrong height. Get those right and the installation lasts decades. Get them wrong and you will be tearing out warped, mildewed panels within five years.
According to a National Association of Home Builders bathroom remodel survey, decorative wall treatments now appear in roughly 28 percent of mid-range bathroom renovations, with beadboard ranking as the most popular non-tile option. The American Society of Interior Designers (ASID) has separately noted that beadboard increases perceived bathroom quality at remodel resale by an average of $1,400 in mid-range markets when installed properly. The catch in both data sets is the qualifier: properly. This guide explains what proper means in moisture environments.
Why Beadboard Belongs in Bathrooms
The case for beadboard wainscoting in bathrooms is partly aesthetic and partly functional. Aesthetically, the vertical grooves echo classic American cottage and Victorian-era detailing, conjuring everything from Cape Cod summer houses to English country cottages depending on the paint color and accompanying fixtures. The pattern adds rhythm to a room that often feels visually stark because of large mirrors, pure-white fixtures, and reflective tile.
Functionally, beadboard protects the lower wall from splash, splatter, and the inevitable dings of vacuum cleaners and laundry baskets. Painted with a high-quality enamel, it wipes clean as easily as tile and outperforms standard drywall in every measurable durability test. The American Institute of Architects has cited beadboard as a cost-effective alternative to full-height tile in bathrooms where budget or aesthetic preference favors a softer treatment, particularly in powder rooms and guest baths that see lower moisture exposure than primary baths with daily showers.
The main caveat is moisture management. Beadboard is wood (or wood composite), and wood swells, warps, or rots when chronically wet. The installation rules below exist primarily to keep the material dry enough to last.
Choosing the Right Beadboard Material
Material selection is the single most important decision and the place where most failed bathroom beadboard installations went wrong at the very start. The wrong material in a bathroom is essentially a slow-motion warranty problem. There are four main options.
Solid pine tongue-and-groove beadboard is the traditional choice and produces the most authentic, character-rich appearance. It is also the most moisture-vulnerable. Pine accepts paint reasonably well but requires complete sealing on all six sides (including back and edges) before installation, plus a high-quality enamel topcoat. Use only in powder rooms or low-moisture half-baths.
Primed MDF beadboard sheets are the contemporary default for painted bathroom installations. Standard MDF will swell catastrophically if it gets wet, but moisture-resistant MDF (sometimes labeled MR-MDF) handles bathroom humidity acceptably when the paint envelope stays intact. Cost is moderate, installation is faster than tongue-and-groove planks, and the finished surface reads smooth and crisp. NARI bathroom remodel guides specifically recommend MR-MDF over standard MDF in any bath application.
PVC or cellular composite beadboard is the bombproof choice for primary baths and any room with a shower or tub. The material is essentially plastic, will not swell, warp, rot, or grow mold, and accepts paint when properly primed with a bonding primer. The visual result is slightly less authentic (the grooves can look a touch crisp and synthetic) but the durability is unmatched. This Old House has covered PVC beadboard installations in coastal and high-humidity bathrooms repeatedly.
Marine-grade plywood with applied beadboard pattern is the highest-end option, used by custom builders in serious bathroom renovations. Cost is significant, installation requires skill, but the result combines authentic wood character with genuine moisture resistance. This material rewards the investment in a primary bath that will see decades of use.
Determining the Right Height
Height in bathroom beadboard differs from dining room wainscoting because the function is different. Splash protection determines the minimum useful height, while proportion to the room and fixtures determines the maximum elegant height. Most bathroom beadboard installations land in one of three zones.
Standard wainscoting height at 32 to 38 inches works in powder rooms, half baths, and bathrooms where the beadboard is decorative rather than splash-protective. This is the equivalent of dining room placement and uses the same one-third-of-ceiling proportional logic. Pair with a small horizontal cap rail and the room reads cottage-traditional.
Three-quarter height at 48 to 60 inches is the sweet spot for most full bathrooms. This height covers the wall above the toilet and behind the vanity, protects against splash from sinks and even partial splash from tubs, and creates a pleasing proportional break. The remaining wall above receives paint or wallpaper. Architectural Digest features on cottage-style bathrooms frequently use this height because it reads substantial without overwhelming a small room.
Full height beadboard runs from baseboard to ceiling and creates the most dramatic, enveloping cottage effect. Reserve for powder rooms, guest baths, or any bathroom where you genuinely want the beadboard to dominate. Avoid in primary baths with showers because the upper portions of the wall serve no protective function and the visual heaviness can make a small bathroom feel smaller. Reader question: will full-height beadboard make my bathroom feel cramped? In bathrooms under 50 square feet, probably yes. In larger bathrooms, the verticality of the grooves actually helps the room read taller.
One refinement that experienced designers use to fine-tune any of these heights is the fixture alignment trick: where possible, align the top of the beadboard with the top edge of the vanity backsplash, the top of the toilet tank, or another major fixture line in the room. The eye reads those alignments as deliberate even when the resulting height varies slightly from a textbook proportional dimension. In bathrooms with a wall-mounted toilet tank at 30 inches and a vanity backsplash at 36 inches, splitting the difference at 33 inches often produces the most resolved composition. The alignment matters more than the exact dimension because human perception responds strongly to coincident horizontal lines.
Critical Installation Details for Moisture Defense
Installation technique is what separates beadboard that lasts thirty years from beadboard that fails in three. The protocol is straightforward but unforgiving of shortcuts.
Step one: seal all six sides of every panel before installation. The back face, the edges, and the top and bottom cuts all need primer or paint applied before the panel touches the wall. Most failures begin at unsealed back faces or cut edges, where moisture wicks into the substrate and lifts the paint film from inside. NARI installation guides treat back-priming as non-negotiable for bathroom applications.
Step two: caulk every joint, including the joint between the beadboard and the wall surface, the joint between the beadboard and any cap rail, and especially the joint between the beadboard and any horizontal surface (vanity counter, tub deck, baseboard top). Use a high-quality paintable silicone or polyurethane caulk rated for bathrooms. Do not use generic latex caulk, which will fail in two to three years.
Step three: finish with high-grade enamel paint. Use a bathroom-rated acrylic enamel in satin or semigloss finish. Cheap flat paint will absorb moisture, harbor mildew, and look terrible within a year. Invest in two coats of premium enamel and the surface stays wipeable for a decade.
Step four: maintain the bathroom ventilation. The beadboard is only as durable as the air around it. A working exhaust fan run for at least 20 minutes after every shower keeps the entire bathroom (including the beadboard) within a moisture range the materials can handle. The American Society of Heating, Refrigerating and Air-Conditioning Engineers (ASHRAE) recommends bathroom fan capacities of at least 50 cubic feet per minute for full baths.
Cap Rails, Trim, and Finishing Details
The top of the beadboard needs a cap rail that does two things: visually finishes the installation and physically protects the top edge from splash and dust. Several profile options work well. A simple chair rail cap with a small horizontal ledge top creates a useful surface for displaying small bathroom items (apothecary bottles, a candle, a small plant). A plain cap molding finishes the edge cleanly without creating a ledge, useful when you do not want a dust-collecting surface.
Inside corners on beadboard typically use cove molding or a small quarter-round to soften the transition between two panel runs. Outside corners use a corner board that overlays both panel ends and conceals the edges. Avoid mitered beadboard corners because the grooves rarely line up perfectly across the joint and the visual mismatch is unforgiving.
Reader question: do you need a baseboard at the bottom of beadboard wainscoting? Yes, both for visual finishing and to cover the bottom edge of the panel where it meets the floor. A baseboard slightly taller than the bathroom's existing baseboard (or matching it exactly) tends to look most intentional. A small shoe molding at the floor handles any gap or unevenness in the floor surface.
Color, Style, and Long-Term Wear
White and off-white beadboard remain the timeless choice and will not date over a 20-year ownership horizon. Saturated colors (deep navy, forest green, oxblood, charcoal) on bathroom beadboard have become a defining contemporary cottage trick over the past five years, but they require more maintenance because every drop of water spot shows clearly on dark paint. Choose dark colors only if you are prepared to wipe the wainscoting weekly.
Two-tone treatments (beadboard in one color, wall above in another) create the most visual interest and let you experiment with bolder paint without overwhelming the room. Cream beadboard below pale blue or sage walls above is a classic cottage combination. White beadboard below charcoal walls above produces a contemporary cottage look with strong contrast. Architectural Digest bathroom features have leaned heavily into this two-tone approach in cottage-coded renovations.
Long-term, expect to repaint the beadboard every seven to ten years in a primary bath, every twelve to fifteen years in a powder room. The paint film is the primary protective layer, and refreshing it before any visible failure prevents moisture from reaching the substrate. Budget roughly $200 to $400 in paint and supplies for a typical bathroom repaint, plus a weekend of careful work. The maintenance is modest, and the payoff is a finish that genuinely lasts.
Conclusion: Build It Right, Then Forget About It
The reason beadboard wainscoting has endured in American bathrooms for more than a century is that it solves multiple problems at once: it protects walls, softens acoustics, adds character, and remains affordable compared to floor-to-ceiling tile. The technique only fails when shortcuts in material selection, sealing, caulking, or ventilation undermine the protective system that lets wood survive in a wet room.
Match the material to the bathroom's actual moisture exposure (PVC for primary baths, MR-MDF for full baths, MR-MDF or sealed pine for powder rooms), choose a height that respects the room's proportion and your splash protection needs, and invest in proper sealing and high-grade paint. With those four decisions made well, the installation becomes essentially invisible as a maintenance concern for the next decade or longer.
The cottage character that beadboard adds is also genuinely durable in design terms. Unlike trend-driven tile patterns that may look dated within a few years, painted beadboard has read appropriate in American bathrooms since the 1880s and shows no signs of going out of fashion. Choosing beadboard is choosing into a long architectural tradition rather than a momentary trend, and the room benefits from that continuity.
Ready to start your installation? Measure your bathroom this weekend, decide on your height range and material, and order samples of two materials before committing. For more guidance on bathroom renovation specifics and code requirements, consult the resources at This Old House, the National Association of Home Builders, and the American Society of Interior Designers, then schedule the work and enjoy a bathroom you actually want to spend time in.
More Articles You May Like



Comments
Post a Comment