Pendant Light Height Over Kitchen Islands: Sizing Guide
Why Pendant Height Matters More Than Most People Realize
Pendant lights over a kitchen island serve a dual purpose that makes their positioning uniquely consequential. They must provide adequate task lighting for food preparation, cooking, and casual dining, while simultaneously functioning as a decorative element that anchors the visual composition of the kitchen. Hang them too low, and they obstruct sightlines, bump into heads, and create a claustrophobic feeling over the island. Hang them too high, and the light becomes diffuse and unfocused, the fixtures lose their visual weight, and the island feels disconnected from the lighting above it. Getting the height right is not about following a single rigid measurement but about understanding the principles that govern the relationship between fixture, surface, and the people who use the space.
The American Lighting Association (ALA) recommends hanging pendant fixtures so that the bottom of the shade or globe sits between 30 and 36 inches above the island countertop surface. This range accounts for the majority of residential ceiling heights and island dimensions, placing the light close enough to illuminate the work surface effectively while keeping it above the natural sightline of both seated and standing users. For islands that serve primarily as prep surfaces where people stand to work, the higher end of this range, around 34 to 36 inches, prevents the fixture from interfering with raised arms and tall cutting boards. For islands that function mainly as eating bars, the lower end, around 30 to 32 inches, creates a more intimate dining atmosphere.
Ceiling height introduces a variable that the standard 30-to-36-inch guideline alone does not fully address. In kitchens with standard 8-foot ceilings, the recommended range works perfectly because the pendant hangs at a visually balanced midpoint between countertop and ceiling. But what happens in a kitchen with 10-foot or vaulted ceilings? Maintaining the same 30-to-36-inch clearance above the counter means the pendant cord or rod spans a much greater distance, which can leave an awkward expanse of empty space between the top of the fixture and the ceiling canopy. The Houzz kitchen lighting guide addresses this by suggesting that the visual center of the pendant should occupy the middle third of the vertical space between countertop and ceiling, which sometimes means hanging slightly lower than the standard range in tall rooms.
Have you ever stood at a kitchen island and felt that something was slightly off about the lighting without being able to identify exactly what? In many cases, the issue is pendant height. Even a two-inch deviation from the optimal position can shift the balance of a kitchen from comfortable to awkward, and the effect is felt subconsciously by anyone who spends time at the island. This is why professional lighting designers treat pendant height as a fine-tuning decision made on site during installation, not a fixed specification determined entirely on paper. The best results come from hanging the fixtures at the planned height, evaluating the result from multiple positions in the kitchen, and adjusting incrementally before final securing.
Sizing Fixtures to Match Your Island Dimensions
Fixture diameter should be proportional to the island it serves, and there are reliable formulas for determining the right size. A widely used guideline from the National Kitchen and Bath Association (NKBA) suggests that the diameter of each pendant should be approximately one-twelfth to one-eighth of the island's length. For a standard 6-foot island, this translates to pendants between 6 and 9 inches in diameter, while an 8-foot island can support pendants up to 12 inches across. These proportions ensure the fixtures are large enough to make a visual impact and cast sufficient light without overwhelming the island or blocking the view across it.
The shape and visual density of the fixture affect perceived size as much as the actual diameter measurement does. An open-frame geometric pendant in brass wire reads as lighter and smaller than a solid opaque drum shade of identical dimensions, even though they occupy the same physical space. This means the formula needs to be adjusted based on fixture style. Transparent or open-frame designs can trend toward the larger end of the recommended range without feeling heavy, while solid, opaque shades should stay closer to the smaller end. A cluster of small pendants at different heights can replace a single large fixture, offering a contemporary alternative that distributes light more evenly across the island surface.
Island width matters as much as length when sizing pendants. A narrow island of 24 to 30 inches works best with slender, vertically oriented fixtures that do not extend beyond the island's footprint when viewed from above. Wider islands of 36 to 48 inches can accommodate broader shades and more horizontal designs without the fixtures appearing to hang over empty space. The International Association of Lighting Designers (IALD) emphasizes that pendant fixtures should never extend beyond the perimeter of the island when viewed in plan, as this creates a visual imbalance and a practical hazard for people walking past the island's edge.
Scale is ultimately a judgment call that no formula can fully replace. The numbers provide a starting range, but the final decision should account for the overall scale of the kitchen, the visual weight of other elements like range hoods and cabinet hardware, and the homeowner's personal preference for understated versus dramatic lighting. Ordering one fixture on approval before committing to a set of three is a strategy that many designers employ, allowing the homeowner to see the physical object in context before making a final commitment. A pendant that looks perfectly proportioned in a showroom or on a screen may read very differently when suspended above your specific island in your specific kitchen.
How Many Pendants and Where to Place Them
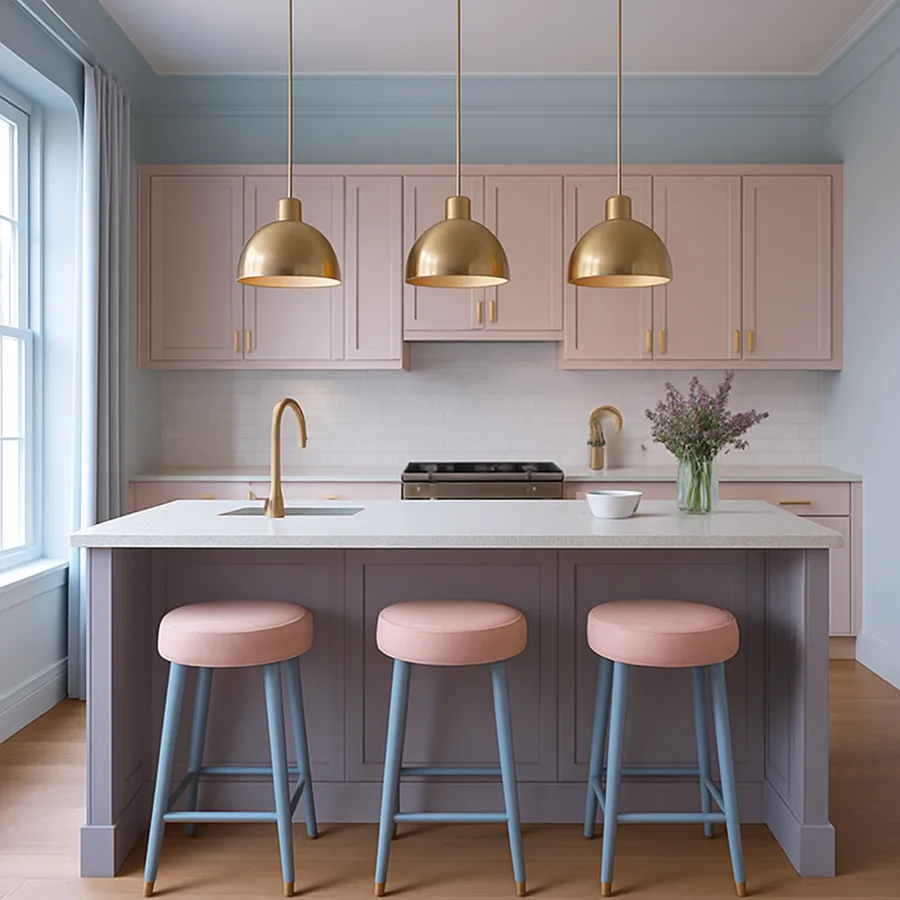
The number of pendant fixtures over an island is determined by the island's length and the visual rhythm you want to create. The standard guideline is one pendant for every two feet of island length, which means a 4-foot island typically gets two pendants, a 6-foot island gets three, and an 8-foot island can support three or four. This spacing creates an evenly distributed light pattern that covers the work surface without gaps or hot spots. However, this is a starting point rather than an absolute rule, and odd numbers of pendants, particularly three, tend to create a more visually balanced composition than even numbers for islands of moderate length.
Spacing between fixtures should be consistent and centered over the island's length. The general recommendation is 24 to 30 inches between the centers of adjacent pendants, with the outermost pendants positioned at least 6 inches inward from the ends of the island. This inset prevents the end fixtures from looking like they are about to fall off the edge and creates a contained lighting arrangement that reads as intentional. For a 72-inch island with three pendants, this might mean centering the middle pendant at the island's midpoint and placing the outer two at 24 inches from center, leaving approximately 12 inches of island extending beyond each outer fixture.
Linear suspension fixtures, which mount multiple light sources on a single horizontal bar, offer an alternative to individual pendants that simplifies installation and creates a different visual effect. A single linear fixture eliminates the challenge of aligning multiple ceiling canopies and ensures perfectly even spacing between light sources. According to a report from the Illuminating Engineering Society (IES), linear fixtures distribute light more uniformly across rectangular surfaces than point-source pendants, which makes them particularly effective for islands that serve as primary food preparation areas. The trade-off is less design flexibility, since a linear fixture commits you to a fixed configuration, whereas individual pendants can be adjusted or replaced independently.
How do you use your kitchen island most frequently? This question should directly influence your pendant count and placement. An island used primarily for food prep benefits from more fixtures placed closer together for maximum task lighting coverage. An island that serves as a casual dining bar may need fewer, larger pendants positioned to create pools of ambient light that foster conversation rather than illuminate every square inch. An island that serves both purposes might benefit from pendants on dimmer switches, allowing bright task lighting during prep and softer ambient lighting during meals. The dual-purpose island is the most common configuration in contemporary kitchens, and dimmable pendants handle this dual identity gracefully.
Adjusting for Ceiling Height and Room Proportions
Standard 8-foot ceilings represent the baseline condition for which most pendant height recommendations are calibrated. In this configuration, a pendant hanging 32 inches above the countertop with a 36-inch counter height positions the bottom of the fixture at approximately 68 inches from the floor, or about 28 inches below the ceiling. This leaves enough headroom for tall individuals to pass comfortably and enough visual space above the fixture for the rod or cord to read as a deliberate design element rather than an awkward vertical line. The proportions work because the pendant occupies a visually balanced position in the vertical column of space between counter and ceiling.
In kitchens with 9-foot ceilings, the additional 12 inches of vertical space means the pendant can maintain the same 30-to-36-inch clearance above the counter while gaining breathing room above the fixture. This extra space generally improves the overall proportion, and many designers consider 9-foot ceilings the ideal height for pendant-lit islands because the vertical balance between fixture, counter, and ceiling feels natural without any adjustment. If anything, pendants in 9-foot kitchens can be hung an inch or two lower than the standard range to close the gap between fixture and island slightly, creating a cozier relationship that takes advantage of the generous ceiling height above.
Kitchens with 10-foot or higher ceilings present a genuine design challenge for pendant lighting. The standard clearance height above the counter leaves a vast expanse of empty chain or cord between the fixture and the ceiling that can look disproportionate and stringy. Several strategies address this: longer, more substantial fixtures that fill more vertical space; pendants hung in staggered configurations at different heights to create a cascading effect; or fixtures mounted on rigid rods rather than chains or cords, which read as more intentional in long vertical runs. Better Homes and Gardens recommends that in rooms with ceilings above 10 feet, the pendant drop should be increased by approximately 3 inches for every additional foot of ceiling height beyond 8 feet, which means a 12-foot ceiling might call for pendants hung 42 to 48 inches above the counter.
Sloped and vaulted ceilings add another layer of complexity because the pendant mounting point may be significantly higher on one side of the island than the other. Swivel canopies that accommodate angled mounting are essential in these situations, and the pendant height should be measured from the countertop rather than from the ceiling to maintain consistent clearance regardless of the slope above. Some homeowners install a horizontal mounting bar or track at a fixed distance below the ceiling peak to create a level reference line from which pendants hang at uniform heights. This approach adds a small architectural element to the ceiling but produces a much cleaner result than pendants hanging at varying heights from an angled surface.
Coordinating Pendant Style With Kitchen Design
The pendant fixture style should emerge from the kitchen's existing design language rather than competing with it. In a transitional kitchen with Shaker cabinets, quartz countertops, and brushed nickel hardware, schoolhouse-style pendants or simple glass globes in a matching finish create continuity without visual friction. These classic shapes have enough character to serve as focal points but lack the assertiveness that might clash with the kitchen's measured aesthetic. The American Society of Interior Designers (ASID) recommends selecting lighting that reinforces rather than redirects the room's established personality, treating pendants as supporting actors rather than scene-stealers.
Modern and minimalist kitchens call for pendant designs that prioritize clean geometry and material honesty. Cone-shaped metal shades, cylindrical concrete fixtures, and simple glass orbs in black, white, or raw brass align with the pared-back vocabulary of contemporary design. The fixture's form should be reducible to a basic geometric shape, sphere, cylinder, or cone, without ornamental embellishment. In these kitchens, the pendant's visual impact comes from proportion, material quality, and precise positioning rather than decorative complexity. A single well-chosen modern pendant can make a stronger statement than an elaborate fixture because it concentrates attention on form rather than dispersing it across surface detail.
Industrial and farmhouse kitchens open the door to more expressive pendant choices. Oversized metal warehouse shades, vintage-inspired Edison bulb fixtures, and hand-blown glass pieces with visible imperfections suit these aesthetics because they share the emphasis on honest materials and visible craftsmanship. Finishes like aged brass, oil-rubbed bronze, matte black iron, and galvanized steel all belong in this category and can be mixed within a single kitchen, as long as there is a unifying element like color temperature or material family tying them together. Mixing two complementary metals, such as matte black and warm brass, has become a widely accepted practice that adds layered sophistication to rustic-leaning kitchens.
The finish and color temperature of the bulbs within the pendants deserve as much consideration as the fixture design itself. A beautifully designed pendant fitted with a harsh, cool-white bulb will undermine the warmth and atmosphere that the fixture was chosen to create. For kitchen islands, bulbs in the 2700K to 3000K color temperature range produce a warm white light that flatters food, skin tones, and most interior finishes. Bulbs rated at 3500K and above shift toward a cooler, more clinical quality that suits commercial kitchens but tends to feel sterile in residential settings. The NKBA design guidelines specify 2700K to 3000K as the recommended range for residential kitchen lighting, balancing task visibility with visual warmth.
Troubleshooting Common Pendant Lighting Problems
Glare is the most frequently reported complaint with kitchen island pendants, and it almost always stems from exposed bulbs or transparent shades that direct light horizontally into the eyes of someone seated at the island. The solution is either a fixture with a solid or frosted shade that directs light downward, or a bulb with a lower lumen output that reduces brightness to comfortable levels. Dimmable fixtures paired with a quality dimmer switch give you control over intensity throughout the day, allowing bright task lighting during meal preparation and softer, glare-free illumination during casual conversations. If your current pendants cause glare and cannot accommodate a dimmer, replacing the bulbs with lower-wattage or frosted alternatives is the least expensive fix.
Insufficient light coverage manifests as dark zones at the ends of the island or shadowed areas between widely spaced fixtures. This problem typically occurs when pendants are spaced too far apart, positioned too high, or fitted with narrow-beam bulbs that create concentrated pools rather than overlapping fields of light. The IES recommends that pendant light cones overlap by approximately 30 percent at the work surface level to eliminate dark gaps between fixtures. If rearranging the fixtures is not practical, switching to bulbs with a wider beam angle or adding subtle under-cabinet lighting to the adjacent cabinetry can compensate for uneven coverage.
Visual clutter occurs when pendant fixtures are oversized, over-decorated, or hung too low, making the island area feel crowded from above. This is particularly common in kitchens where the pendant selection was made based on a photograph of a much larger space, resulting in fixtures that are disproportionate to the actual island and ceiling height. The simplest diagnostic test is to stand at the island and look across to the person on the opposite side. If the pendants obstruct your view of their face, the fixtures are too low, too large, or both. Raising the pendants by two to three inches or replacing them with slimmer profiles can resolve the issue without requiring a complete fixture change.
Uneven hanging heights between multiple pendants over the same island create a distracting visual imbalance that undermines the composed look you are trying to achieve. This problem is surprisingly common because ceiling joists are not always perfectly level, and different cord or chain lengths can stretch differently under the weight of the fixture. A laser level held at the desired pendant height across the full length of the island is the most reliable way to ensure all fixtures hang at the same elevation. Many electricians perform this check during installation as a matter of course, but if yours does not, requesting it explicitly takes only a moment and prevents a result that will bother you every time you stand at the island.
Conclusion: Precision That Pays Off Daily
Pendant lighting over a kitchen island is one of those design decisions that you interact with every single day, which makes getting it right disproportionately important to your satisfaction with the kitchen as a whole. The guidelines in this article, 30 to 36 inches above the counter, one pendant per two feet of island length, diameter proportional to island size, provide a reliable framework that applies to the vast majority of residential kitchens. These numbers are starting points for on-site refinement, not rigid mandates, and the best installations always involve standing in the actual kitchen and evaluating the fixtures in real lighting conditions before committing to a final position.
The interplay between fixture height, spacing, size, and style creates a lighting arrangement that is far more than the sum of its parts. When these variables are calibrated correctly, the pendants illuminate the island beautifully, anchor the kitchen's visual composition, and contribute to an atmosphere that makes people want to gather around the counter. When they are off, even by small margins, the kitchen feels subtly uncomfortable in a way that is hard to articulate but impossible to ignore.
Before your next kitchen renovation or lighting update, take a tape measure to your island and ceiling, calculate the proportions using the formulas discussed here, and visit a lighting showroom to see fixtures at actual scale. If possible, request a trial installation where the fixtures are hung at the planned height before the final electrical work is completed. This single step, which adds minimal time and cost to the project, ensures that your pendant lights will perform exactly as intended for the thousands of meals, conversations, and quiet mornings that your kitchen island will host in the years ahead.
More Articles You May Like


Comments
Post a Comment