Plug-In Wall Sconces for Renters Who Cannot Hardwire Fixtures
The Renter's Lighting Problem Nobody Talks About
Renting an apartment or a house means accepting someone else's lighting decisions. The landlord installed a bare ceiling fixture in the bedroom, a fluorescent tube under the kitchen cabinet, and a single overhead in the living room, and those are the light sources you inherit. Adding new hardwired fixtures requires an electrician, a landlord's written permission, and the understanding that you will probably need to reverse the installation when you move out. Most renters never pursue this path, which means they spend years living under lighting that was chosen for cost and code compliance rather than for comfort, aesthetics, or the way people actually use their rooms. Plug-in wall sconces solve this problem completely, delivering the visual impact and layered lighting of hardwired fixtures without touching a single wire inside the wall.
A plug-in wall sconce is a wall-mounted light fixture that draws power from a standard electrical outlet through a cord rather than from wiring concealed inside the wall. The fixture mounts to the wall using screws, adhesive strips, or a mounting plate, and the power cord runs from the fixture down to the nearest outlet. The visual result, once the cord is managed properly, is nearly indistinguishable from a hardwired sconce. The functional result is identical. The American Lighting Association has noted that plug-in sconces represent one of the fastest-growing segments of the residential lighting market, driven primarily by the 44 million renter households in the United States who cannot modify their electrical systems but increasingly demand the same lighting quality available to homeowners.
The stigma that once surrounded plug-in fixtures has largely evaporated. A decade ago, visible cords signaled budget constraints or temporary living arrangements. Contemporary plug-in sconces from manufacturers like Visual Comfort, Schoolhouse Electric, and Arteriors feature the same materials, finishes, and design quality as their hardwired counterparts. Several high-end interior designers now specify plug-in fixtures even in owned homes because of the installation flexibility they provide. A plug-in sconce can be relocated to a different wall or a different room in minutes, a freedom that hardwired fixtures cannot offer. The design world has recognized that the power delivery method is an engineering detail, not a quality indicator, and the market has followed.
How many rooms in your current home have lighting that you would change if you could? If you are a renter, the answer is probably most of them. This guide walks through the selection, placement, installation, and cord concealment strategies that transform plug-in sconces from a compromise into a deliberate design choice. By the end, you will have a specific plan for upgrading at least one room's lighting this weekend without involving your landlord, an electrician, or any tool more complex than a screwdriver.
Choosing the Right Sconce Style for Each Room
Plug-in wall sconces fall into four broad categories based on their arm configuration and light direction, and each category serves a different functional purpose. Swing-arm sconces extend outward from the wall on an articulated arm that pivots horizontally and vertically, positioning the light source exactly where it is needed. These are the classic bedside reading lights, providing directed illumination that can be aimed at a book page without disturbing a sleeping partner. Fixed-arm sconces mount flush or with a short projection from the wall and cast light in a predetermined pattern, either upward, downward, or both. These serve as ambient accent lights in hallways, living rooms, and dining areas. Shade sconces, which feature a fabric or glass shade that diffuses light in all directions, provide the softest and most even illumination, suitable for bedrooms and sitting areas where gentle ambiance matters more than directed task light.
The fourth category, picture lights and art lights, mounts above or below artwork and directs a focused beam onto the piece. These are specialty sconces that serve a specific function, but for renters with gallery walls or featured artwork, they provide a level of polish that no other fixture type can match. The Architectural Digest rental apartment features consistently highlight plug-in picture lights as one of the simplest upgrades that makes a rented space look intentionally designed rather than temporarily occupied. A single plug-in picture light over a statement piece of art communicates that the resident cares about their environment and has invested thought into how the space presents, even if the lease expires in eleven months.
Material and finish selection should coordinate with the room's existing hardware. If the door handles, cabinet pulls, and curtain rods are brushed nickel, a brushed nickel sconce integrates seamlessly. If the room has warm brass or gold-toned fixtures, match accordingly. Mixing metals is a valid design choice when done intentionally, but unintentional mixing, where a chrome sconce sits next to a brass curtain rod, reads as oversight rather than style. The safest approach for renters who move frequently is to invest in sconces with a finish that works across multiple aesthetic contexts. Matte black, aged brass, and oil-rubbed bronze are the three most versatile finishes, compatible with modern, traditional, industrial, and transitional interiors without appearing mismatched.
Scale matters as much as style. A sconce that looks proportionate in a showroom or on a website may overwhelm a small bedroom wall or disappear on a large living room expanse. The general rule from the American Society of Interior Designers (ASID) is that a wall sconce should measure approximately one-quarter to one-third the width of the furniture piece or wall area it is associated with. A sconce flanking a 60-inch headboard should have a shade or backplate width of 5 to 8 inches. A sconce beside a 36-inch bathroom mirror should be 4 to 6 inches wide. Measure your wall space before purchasing, and if choosing online, tape a piece of paper cut to the sconce's dimensions onto the wall to preview the visual proportion before committing.
Placement Rules That Professional Designers Follow
Sconce placement height is the single variable that most dramatically affects both the appearance and the functionality of the fixture, and getting it wrong is obvious from across the room. The standard mounting height for most wall sconces is 60 to 66 inches from the floor to the center of the backplate, which positions the light source at approximately eye level for a standing adult. This height works for hallways, living rooms, and any space where the sconce provides ambient light to standing or seated occupants. Bedside sconces mount lower, at 48 to 54 inches from the floor, which positions them at shoulder height for a person sitting up in bed and ensures the light falls onto a book or device held at lap level rather than shining into the reader's eyes.
Horizontal placement relative to furniture anchors the sconce in the room's composition. Bedside sconces center on the pillow position, typically 8 to 12 inches from the outer edge of the headboard or mattress. Living room sconces flanking a sofa or fireplace should be equidistant from the center point, spaced symmetrically to create visual balance. A single sconce beside a reading chair should be positioned on the side where the reader holds a book, which is the left side for a right-handed reader and the right side for a left-handed reader. The fixture's arm, when extended, should position the light source approximately 12 inches in front of and 18 inches above the reader's shoulder. The NKBA publishes detailed fixture placement guidelines for bathrooms that specify sconces should be mounted at 60 to 65 inches above the floor and centered on the mirror edges when used as vanity lighting.
Outlet proximity dictates the practical feasibility of any plug-in sconce installation. Before selecting a mounting location, identify every outlet on the intended wall and adjacent walls. The cord run from the sconce to the outlet should be as short and as vertical as possible. A sconce mounted directly above an outlet requires only a straight vertical cord drop, the simplest configuration to conceal. A sconce mounted five feet laterally from the nearest outlet requires a horizontal cord run along the wall that is harder to hide and more visually disruptive. If no outlet exists in a workable position, a flat-profile extension cord routed along the baseboard to a more distant outlet is preferable to a long diagonal cord run across open wall space.
Renters should also consider switch accessibility when planning placement. A plug-in sconce with an inline cord switch requires reaching down to the cord to turn the light on and off, which is inconvenient for bedside use when you are already lying down. Sconces with a built-in switch on the fixture body, a pull chain, or a remote control receiver eliminate this inconvenience. Several plug-in sconces now come with small wireless remote controls or are compatible with smart plugs that add voice control and scheduling capabilities. A smart plug inserted between the sconce's cord and the wall outlet transforms any plug-in sconce into a smart light controllable through Alexa, Google Assistant, or a smartphone app, adding dimming and automation without modifying the fixture itself.
Cord Concealment Methods That Actually Work
The cord is the sole visual difference between a plug-in sconce and a hardwired one, and concealing it effectively is the difference between a polished installation and one that looks temporary. Paintable cord covers are the most effective and most popular concealment method. These are flat or D-shaped plastic channels that adhere to the wall with peel-and-stick backing and accept standard lamp cords inside. Once painted to match the wall color, a cord cover becomes virtually invisible from normal viewing distances. The Wiremold CordMate line from Legrand is the most widely available brand, sold at every major hardware retailer in multiple sizes. A single CordMate channel kit covering a five-foot vertical run costs under ten dollars and installs in less than fifteen minutes with no tools beyond a utility knife to cut the channel to length.
For renters who cannot paint or who have textured walls where cord covers would be conspicuous, fabric cord covers offer a softer alternative. These are textile sleeves that slip over the cord and can be color-matched or pattern-matched to the wall surface or treated as a visible design element in a contrasting color. A white fabric cord sleeve on a white wall disappears almost as completely as a painted plastic channel. A gold fabric sleeve running from a brass sconce down a dark wall reads as an intentional detail rather than an exposed wire. The key is committing to the aesthetic rather than trying to hide what cannot be fully hidden. A cord that is styled looks deliberate; a cord that is partially hidden looks like a failed attempt at concealment.
The third approach to cord management bypasses concealment entirely by making the cord a feature. Industrial and minimalist interiors increasingly display cords as part of the fixture's visual identity, running them in clean, taut lines from the sconce to the outlet with small adhesive cord clips holding them at precise intervals. The cord becomes a graphic element on the wall, a thin vertical line that connects the fixture to its power source with visual honesty. This approach requires a cord that is aesthetically worthy of display, which means either a fabric-wrapped cord, a cord in a color that complements the fixture, or a braided vintage-style cord that adds textural interest. Many plug-in sconce manufacturers now offer cord color options or sell decorative replacement cords specifically for visible installations.
Regardless of the concealment method chosen, the cord routing should follow the shortest path from the fixture to the outlet, running vertically wherever possible and avoiding diagonal runs across open wall space. If the cord must travel horizontally, route it along the top of a baseboard where the natural shadow line at the wall-floor junction reduces its visibility. Never route a cord across a doorway, under a rug where it crosses a walking path, or behind furniture where it could be pinched or overheated. The Consumer Product Safety Commission (CPSC) reports that cord-related electrical fires most commonly originate from cords that are damaged by furniture compression or routed under carpeting where heat cannot dissipate, and plug-in sconce cords are subject to the same risk if improperly managed.
Installation Without Damaging Walls
The mounting method determines whether you get your full security deposit back when you move out. Traditional screw mounting into wall studs provides the most secure installation but leaves holes that require patching, sanding, and touch-up painting at move-out. For lightweight sconces weighing under three pounds, which includes the majority of single-arm and shade sconces, heavy-duty adhesive strips rated for the fixture's weight provide a damage-free alternative. Command brand strips rated for 12 to 16 pounds can support most plug-in sconces without any wall penetration, and they remove cleanly from painted drywall, leaving no residue or surface damage. Follow the manufacturer's weight rating precisely, accounting for the weight of the bulb and shade in addition to the fixture body.
Heavier sconces, particularly swing-arm models with long extension arms that create leverage force on the mounting point, require more robust attachment. Drywall anchors rated for the fixture's weight plus a safety margin of 50 percent provide adequate holding strength while leaving only small holes that are trivially patched at move-out. A toggle bolt anchor holds 50 pounds or more in standard half-inch drywall and requires only a half-inch hole that fills with a single dab of spackle and a touch of paint when the fixture is removed. The total move-out repair cost for two toggle bolt holes is approximately zero dollars in materials and three minutes of labor, a negligible price for years of improved lighting.
Adhesive mounting requires clean, smooth wall surfaces for reliable adhesion. Wipe the mounting area with isopropyl alcohol before applying adhesive strips to remove dust, oils, and residue that reduce bonding strength. Allow the adhesive to cure for the full period specified by the manufacturer, typically 24 to 72 hours, before hanging the fixture. Test the bond by pressing firmly on the mounted backplate before attaching the sconce body and bulb. If the backplate shifts or the adhesive begins to release, the wall surface may be incompatible with adhesive mounting due to texture, old paint, or residual cleaning product, and you should switch to mechanical fasteners instead.
Do you know whether your walls are drywall, plaster, or concrete? The answer determines which fasteners work. Drywall accepts screws, anchors, and adhesives readily. Plaster, found in pre-war apartments and older homes, is harder and more brittle, requiring masonry bits for pilot holes and spreading the load across a wider mounting plate to prevent cracking. Concrete and brick walls, common in loft apartments, require masonry anchors and a hammer drill. Each wall type has a reliable fastener solution, and none of them require landlord permission as long as the holes are repairable at move-out. When in doubt, start with the smallest feasible fastener and upgrade only if the sconce does not feel secure after installation.
Maximizing Impact With Layered Plug-In Lighting
A single plug-in sconce improves a room. A pair transforms it. Multiple pairs, installed at different heights and in different zones, creates the kind of layered lighting that professional interior designers spend thousands to achieve in custom installations. The principle behind layered lighting is simple: light should come from at least three different heights and two different directions in every room to eliminate harsh shadows, create depth, and provide appropriate illumination for every activity that happens in the space. A ceiling fixture alone, no matter how attractive, produces flat, shadowless light that makes rooms feel institutional. Adding wall-mounted sconces at mid-height introduces a second layer that models faces, highlights textures, and creates warm pools of light that draw the eye through the space.
In a living room, the layered lighting formula for renters starts with the existing overhead fixture, adds a pair of plug-in sconces flanking the sofa or the main seating area at 60 to 66 inches, and supplements with a table or floor lamp for reading-level task light. Three layers, three heights, and the room immediately feels warmer, more dimensional, and more deliberately designed. The total cost of two quality plug-in sconces, two cord cover kits, and two LED bulbs runs between $80 and $200 depending on fixture quality, which is less than most renters spend on a single decorative throw pillow that provides no functional improvement whatsoever.
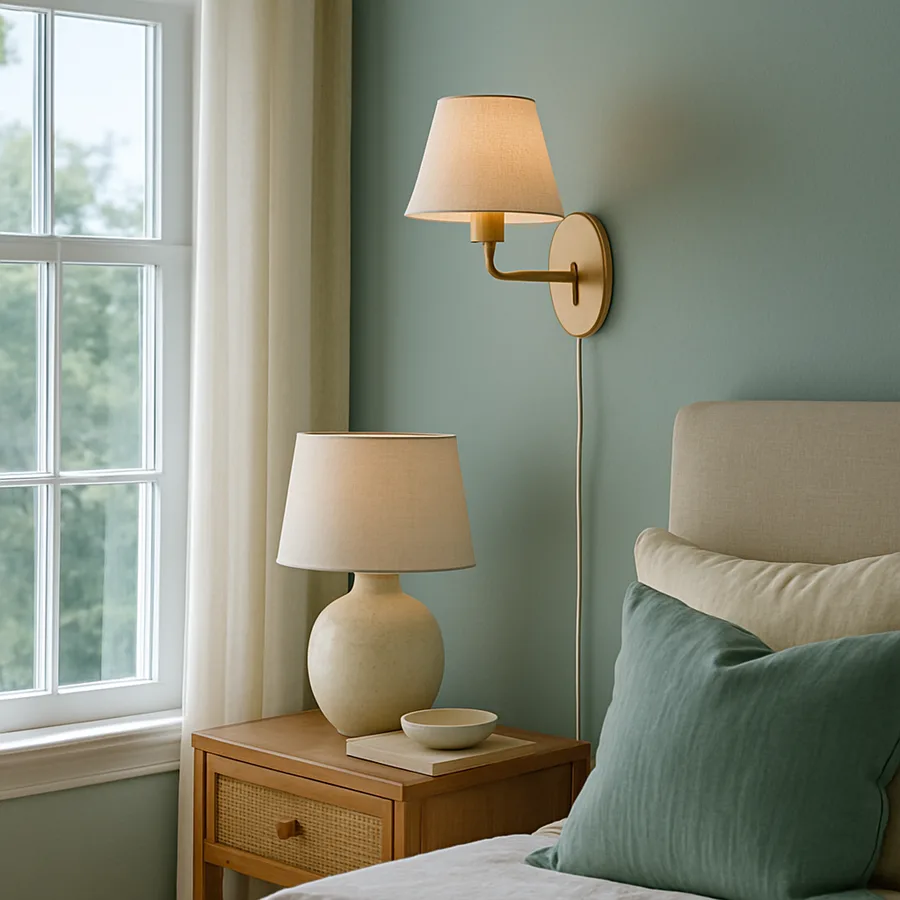
Bedrooms achieve the most dramatic transformation because the bed is a fixed focal point that anchors the sconce placement. A pair of matching plug-in sconces flanking the headboard replaces table lamps entirely, freeing nightstand surface area for books, phones, water glasses, and alarm clocks while providing better-directed reading light at a more comfortable angle. The nightstand goes from a cluttered surface dominated by a lamp base to a clean, functional space that enhances the room's sense of order. Swing-arm sconces with integrated dimmers allow each sleeper to adjust their light independently, reading at a comfortable brightness on one side while the other side stays dark. This configuration is the single most impactful lighting upgrade a renter can make in a bedroom, and it installs in under an hour with no permanent wall modification.
Consider extending the plug-in sconce approach to spaces that rarely receive dedicated lighting attention. A small sconce in an entryway creates a welcoming glow that greets you when you come home. A picture light above a favorite photograph or painting gives the artwork the presence it deserves. A sconce in a hallway eliminates the harsh overhead that makes nighttime trips to the bathroom feel like walking into a convenience store. Each of these additions costs $25 to $75, installs in minutes, and contributes to a cumulative effect where every room and transitional space feels intentionally lit. Visit the Better Homes and Gardens lighting gallery for inspiration on sconce arrangements that translate directly to rental-friendly installations.
Your First Plug-In Sconce Project Starts Here
The path from reading this article to enjoying better lighting in your home is shorter than you think. Choose one room, ideally the bedroom or the living room, and identify the wall where a sconce would have the most impact. Measure the mounting height, locate the nearest outlet, and determine the cord run distance. Browse plug-in sconces in your preferred style and finish, filtering for models that include a cord or offer cord color options that suit your concealment plan. Order the sconce and a cord cover kit in the same transaction so both arrive together, and block 90 minutes on a weekend morning for the installation.
The installation itself proceeds in four steps: mount the backplate or adhesive mount to the wall, attach the sconce body to the mount, route and conceal the cord from the fixture to the outlet, and insert the bulb. Test the switch, adjust the arm position if applicable, and step back to evaluate the light pattern. If the sconce has an integrated dimmer or connects through a smart plug, experiment with brightness levels at different times of day to find the settings that work for morning, afternoon, and evening use. Within a week, the sconce will feel like it has always been there, and the room will feel like it has always been this comfortable.
Renting does not require accepting inferior lighting any more than it requires accepting uncomfortable furniture or bare walls. Plug-in wall sconces give renters the same lighting quality that homeowners achieve through hardwired installations, with the added advantages of portability, flexibility, and zero landlord involvement. Every sconce you install moves with you to the next apartment, the next house, and the next chapter. The investment is not in the rental; it is in the quality of your daily life, and that return follows you wherever you go. Start with one sconce this weekend and discover what your rooms have been missing.
More Articles You May Like


Comments
Post a Comment