Heated Floor Mats Under Entryway Tile for Cold Winter Mornings
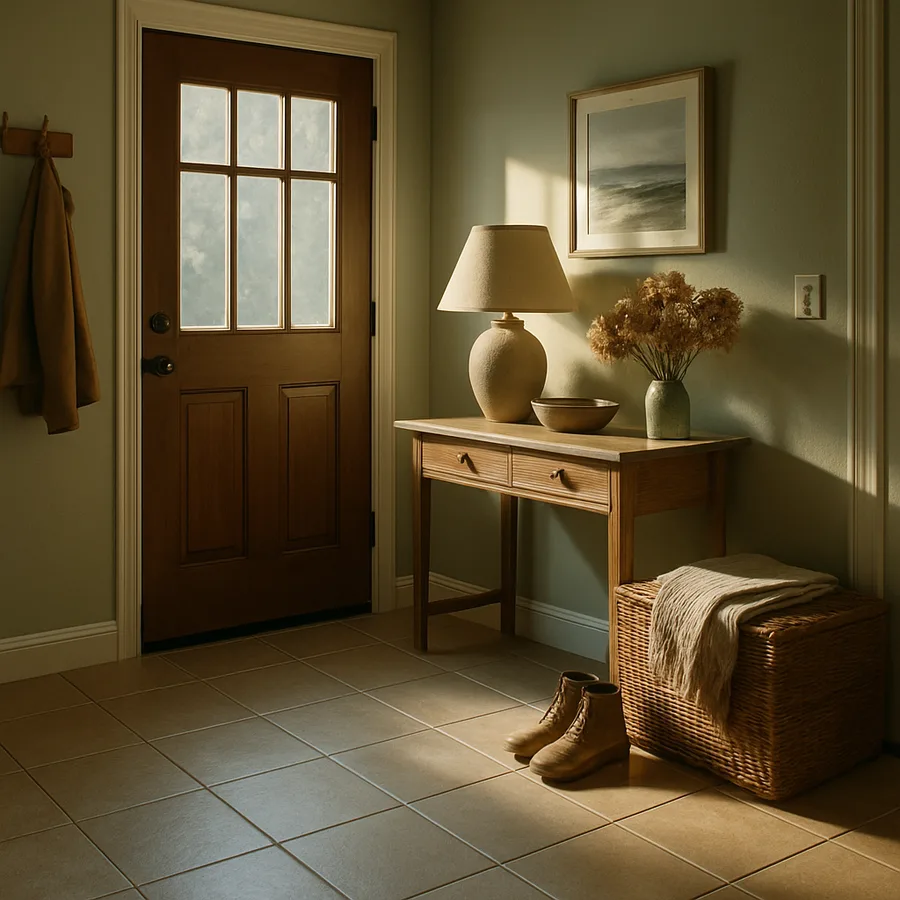
There is one thing a luxurious entryway tile cannot do on its own: be warm on a January morning at six a.m. For that you need an electric heated floor mat installed under the tile, a technology that has quietly become one of the highest-impact, lowest-complexity comfort upgrades available in residential remodeling. A properly specified mat warms the tile surface to a comfortable temperature in the 80 to 85 degree Fahrenheit range, takes fifteen to thirty minutes to reach that point, and costs less to operate over a winter than most people assume. Here is how the systems work, how to size them, and how to install them so they last for decades.
How Electric Heated Floor Mats Work
An electric floor heating mat is a resistance heating element, typically a thin cable woven into a mesh backing, which is embedded in the mortar bed directly below the tile. When powered, the cable generates heat at a rate determined by its wattage rating (usually 10 to 15 watts per square foot for residential tile applications). A floor sensor probe embedded in the mortar bed feeds temperature data back to a wall-mounted thermostat, which switches the circuit on and off to maintain the target surface temperature.
Unlike hydronic (hot-water) radiant systems, electric mats require no boiler, no pumps, and no plumbing. They are powered from a standard 120-volt or 240-volt circuit and controlled by a thermostat that can be programmed, scheduled, or voice-integrated with modern smart-home systems. According to data from the U.S. Department of Energy (DOE), electric radiant floor systems deliver heat with a room-by-room efficiency gain of 10 to 30 percent over forced-air systems for zoned applications because no heat is lost in ductwork. Detailed efficiency comparisons are published at the U.S. Department of Energy.
Sizing the System for Your Specific Entryway
Sizing a mat correctly requires three measurements: the heated footprint (exclude areas under cabinets, built-in benches, or large fixed furniture), the target surface temperature (most systems top out at 85 to 90 degrees Fahrenheit per manufacturer limits), and the adjacent thermal load (an entryway with a cold exterior door and a sidelight will lose heat faster than an interior hallway). A reputable mat manufacturer will size a system for your actual floor plan using either an online calculator or a phone consultation.
The Radiant Professionals Alliance (RPA) recommends that an electric mat cover roughly 85 to 90 percent of the usable floor area, leaving a 3-to-4-inch perimeter buffer from walls and a wider buffer (6 to 12 inches) from exterior doors where moisture and heat loss are highest. Oversizing can cause the thermostat to cycle too frequently; undersizing leaves cold zones that defeat the purpose. Reader question: is it worth installing a mat under a bench or closet? Generally no: the heat is wasted on areas you do not walk on, and the bench can trap heat in ways that stress the cable. Reserve coverage for the real walking footprint.
Installation: What Goes Between the Subfloor and the Tile
A proper heated-floor installation stacks six layers in this order from bottom up: subfloor, cement backer board or uncoupling membrane, heating mat or cable, floor sensor probe, thinset mortar bed, and tile. Each layer has a specific role. The backer board or uncoupling membrane provides a stable substrate. The mat delivers the heat. The probe reports temperature back to the thermostat. The mortar encapsulates the cable, protects it from physical damage, and transfers heat into the tile.
The Tile Council of North America (TCNA) specifies in its Handbook that the heating element must be fully encapsulated in mortar with no air voids, because voids create hot spots that can damage the cable over time. Installation is demanding enough that the National Electrical Contractors Association (NECA) recommends hiring an electrician for the power connection and a certified tile installer for the mat placement, or a single general contractor who subcontracts both trades with clear sequencing. A resistance test with a digital ohmmeter should be performed three times during installation: before placing the mat, after placing the mat, and after applying the mortar bed. A single damaged cable before tiling is repairable in minutes; the same damage discovered after the tile is down is a multi-thousand-dollar remediation. Additional installation standards and safety specifications are available at the Tile Council of North America.
Energy Use and Operating Cost Reality Check
Electric floor heating uses real electricity, and homeowners regularly overestimate or underestimate the operating cost. A typical 40-square-foot entryway with a 12-watt-per-square-foot mat draws 480 watts at full power. If the thermostat runs the system at a 40-percent duty cycle through a cold morning warmup and then idles at a lower duty cycle through the day, actual daily energy consumption typically lands between 3 and 5 kilowatt-hours. At the U.S. average residential electricity rate of approximately 16 cents per kWh (per the U.S. Energy Information Administration), that is $0.50 to $0.80 per day, or roughly $45 to $72 for a 90-day heating season.
Programmable and smart thermostats cut this cost further by running the system only during occupied hours. A mat that warms the floor only from 6 a.m. to 8 a.m. and again from 5 p.m. to 9 p.m. costs a fraction of a 24-hour operation. Reader question: does an electric mat raise home insurance rates? Almost never, provided the system is installed to National Electrical Code (NEC) Article 424 specifications and properly permitted. An unpermitted installation, on the other hand, can create problems with both insurance and eventual resale. The U.S. Energy Information Administration publishes current regional electricity pricing for accurate cost projections.
Thermostats, Controls, and Smart-Home Integration
The thermostat is where a heated floor becomes either a luxury appliance or a forgotten utility. Basic dial thermostats work but are crude. Programmable thermostats allow weekly schedules, which is a substantial comfort and cost improvement. Smart thermostats with Wi-Fi connectivity integrate with Google Home, Apple HomeKit, Amazon Alexa, and SmartThings, and the best models support adaptive learning that anticipates how long the system needs to run to reach target temperature at your scheduled time.
Modern control systems can also integrate outdoor temperature inputs, meaning the system runs harder on very cold mornings and less on mild days without manual adjustment. The ENERGY STAR program (administered by the EPA) notes that properly programmed smart thermostats reduce heating energy consumption by an average of 10 to 12 percent annually. Reader question: do you need a dedicated circuit for the mat? Yes, per NEC requirements a dedicated GFCI-protected 20-amp circuit is standard for most residential mat installations, and the electrician should size the circuit for the mat's full wattage with a safety margin.
Compatibility, Warranties, and What to Ask Suppliers
Not every tile and mat combination performs well. Porcelain and ceramic tile transfer heat efficiently and are the standard specification. Natural stone (slate, travertine, granite) also works well. Engineered hardwood over mats works with carefully controlled temperature limits. Luxury vinyl plank (LVP) generally caps at 85 degrees Fahrenheit per manufacturer warranty, which limits maximum comfort. Solid hardwood over electric mats is not recommended by most manufacturers.
Warranty coverage is an important differentiator. Reputable mat manufacturers offer 25-year to lifetime warranties on the heating element itself, with some brands guaranteeing free replacement including installation labor in the event of element failure. Ask for the warranty terms in writing and verify the manufacturer's history: a 25-year warranty from a company that has only existed for 5 years is not the same as a 25-year warranty from a manufacturer with decades of installed-base track record. The National Association of Home Builders (NAHB) maintains a list of reputable building product manufacturers for reference. For broader installation planning resources, consult the National Association of Home Builders.
Conclusion
An electric heated floor mat under entryway tile is one of the highest-satisfaction home upgrades available at its price point. For roughly $10 to $15 per square foot installed, added to the base tile installation, you convert the single coldest surface in a cold-climate home into a welcoming 85-degree landing zone that greets you after every winter errand and every walk in from a frozen car. Combined with a quality tile specification, a programmable smart thermostat, and proper NEC-compliant electrical work, the system operates reliably for decades on pennies per day.
The critical execution details are correct sizing (cover only the walking footprint, not fixed-furniture zones), proper installation sequencing (backer board, mat, sensor probe, mortar, tile, in that order, with resistance testing at three stages), thermostat selection (smart programmable with adaptive learning is the sweet spot), and confirmed compatibility with your chosen tile and adjacent flooring materials. Cut corners on any of these and you create either a discomfort problem or a repair problem that is far more expensive to solve after the fact.
For homeowners in climates with real winters, a heated entryway floor is no longer a luxury indulgence; it is a rational infrastructure investment that pays dividends in comfort every single cold-weather day. Pair it with a properly specified tile (porcelain for maximum durability, slate for natural character, or wood-look porcelain for warmth and style), a layered walk-off mat sequence, and thoughtful lighting, and you will have built the single most pleasant room-entry experience in the entire house.
Ready to plan your own heated floor installation? Schedule a consultation with a licensed electrician and a certified tile installer together before you finalize your tile purchase, so wattage, circuit capacity, and mat layout can all be optimized against your actual floor plan and daily routine.
One of the most important design decisions in a heated-floor system is where the thermostat physically lives on the wall. Placing the thermostat on an interior wall away from direct sunlight and away from heat-producing fixtures gives the wall-mounted ambient sensor (if the unit has one) an accurate read on room conditions. Placing it near an exterior door or under an HVAC supply register produces erratic cycling. The floor probe sensor, by contrast, should be routed to a predictable, reachable point between tile joints so that it can be replaced if it ever fails; manufacturers typically supply a conduit for exactly this purpose. Discuss sensor routing with your installer before mortar goes down.
Retrofitting an existing tile floor with heated mats is technically possible but economically rarely sensible. The project requires removing the tile, installing the mat over the existing substrate (or replacing the substrate if required), and re-tiling. Depending on tile value and labor rates, retrofits run $25 to $45 per square foot, compared with roughly $10 to $15 per square foot when the mat is installed as part of a fresh tile installation. The takeaway: if you are doing any tile work anyway, add the mat; if your tile is in perfect condition, budget a different comfort solution (a high-quality area rug over the cold zone, for instance) rather than destroying a functional floor.
For the adventurous DIY homeowner, some components of a mat install are accessible: removing old tile, placing the backer board, and laying out the mat are all doable with modest skill. The components that require professional execution are the electrical power connection (both for safety and for code compliance under the National Electrical Code) and the final tile installation if slate or large-format stone is involved. A common cost-effective split is DIY demolition and substrate prep, with a licensed electrician handling the 20-amp dedicated circuit and a certified tile installer completing the mat-mortar-tile stack. Document everything with photographs for future reference, particularly the mat layout, because future repair or remodel work will need to know exactly where the cable runs.
A final consideration is backup and reliability. Modern heating mats are extremely reliable, but a cable failure after installation is disruptive to repair. Purchase from manufacturers with genuine warranty service, keep warranty documentation filed, and consider installing a redundant secondary floor sensor probe during the original work (manufacturers often supply two for exactly this purpose). A backup sensor is cheap insurance against a decade-out failure that would otherwise require tile removal to replace. Ask specifically about this during the installation planning conversation; reputable installers recommend it automatically, and budget installers often skip it to shave costs.
More Articles You May Like


Comments
Post a Comment