Butcher Block Bathroom Vanity Tops: Sealing and Maintenance Tips
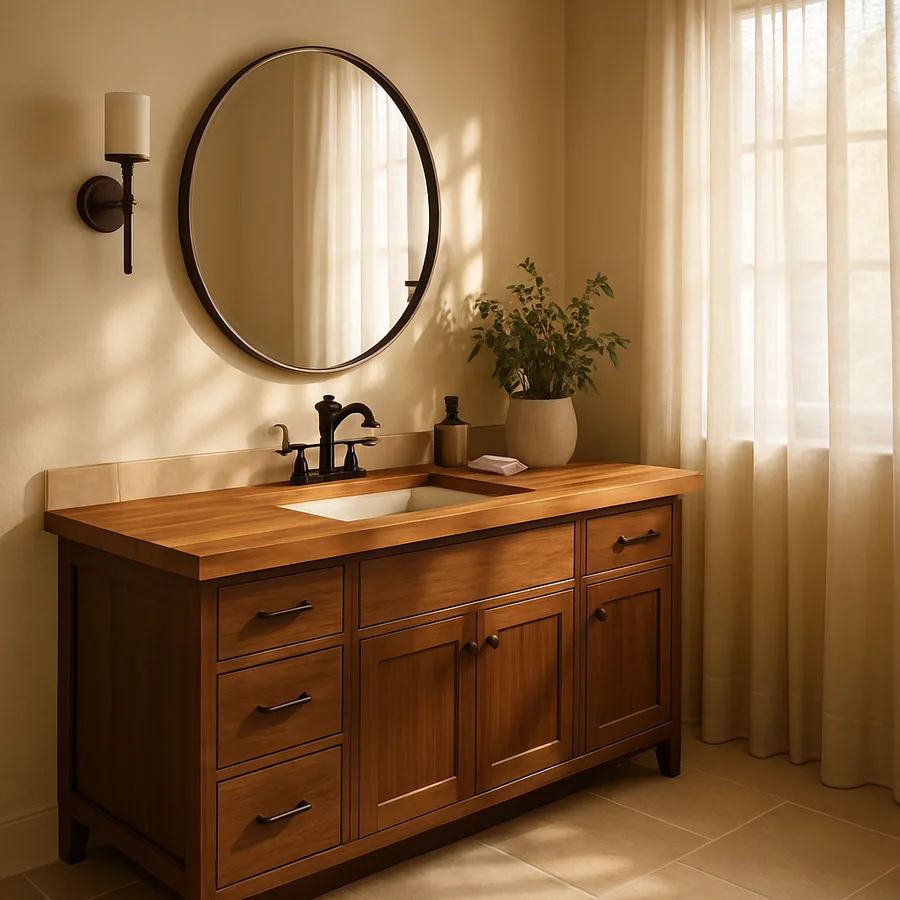
Butcher block is an unlikely hero in the bathroom. The material built its reputation on kitchen counters and prep stations, where wood cells close to form a surface that shrugs off knife work and hot pans. Bring that same slab into a splash zone of toothpaste, perfume and hair dye and you create an entirely different challenge: water is the enemy, and wood is hungry for it. Done correctly, a butcher block vanity top delivers warmth and tactile character that no synthetic surface can match. Done badly, it warps, darkens and harbors mildew within a single season.
The difference between those two outcomes comes down almost entirely to sealing and maintenance. This guide walks through both in detail, drawing on recommendations from the Hardwood Manufacturers Association, the Architectural Woodwork Institute and seasoned bathroom fabricators who have specified wood tops for a decade or more. Whether you already have a block installed or are planning a renovation, the protocols below are the difference between a surface that looks better with age and one that fails within two years.
Choosing the Right Wood for a Wet Room
Not every butcher block belongs in a bathroom. Species selection matters enormously because wood density, grain structure and natural oil content all influence how the slab reacts to humidity. Dense hardwoods with tight grain resist water penetration far better than softer species, and tropical hardwoods with natural oils perform best of all. The Hardwood Manufacturers Association publishes density ratings on the Janka scale, and most bathroom specialists recommend staying above 1,200 pounds-force.
Hard maple (Janka 1,450), white oak (1,360) and walnut (1,010, just under the threshold but widely used) are the dominant species in bathroom vanities. Teak and iroko push even higher and bring natural oil content that repels water aggressively, though both carry premium pricing and sustainability questions depending on sourcing. Check whether the supplier offers FSC-certified material through the Forest Stewardship Council, especially if you are specifying tropical species. End-grain construction, where wood cubes are stood on end and glued, is traditional for kitchen chopping blocks but less common in bathrooms; edge-grain and face-grain slabs are easier to seal uniformly.
Understanding Sealer Categories
Sealer choice is the single most consequential decision for a wood vanity top. The market divides cleanly into three categories, and confusing them is the most common reason these tops fail. Food-safe mineral oil and beeswax blends dominate kitchen applications because they are nontoxic and easy to renew, but they are not moisture barriers. Water beads initially and then soaks in once the oil saturation fades.
The second category covers penetrating hardening oils such as tung oil and pure linseed oil, which chemically cure inside the wood to create water resistance. These finishes deepen the grain, develop a soft patina and can be spot-repaired without sanding the whole top. The third category is film-forming finishes: marine spar urethane, waterborne polyurethane and two-part epoxies. These sit on top of the wood and deliver the highest moisture resistance but completely change the tactile feel from wood to plastic. For bathrooms, fabricators increasingly favor hardening oils with occasional topical wax, or a conversion varnish spray finish applied at the shop. Which approach suits your project?
The Initial Seal: Doing It Right the First Time
Initial sealing is not a one-coat job. Bare wood absorbs finish unevenly, and end-grain areas drink up three to four times as much as face-grain. Plan on at least four coats with light sanding between them, and allow full manufacturer-recommended cure time between applications. Rushing this step is the number one preventable mistake in butcher block installations.
Sand the top with progressively finer grits, ending at 220 for oils or 320 for varnishes, and vacuum thoroughly. Apply the first coat generously, let it soak for 15 to 20 minutes, and wipe off any excess that has not been absorbed. Subsequent coats use less material because the surface is saturating. Pay extra attention to the sink cutout edges, faucet holes and any spot within four inches of the rim; these are the areas that see the most water and fail first. The Architectural Woodwork Institute quality standards specify that sealed wood tops intended for wet applications receive a minimum six-coat buildup with full cross-grain sealing of all edges, and you should hold your fabricator to that benchmark.
Daily Habits That Extend Lifespan
Wood vanities reward attentive owners. The habits required are not demanding, but they do need to become automatic. Wipe standing water within a few minutes, not hours. Lift toiletry bottles weekly to dry the ring underneath, because trapped moisture under a shampoo pump will darken and eventually swell the wood below. Use a soap dish with drainage rather than letting bar soap sit directly on the surface.
Cleaning should stay gentle. A damp microfiber with a drop of mild dish soap handles daily grime, and the American Society of Interior Designers (ASID) specifically warns against ammonia-based cleaners, bleach and anything containing citrus solvents on sealed wood surfaces. Vinegar solutions are a mixed bag: mild dilution is fine on hardening oil finishes but can fog film finishes over time. If a guest leaves a makeup stain or a drop of nail polish, address it immediately with a cloth slightly dampened in mineral spirits and reoil the spot afterward. Small interventions prevent large repairs.
Humidity control is the quiet factor behind most long-lasting wood vanity installations. Bathroom relative humidity routinely spikes above 70 percent during and after showering, then drops back toward ambient over several hours. Wood absorbs moisture during those spikes and releases it as the room dries, expanding and contracting across the grain each time. Over hundreds of cycles, repeated movement stresses finishes and seams. A bathroom exhaust fan rated for the room's cubic footage and running at least 20 minutes after each shower dramatically reduces this stress, and the ASHRAE standard 62.2 provides the ventilation sizing guidelines most building codes reference. The investment in a quiet, properly sized fan is easily the cheapest insurance your wood top will ever get.
Seasonal shifts matter too, particularly in climates with dry winters. Forced-air heating can drop indoor humidity below 25 percent, which pulls moisture out of wood counters and can open hairline cracks at glue joints. A simple room hygrometer lets you track the reading, and running a small humidifier in the bathroom during winter keeps the top in its happy zone of roughly 40 to 55 percent relative humidity. According to data compiled by NAHB researchers on wood dimensional stability, the difference between a stable humidity environment and an uncontrolled one correlates directly with finish lifespan, sometimes doubling the years between recoats. If you already invested in a premium wood top, the incremental cost of humidity monitoring is trivial next to the protection it provides.
Reoiling and Scheduled Maintenance
Hardening oil finishes need refreshing, and the signal is visual: water stops beading and begins to absorb, or the surface starts looking dry and hazy. In a primary bathroom, expect to reoil every three to four months in the first year, then roughly twice a year once the finish has built up. Lightly scuff the surface with a white nonwoven pad, wipe clean, apply a thin coat of the same oil used originally, and buff off the excess after 20 minutes. The entire task takes under 30 minutes.
Film finishes are lower touch but higher stakes when they do fail. A well-applied marine spar urethane can go three to five years before noticeable wear, but once it cracks near a seam or sink edge, water gets trapped between the film and the wood and accelerates damage. According to finish-industry data compiled by the NAHB, properly maintained hardening oil vanities last 15 to 20 years in typical bathroom use, while neglected tops often require replacement within five. That spread is almost entirely a maintenance story, not a material story.
Repairing Common Damage
One underrated advantage of wood is that almost everything is repairable. Shallow scratches often disappear with a light sanding and a reoil. Deeper gouges can be filled with a tinted wood epoxy, sanded flush and refinished. Water stains that have penetrated the finish but not deep into the wood respond well to oxalic acid solutions, sometimes sold as wood bleach, followed by a fresh oil coat.
Mildew or a musty odor indicates that water has reached unsealed wood, usually through a compromised sink perimeter. This requires more serious intervention: remove the sink, inspect the cutout, sand back to sound wood, treat with a borate solution to kill fungal growth, and rebuild the finish. The Natural Stone Institute may not publish wood guidelines, but the Forest Products Laboratory of the USDA has extensive research on wood moisture management that fabricators reference for exactly these repairs. Before you conclude that a top is beyond saving, get a second opinion from a craftsman who works in wood daily, because repair is almost always cheaper than replacement.
Professional refinishing is worth mentioning as an option before you conclude a wood top is a total loss. Several regional shops specialize in on-site restoration of water-damaged or heavily worn butcher block, and a full refinish typically costs 30 to 50 percent of a replacement. The process involves removing the top, sanding back to bare wood at a cabinet shop, treating any fungal or mineral staining, rebuilding the sealant stack and reinstalling. Turnaround is usually two to three weeks. The Architectural Woodwork Institute maintains a member directory of certified shops, and cross-referencing that list with local reviews surfaces the craftsmen who genuinely do this work well.
Conclusion
A butcher block vanity top is a committed relationship rather than an installation. The material pays back the attention you give it with a surface that genuinely improves over years of use, developing a patina and character that factory-finished materials cannot duplicate. The warmth of real wood in a bathroom, especially paired with matte black or aged brass hardware, creates an atmosphere that feels restorative rather than utilitarian.
The entry cost of that experience is developing good maintenance habits and choosing the right species, finish and fabricator at the outset. Most failures trace back to a shortcut somewhere in the initial sealing or a homeowner who assumed the surface would take care of itself. Neither outcome is inevitable. With four coats of quality hardening oil, a dense hardwood species, twice-yearly reoiling and prompt attention to standing water, these tops routinely survive two decades of daily use.
Before your project starts, request written species specifications, finish details and edge sealing confirmation from your fabricator. Get the AWI quality tier in writing. And once the top is installed, set a calendar reminder for the first reoiling at 90 days; that single habit catches most problems before they start.
Thinking about a wood vanity for your next bathroom renovation? Grab our printable sealing-and-care schedule, share it with your contractor, and start your project with the confidence that comes from a well-briefed team. Your future patina is waiting.
More Articles You May Like


Comments
Post a Comment