Appliance Garage Cabinets That Hide Countertop Clutter Neatly
Every kitchen accumulates a collection of small countertop appliances that are used frequently enough to justify permanent counter space but contribute nothing to the room's visual appeal. The toaster, the coffee maker, the stand mixer, the blender, and the electric kettle gradually colonize the countertop until the beautiful stone or quartz surface that anchored the kitchen's design is barely visible beneath a tangle of cords, crumb trays, and mismatched finishes. The appliance garage cabinet is the architectural answer to this problem, a dedicated enclosure built into the cabinetry that stores small appliances behind a closeable door, keeping them accessible for daily use while completely hidden from view when not in operation. According to a kitchen planning survey published by Houzz, 62 percent of homeowners who recently completed a kitchen renovation cited countertop clutter as their single greatest source of daily frustration, and appliance garages ranked among the top five most-requested storage features in new kitchen designs. This guide covers the design, construction, and practical planning of appliance garages that genuinely transform how a kitchen looks and functions.
What Defines an Appliance Garage and Why It Works
An appliance garage is a cabinet, typically positioned on the countertop between the upper cabinets and the lower counter surface, that provides an enclosed space where small appliances live permanently plugged in and ready to use. The front of the enclosure features a door, which can be a tambour roll-up, a lift-up flap, a pocket door, or a traditional hinged panel, that opens when the appliance is needed and closes when it is not. The appliance sits on the countertop surface inside the garage, at the same working height as the rest of the counter, so using it requires no lifting, unpacking, or cord management. When the door closes, the appliance, its cord, and any accessories disappear completely.
The concept works because it addresses the fundamental tension between accessibility and aesthetics that defines countertop appliance storage. Storing a stand mixer in a lower cabinet keeps the countertop clean but requires lifting a 25-pound machine onto the counter every time you want to use it, a task that discourages use and causes back strain. Leaving it on the counter keeps it accessible but consumes valuable workspace and introduces visual clutter. The appliance garage resolves this tension entirely: the mixer stays at counter height, plugged in, with its attachments nearby, but behind a closed door it contributes nothing to the room's visual noise. The National Kitchen and Bath Association classifies the appliance garage as a Tier 1 convenience feature, placing it in the same category as pull-out trash bins and lazy Susans for its impact on daily kitchen usability.
Appliance garages also protect the items they contain. Small appliances stored on open countertops accumulate cooking grease, dust, and moisture from steam, all of which degrade their appearance and can affect performance over time. A closed garage shields these appliances from ambient kitchen contamination while also protecting the countertop surface beneath them from the heat, moisture, and scratches that appliances can inflict. For households with young children, the enclosed space adds a layer of safety by removing access to hot toaster surfaces, sharp blender blades, and dangling cords that an open countertop cannot provide.
How many appliances do you use at least three times per week? That number, rather than the total count of appliances you own, should determine how many appliance garages your kitchen needs and how large each one should be. Appliances used less frequently are better stored in pantry cabinets or lower cabinets with pull-out shelves, reserving the premium garage space for the daily drivers that benefit most from instant, cord-free access. Most households find that two to four appliances meet the frequency threshold, which translates to one or two garage enclosures in a standard kitchen layout.
Door Mechanisms and Their Design Implications
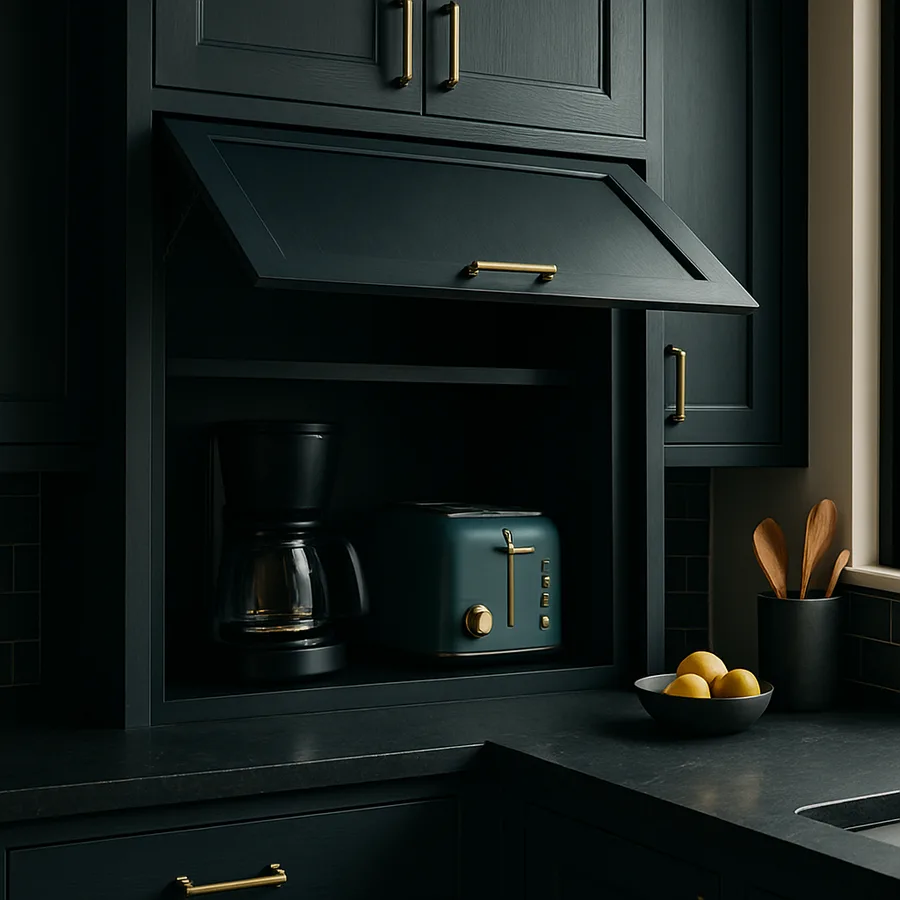
The door is the defining feature of an appliance garage, and the mechanism chosen affects the enclosure's appearance, its ease of use, and the amount of clearance required for operation. Tambour doors, which consist of thin horizontal slats bonded to a flexible backing that rolls up into a track mounted inside the cabinet, are the classic appliance garage door and remain popular for good reason. They require no swing clearance in front of or beside the cabinet, they retract completely out of sight when open, and they produce a distinctive ribbed texture that can serve as a design accent. Modern tambour doors are available in wood, painted MDF, and even stainless steel, with track systems that operate smoothly and quietly when properly installed.
Lift-up doors, sometimes called flipper doors, hinge at the top of the opening and swing upward, typically assisted by gas struts or spring-loaded hinges that hold the door in the open position. This mechanism provides a completely clear opening with no door components remaining in the workspace, which is advantageous for tall appliances like stand mixers with bowl-lift mechanisms. The trade-off is that the open door occupies space above the counter that may interfere with upper cabinet doors or range hoods, and the gas struts have a finite lifespan that eventually requires replacement. Blum and Hettich, two leading European hardware manufacturers, produce lift mechanisms specifically designed for appliance garage applications, with adjustable spring tension that accommodates panels of various weights.
Pocket doors, which slide horizontally into slots on either side of the opening, offer a contemporary alternative that keeps the door completely out of the way without occupying vertical space above the counter. This mechanism works best with wider garages that have sufficient cabinet depth on each side to house the retracted door panels. A double pocket door, with panels sliding in opposite directions, can span openings of 30 inches or more while maintaining smooth operation. The hardware for pocket door systems is more complex and costly than tambour or lift-up mechanisms, but the clean, flush-front appearance when closed and the unobstructed opening when in use make pocket doors the preferred choice in many high-end kitchen designs.
Traditional hinged doors, whether single or bifold, are the simplest and least expensive option. A single hinged door works well for narrow garages dedicated to a single appliance, while bifold doors allow a wider opening without the full swing arc of a single panel. The disadvantage of hinged doors is that they remain open and protruding during appliance use, which can interfere with adjacent workspace and create a visual reminder that the door exists. For kitchens where the appliance garage is used briefly and closed promptly, such as a toaster garage opened only during breakfast, this limitation is negligible. For garages that stay open throughout meal preparation, a retractable mechanism is more practical.
Sizing, Electrical Planning, and Interior Layout
Correct sizing is the foundation of an appliance garage that actually works in daily life rather than becoming an awkward storage cubby. The interior dimensions must accommodate not only the appliance body but also the cord, any heat dissipation clearance, and enough workspace to operate the appliance without removing it from the enclosure. A standard countertop coffee maker requires a garage opening at least 14 inches wide, 14 inches deep, and 18 inches tall. A stand mixer needs 12 inches of width, 14 inches of depth, and at least 17 inches of height to clear the tilt-head mechanism. Measuring each intended appliance in its operating configuration, not its stored footprint, prevents the frustrating discovery that the garage is too small to use the appliance without extracting it.
Electrical outlets inside the garage are not optional; they are the feature that makes the garage concept viable. Each appliance garage should contain at least one duplex outlet, and garages intended for two or more appliances should have two outlets or a quad-box configuration. The outlets should be positioned at the back wall of the enclosure, 4 to 6 inches above the countertop surface, so that cords drape naturally behind the appliance rather than draping across the counter or bunching at the base. All garage outlets must be GFCI-protected, as required by the National Electrical Code for any receptacle serving a kitchen countertop surface. Planning the outlet locations during the rough-in electrical phase, before drywall and cabinetry are installed, avoids the costly and disruptive process of retrofitting outlets into a finished cabinet.
Ventilation is a critical but frequently overlooked consideration, particularly for heat-generating appliances. A toaster, a toaster oven, or a coffee maker produces significant heat during operation, and an enclosed garage without ventilation traps that heat, potentially damaging the cabinet interior, discoloring the enclosure walls, and accelerating wear on the appliance itself. Solutions include leaving the back of the garage open to the wall cavity, installing a small ventilation grille in the garage's top panel, or simply keeping the door open during appliance operation and for several minutes afterward. The National Kitchen and Bath Association guidelines recommend a minimum of 2 inches of clearance above any heat-producing appliance within an enclosed cabinet, plus either an open back or active ventilation.
The interior finish of the garage matters more than many homeowners realize. The countertop surface extends into the garage, providing a durable, heat-resistant, and easy-to-clean base. The back and side walls, however, are often left as unfinished cabinet box material, which absorbs spills, stains from coffee drips, and crumb accumulation that is difficult to clean. Finishing the interior walls with a wipeable surface, whether painted melamine, a laminate panel, or even a sheet of tempered glass, transforms maintenance from a frustrating chore into a quick wipe-down. Some designers tile the garage interior to match the kitchen backsplash, creating a visual connection that makes the garage feel like an intentional architectural detail rather than a utilitarian cubby.
Positioning Within the Kitchen Layout
Where the appliance garage sits within the kitchen plan determines how naturally it integrates into daily cooking and preparation workflows. The most common and effective position is at the end of a countertop run, typically in a corner or against a wall where the garage occupies space that would otherwise be underutilized. Corner garages transform the notoriously difficult corner countertop zone, too deep to reach comfortably and too awkward for food preparation, into productive storage that makes the most of otherwise wasted real estate. The garage door wraps the corner, and the interior space, which extends deeper than a standard base cabinet, easily accommodates large appliances like stand mixers and bread machines.
A second effective position is the countertop zone between the refrigerator and the primary prep area, creating a breakfast station where the coffee maker, toaster, and electric kettle live behind a single garage door. This placement keeps morning routine appliances clustered together and separate from the main cooking zone, preventing the congestion that occurs when two people try to prepare breakfast and dinner prep simultaneously. Positioning the breakfast garage near the refrigerator also minimizes travel distance for milk, butter, bread, and other items that shuttle between cold storage and the morning appliances.
Island-mounted appliance garages are less common but increasingly appear in large kitchen designs where the island serves as a secondary work zone. An island garage typically rises from the back edge of the island countertop, facing away from the seating side, so that the appliances are accessible to the cook but invisible to anyone seated at the island bar. This configuration requires careful planning of the island's electrical supply, which must include dedicated circuits for the garage outlets routed through the floor slab or subfloor. The structural implications make island garages a feature best planned during new construction or a full kitchen gut renovation rather than as an addition to an existing island.
How does the garage position interact with your upper cabinet layout? An appliance garage that conflicts with the upper cabinets, preventing their doors from opening fully or blocking sightlines to items stored inside, creates a daily annoyance that erodes the benefit of the hidden appliance storage. Before finalizing the garage location, confirm that all adjacent upper cabinet doors open fully, that the garage door mechanism does not collide with the range hood or microwave housing, and that the garage does not create a visual dead zone where the backsplash is interrupted without a coherent design rationale. A mock-up using cardboard boxes cut to the garage dimensions, temporarily placed on the countertop, reveals spatial conflicts that floor plans cannot communicate.
Style Integration and Custom Design Options
The exterior of the appliance garage should integrate with the surrounding cabinetry as seamlessly as a paneled appliance, using the same door style, finish, and hardware to maintain the kitchen's design language. When closed, the garage should be virtually indistinguishable from the adjacent cabinets, appearing as just another section of the cabinetry wall. Achieving this requires matching the panel profile exactly, aligning the reveal gaps with the gaps between neighboring doors, and mounting hardware at the same height and spacing as the rest of the kitchen. The tambour door is the one exception to this matching rule, as its ribbed texture is inherently different from a flat or profiled panel, but this difference can be leveraged as a deliberate design accent when the tambour material and color match the cabinetry palette.
Interior lighting elevates the appliance garage from a practical cubby to a polished design feature. LED strip lights mounted along the underside of the garage top illuminate the interior when the door opens, making it easy to see controls, read measurement markings, and monitor brewing progress. Battery-operated puck lights with motion sensors offer a retrofit solution for existing garages, while hardwired LED strips connected to a door-activated switch provide the most seamless experience. The light color temperature should match the kitchen's general under-cabinet lighting, typically 2700K to 3000K warm white, to maintain visual consistency when the garage is open and the interior is visible.
Custom inserts and organizers maximize the utility of the garage interior. A pull-out shelf or a mixer lift, a spring-loaded platform that raises a heavy appliance from a lower stored position to counter height, transforms the garage into a professional-grade workstation. Shelf dividers create dedicated zones for each appliance and its accessories. A small drawer or tray at the base of the garage holds coffee pods, tea bags, or spice packets associated with the appliances above. The Rev-A-Shelf company and Hafele both manufacture appliance garage organizer systems that integrate with standard cabinet construction, offering off-the-shelf solutions for common configurations.
Visit a kitchen showroom that features working appliance garage displays before finalizing your design, and physically operate each door mechanism to assess noise level, effort required, and clearance demands in a real spatial context. The difference between a tambour door that whispers and one that rattles, between a lift mechanism that holds firmly and one that drifts slowly closed, and between a pocket door that glides and one that sticks, is impossible to evaluate from a catalog page. Hands-on experience with the hardware informs a confident decision that delivers satisfaction over years of daily use. This investment of an afternoon at a showroom prevents the buyer's remorse that follows a choice made purely on aesthetics or specification sheets.
Conclusion
Appliance garage cabinets address one of the most persistent practical and aesthetic challenges in kitchen design by giving small countertop appliances a permanent, enclosed home that keeps them accessible for daily use while completely hidden from view. The concept is simple, but the execution involves thoughtful decisions about door mechanisms, interior dimensions, electrical planning, ventilation, and position within the kitchen layout. Each of these decisions affects how naturally the garage integrates into daily cooking routines and how effectively it delivers on its promise of clutter-free countertops.
The door mechanism, whether tambour, lift-up, pocket, or hinged, is the feature that defines the garage's personality and determines its spatial requirements. Sizing the interior to accommodate appliances in their operating configuration, not just their stored footprint, prevents the frustrating compromise of extracting appliances to use them. Properly planned electrical outlets and ventilation make the garage a functional workstation rather than a decorative cubby, and interior finishes that resist moisture and staining simplify the maintenance that keeps the enclosure clean and attractive over time.
Positioning the garage at the end of a countertop run, in a corner, or as part of a dedicated breakfast station maximizes its integration into the kitchen workflow, while style-matched exteriors ensure the closed garage is indistinguishable from the surrounding cabinetry. For kitchens where countertop clutter is a daily frustration, the appliance garage is not merely a storage solution but a fundamental improvement in how the room looks, feels, and functions throughout every hour of use.
More Articles You May Like


Comments
Post a Comment