Hydroponic Herb Garden Counter Top Setup Beginners
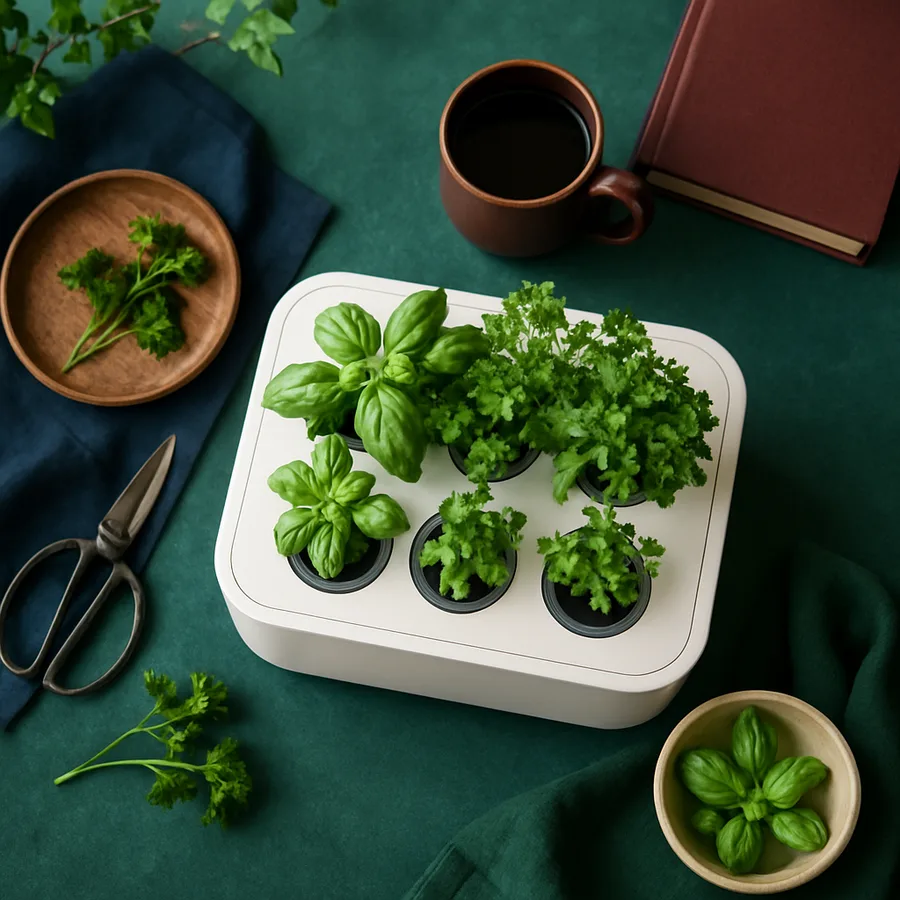
The first time I grew basil hydroponically on a kitchen counter, it shot up so fast I thought something was wrong. Three weeks from seed to a usable harvest. No soil, no pests, no pots dropping dirt onto the cutting board when I refilled them. That experience converted me, and the small home countertop system I started with is the same one I recommend now when friends ask where to begin.
This guide walks through the actual mechanics of setting up a beginner countertop hydroponic herb garden: which type of system to pick, what to grow first, how to mix nutrients without overthinking it, and where most people fail in the first month. I am not going to sell you on hydroponics. I am going to give you the operating manual so you can decide if it fits how you cook.
What "Hydroponics" Actually Means For A Countertop
Hydroponics is the practice of growing plants without soil, with their roots suspended in or regularly exposed to a nutrient-rich water solution. The roots take up dissolved minerals directly, which is why hydroponic plants grow faster than their soil counterparts - they spend less energy hunting for nutrients and more energy producing leaves.
On a countertop, this almost always means one of three small-scale systems. Deep water culture (DWC) suspends roots in oxygenated water. Wick systems draw water up to the root zone through an absorbent material. Active recirculating systems, like the all-in-one units sold by Click and Grow, AeroGarden, and Gardyn, run pumps that move water past the roots on a timer. The third category is what most beginners actually buy, because it removes the math.
According to a 2024 market report from Grand View Research, the global indoor hydroponics market was valued at over $1.5 billion and is growing at roughly 11 percent annually. The reason is not just food production. It is convenience. A countertop herb garden gives you fresh basil in February without a 20-mile drive, and that math wins for a lot of households.
There is also a sustainability angle worth knowing. According to research published by the National Aeronautics and Space Administration on controlled environment agriculture, hydroponic systems use roughly 90 percent less water than soil-based growing for the same yield, because water in a closed system gets recirculated rather than absorbed and lost to soil and evaporation. That ratio holds even at countertop scale. A small herb system might use a gallon of water over six weeks to produce the same harvest a potted plant would take eight gallons to grow.
Picking Your First System: All-In-One Versus DIY
For absolute beginners, I almost always recommend an all-in-one unit with built-in lights and a self-priming pump. Yes, they cost more upfront. The AeroGarden Harvest runs around $100 and a Click and Grow Smart Garden 3 is in the same range. But they handle three things that DIY systems get wrong on the first try: light intensity, pump cycling, and nutrient dosing.
If you already grow soil houseplants successfully and want to save money, a DIY DWC setup costs about $35. You need a 5-gallon opaque tote, an aquarium air pump, an air stone, a few net pots, some hydroton clay pebbles, and a basic LED grow light on a timer. The University of Maryland Extension has a clear beginner guide to DWC mechanics if you want to go this route - and you can absolutely go this route. The learning curve is just steeper.
The question to ask yourself is honest. Do you want to grow plants, or do you want to learn hydroponics? If it is the first, buy the all-in-one. If it is the second, build the DWC. Both are valid. Have you ever bought a hobby kit and never opened it? Pick the option you will actually use.
What To Grow First (And What To Avoid)
Beginner success in hydroponics depends heavily on plant choice. Some herbs grow like weeds in water. Others struggle and make you think you did something wrong.
The reliable starters are basil (Ocimum basilicum), lettuce (technically not an herb but worth mentioning), mint (Mentha species), chives (Allium schoenoprasum), parsley (Petroselinum crispum), and cilantro (Coriandrum sativum). Basil in particular is almost foolproof and will give you a harvestable plant in three to four weeks. Mint is so easy it becomes a nuisance - keep it in its own pod so it does not crowd out neighbors.
The harder ones, which you should skip for now, are rosemary (Salvia rosmarinus), sage (Salvia officinalis), oregano (Origanum vulgare), and thyme (Thymus vulgaris). These Mediterranean herbs evolved in dry, rocky soil and tend to develop root rot or stunted growth in constantly-wet hydroponic conditions. They can be grown hydroponically, but the technique requires aerated systems and careful nutrient management. Start with basil and circle back to rosemary once you have a season under your belt.
One more consideration on plant choice: matched maturity rates. Many beginner systems have three or six pods, all planted at the same time, all expected to harvest at the same time. The problem is that basil reaches harvest in three to four weeks while parsley needs six to eight, and cilantro bolts to flower in about four weeks regardless. If you plant all six pods on day one with a mix of species, you will be unable to coordinate harvests and replacements. The cleaner strategy is to stagger plantings - three pods on day one, three pods on day fourteen - so you have continuous production rather than feast-or-famine cycles.
Another underrated choice for countertop hydroponics is microgreens. While not herbs in the classical sense, microgreens (immature seedlings of plants like radish, broccoli, sunflower, and pea) grow in seven to fourteen days from seed to harvest, deliver high nutrient density, and can be grown in extremely shallow hydroponic trays. If you want fast results and tangible food production, microgreens beat herbs on every metric except culinary versatility.
Lighting: The Variable That Trips Up Most Beginners
If you bought an all-in-one system, the light situation is solved for you. Skip ahead. If you are building DIY, this is where I see the most early failures.
Herbs need 14 to 16 hours of light per day to thrive indoors. Natural light through a kitchen window, even a south-facing one, is almost never enough during winter at latitudes above the 35th parallel. The University of Minnesota Extension recommends that indoor herb gardens supplement with full-spectrum LED grow lights at a distance of 6 to 12 inches above the plant canopy.
The good news is that grow light technology has gotten cheap. A basic 20-watt full-spectrum LED panel runs $25 to $35 on most retailers. Set it on a timer for 14 hours per day. Adjust the height as plants grow so the light stays 6 to 12 inches above the tallest leaves. If you skip this step or use a regular desk lamp, your basil will get leggy, pale, and weak within two weeks. There is no fixing it after the fact - you just start over.
The Nutrient Question
This is what scares most beginners away from DIY hydroponics, and it should not. Hydroponic nutrients are pre-formulated solutions that contain everything plants get from soil - nitrogen, phosphorus, potassium, plus calcium, magnesium, and trace elements. You buy a two-part liquid concentrate (the "A and B" bottles), measure a few milliliters into your reservoir water, and that is the entire process.
For beginners, General Hydroponics FloraGro and FloraBloom are the standard recommendation. Read the bottle, follow the dilution rates for "leafy greens" or "herbs," and start at half-strength for the first two weeks while seedlings establish. A 32-ounce bottle costs about $15 and will last you a year or more on a countertop system.
There is also a meaningful distinction between mineral nutrients (synthetic) and organic nutrients (kelp-based, fish-emulsion-based, etc.). Mineral nutrients are predictable, clean-smelling, and what most beginner all-in-one systems are designed to work with. Organic nutrients can clog pumps, smell stronger, and require more frequent reservoir changes - but they are appealing to growers who want to maintain organic principles. For your first system, stick with mineral nutrients. They are easier to dose, easier on equipment, and produce equally edible herbs.
You should also pay attention to two numbers: pH and EC (electrical conductivity). Herbs prefer a pH between 5.5 and 6.5. EC for herbs sits around 1.0 to 1.6 mS/cm. A combo pH and EC meter costs $20 to $40 and pays for itself quickly. The Cornell University Controlled Environment Agriculture program publishes detailed nutrient charts if you want to go deeper, but for countertop herbs, the meter readings plus the bottle directions get you 95 percent of the way there.
Setting Up: The First Two Hours
Whether all-in-one or DIY, the physical setup takes about an hour, plus another hour for the first nutrient and water cycle to stabilize. Here is the sequence.
Place your unit on a stable countertop near a power outlet, but away from direct sun (which can cook the water and breed algae) and away from the stove (steam plus electronics is bad). Pick a spot you walk past at least three times a day. Out-of-sight hydroponics get neglected fast. The corner of the kitchen island, the open shelf above the sink, the breakfast nook - these are the spots that work in real homes.
Fill the reservoir with filtered or dechlorinated water. Tap water sitting open for 24 hours works. So does standard household filtered water from a pitcher. Avoid distilled, which is too "pure" and lacks the calcium and magnesium that act as buffers. Add nutrients per the bottle. Check pH; adjust with pH Up or pH Down drops if needed. Place seed pods or net pots. Plug in the pump and light. Set the light timer for 14 hours on, 10 off.
Germination takes 5 to 10 days for most herbs. You will see roots reaching into the water within two weeks. From that point forward, the plants more or less take care of themselves. Top up the reservoir with fresh water (no extra nutrients) when the level drops by a third. Do a full reservoir change every two to three weeks.
Maintenance: What You Actually Have To Do
Honest answer: not much, but the small amount you have to do, you have to do consistently.
Weekly tasks include checking the water level, glancing at the plants for yellowing or wilting leaves, and pinching back basil so it bushes out instead of bolting to flower. Pinching matters more than people realize - basil that flowers stops producing usable leaves, and one missed pinch can end the productive life of a plant six weeks early.
Every two to three weeks, drain the reservoir completely, rinse it with a 10 percent bleach solution if you see any biofilm or algae, rinse with clean water, refill with fresh nutrient solution, and reset. The whole process takes about 15 minutes. If you skip it for two months, you will see algae growth, declining plant vigor, and potentially root disease.
Every harvest you cut the top third of basil and chives off and use it. Plants respond by branching out. A well-managed basil plant on a countertop hydroponic system will produce continuously for four to six months before it loses vigor and needs replacement. Are you the kind of cook who uses fresh herbs three times a week? If yes, this system will pay for itself in months. If you use them twice a year, it will not.
Harvest technique matters more than people realize. With basil, never strip leaves off a stem one by one - instead, cut the entire top of a stem just above a pair of side shoots. The plant will respond by sending new growth from both side shoots, doubling the productive branches. This is the "pinch above the node" rule. Done consistently for three months, a single basil plant can become a small bush with eight to twelve productive branches, all from one pod. Done incorrectly, the plant becomes a tall single stem that bolts to flower and stops producing.
Pest management on countertop hydroponics is usually simpler than soil gardening but not zero. The most common visitors are aphids, fungus gnats, and occasionally spider mites. Aphids on indoor hydroponic herbs usually arrive on a recently-purchased plant or by walking in through an open window. The University of Minnesota Extension recommends spraying with a dilute insecticidal soap or a stream of plain water to dislodge them, then repeating every three days for two weeks. Avoid neem oil on plants you intend to eat within a week of application. Fungus gnats indicate excess moisture in the growing medium and respond to letting the rockwool or coco coir dry slightly between irrigation cycles.
Common Beginner Mistakes And How To Avoid Them
I have watched a lot of friends start hydroponic herbs and quit within two months. The failures cluster into a small number of patterns. Knowing them in advance is most of the battle.
First, overcrowding. Beginners want six plants in a three-pod system. The roots compete, light cannot reach lower leaves, and everything suffers. Plant one herb per pod and respect the system's capacity. Second, ignoring the light schedule. Plants need consistent day-night cycles. Random "on when I think about it" lighting kills herbs faster than missed waterings. Set a timer and forget it.
Third, harvesting too early or too late. Wait until plants have at least six true leaves before the first harvest, and never take more than a third of the plant at once. Fourth, treating the reservoir as set-and-forget. Even great systems need a full water change every two to three weeks. Skipping this is the single most common cause of late-stage plant decline. Fifth, planting Mediterranean herbs as a beginner. We covered this - do not do it. Save rosemary for season two.
If you do these five things right, your countertop herb garden will outproduce anything you can grow in pots on a windowsill, with less mess and less ongoing cost than buying packaged fresh herbs at the grocery store.
The Takeaway
A countertop hydroponic herb garden is one of the genuinely good small investments in home food production. The startup cost is modest - $35 for DIY DWC or $100 for an all-in-one - and the payoff is fresh basil, mint, parsley, and chives within a month of plug-in. The system rewards consistency more than expertise. If you can remember to glance at it once a day and do a 15-minute reset every two weeks, you will succeed.
Start with one all-in-one unit and basil. Get one harvest under your belt. Then expand. Buying a whole vertical tower before you have grown a single leaf is the most common way people waste money on this hobby. Drop a comment below with which system you are eyeing, and I will tell you whether it is worth it. Your kitchen counter is the cheapest farm you will ever run - use the cheap part first before scaling up.
Authority references for further reading:
More Articles You May Like



Comments
Post a Comment