Electric Insert For Existing Wood Burning Fireplace
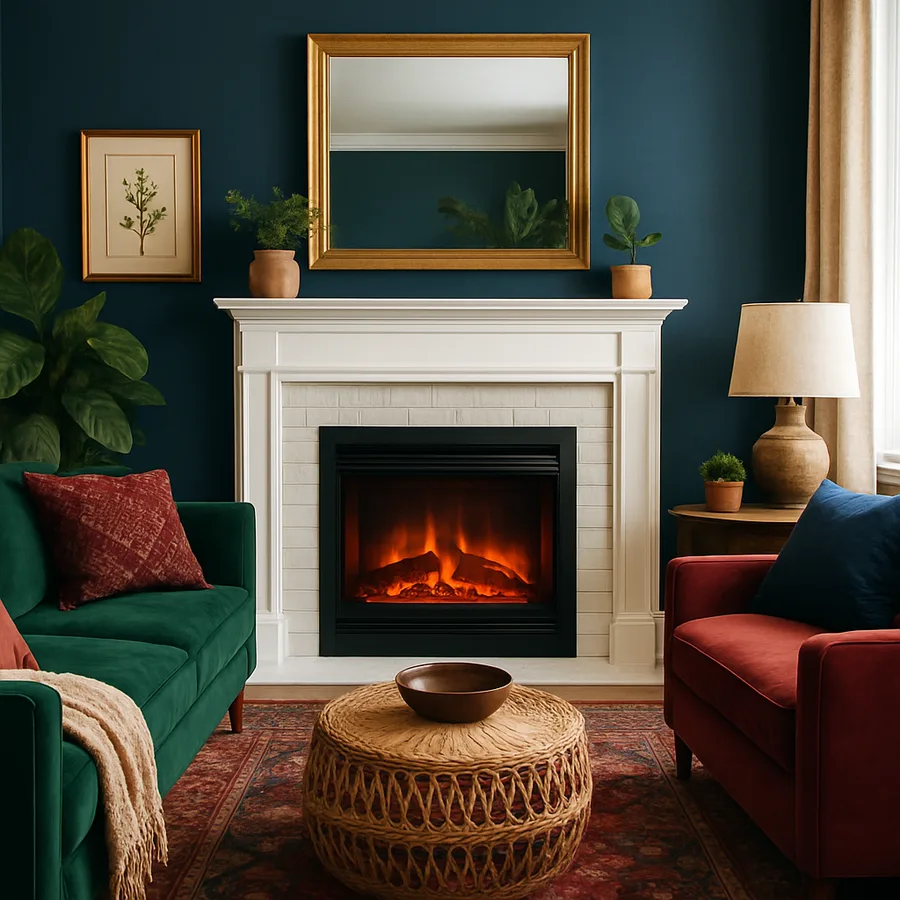
Converting a tired wood burning fireplace into a clean, push-button electric hearth is one of the most popular remodeling decisions homeowners are making right now. The reasons are easy to list: no chimney sweep, no firewood storage, no smoke complaints from the neighbors, no draft pulling conditioned air up the flue, and a meaningful jump in indoor air quality. What homeowners do not always realize is that the project is more nuanced than dropping a black box into a masonry opening and plugging it into the nearest outlet. Done well, an electric insert can transform a room. Done casually, it can underwhelm, trip breakers, and leave the original chimney as an unsolved energy liability.
This article walks through the entire decision and installation process: how to measure your existing firebox, how to choose between plug-in and hardwired models, how to handle the abandoned flue, what the electrical load really looks like, and how to plan the surround so the finished product reads as a designed hearth rather than a TV stand with embers. The goal is to give you the same checklist a seasoned hearth retailer would walk through with you in person.
Why Homeowners Are Making the Switch
Wood burning is in steady decline as a primary residential heat source. According to the U.S. Energy Information Administration (EIA), the share of U.S. households using wood as a primary heating fuel has dropped below 2 percent and continues to fall in every Census region. Even in homes where wood is loved for ambiance, the actual use rate is low: a recent HPBA consumer survey found that more than 60 percent of wood burning fireplace owners light a fire fewer than six times per year, citing convenience, cleanup, and indoor air quality as the dominant friction points.
Electric inserts solve all three. There is no ash, no kindling, no creosote, and no chimney inspection cycle. The flame effect is on demand. Heat is on demand. And because the unit is sealed, the room no longer loses warm air up an open damper every time the homeowner forgets to close it after the fire dies down.
There is an energy story too. A typical open masonry fireplace, when not in use, can leak the equivalent of leaving an eight-inch window open in the same wall, a figure documented in U.S. Department of Energy weatherization studies. Sealing or capping the flue as part of an electric conversion can pay back in lower heating bills within a few seasons in cold climates.
Measuring the Existing Firebox
Every electric insert is sized by the dimensions of the firebox opening, not by the dimensions of the chimney breast or the mantel above it. Before you shop, you need four measurements taken with a tape measure and recorded on a sketch: front opening width, rear width (most fireboxes taper toward the back), height at the front, and depth from front face to back wall.
Most electric inserts on the market today are designed to drop into openings between 23 and 42 inches wide. Depth requirements vary widely. Slim-line units only need about 9 inches of depth and are designed for shallow Rumford-style or prefabricated metal fireboxes. Standard inserts typically need 14 to 16 inches. If your firebox is shallower than the unit, you have two options: choose a slim model, or build a forward extension of the surround so the unit sits proud of the original opening. Both are legitimate. The second one requires more carpentry and a thoughtful mantel plan to avoid looking improvised.
Have you checked whether your firebox is masonry or a factory-built metal unit? The answer matters. Masonry fireboxes can accept almost any insert as long as the dimensions work, because the surrounding material is non-combustible brick and mortar. Factory-built fireboxes, the kind installed in the 1980s and 1990s with a sheet-metal shell behind the brick-look refractory panels, have specific listing requirements. The NFPA and most local codes require that any insert installed in a factory-built firebox be specifically listed for use in that firebox or in factory-built units generally. Read the label inside your damper before you order.
Plug-In Versus Hardwired: The Electrical Reality
Electric inserts come in two electrical formats. The first is a standard 120-volt, 15-amp plug-in model. These units cap out at about 5,000 BTU per hour, which is enough to take the chill off a 400 square foot room but not enough to serve as a primary heat source for anything larger. The second format is a hardwired 240-volt unit, typically drawing 20 to 30 amps and producing 8,500 to 10,000 BTU per hour. These can credibly heat a 1,000 square foot great room in a moderate climate.
The 120-volt plug-in path is tempting because it requires no electrician. But there is a catch: the outlet behind your fireplace was almost certainly installed for a gas log starter or a blower fan, and it is often on a shared circuit with other living-room loads. Running a 5,000 BTU heater on a circuit that already serves a television, lamps, and a phone charger is a recipe for nuisance trips. The National Electrical Code (NEC), published by the National Fire Protection Association, allows continuous loads up to 80 percent of circuit capacity. A 1,500 watt heater is 12.5 amps, which is exactly 83 percent of a 15-amp circuit, leaving no headroom for anything else.
If you want primary heat performance, plan on a dedicated 240-volt circuit pulled from the main panel by a licensed electrician. Budget $400 to $1,200 for the electrical work alone depending on panel location and wall access. Yes, it is more expensive. It is also the difference between a decorative flame and a working fireplace.
What to Do With the Old Chimney
This is the question most homeowners forget to ask, and it is the one that affects long-term energy performance the most. When you install an electric insert, the original masonry chimney becomes a vertical hole in your thermal envelope. Even with the damper closed, an old fireplace damper typically leaks a substantial volume of air. The U.S. Department of Energy estimates that an uncapped, unsealed chimney can account for 8 to 14 percent of total household air leakage in older homes.
You have three reasonable options. The first is an inflatable chimney balloon installed just above the damper, which is reversible if a future owner wants to restore wood burning. The second is a top-sealing damper installed at the crown of the chimney, which seals with a rubber gasket and is operated by a stainless steel cable. The third is permanent capping with an insulated chimney cap and a foam-and-mortar plug at the throat, which is the most thorough but also the most committed solution.
Whatever you choose, do not skip this step. Installing an electric insert without addressing the chimney is like installing a high-efficiency window next to a screen door. The room will feel warmer near the unit and colder near the floor, and the homeowner will blame the insert when the real culprit is the open flue.
Designing the Surround
The visual success of an electric insert depends almost entirely on what you do around it. The unit itself, in most cases, is a black rectangle with a glass front. Left as-is in the middle of a soot-stained brick fireplace, it looks like an appliance. Framed inside a designed surround, it can become the focal point of the room.
Three approaches work well. The first is a flush-mount design that uses a matte black metal trim kit to bridge any gap between the insert and the original opening, producing a clean, gallery-like presentation. The second is a refaced surround using large-format porcelain tile, honed limestone, or steel-clad MDF that covers the original brick and gives the wall a modern restart. The third is the painted-brick route, which costs almost nothing and works surprisingly well in transitional and farmhouse interiors when paired with a new mantel.
Designers affiliated with the American Society of Interior Designers (ASID) increasingly recommend extending the surround material full-height to the ceiling rather than stopping at the original chimney breast. The vertical line gives the room better proportion and disguises the seam where new tile meets old plaster. It is also a natural place to hide the new electrical and any low-voltage wiring for accent lighting above the mantel.
Heat Output, Operating Cost, and Realistic Expectations
Electric resistance heat is 100 percent efficient at the appliance, meaning every watt drawn becomes a watt of heat inside the room. What that does not tell you is how that heat compares on a cost-per-BTU basis with gas, oil, or a heat pump. In most U.S. markets, electric resistance heat is the most expensive form of heat per BTU delivered, often two to three times the cost of natural gas and meaningfully more than a modern cold-climate heat pump.
That math is fine for an electric insert because the insert is rarely the home's primary heat source. It is a zone heater, used in the evenings, in the room the family actually occupies, while the central thermostat is dialed back a few degrees. Used that way, an electric insert can lower whole-home energy use even though its own per-BTU cost is high. Manufacturers cite typical operating costs of 8 to 18 cents per hour for flame-only mode (no heat) and 20 to 50 cents per hour with heat engaged, depending on local electricity rates.
Have realistic expectations about coverage. A 5,000 BTU unit will warm the seating area in front of it, not the whole great room. A 10,000 BTU unit on a dedicated 240-volt circuit can carry a typical living room. Nothing on the market today can credibly replace a furnace for a 2,500 square foot house in a cold climate, regardless of what the marketing copy implies.
The flame effect itself is a separate consideration from heat. Nearly every modern electric insert allows the flame to operate independently of the heat element, meaning the homeowner can enjoy the visual ambiance year-round without warming the room in July. The flame is produced by a combination of LED light, a rotating reflector, and in higher-end units a fine water-vapor mist that creates a startlingly realistic three-dimensional flame. Operating cost in flame-only mode is typically under 5 cents per hour, which is cheaper than running a single ceiling fan and dramatically cheaper than any combustion-based ambiance source.
One detail worth confirming before purchase is the noise profile. Cheaper electric inserts rely on a forced-air blower to distribute heat, and the blower in entry-level units can produce a perceptible hum at higher speeds. Premium models use either a quieter, variable-speed blower or a fan-free convection design that relies on the natural rise of warm air. If the fireplace will live in a room where you watch movies, listen to music, or hold conversations, spend the additional money for a quiet unit. The annoyance of fan noise during dialogue scenes is the kind of small irritation that compounds over years of daily use.
Conclusion
An electric insert is one of the best value remodels available in a hearth context. For a project budget that typically lands between $1,800 and $6,000 all-in including the unit, the surround, the electrical work, and the chimney sealing, you get a cleaner, safer, more controllable focal point that immediately raises the perceived quality of the room. The maintenance disappears. The smoke disappears. The damper-management problem disappears. And if you ever sell, an electric hearth shows beautifully to buyers who have no interest in stacking firewood.
The keys to a successful project are not glamorous. Measure the firebox carefully. Choose a unit listed for your firebox type. Pull a dedicated circuit if you want real heat. Seal the chimney. Extend the surround to give the unit visual weight. Each of those steps individually is modest. Together they are the difference between a finished room and an unfinished project.
Before you order, talk to two installers, get one written quote that includes the electrical work and one that excludes it, and ask each contractor specifically how they plan to seal the original flue. The answers will tell you which contractor has done this work before and which one is improvising on your dime.
If you are ready to start, take the four firebox measurements described above, photograph the inside of your damper, and bring both to a local hearth retailer. With those in hand, you can walk out the same day with a shortlist of three units that will physically fit, a realistic budget, and a timeline you can plan around.
More Articles You May Like



Comments
Post a Comment