Mini Split Heat Pump Selection For Older Homes Without Ducts
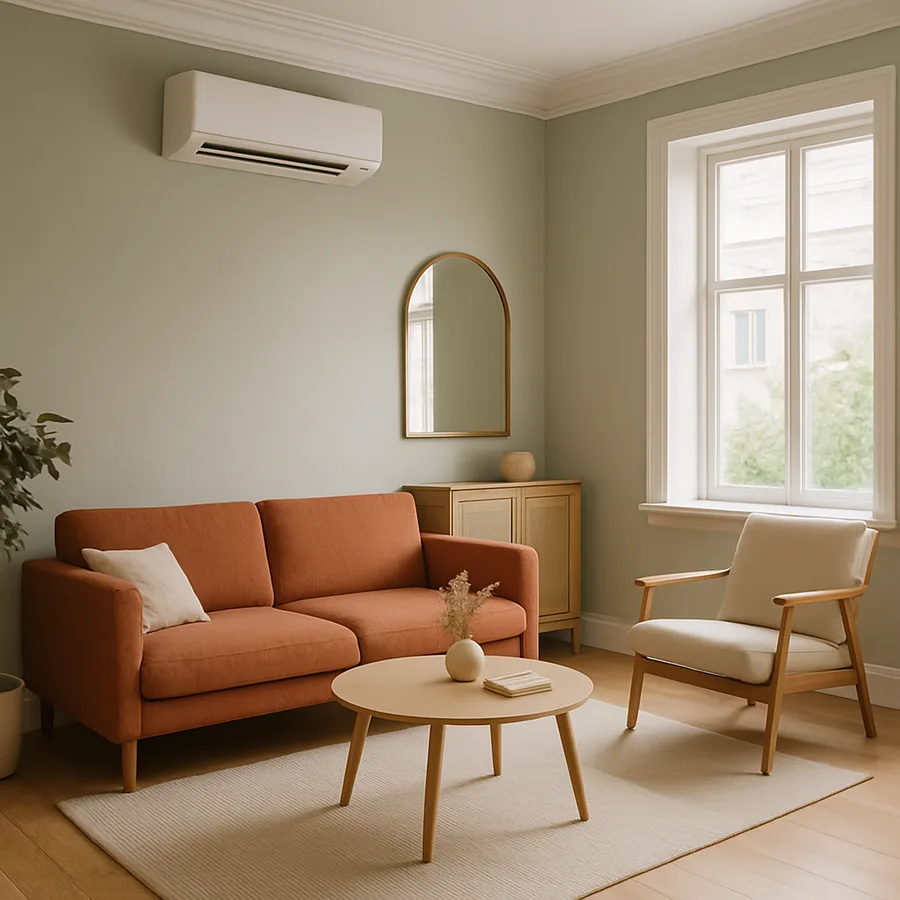
Older homes built before forced-air heating became standard pose a stubborn comfort problem. Radiators or baseboards handle winter heating adequately, but summer cooling depends on window units or noisy portable air conditioners, and shoulder-season heating is often inefficient or uncomfortable. Ductless mini split heat pumps have become the dominant retrofit solution for these homes because they deliver both heating and cooling without requiring the destructive ductwork that traditional central systems demand. Choosing the right system, however, requires understanding what makes older homes different from new construction.
This guide walks through how to evaluate a pre-war or mid-century home for a mini split installation, how to size the system honestly, how to handle the unique challenges of plaster walls and irregular floor plans, and how to read the spec sheet so you select equipment that will actually perform in your climate. We will reference efficiency standards from ENERGY STAR, performance guidance from ASHRAE, and federal program information from the U.S. Department of Energy to anchor the decision in verifiable data rather than vendor sales pitches.
Why Mini Splits Suit Older Homes
The defining feature of a mini split heat pump is that it does not require ductwork. The outdoor compressor connects to each indoor unit through a small bundle of refrigerant lines, condensate drain, and control wiring, typically only three inches in diameter. That bundle can pass through an exterior wall with a single neat penetration, eliminating the need for the soffits, dropped ceilings, or wall chases that retrofitting a ducted system would require. In a home with plaster walls, original woodwork, and limited cavity space, the difference is decisive.
Mini splits also handle zoning naturally. Each indoor unit operates independently with its own thermostat, which suits older homes where rooms have very different heating and cooling loads. A south-facing sunroom and a north-facing master bedroom in the same house can have wildly different needs; a single-zone central system compromises both, while a multi-zone mini split serves each correctly. The Department of Energy notes that the absence of duct losses alone improves system efficiency by 25 to 40 percent compared to ducted alternatives, since ducts in attics and crawl spaces commonly leak 20 to 30 percent of conditioned air.
Modern cold-climate mini splits have transformed the heating story. Older heat pump technology lost efficiency below 30 degrees Fahrenheit, but current variable-speed inverter-driven units maintain rated capacity down to 5 degrees Fahrenheit and continue to operate, with reduced capacity, well below zero. This means a properly sized cold-climate mini split can serve as the primary heating system in most of the contiguous United States, supplementing or replacing aging boilers and furnaces. For homeowners replacing oil or propane heating, the operating cost reduction can be substantial.
Sizing Honestly - Manual J Calculations
The temptation in older homes is to oversize the system because the walls are leaky, the windows are single-pane, and intuition says more capacity is safer. That instinct produces the same problems as oversized window units: short cycling, poor humidity control, and reduced lifespan. The right approach is a proper Manual J load calculation, which accounts for the actual building envelope, window characteristics, orientation, infiltration rate, and local climate.
Manual J is a procedure published by the Air Conditioning Contractors of America and is the industry standard for residential load calculations. A good HVAC contractor will perform Manual J before recommending equipment sizes, and any contractor who eyeballs the house and quotes capacity from a square-foot rule of thumb is cutting a corner that matters. The calculation typically takes one to two hours of room-by-room measurement and produces BTU loads for both heating and cooling at design temperatures. Equipment capacity should match the calculated load within 15 percent on the cooling side and 25 percent on the heating side, allowing for the system's natural performance modulation.
Older homes complicate Manual J because envelope assumptions must be measured rather than guessed. Walls may be solid masonry, balloon-framed with no insulation, or partially upgraded with retrofit foam. Windows may be original single-pane with storms, replacement double-pane, or a mix. Air infiltration rates are typically higher than in new construction but vary widely with how the home has been maintained. A blower door test before the load calculation gives a much more accurate infiltration number and often shifts the equipment recommendation downward by one capacity step.
Choosing Between Single-Zone and Multi-Zone Systems
The first equipment decision is whether to install one outdoor unit serving multiple indoor heads - a multi-zone system - or several independent single-zone systems. Multi-zone units are more compact outside, requiring only one compressor pad and one electrical disconnect for two to five indoor heads. Single-zone systems require a separate outdoor unit for each indoor unit, taking more outdoor space but typically delivering higher efficiency.
Efficiency differs because multi-zone outdoor units must size their compressor for the combined load of all connected indoor units, and they cannot modulate as deeply when only one zone is calling for cooling or heating. A single-zone inverter-driven outdoor unit can ramp down to 25 or 30 percent of rated capacity when a small load is present, sipping electricity all afternoon at a low steady output. A multi-zone unit serving only one active zone may modulate down to perhaps 50 percent, using more electricity for the same delivered comfort. HSPF2 and SEER2 ratings on the spec sheet reflect this difference, with the best single-zone units often outperforming the best multi-zone units by 10 to 20 percent.
For a small older home with two to three zones, single-zone units in each room often deliver the best performance and easiest service, provided outdoor space accommodates the multiple condensers. For a larger home with four or five zones, multi-zone systems make sense because of outdoor clutter and refrigerant line length. The right answer is rarely all one or all the other; many practical installs combine a multi-zone system serving bedrooms with single-zone systems serving high-load areas like sunrooms or top-floor rooms.
Indoor Unit Types and Placement in Period Homes
Mini split indoor units come in several formats. Wall-mounted units are the most common and most visible, typically installed high on an interior wall opposite the room's main occupancy zone. Floor-mounted units mount near the baseboard and look more like a radiator, which sometimes blends better into rooms with period detailing. Ceiling cassette units install flush in a dropped ceiling with only a square grille visible; they work well in finished basements or additions but rarely in original plaster ceilings. Concealed ducted units hide in a soffit or closet and connect to short, low-profile ducts that serve multiple rooms, which can preserve the appearance of period spaces.
Placement matters even more in older homes than in new construction. Wall-mounted units need clear airflow paths to the seating zone of the room, which can be tricky around the irregular furniture layouts that period homes accommodate. Floor units work well in rooms with built-ins or wainscoting, since they sit against the wall like furniture rather than floating above it. Concealed ducted units offer the most aesthetic flexibility but cost more to install because they require some duct work, even if minimal, and the supply registers must be cut into ceilings or walls.
Have you walked through your home and identified where indoor units could realistically go without compromising original features? The visual impact varies enormously by room, and the best installs result from collaboration between an HVAC contractor and an owner who understands which compromises matter. Some homeowners prioritize hiding the equipment entirely and accept higher installation costs; others accept visible wall units in exchange for simpler installs and lower up-front cost.
Refrigerant Lines, Condensate, and Wall Penetrations
The plumbing of a mini split is mostly invisible after installation, but the routing decisions made during the install determine how the system looks and performs for decades. Refrigerant line sets are typically encased in PVC line-hide covers on the exterior of the building, painted to match siding. In older homes with brick, stucco, or stone exteriors, line-hide selection becomes a real aesthetic decision. Some installers route lines through interior closets and basement ceilings to minimize exterior visibility, though longer interior runs add cost and require careful attention to drainage.
Condensate management is the most common service issue with mini splits. Each indoor unit produces water during cooling, and that water must drain by gravity to an outdoor termination or be lifted to drainage by a condensate pump. Gravity drainage is more reliable but constrains where indoor units can go; pumps add flexibility but introduce a small failure point. In older homes with thick walls and irregular interior elevations, condensate routing often dictates indoor unit placement more than aesthetic preference does.
Wall penetrations should be no more than three to four inches in diameter and must be sealed thoroughly against weather and pest entry. In plaster-and-lath walls common in pre-war homes, drilling requires care to avoid cracking large areas of plaster. Experienced installers use core drills with diamond bits and stabilize the plaster with backing materials during the cut. Inexperienced installers can leave plaster damage that costs more to repair than the entire mini split installation. Choosing a contractor with documented experience in older homes is not optional; it is the single highest-leverage decision in the whole project.
Cost, Efficiency, and Incentives
Mini split installations cost more than window units but less than retrofitting central HVAC into a home without ducts. A typical single-zone installation runs $4,000 to $6,000 installed for a 9,000 to 12,000 BTU system, while a multi-zone installation with three to four indoor heads typically costs $12,000 to $20,000. Cold-climate models cost roughly 15 to 25 percent more than standard models but pay back the premium in colder regions through year-round operation. Approximately 30 percent of new residential cooling installations in cold-climate states now use mini split heat pumps, reflecting how mainstream the category has become.
Federal tax credits available under recent energy legislation cover up to 30 percent of qualifying heat pump installation costs, capped at $2,000 per year, when the equipment meets ENERGY STAR's cold-climate criteria. Many states and utilities layer additional rebates, often $500 to $2,000 per system, that can be combined with the federal credit. The combined incentive picture can reduce the effective cost of a quality installation by 30 to 40 percent, materially shifting the payback math compared to oil, propane, or electric resistance heating.
Lifetime operating cost depends on HSPF2 for heating efficiency, SEER2 for cooling efficiency, and the local electricity rate. A unit with an HSPF2 of 9 and a SEER2 of 20 will use roughly 25 percent less electricity than a unit with an HSPF2 of 7.5 and a SEER2 of 14, which compounds to thousands of dollars over a 15-year lifespan in homes that use heating heavily. Spec sheets should be compared honestly, since premium efficiency models are not always priced proportionally above standard ones.
Conclusion
Mini split heat pumps have made comprehensive heating and cooling possible in homes that previously had no good options. The combination of zoning flexibility, modest installation footprint, modern cold-climate performance, and substantial federal and state incentives makes the category compelling for almost any older home in a climate that demands both heating and cooling. The systems are not, however, plug-and-play; the choices that decide whether a project succeeds happen before any equipment arrives on site.
Sizing with a proper Manual J calculation, choosing between single-zone and multi-zone configurations based on actual load distribution, selecting indoor unit types that fit the rooms, and planning refrigerant and condensate routing thoughtfully are the steps that separate a great install from a mediocre one. Contractor selection matters more than equipment brand selection in most cases, since the best equipment installed poorly underperforms the most basic equipment installed well. References, examples of past work in similar-vintage homes, and willingness to perform load calculations should be non-negotiable when evaluating bidders.
Long-term performance depends on simple maintenance. Indoor unit filters should be cleaned every two to four weeks during heavy use. Outdoor coils should be inspected and rinsed annually. Refrigerant levels should be verified by a technician every three to five years, since slow leaks can degrade efficiency long before they cause obvious failure. These steps cost almost nothing and add five to ten years to typical system life.
If you are evaluating heating or cooling upgrades for an older home this season, request Manual J calculations and itemized proposals from at least two qualified contractors who specialize in retrofit work. Compare the calculated loads, the proposed equipment, the installation details, and the warranty terms - not just the bottom-line price. A thoughtful contractor will welcome the questions and a hurried one will not, which itself tells you most of what you need to know about who to hire.
More Articles You May Like



Comments
Post a Comment