Dormer Window Addition Cost For More Attic Headroom
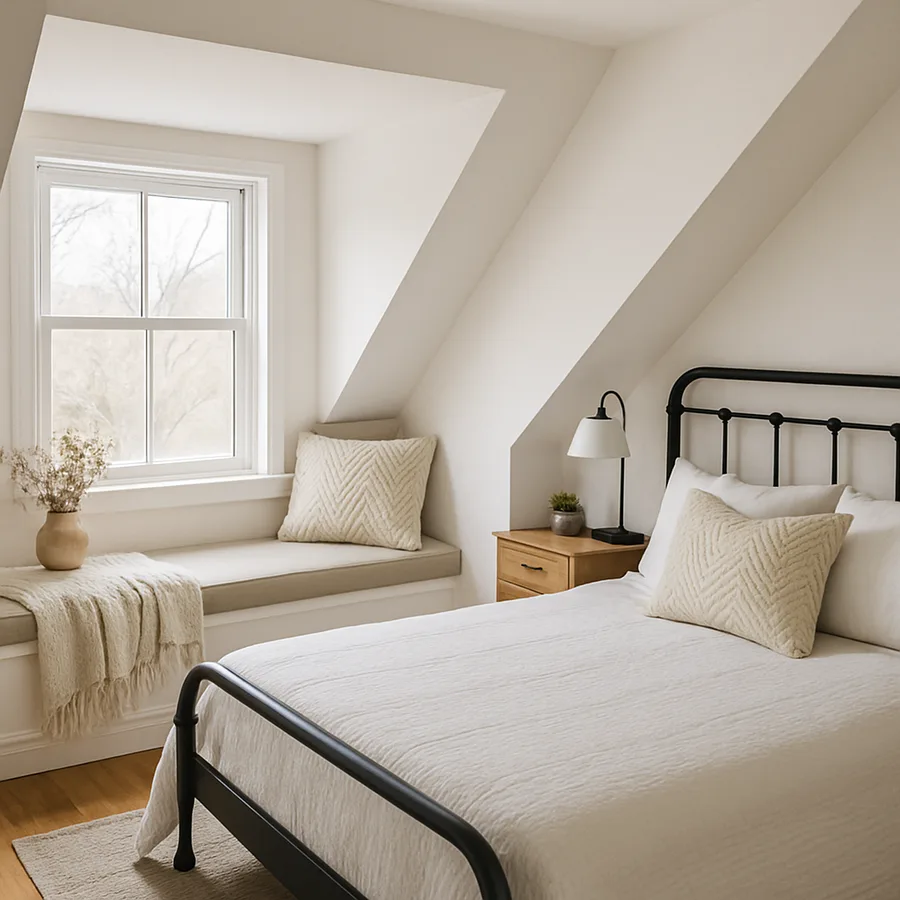
An attic with a steep roof pitch and a stingy ceiling height has long been the great underused volume of the American home. Bedrooms get crammed into the kneewall corners, sightlines feel claustrophobic even when the square footage is generous, and natural light arrives only at the gables. A dormer window addition is the architectural intervention that turns that wasted volume into a livable room - adding both headroom and daylight in a single coordinated structural move.
The cost question, predictably, is the first thing homeowners ask, and the answer depends on the type of dormer, the size, the existing roof structure, and the local labor market. The National Association of Home Builders tracks dormer projects in its cost-versus-value research and reports a typical installed range of $15,000 to $90,000, with the lower end representing a single small shed dormer in a region with affordable labor and the upper end reserved for ambitious full-width dormers in high-cost metros. This guide walks through the choices that drive the number.
Dormer Types and Their Cost Implications
Dormers come in four common residential types, each with a distinctive aesthetic and a distinctive cost profile. The shed dormer is the workhorse - a single-pitch roof projecting from the main slope, typically capable of adding the most headroom for the lowest cost per square foot. A modest shed dormer for a single attic bedroom runs $15,000 to $30,000 installed in most markets and adds roughly 60 to 120 square feet of usable floor area at standing height.
The gable dormer, sometimes called a doghouse dormer, is the picture-book shape with a peaked roof that mirrors the main house. It costs more per square foot than a shed dormer because of the additional framing and roofing complexity, typically $20,000 to $40,000 for a comparable size. Visually, it provides more curb appeal and integrates more elegantly with traditional architecture, which is why most resale-driven additions still favor gables despite the cost penalty.
The hip dormer and eyebrow dormer are the specialty options. Hip dormers feature sloped roof planes on three sides and are favored on hip-roofed houses where a gable would look architecturally awkward; they run $25,000 to $50,000 due to the framing complexity. Eyebrow dormers - those curved, low-arched dormers that look like a sleepy eye in the roof - are rare, expensive, and almost always custom; budgets typically start at $40,000 and rise quickly with size and detailing.
Structural Implications and Load Path Considerations
Cutting a hole in your existing roof to insert a dormer is not a trivial structural operation. The rafters being severed must transfer their load to new headers above and below the opening, and those headers must in turn transfer the load to the existing ridge, walls, and foundation. For small dormers, double 2x10 or 2x12 headers usually suffice. For wider shed dormers or anything over six feet of clear span, engineered lumber such as LVL or even steel may be required.
The International Code Council publishes the International Residential Code provisions that govern dormer framing in most jurisdictions, and a stamped structural engineer's drawing is typically required for any dormer wider than the existing rafter spacing. Plan for $500 to $2,000 in engineering fees for a straightforward project, with more complex situations easily exceeding $5,000. Skipping the engineer is the single most expensive shortcut in this category of project - failures are rare but catastrophic when they occur.
Have you ever wondered what makes some dormer projects creep dramatically over budget? In nearly every case it traces back to undiscovered structural issues - undersized rafters, deteriorated sheathing, or a load path that was marginal even before the dormer was added. A pre-construction structural inspection costing a few hundred dollars routinely saves five-figure surprises later. The American Institute of Architects recommends this assessment as standard practice for any addition affecting the primary roof structure.
Permits, Zoning, and Historic District Constraints
Dormers almost always require a building permit, and the permit process involves more than a quick sign-off. Most jurisdictions require submission of dimensioned drawings, a structural calculation package, and sometimes elevations showing how the new dormer integrates with the existing facade. Permit fees range from a few hundred dollars in small municipalities to several thousand in major metros, and review times span two weeks to three months.
Zoning is the constraint most homeowners forget. A dormer can affect both the height and the floor area ratio of your home under local zoning codes, and either can push you over a regulatory threshold that demands a variance hearing. Setback rules sometimes also apply if the dormer overhangs a side or rear elevation that already sits near the property line. Pull your zoning records before you commission drawings - a five-minute consultation with the planning office can save months of design work that turns out to be infeasible.
If your home sits in a historic district or carries a landmark designation, expect a separate review process with the local historic preservation commission. The commission will scrutinize the dormer's proportions, materials, window pattern, and siding to ensure it reads as authentic to the architectural period of the original house. Their conditions can add $5,000 to $20,000 in upgraded materials and detailing, but the resulting work also tends to hold its value better than less carefully integrated additions.
Interior Finishing: Where the Budget Really Goes
Newcomers to renovation are routinely surprised that the rough shell of a dormer represents only 40 to 60 percent of the total project cost. The remainder lives in the interior finishing: insulation, drywall, flooring, trim, electrical, HVAC tie-ins, and the window itself. Each of these line items carries its own decision tree, and choices made in finish levels can swing the final number by tens of thousands of dollars.
Insulation deserves particular attention. Dormer cavities are framed at narrower depths than standard exterior walls, and meeting modern energy code in cold climates often requires either continuous exterior insulation, spray foam, or a hybrid approach. The U.S. Department of Energy publishes climate-zone-specific insulation recommendations that should drive your assembly choice, not the cheapest path your contractor proposes. Spending an extra $1,500 to $3,000 on insulation at the framing stage pays back in comfort and operating cost for decades.
HVAC integration is the second easy mistake. A new dormer adds heating and cooling load that the existing system may or may not be sized to handle. A ductwork extension into a shed dormer ceiling is often straightforward; a full mechanical zone with a new mini-split head can run $3,000 to $5,000 but may be the right answer if the new space will be used at different temperatures than the rest of the attic. Get a Manual J load update from your HVAC contractor before finishing - it costs little and prevents an undersized system that struggles for the life of the home.
Resale Value and the Cost-Versus-Value Question
The financial return on a dormer addition is among the more favorable categories of major renovation, especially when the project converts unfinished attic into officially permitted living space. Real estate appraisers in most markets assign meaningful per-square-foot value to permitted finished area above grade, and the addition often signals to buyers that the home has been carefully cared for. The National Association of Home Builders reports recoup rates in the 60 to 75 percent range for attic conversions in major metros, with shed dormer projects performing slightly better than gable dormers on pure cost basis.
Several factors push recoup rates above or below the average. Adding a full bedroom plus a bathroom in the new space typically pushes recoup well past 75 percent because the home moves up a bedroom count in MLS listings - a single bedroom can shift the price band materially. Adding only headroom and light, without enclosing a new programmed room, tends to recoup closer to 50 percent because the value is real but harder for buyers to quantify.
Geography matters as much as design. In high-cost coastal metros where buyable square footage is the binding constraint, dormers often pay back at or above 100 percent because the alternative - moving to a larger home - is dramatically more expensive. In rural and low-cost markets where comparable larger homes are widely available, recoup rates can dip below 50 percent regardless of how well the work is done. The local market context should be a major input to your design ambition.
Hiring the Right Team and Phasing the Work
Dormer projects benefit from a design-build team or, at minimum, a tightly coordinated architect-contractor pairing. A general contractor without architectural input often produces a structurally sound but visually awkward addition, while an architect without a builder partner can specify details that drive cost without proportionate value. The best results come from teams that have worked together on at least three similar projects and can show you photos of completed dormers in your region.
Phasing matters for budget control. The structural rough-in - framing, sheathing, roofing, and exterior weatherproofing - should be quoted as a discrete phase with firm pricing, because surprises in this phase are most expensive. Interior finish can sometimes be phased over time if cash flow demands it, though most homeowners prefer to finish everything in one continuous project to avoid living through construction twice.
Have you considered how long you will live with construction in your home? A typical dormer project takes four to eight weeks of active work, with about two weeks of that time being noisy and disruptive structural activity. Plan family logistics accordingly - many homeowners find that timing the project around a vacation or a school holiday smooths the experience considerably. The Remodeling Magazine Cost vs. Value Report tracks these timelines and consistently finds that projects with clear phase plans run on schedule far more often than open-ended scopes.
Window Selection, Egress Codes, and Daylight Design
The windows themselves are the centerpiece of any dormer, and choosing them well is the difference between a dramatic upgrade and a merely adequate one. Double-hung windows remain the traditional choice and work beautifully in shed and gable dormers alike, particularly when matched to the proportions of the existing house. Casement windows offer larger unobstructed glass and better ventilation, though their swing geometry can complicate exterior landscaping or interior trim details. Fixed picture windows flanked by smaller operable units deliver the most light while keeping costs in check.
If the dormer is part of a new bedroom, at least one window must meet bedroom egress code. The International Residential Code requires a minimum net clear opening of 5.7 square feet, with minimum dimensions of 20 inches wide and 24 inches tall, and a sill height no higher than 44 inches above the finished floor. These numbers determine the minimum size of the operable window unit and frequently push designers toward larger windows than they would otherwise choose. Skipping this requirement means the room cannot legally be marketed as a bedroom on resale.
Daylight design rewards a little extra thought. Aiming the dormer at a south or east exposure brings warm morning and midday light; a north-facing dormer delivers softer, more even illumination that designers and artists often prefer. Adding a small skylight in the dormer ceiling can transform the feel of the space at a modest cost, especially when the dormer roof depth allows a tubular daylight device. The combination of vertical and overhead glazing creates a quality of light that no single window can match.
Conclusion
A dormer window addition is one of the most effective ways to unlock latent value in a home with a steep roof pitch and an underused attic. The combination of new headroom, daylight, and finished floor area transforms cramped, dark space into usable bedroom, office, or playroom volume that materially improves daily life. The financial case is generally sound, particularly in dense urban markets, and the structural and aesthetic technology is mature enough that well-designed dormers blend seamlessly into existing architecture rather than looking like an awkward afterthought.
The decision points that matter most are the dormer type, the structural design, the level of interior finish, and the team executing the work. Get those four right and the project lands on time and on budget with a result that delights you and adds documented value to the home. Get any one of them seriously wrong and you may discover that the addition is structurally compromised, visually awkward, or stretching the household budget past its breaking point.
The most rewarding dormer projects begin with a clear-eyed assessment of what the attic is good for and what it is not. An attic with seven-foot kneewalls and a steep main pitch can become a beautiful primary bedroom suite with a properly sized dormer; an attic with six-foot kneewalls and limited usable depth may need two dormers or a different intervention entirely. Walk your attic this week with a tape measure and a sketch pad, then bring those notes to an architect or a design-build firm for a feasibility consultation - the conversation usually costs little and reveals everything about whether a dormer is the right move for your home.
More Articles You May Like


Comments
Post a Comment