
Above Cabinet Lighting For Crown Molding Glow Effect
Above Cabinet Lighting For Crown Molding Glow Effect
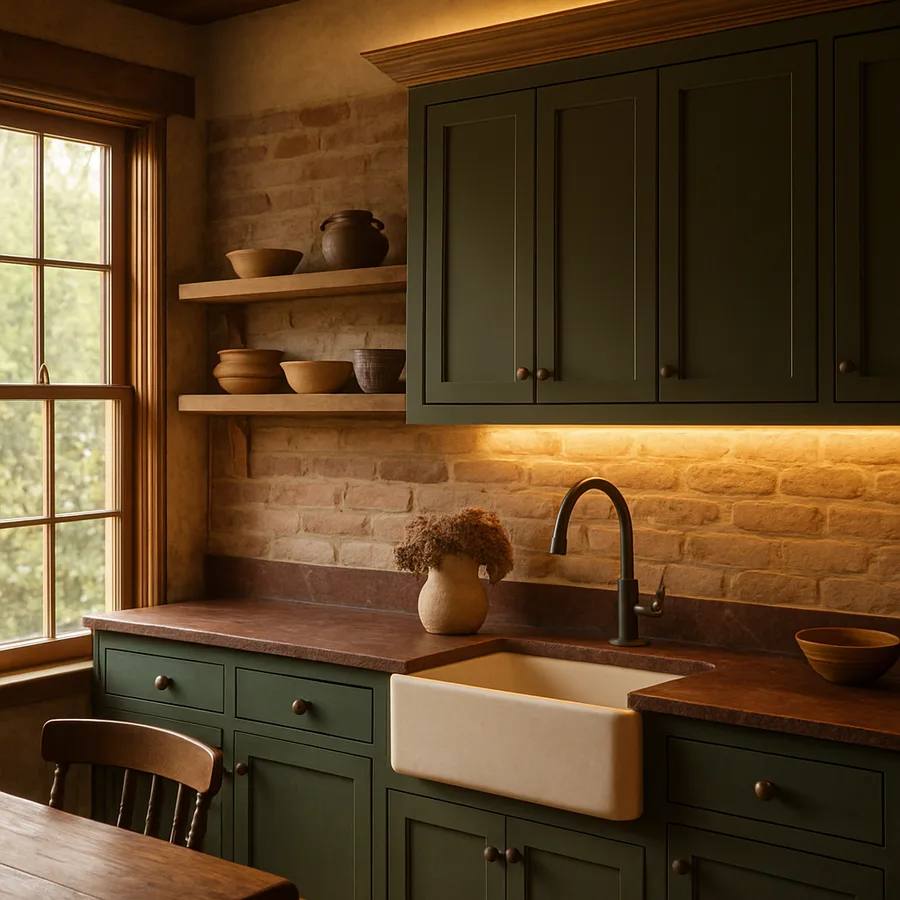
The space above kitchen cabinets is one of the most overlooked design opportunities in the home. When upper cabinets stop short of the ceiling, the gap collects dust and reads as wasted space. Add a hidden LED run behind a strip of crown molding, and that same gap becomes the source of the softest, most flattering ambient light in the room. The Illuminating Engineering Society identifies indirect ceiling-bounced lighting as the highest-comfort technique for residential ambient layers, and an above cabinet installation is one of the cleanest ways to deliver it.
This guide explains how to plan, install, and tune a crown molding glow that looks intentional rather than improvised. You will learn how the ceiling material affects perceived brightness, why color temperature matters more here than anywhere else in the kitchen, where to place the strip behind the molding, and how to pair the dimmer for a velvety dim from full power down to a candle level. Have you ever walked into a friend's kitchen and felt that the ceiling itself was glowing without being able to find a fixture? That is exactly the effect we are building.
Why The Above Cabinet Layer Transforms A Room
A kitchen typically has three lighting layers: ambient overhead, task at the counter, and accent within or around the cabinets. The above cabinet glow is a fourth layer that most homes skip, and it is the one that transforms the room emotionally. Recessed cans deliver light directly downward and tend to flatten the space. A hidden cove behind crown molding bounces light off the ceiling first, which softens shadows on faces and makes the room feel taller.
The American Lighting Association notes that ambient bounce lighting from a high source dramatically reduces the harsh shadowing typical of downward-only schemes. In a kitchen with a coffered or beam ceiling, the effect is even more pronounced because the indirect light reveals the texture of the architecture instead of competing with it. The National Kitchen and Bath Association regularly features cove lighting in their year-end design trend reports, and the above cabinet variant is the most accessible way for a homeowner to achieve the look without a remodel.
The functional benefit is real too. A dimmed above cabinet glow at ten percent output gives you enough light to move safely through the kitchen at night without flipping on overheads. For entertaining, dimming the overheads and bringing the above cabinet layer to fifty percent produces a warm enveloping atmosphere that feels miles away from the bright workhorse kitchen of mid-day. One installation, many moods, all from a single dimmer.
Measuring Planning And Choosing Materials
Begin with the gap. Measure the vertical distance from the top of the upper cabinets to the ceiling, then the horizontal depth from the cabinet face to the wall behind. You need at least three inches of vertical clearance and three inches of depth for a clean installation behind crown molding. If your gap is smaller, you can still install a lower-profile strip, but the molding will need to be slimmer to maintain proportion.
Walk the perimeter of every upper cabinet run and add the linear footage. Most installations land between eight and twenty linear feet. A single five-meter reel of quality 2700K LED tape covers roughly sixteen feet, so plan whether you need one or two reels and whether you will need to feed them in parallel from a central driver. Continuous runs longer than sixteen feet on a single feed develop voltage drop, which shows up as a slight dim at the far end.
For materials, specify a 24-volt LED tape with at least sixty diodes per meter, color temperature between 2700K and 3000K, and a color rendering index above ninety. Buy a frosted aluminum channel even though the strip will be hidden, because the channel acts as a heatsink and dramatically extends LED life. Add an ELV-compatible driver sized at twenty percent above your total wattage, and a low-voltage dimmer rated for that driver. The Department of Energy lifetime testing program shows that properly heatsinked LED runs can exceed fifty thousand hours, while unmounted tape can fail in as little as ten thousand.
Where To Place The Strip Behind Crown Molding
Placement is the single most important detail in this entire installation. The strip should sit on top of the cabinet, set back about one to two inches from the front edge of the crown molding, with the diodes pointing upward toward the ceiling. This geometry ensures that you never see the light source directly from any standing eye line in the room. You only see the wash on the ceiling above.
If you set the strip too close to the front of the molding, the light spills downward and reveals the source. If you set it too far back, the molding blocks part of the upward throw and you lose ceiling coverage near the front of the cabinet. The sweet spot is roughly one and a half inches from the front face of the molding, with the channel sitting flush against the cabinet top so the strip points perfectly vertical.
Corners deserve special attention. Cut the channel and the strip at the corner of the cabinet run, never around the corner, and use a corner clip or a soldered jumper to maintain continuity. A mitered channel at a ninety degree corner looks beautiful from the top but is invisible from below, so the extra effort is purely about wiring continuity. Did your ceiling glow stop suddenly at the corner of the cabinet run? You probably bent the strip too sharply.
Ceiling Material And Color Temperature Pairing
The ceiling is the largest reflector in this entire system, and its color and texture determine how the light reads in the room. A standard flat white ceiling at a typical eighty percent reflectance bounces nearly all of the light back into the room and produces a clean, neutral glow. A colored or wood-paneled ceiling absorbs significantly more light and shifts the apparent color temperature toward the ceiling tone.
Match the LED color temperature to the ceiling. With a white ceiling, anywhere from 2700K to 3000K reads as warm and inviting. With a wood ceiling, drop the LED temperature to 2400K or 2700K because the warm wood will already shift the bounce toward orange, and a higher LED color temperature would fight that warmth. With a cool gray or pale blue ceiling, a 3000K LED keeps the room from reading too cold. The American Lighting Association publishes guidance on color temperature pairing with ceiling tones that is worth reviewing before you buy.
Ceiling height also matters. A standard eight-foot ceiling produces a bright, immediate glow. A nine or ten-foot ceiling produces a more diffuse, atmospheric wash because the light has more room to spread before it reflects back. For higher ceilings, you may want a denser LED strip, perhaps one hundred and twenty diodes per meter, to maintain perceived brightness at the same dimmer setting. Ceiling reflectance is the multiplier on every other choice in this system.
Wiring Dimmer Selection And Control
The driver is the brain of the system. Mount it inside the nearest upper cabinet rather than on top in the dust zone. Cabinet tops collect grease aerosol and a film of dust over time, and a driver running hot in that environment fails years earlier than one in a clean enclosed space. Run two-conductor low-voltage wire from the driver up through a discreet hole in the top of the cabinet to the strip, and seal the hole with a small grommet to keep dust out.
For dimming, pair the driver with an ELV in-wall dimmer rated for the driver's load. ELV dimmers use reverse phase control, which produces a smoother dim curve for LED loads than the older forward phase Triac dimmers. ENERGY STAR certification programs specify a flicker-free dim range from one hundred percent down to ten percent or lower, and quality ELV dimmers easily achieve this with matched drivers. Test the curve before final mounting because some pairings buzz at certain points in the dim range.
If you want scene control, consider a smart dimmer compatible with your home automation system. Many homeowners set a one hundred percent preset for cleaning, a fifty percent preset for entertaining, and a ten percent preset for nighttime. The Department of Energy notes that scene-based control significantly improves user satisfaction with residential lighting because it removes the friction of constantly hunting for the right dimmer level.
Common Mistakes And How To Avoid Them
The most common mistake is mounting the strip directly to the wood cabinet top without an aluminum channel. The cabinet acts as an insulator, not a heatsink, and the strip overheats within hours of running at full output. Color shift and early failure follow predictably. Always use the channel, even when it will be completely hidden from view. The channel is functional, not decorative.
The second mistake is choosing too cool a color temperature. A 4000K above cabinet glow looks clinical and reads as a parking garage rather than a kitchen. Stick to 2700K or 3000K, with 2400K as an option for warm wood ceilings. The Illuminating Engineering Society explicitly recommends warm tones for residential ambient applications because they support the circadian rhythm in the evening when this layer gets the most use.
The third mistake is forgetting to dust the cabinet tops before installation. Cabinet tops accumulate years of dust, and that dust will eventually fall onto the lens of the strip and into the diodes. Wipe the entire run clean with a damp microfiber cloth before mounting the channel. Have you ever installed a beautiful new lighting layer only to see a dim layer of grime on it within a year? Pre-installation cleaning prevents exactly that.
Coordinating The Glow With Other Kitchen Layers
An above cabinet glow is most powerful when it works in concert with the other lighting layers in the room rather than competing with them. The four layers in a well-lit kitchen are ambient overhead, task at the counter, accent inside or under the cabinets, and the above cabinet bounce. Each layer has a different target output range and a different time of day when it should dominate. The Illuminating Engineering Society publishes scene guidance for residential interiors that maps these layers against typical activities.
During food preparation, the task layer should dominate at roughly seventy percent output, the ambient overhead should sit at fifty percent, and the above cabinet glow should hold around thirty percent as a warm fill. During dining or entertaining, the ambient overhead drops to twenty percent, the task layer drops to ten or even off entirely, and the above cabinet glow rises to fifty or sixty percent to become the primary ambient source. During late evening, all layers come down to ten percent or less, with the above cabinet glow providing a soft baseline that lets you move through the room without harsh contrast.
The dimmer placement matters for this coordination. Put all four layers on a single multi-channel dimmer or a smart hub so you can call scenes with a single tap rather than fiddling with four separate sliders. The American Lighting Association reports that scene-based control significantly improves homeowner satisfaction with multi-layer lighting installations because the friction of manual coordination is the main reason people stop using the layers as designed.
Conclusion
An above cabinet crown molding glow is the highest-impact, lowest-cost ambient lighting upgrade available to most homeowners. The installation is largely invisible, the materials run a few hundred dollars, and the effect transforms the room emotionally. The key is treating the ceiling as a deliberate reflector, choosing a warm color temperature that flatters the space, and pairing the right dimmer with the right driver. None of these decisions require expert skill, only attention to detail.
The compounding payoff is worth emphasizing. Every other layer in your kitchen, from the recessed cans to the pendant over the island to the under cabinet task lights, looks better when there is a warm ambient bounce filling the ceiling plane. Without that bounce, the room feels like a stage set with spotlights. With it, the room reads as a finished interior. The above cabinet layer is what separates a kitchen that works from a kitchen that glows.
Plan this layer early. If you are renovating, install it before the crown molding goes up because you will have clean access to the cabinet tops. If you are retrofitting, you can absolutely install it after the fact, but expect to dust thoroughly and work around the existing molding. Either way, do not skip this layer because the gap looks small or unimportant. The gap is the opportunity.
Take action this weekend. Measure the gap above your cabinets, count your linear feet, and pick a 2700K LED tape with a matching ELV dimmer. Review the Illuminating Engineering Society recommended practice for residential ambient lighting, browse the American Lighting Association guidance on color temperature, and check the ENERGY STAR certified product list to ensure your driver delivers flicker-free dimming all the way to ten percent.


Comments
Post a Comment