Floating Vanity Lighting Underneath for Bathroom Glow Effect
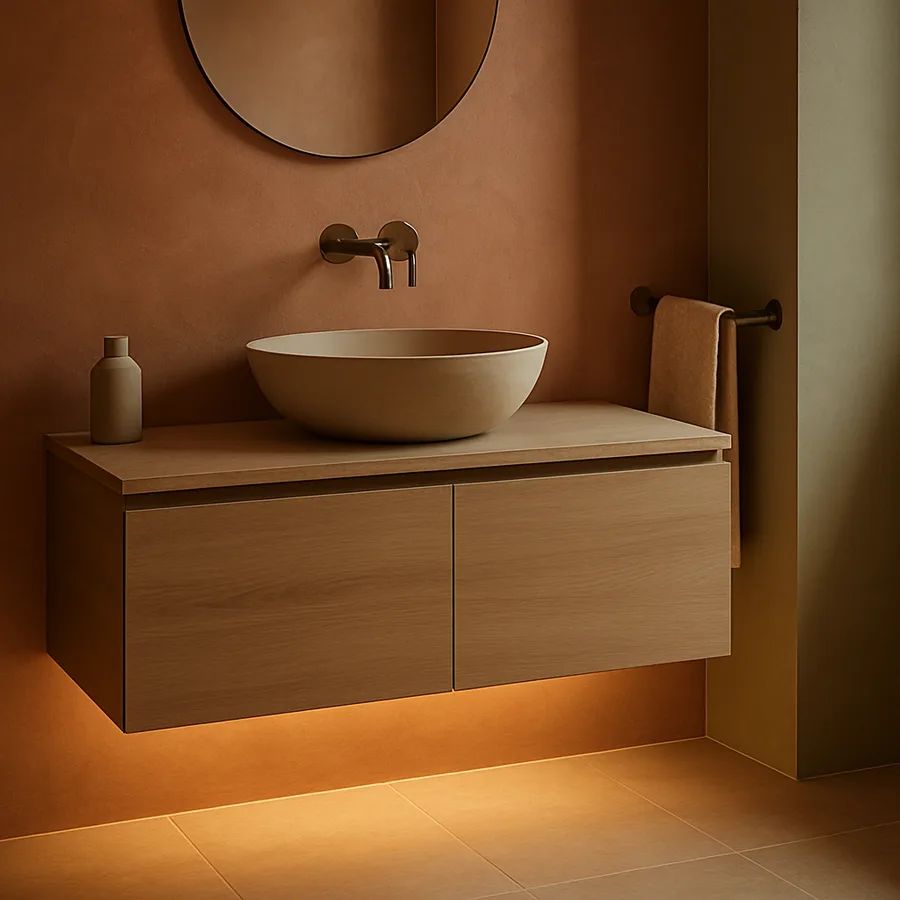
A floating vanity is already a quiet flex, but the moment you tuck a strip of warm light beneath the cabinet body, the whole bathroom shifts register. The vanity stops looking like furniture and starts looking like an object that hovers, casting a soft halo across the floor and grounding the room in something close to spa lighting. Designers call this technique cove underlighting or perimeter glow, and when it is executed well it does three things at once: it widens the room visually, it gives you a low-glare nightlight, and it dissolves the heavy bottom edge of millwork that would otherwise read as bulky.
The trick is that this is not really a decorative project. It is a layered-lighting project that happens to look decorative. Industry guidance from the Illuminating Engineering Society (IES) places bathrooms in the category of high-contrast, mixed-task spaces, which means underglow has to coexist with task lighting at the mirror, ambient ceiling fill, and any accent fixtures over a tub or shower. Get the layering right and the underlight feels intentional. Get it wrong and you get a glowing UFO docked under your sink. This article walks through the planning, hardware, color, mounting, code, and styling decisions that separate a polished install from a regrettable one.
Why Underlighting Works on a Floating Vanity
The visual logic of underglow rests on a single principle: the human eye reads shadow gaps as evidence of weightlessness. Architects have used reveals at the base of walls and millwork for decades to make heavy elements feel like they hover. A floating vanity already has a literal shadow gap because it is wall-hung; underlighting amplifies that gap, pushing it from a subtle detail to a deliberate design moment. The cabinet stops competing with the floor and starts having a conversation with it.
There is also a functional argument. The National Kitchen and Bath Association (NKBA) recommends layered lighting in every bathroom, with at least one source positioned below eye level to soften facial shadows during late-night use. Underglow checks that box without requiring a separate toe-kick fixture or a motion-activated path light. NKBA design guidelines also note that low-level light reduces pupil shock during nighttime trips to the bathroom, which can lower fall risk for older users.
Have you ever walked into a hotel bathroom and felt instantly calmer before you even understood why? Often it is because the brightest light source is not on the ceiling. It is at the perimeter of the vanity or behind the mirror. Underglow imports that hospitality cue into a residential space cheaply. According to a 2024 American Lighting Association consumer survey, 71% of homeowners who renovated a primary bathroom in the prior twelve months added at least one indirect lighting layer, with vanity underlighting and toe-kick strips ranking among the top three additions.
The aesthetic payoff is biggest when the floor finish has some reflectivity. Polished concrete, large-format porcelain, honed marble, and microcement all bounce light beautifully. A heavily textured slate or a deep, matte rug will absorb most of the glow and you will get less return on the install. So the first question to ask before buying a single LED is whether the floor under the vanity will actually carry the light.
Choosing the Right LED Strip Hardware
Not all LED tape is built for bathrooms. The single most important spec is the IP rating, which describes resistance to dust and moisture. For a vanity underglow that sits well above the floor and is unlikely to be splashed, IP44 is generally acceptable. If the strip will be within the splash zone of a wall-mounted faucet or near a freestanding tub, step up to IP65 or IP67. The ENERGY STAR certified lighting database is a useful place to verify that a manufacturer's stated efficacy and lifespan claims have been independently tested.
The second spec is density, measured in LEDs per meter. A 60-LED-per-meter strip is the residential minimum for a smooth, dotless line of light. At 120 LEDs per meter you get a continuous wash with no visible hotspots, which matters because the light source will sit close to the floor and any unevenness will be magnified by reflection. Cheap 30-LED-per-meter strips will look like a string of beads from floor level and should be avoided entirely.
The third spec is CRI, the Color Rendering Index. For a bathroom where you may apply makeup, examine skin, or check wound healing, you want a CRI of 90 or higher, ideally 95+. A low-CRI strip will make towels look muddy and skin look greenish even if the color temperature is technically correct. Read the spec sheet, not the marketing copy, because many strips advertise "high CRI" while quietly listing 80.
Finally, plan the driver and aluminum channel as part of the purchase. A constant-voltage 24V driver is more forgiving over long runs than 12V, and an anodized aluminum channel with a frosted diffuser does three jobs at once: it acts as a heat sink to extend LED life, it hides the individual diodes, and it gives you a clean mounting surface that will not sag over time. Skipping the channel is the most common reason a DIY underglow looks amateur within a year.
Color Temperature and the Glow You Actually Want
Color temperature is where most underglow projects either land their effect or miss it entirely. Measured in Kelvin, lower numbers are warmer and higher numbers are cooler. A 2700K to 3000K range produces the candlelight-to-soft-white glow that reads as residential and calming. Pushing to 3500K gives you a slightly crisper white that suits modern, gallery-style bathrooms with stone and metal finishes. Anything above 4000K starts to feel clinical and will undermine the spa intent.
If you want flexibility, install a tunable white strip, sometimes labeled CCT-adjustable, that lets you dial anywhere from 2200K to 5000K from a single driver. This pairs naturally with circadian routines: warm amber in the late evening to support melatonin production, neutral white in the morning. Several large-scale studies summarized by the IES have linked evening exposure to short-wavelength (cool, blue-rich) light with delayed sleep onset, which is one reason warm underglow at night is more than an aesthetic choice.
Brightness matters as much as color. Underglow is meant to be indirect ambient light, not task lighting, and a typical residential install lands in the range of 200 to 400 lumens per linear meter of strip. Anything brighter and the underside becomes a glare source that distracts from the rest of the room. A dimmable driver is essentially required, because the perfect daytime brightness is almost always too much at 2 a.m. Look for drivers rated for 0 to 100 percent dimming with a compatible wall control, not just on/off.
Have you considered how the wall paint will read once the glow hits it? A warm white strip against a cool gray wall will fight itself, producing a slightly muddy color cast at the floor line. Pull a sample of the strip's actual output against a paint chip before committing to either choice. A simple test: tape a 12-inch piece of strip to a card, hold it under the vanity at the planned mounting point, and look at the floor and lower wall in the dark. If the result feels right, you have your answer.
Mounting Position and Beam Geometry
Where exactly the strip lives under the cabinet changes the entire effect. The two main options are flush at the front edge, which casts light forward across the floor, and recessed back from the front edge by 1 to 2 inches, which casts light downward and lets the front face of the cabinet dissolve into shadow. Recessed is the more sophisticated choice in most installs because it hides the diode line completely from anyone standing in the room.
The strip should also be set back from the wall by at least the depth of the cabinet's wall reveal, so the light does not climb the back wall and create a harsh bright line. If your floating vanity has a recessed toe area on the back, you can run the strip in a U or C shape, leaving the wall side open and producing a clean horseshoe of light on the floor that perfectly frames the vanity footprint. This is the move borrowed from boutique hotel design.
Beam angle is controlled almost entirely by the diffuser. A clear lens produces a roughly 120-degree spread, which is the default for most LED tape and is fine for general glow. A frosted diffuser in an aluminum channel softens the spread and eliminates pixelation. A narrow-beam channel with a 30 or 45 degree optic directs the light into a tighter pool, which is useful if the vanity sits over a textured floor and you want a defined halo rather than a wide wash.
One detail that gets missed: continuity at corners. If your vanity is L-shaped or wraps a corner, do not bend a single strip around the joint. Use a corner connector or two channels meeting at a mitered joint, and confirm that the LEDs continue at a consistent density across the seam. Visible dark spots at corners are the most common complaint after a self-installed underglow and are almost always avoidable with a $4 connector.
Wiring, Code, and the Driver Location
This is the section most articles skip and the section that determines whether your project is safe and inspection-ready. Bathrooms are wet locations under the National Electrical Code (NEC), and any line-voltage wiring must be on a GFCI-protected circuit. The good news is that LED tape is low voltage, typically 12V or 24V DC, so the strip itself is not the issue. The driver is.
The driver converts 120V line voltage to low-voltage DC and must be installed in a location that complies with both NEC requirements and the manufacturer's instructions. A common safe approach is to mount the driver inside an adjacent vanity drawer or cabinet body, hardwired into a junction box on a GFCI-protected circuit. Plug-in drivers connected to an outlet inside the cabinet are also acceptable in most jurisdictions, but the outlet itself must be GFCI-protected. If you are not sure, hire a licensed electrician for the line-voltage portion. The cost is usually one to two hours of labor and it removes any liability concern.
Place the driver where it can dissipate heat. Drivers fail when buried in insulation, stuffed behind plumbing, or surrounded by stored towels. Most quality drivers want at least a few inches of air on all sides. Many are also rated for a maximum continuous load, often 80 percent of nameplate, so a 60-watt driver should be specified for a load of 48 watts or less. Underloading a driver also extends its life, which matters because a failed driver means no light until you can access it.
For the control side, a wall-mounted dimmer that pairs with the driver is the cleanest user experience. Wireless and app-controlled options are increasingly common, and the American Lighting Association reports that smart-controlled bathroom lighting installs grew 38% year over year in 2024. If you go smart, choose a system with a physical wall control as backup, because nobody wants to open an app at 3 a.m.
Styling, Color Drift, and Long-Term Maintenance
The styling decisions around underglow are subtle but additive. A vanity in a warm wood like rift-cut white oak or walnut will glow most beautifully because the light bounces off both the floor and the underside of the cabinet, giving you a doubled effect. A high-gloss lacquer cabinet, by contrast, will reflect the strip itself if anyone crouches down, so the channel and diffuser have to be perfectly aligned. Matte finishes are more forgiving.
The hardware on the vanity should not fight the glow. If the underlight is warm at 2700K and the cabinet pulls are cool chrome, the eye will register the conflict. Brushed brass, antique bronze, and matte black all sit comfortably with warm light. Polished chrome and stainless can work but read better against neutral white at 3500K. The American Society of Interior Designers (ASID) publishes finish-pairing guidance that is worth a glance before committing.
Over time, LED tape can experience color drift, a slow shift in output color as the phosphors age. Quality strips with binning in the 3-step MacAdam range will hold color for the life of the product. Cheap strips can drift visibly within 18 months, which is why the per-meter price difference between budget and premium tape almost always pays back. Plan to replace the strip in a long run as a unit, not in segments, because a new section will not match an aged section even from the same brand.
Cleaning is straightforward but easy to forget. Dust and lint accumulate on the diffuser and dim the output measurably within a year. A microfiber cloth on a long-handled duster, used monthly, will keep the line crisp. If your driver is accessible, check the housing temperature once a year; a driver that is uncomfortably hot to touch is a driver that is failing early. Replace before it dies and you will never lose the light.
Conclusion
Floating vanity underlighting is one of the highest-leverage moves in a bathroom renovation. The hardware cost is modest, the install is well within reach for a confident DIYer with an electrician on call for the line-voltage tie-in, and the visual return is wildly disproportionate to the budget. A single linear meter of high-CRI tape in an anodized channel, dimmed to about 30 percent at night, will change how the entire room feels.
The decisions that matter most are the ones you cannot see from across the room. IP rating that matches the splash zone. CRI of 90 or higher. A driver located where it can breathe and a dimmer that gives you the full range from candle-soft to functional. Color temperature in the 2700K to 3000K window, or tunable white if you want both. Mounting position recessed back from the front edge so the diodes disappear and only the glow remains. Get those right and the rest is styling.
Before you order parts, sketch the cabinet footprint and walk through the strip layout in your head. Where will the seams fall? Where does the driver live? Which dimmer will control it, and is the circuit GFCI-protected? Spending an hour on the plan saves a weekend of redoing connections. If any part of the wiring feels uncertain, bring in a licensed electrician for the high-voltage portion. The peace of mind is worth more than the saved labor.
Ready to start your floating vanity glow project? Pull the existing vanity drawings, measure the cabinet footprint, and price out a 24V, IP65, 95+ CRI tunable-white kit with an aluminum channel and a dimmable driver. Walk through the install plan with a licensed electrician before you cut a single piece of tape, and you will end up with a bathroom that quietly outperforms its budget every single night.
More Articles You May Like


Comments
Post a Comment