Venetian Plaster Walls in Bathrooms for Tadelakt-Like Finish
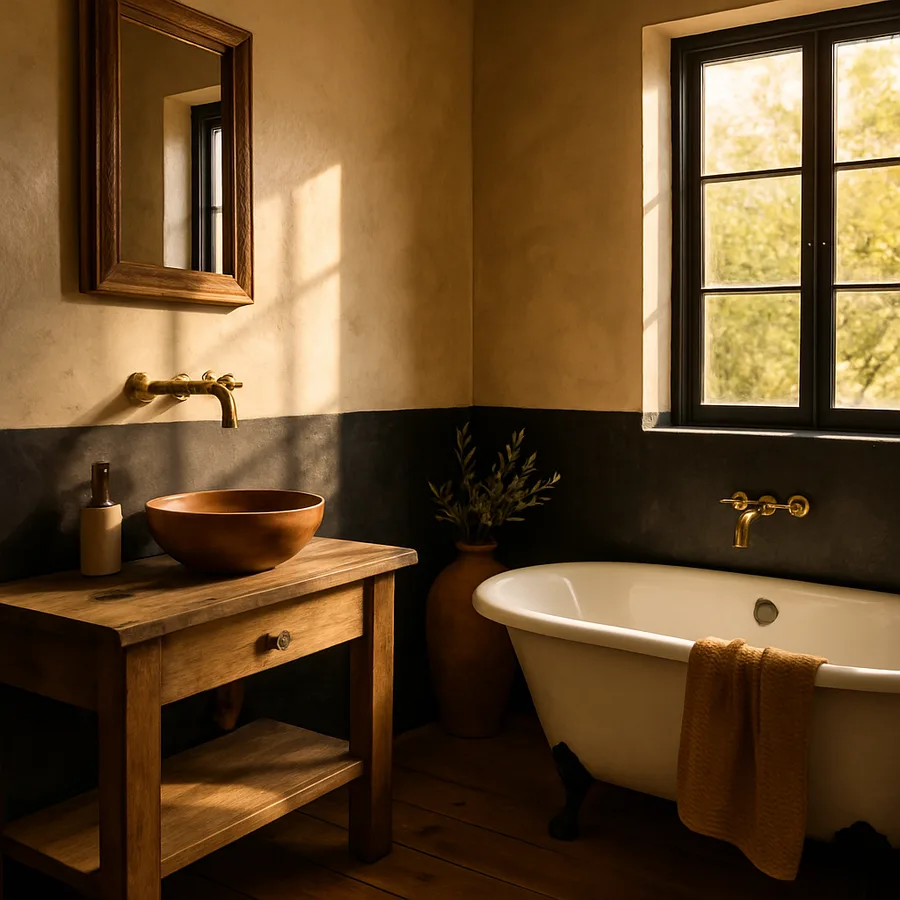
Among the small handful of finishes that genuinely change how a bathroom feels, almost nothing rivals a properly burnished Venetian plaster wall pursuing the look of Moroccan tadelakt. The surface is hard, glassy in spots, faintly mottled in others, and seems to absorb steam and lamplight in equal measure. Authentic tadelakt is a specialized lime plaster originally developed for the hammams of Marrakech, polished with smooth river stones and sealed with olive-oil soap. Most contractors outside Morocco do not work in true tadelakt, but a skilled application of Venetian plaster combined with the right sealing strategy delivers a remarkably similar atmosphere at a more accessible price point.
This guide is written for the homeowner working with a careful contractor or for the experienced DIYer attempting their first wet-zone plaster project. Bathrooms add complexity that ordinary rooms do not, so the prep, sequencing, and post-cure care all require extra attention. By the end you will have a clear sense of what is realistic to attempt yourself, what to subcontract, and how to evaluate finished work so it lasts decades rather than seasons.
Understanding Venetian Plaster Versus True Tadelakt
Venetian plaster is a broad category covering several traditional Italian techniques, including marmorino, stucco lustro, and grassello. All begin with slaked lime and finely ground marble dust, and all are applied in multiple thin layers and burnished to varying degrees of polish. Tadelakt, by contrast, uses a specific lime from the region around Marrakech, applied in fewer thicker passes and finished with hand-polishing using smooth stones, then waterproofed with traditional black soap.
The visual results overlap substantially when both are executed by skilled hands. The differences matter for purists and for very wet applications such as shower interiors, where authentic tadelakt's monolithic chemistry is genuinely superior. For bathroom walls outside the direct shower spray zone, well-applied Venetian plaster with a compatible mineral sealer holds up beautifully and offers far broader contractor availability and material sourcing.
According to the Master Painters Institute, lime-based decorative finishes have grown in specification frequency over the past several years as designers and homeowners reach for surfaces with more tactile depth than tile or paint. Architectural Digest has documented the trend across hospitality and residential projects from Mexico City to Stockholm, where the seamlessness and warm hand of plaster anchors otherwise minimal bathrooms. Have you noticed how often you reach out to touch a beautifully plastered wall the first time you see one? That instinctive response is precisely the reason this category has surged.
Substrate Preparation for Wet Zones
Bathroom plaster fails most often because of moisture intrusion behind the finish, not surface wear on the front. Begin with a fully waterproofed substrate. In areas adjacent to a shower or tub, this means a cement backer board (such as a fiber cement panel) coated with a liquid waterproofing membrane or, alternatively, a foam waterproofing panel system. Standard greenboard drywall is acceptable in low-moisture zones such as around a vanity, but it is not a forgiving choice for surfaces near direct water exposure.
All seams between panels must be taped and sealed before plaster touches them. The National Association of Home Builders publishes detailed guidance on bathroom moisture management that any plaster contractor should be able to discuss fluently. If your contractor seems vague on the subject, that is a meaningful red flag. The plaster sits on top of these layers and depends entirely on them; no surface treatment can rescue a poorly sealed substrate.
Once waterproofing is complete and inspected, apply a mineral bonding primer compatible with your chosen plaster system. Most Venetian plaster manufacturers (including major suppliers carried through Sherwin-Williams specialty channels) sell their own primers and require their use to maintain warranty coverage. The primer creates the chemical and mechanical bond that allows lime plaster to adhere and cure correctly.
Choosing Color, Sheen, and Finish Style
Color decisions for plaster bathrooms are unlike paint decisions. Pigment is mixed into the plaster body itself, which means the color goes deep into the material and reads slightly differently in every burnished pass. Sample boards are essential, and they must be sized large enough to read accurately; a four-by-four-inch chip is useless, while a two-by-two-foot panel is genuinely informative.
Popular bathroom palettes include warm whites that nod to Mediterranean traditions, soft terracottas, deep oxide reds, smoky greens, and even moody charcoals for boutique-hotel atmosphere. Surveys cited by the Paint Quality Institute show that bathroom color preferences have shifted noticeably toward saturated, earthy tones over the past decade, partly driven by social media exposure to spa and resort imagery.
Sheen is set by the burnishing technique rather than by the material itself. Light burnishing produces a matte, suede-like surface; aggressive burnishing produces a glossy, almost wet-looking finish that is associated with classical Venetian work. For a tadelakt-like effect, aim for medium burnishing on most surfaces with localized higher-polish areas to suggest hand variation. Discuss the desired sheen explicitly with your contractor and have them produce sample panels showing the exact look you are after.
Application Technique Layer by Layer
Authentic Venetian plaster goes on in three to five thin layers, each applied with a stainless steel trowel held at a low angle to the wall. The first layer is the base coat, applied to fill micro-imperfections and establish the color field. Subsequent layers are progressively thinner and applied with more deliberate trowel work, creating the cloud-like depth that distinguishes plaster from paint.
Between layers, the surface is allowed to set but not fully cure, then lightly scraped or sanded to remove trowel ridges before the next pass. Timing matters enormously; apply the next layer too soon and you will tear the surface, too late and the bond will be weaker. This is the part of the work that benefits most from experienced hands. A first-time DIYer can absolutely produce beautiful plaster, but the learning curve on timing is real, and bathroom walls are an unforgiving classroom.
The final layers are where the tadelakt-like character emerges. Hold the trowel almost flat and burnish the partially set plaster with firm, overlapping strokes. The pressure compacts the lime crystals and produces that characteristic glassy luminosity. For a true tadelakt feel, finish with a smooth river stone or polished trowel back, working in circles to create subtle directional sheen variations. This is also when you might wet-polish the surface with a damp sponge to enhance depth.
Sealing and Waterproofing for Bathroom Use
Even fully cured lime plaster needs protection in a bathroom environment. Authentic tadelakt is sealed with a paste of traditional black soap (savon noir) burnished into the surface. This soap saponifies with the lime to create a hydrophobic crystalline barrier that is genuinely impressive in performance. For Venetian plaster systems, manufacturers typically sell a compatible mineral or wax-based sealer designed for wet environments.
Apply the sealer in two thin coats, allowing each to absorb fully before the next. Some systems require buffing between coats to encourage penetration. The goal is a sealed surface that still breathes, allowing water vapor to migrate but blocking liquid water from penetrating the plaster body. Polymer-heavy sealers are tempting but often counterproductive; they create a film that can fail at edges and trap moisture inside, leading to failures that are difficult to repair invisibly.
Direct shower walls demand the most rigorous sealing and ideally an authentic tadelakt application by a specialist if you want plaster in that zone. For walls outside the spray pattern (around the vanity, the tub surround face, the toilet alcove), well-sealed Venetian plaster performs beautifully. The American Society of Interior Designers (ASID) has noted in trend reporting that integrated wet-zone plaster designs have moved from rare to relatively common in custom residential work over the past five years.
Daily Care, Long-Term Maintenance, and Repair
Once cured and sealed, Venetian plaster bathroom walls need surprisingly little daily attention. Squeegee or wipe down significant water collection, especially in the first several months while the sealer matures. Avoid harsh cleaners, anything containing vinegar or other acids (which dissolve lime), and abrasive scrubbers. A microfiber cloth and warm water handle nearly all routine cleaning. For mineral deposits from hard water, a soft cloth dampened with distilled water and gentle pressure works well.
Soap scum tends to be less of an issue than on tile because the smooth burnished surface offers fewer mechanical anchor points. If buildup occurs, gentle wiping immediately after a shower prevents accumulation. A quarterly application of fresh tadelakt soap (or the manufacturer-specified maintenance product) restores the protective layer and keeps the surface looking freshly polished. Better Homes & Gardens recommends keeping a small dedicated set of soft cloths and the appropriate maintenance soap stored under the bathroom sink so the routine becomes effortless.
Repairs are the area where plaster diverges most sharply from tile. Small chips and scratches can be invisibly repaired by skilled plasterers, but the work requires color matching from the original pigment lot and careful blending. Keep a labeled sample of leftover plaster and pigment from your original installation; this small archive can save substantial cost down the road. Catastrophic damage (large impacts, water intrusion from behind) typically requires a full wall reskim, but such events are rare in normal use.
Conclusion
A Venetian plaster bathroom wall pursuing the tadelakt aesthetic is one of the most rewarding finishing decisions a homeowner can make. The material is ancient, the technique is alive in skilled hands worldwide, and the result is a surface that few other treatments can match for depth, atmosphere, and quiet luxury. The work demands real preparation and skilled application, but the payoff is a bathroom that feels like an entirely different category of space.
The most important decision you will make is whether to attempt the project yourself or hire a qualified plaster specialist. For walls outside direct water contact, a careful and patient first-time DIYer can produce excellent results with practice on sample boards. For shower interiors and other heavily wet zones, the case for hiring a true tadelakt or master plaster contractor is strong. Honest self-assessment here pays back enormously over the life of the installation.
Are you considering plaster for an upcoming bathroom renovation but unsure how to begin? Start by sourcing two or three qualified contractors in your area and asking to see finished projects in person. Photographs lie about plaster; in-person evaluation does not. Ask about substrate prep, sealing strategy, and warranty coverage. The right contractor will welcome these questions and answer in specific, confident detail rather than generalities.
If you are ready to move forward, take three concrete steps this week: request quotes from at least two specialty plaster contractors, order one large sample panel in your top color, and walk through your existing bathroom honestly evaluating which surfaces are good plaster candidates and which should remain tile or paint. The result of that small homework will be a better-scoped project, a calmer install, and a finished bathroom that will quietly delight you every day for decades.
One often-overlooked aspect of plaster bathroom design is the relationship between the plaster surface and the surrounding fixtures. Polished chrome and high-gloss faucets can clash with the matte, hand-finished quality of plaster; unlacquered brass, aged bronze, and brushed nickel typically harmonize far better. Similarly, sharp-edged contemporary vanities can fight the soft organic feel of a plastered wall, while curved or hand-shaped wood, stone, or vintage furniture pieces enhance it. These coordination decisions are not strictly necessary for the plaster to succeed, but the most memorable plastered bathrooms tend to be the ones where every surface has been considered as part of a unified material story rather than treated as an isolated element. Spend time looking at completed projects in design publications and in person when possible; the difference between a good plaster bathroom and a great one is rarely the plaster itself but the surrounding choices.
Finally, consider the long-term lifecycle and resale implications of installing a specialty plaster finish. Custom plasterwork tends to add meaningful value to the appraisal of higher-end homes and is increasingly recognized by realtors as a differentiator in competitive markets. However, very personal color choices (deep oxide red, dramatic charcoal) can polarize prospective buyers if you sell within a few years. If long-term resale is a concern, lean toward broadly appealing palettes (warm whites, soft taupes, muted greens) for primary bathrooms while saving more dramatic choices for powder rooms or guest baths where the stakes are lower. The National Association of Realtors and similar industry bodies have begun publishing data on specialty finish premium ranges, and bathroom plaster appears among the higher-return luxury upgrades in current market conditions, particularly in the Southwest and along both coasts where the aesthetic resonates most strongly with regional design traditions.
More Articles You May Like


Comments
Post a Comment