Sponge Painting Wall Texture Old World Plaster Look
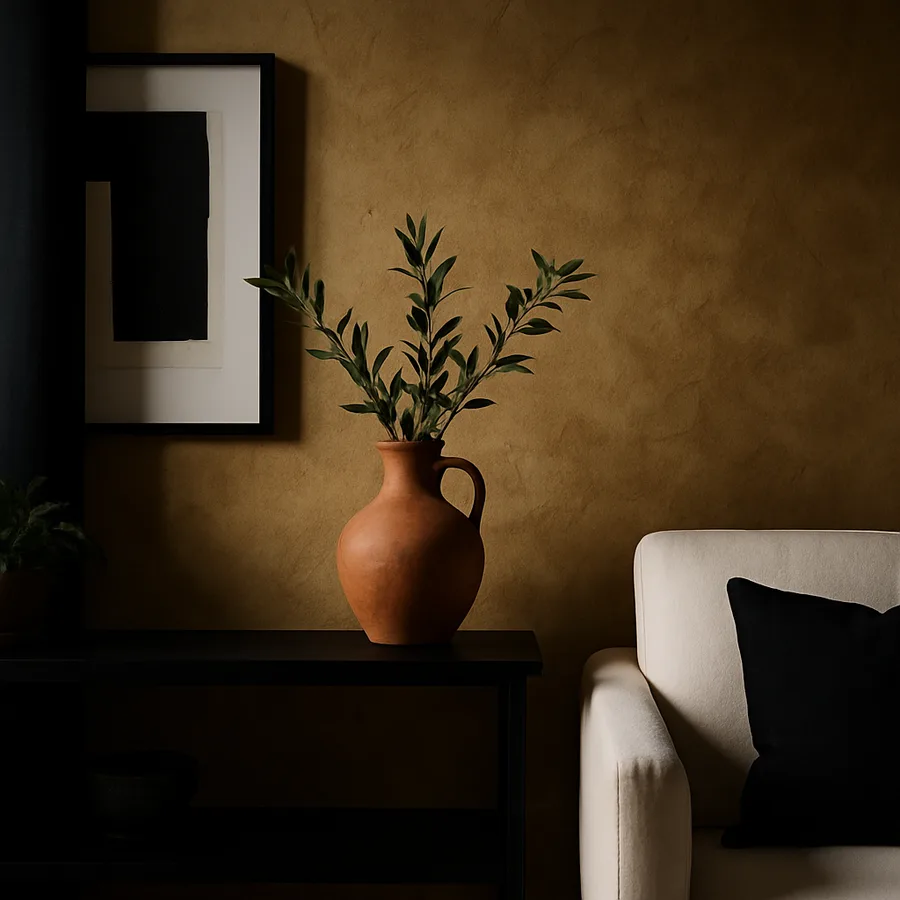
Sponge painting earned a bad reputation in the late 1990s because too many homeowners stippled pastel pinks over white walls and called it Tuscan, but the technique itself is centuries older than the trend and infinitely more sophisticated than its bargain-bin reputation suggests. Done correctly, a sponge-painted wall mimics the soft mineral depth of old world plaster, the kind found in Umbrian farmhouses and Provencal villas where lime washes have been layered on top of each other for two hundred years. The technique takes patience, the right sponge, and a disciplined color hand, but the materials cost a fraction of true plaster and the result reads as expensive rather than dated.
What Old World Plaster Actually Looks Like Up Close
Before mixing a single ounce of glaze, study the reference. True old world plaster is not a single color but a record of color over time. A wall in a centuries-old Tuscan kitchen might have started as raw lime white, been over-coated with ochre during a renovation generations later, dusted with smoke from a wood stove for fifty years, and then patched with a slightly cooler ochre after a 1960s repair. What your eye reads as "warm cream" is actually four to seven distinct colors layered semi-transparently with soft cloud-like edges, with darker pigment caught in the lower troughs and lighter pigment held on the upper peaks of the plaster's natural texture.
The defining quality is depth, not pattern. A real plaster wall does not look like a wall with paint on top of it; it looks like a wall that contains color from front to back. That depth comes from translucency, which is exactly what makes glazing the right technique and flat opaque paint the wrong one. Have you ever stood next to a stuccoed wall in late afternoon light and noticed the colors shift as you walk past? That parallax effect is the goal, and it comes from layering at least three glazes of related but distinct colors over a base coat.
The texture itself is gentle. Old world plaster is not the dramatic Venetian polished plaster you sometimes see in luxury bathrooms; it is closer to a quiet topographical map with soft hills and shallow valleys. Sherwin-Williams publishes a faux-finish guide that recommends starting with the smoothest possible drywall surface and building texture entirely with paint, glaze, and sponge, rather than trying to create texture in the substrate first.
Tools and the Right Kind of Sponge
The single most important purchase is the sponge itself. Cellulose kitchen sponges produce a uniform mechanical pattern that screams "1998 sponge paint," while a natural sea sponge, which is irregular, porous, and asymmetrical, produces the soft cloud-edged blotting that mimics real plaster. Buy the largest natural sea sponge you can find, ideally six to eight inches across, with a varied pore structure. Wet it thoroughly before the first coat so it is supple and damp rather than dry and stiff.
Beyond the sponge, you will need flat latex base-coat paint, glaze medium (a clear water-based medium that extends working time and increases translucency), at least three coordinated paint colors for the layers, lint-free rags, painter's tape, plastic buckets, and a pair of nitrile gloves. A glaze medium ratio of roughly four parts glaze to one part paint is a starting point for translucency; adjust by eye for stronger or softer color load. Sherwin-Williams sells a clear waterborne glaze called Faux Impressions that performs predictably for this technique, and the Master Painters Institute classifies glaze mediums separately from standard paints because their working properties differ enough to require their own product category.
One often-overlooked tool is the spray bottle. Misting the wall lightly with clean water before sponging the second and third glaze coats keeps the edges soft and prevents hard lines where one section meets the next. The mist also extends working time in dry climates, which matters because the technique demands wet-into-wet blending. Without the spray bottle, dry edges form within minutes and the wall starts to look patchy.
Building the Color Recipe in Layers
Old world plaster colors are dirty colors. Pure red, pure yellow, and pure orange will look like a children's birthday party; the right palette pulls those hues toward gray and brown. A classic warm Italian recipe might use a base coat of warm cream, a first glaze of soft ochre, a second glaze of weathered terracotta, and a final whisper of cool putty in the deepest valleys. A cool French recipe might run from chalky white through pale lavender-gray, smoky blue, and a final misted green.
Build the recipe by mixing three or four sample boards before committing to the wall. Paint each sample with the same base coat, then apply each glaze layer in succession, photographing the boards under both natural and artificial light. The colors will look completely different at noon than at 7pm, and a recipe that looks beautiful in showroom fluorescents can read brassy under warm incandescent bulbs. Benjamin Moore historic palettes are an excellent starting point because the colors are pre-grayed for authenticity, and the brand publishes sample-board recipes specifically for European faux finishes.
A common mistake is making the layers too contrasty. The strongest old world plaster effects use closely related colors with only modest value differences between layers, so the final wall reads as one mineral surface rather than a stack of distinct paint coats. If you can identify each layer by name when standing five feet from the wall, the contrast is too high; pull the layers closer together and the wall starts to look like real plaster.
The Sponge Technique Step by Step
Begin with a clean wall, primed and finished with the base-coat color, fully dry. Tape off adjacent surfaces and lay drop cloths because sponging throws more spatter than rolling. Mix the first glaze (paint plus glaze medium) and pour a shallow puddle into a paint tray. Dampen the sea sponge with water, wring it nearly dry, then dip one face lightly into the glaze. Off-load the loaded sponge onto a piece of cardboard until it leaves a soft irregular impression rather than a wet print.
Apply the first glaze in a random rotational pattern, lifting and turning the sponge between each touch so no two impressions are identical. Do not press hard; the goal is a kissing contact that leaves color in the sponge's high spots only. Work in sections of three to four square feet, keeping a wet edge with the previous section. Cover roughly 60 to 70 percent of the base coat with this first glaze, leaving deliberate gaps so the base color shows through. Step back every few minutes to read the wall as a whole rather than as individual marks.
Allow the first glaze to dry, then apply the second glaze using the same technique but with a fresh sponge face and a different rotation pattern, covering only 40 to 50 percent of the wall. The third glaze covers 20 to 30 percent and is the most strategic, applied selectively in spots that mimic where shadow would naturally fall: corners, the bottom third of the wall, near baseboards, and around the natural focal points of the architecture. The progressive reduction in coverage is what creates depth, because the human eye reads decreasing density as receding distance.
Common Mistakes and How to Recover
The first mistake is the regular pattern, which happens when the painter unconsciously rotates the sponge in the same direction with each touch. Force yourself to twist the sponge a quarter turn between every impression, and switch hands occasionally to break muscle memory. The second mistake is too much paint on the sponge, which produces wet blots instead of soft texture; off-load aggressively until the sponge prints lightly.
The third mistake, and the most common, is panicking mid-wall. Sponge finishes look terrible at the halfway point because the eye reads the unfinished pattern as patchy. The temptation is to keep adding glaze until the patchiness disappears, but that path leads to a muddy overworked wall. Instead, finish the entire wall in the planned three layers, walk away for two hours, then return and assess. Almost always the finish reads better after rest, and any genuine weak spots can be touched up locally with a small sponge piece and a thinned glaze.
If a section truly fails, the recovery is simple: let everything dry, sand lightly with 220-grit, prime the affected area, and start the layers again from the base coat in that section. Working in sections rather than continuous walls, with breaks in the technique at natural architectural lines like corners, doors, or wainscoting, makes recovery far easier than trying to blend across an open wall. The American Society of Interior Designers reports that more than 60 percent of failed faux-finish projects are abandoned at the second-glaze stage, when the wall looks worst, so simply persevering past that point is half the battle.
Sealing, Lighting, and Living With the Finish
Once the final glaze is fully cured, decide whether to seal the wall. In low-traffic rooms like dining rooms and primary bedrooms, the glaze itself is durable enough to leave bare. In kitchens, baths, and hallways, a clear waterborne polyurethane in matte sheen adds wash-ability without changing the visual depth. Avoid satin or semi-gloss top coats because the sheen flattens the depth that the layering created and adds a plasticky surface read.
Lighting completes or destroys the effect. A warm 2700K bulb at a raking angle, ideally from a sconce mounted six to eight inches off the wall, makes the texture come alive by casting micro-shadows in the sponge impressions. Overhead recessed cans flatten the wall and waste the technique entirely. If the room has only overhead lighting, add a single floor lamp or wall sconce to introduce the side-light that the finish needs to read three-dimensionally.
Furnishing the room around an old world plaster wall is its own discipline. The wall is now the loudest surface in the room visually, even if its colors are quiet, so simplify everything else. Solid linens, oiled wood, aged metal, and a single piece of confident art will pair with the wall; busy patterns and high-gloss finishes will fight it. Have you ever wondered why magazine photos of European farmhouse interiors feel so calm despite all that texture? It is because everything besides the walls is restrained, and the walls do almost all the visual work.
Conclusion: Bringing Patience Back to the Wall
A sponge-painted old world plaster finish is the rare technique where the materials are inexpensive but the result reads as luxury, and the difference is entirely in the hand of the person holding the sponge. The investment is time and attention rather than money: a single accent wall might take eight to ten hours of actual work spread across two or three days, but the finish lasts decades and ages more gracefully than any factory product.
If you have ever dismissed sponge painting as a dated trend, look again at the reference photographs of the centuries-old plasterwork the technique is meant to imitate. The dated version was a shortcut; the real thing is a discipline. Mix dirty colors, layer them with restraint, off-load the sponge until it whispers, and stop one layer earlier than your instincts suggest. The wall will look quieter and richer for the restraint.
Pick a single accent wall, not the whole room, for your first attempt. The dining room behind the table, the master bedroom behind the headboard, or a powder room from floor to ceiling are all forgiving spots where the finish has high impact and low risk. Order a natural sea sponge today, mix three sample boards this weekend, and commit to the wall next weekend. The finish will outlast the next three trends, and you will have a wall that no machine could have made.
More Articles You May Like


Comments
Post a Comment