Brick Veneer Accent Walls Indoors That Look Authentic and Old
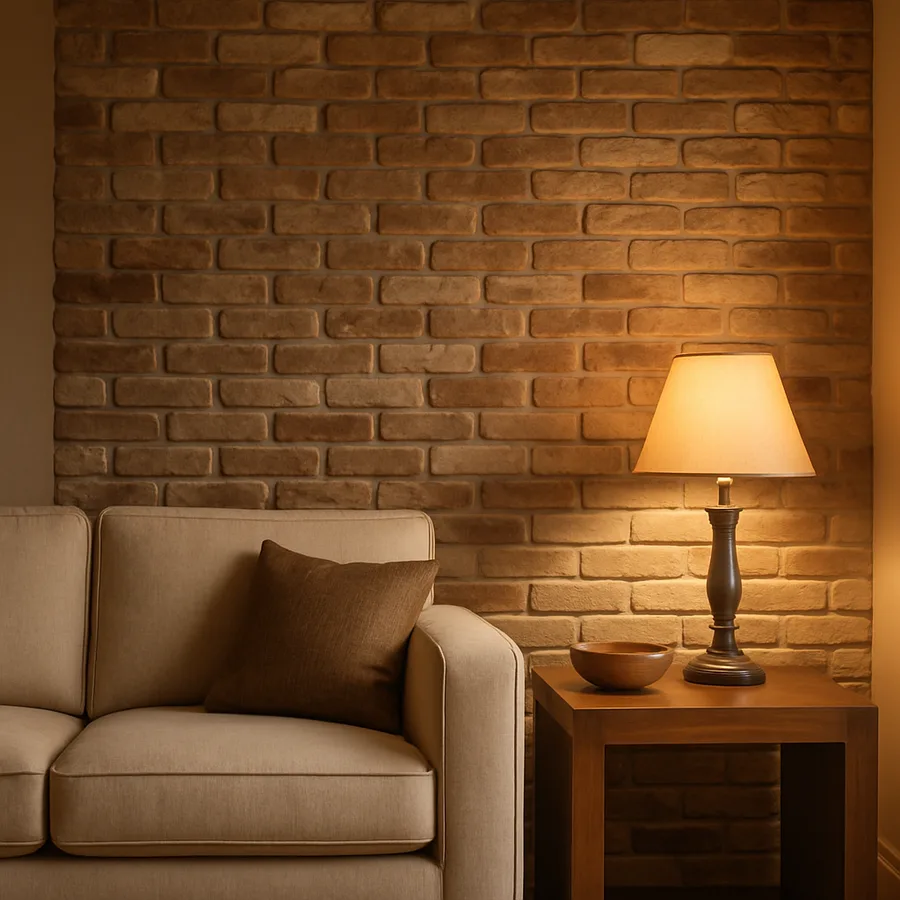
Most indoor brick veneer accent walls fail the authenticity test for one reason: they were installed to look new. Tight uniform mortar joints, pristine red faces, factory-cut corners. The eye reads new brick as decorative cladding, and decorative cladding reads as fake. Authentic-looking interior brick requires a different approach altogether, irregular faces, varied tonal range, irregular mortar squeeze-out, smoke staining, and the small accidents of time that signal a wall has stood for a hundred years even when it was installed last Tuesday.
This is achievable, and it is not as expensive as homeowners assume, but it requires choosing the right product category, the right mortar color and joint style, and the right finishing techniques. This guide walks through the four veneer categories that actually pass for old, the mortar decisions that make or break the result, the aging treatments that professional designers use, and the costs you should expect across each approach. By the end you will know whether you can DIY the installation, when to hire a mason, and what to specify so the finished wall reads as inherited rather than installed.
The Four Veneer Categories and What Each One Actually Looks Like
Interior brick veneer comes in four distinct product families, and choosing the wrong one is the single most common reason DIY installations look fake. The first family is thin brick veneer, which is genuine clay brick sliced to a thickness of half an inch to one inch. It installs like tile, with thinset mortar on a backer board substrate, and when sourced from a reputable kiln it has the same color depth and surface texture as full-thickness brick. This is the category professionals reach for when authenticity matters.
The second family is reclaimed thin brick, which is sliced from genuinely old structural brick salvaged from demolished factories, warehouses, and row houses. The faces carry a century of weathering, smoke, paint residue, and color variation that no manufacturer can replicate. The Brick Industry Association tracks reclaimed brick as one of the fastest-growing segments of the residential masonry market, and supply has tightened as demolition of pre-1940 industrial buildings has slowed. Browsing the Brick Industry Association resource library gives a clear sense of what authentic aged brick actually looks like up close.
The third family is manufactured brick veneer, sometimes called concrete brick veneer, which is cast from concrete or polymer-modified mortar in molds taken from real brick faces. Quality varies wildly. The best products from established manufacturers are nearly indistinguishable from clay brick at three feet of viewing distance and cost roughly half as much. The worst products have a plastic sheen, repeating face patterns every four to six bricks, and a hollow sound when tapped. The fourth category is brick wallpaper and brick-look panels, which I am mentioning only to advise against, they almost never pass for authentic in person, regardless of how convincing they look in photos.
Why Mortar Color and Joint Style Matter More Than the Brick
Designers consistently observe that homeowners obsess over brick selection and ignore mortar, when in fact the mortar is doing 60 percent of the visual work. Mortar color determines whether the wall reads as crisp or weathered, while joint style determines whether it reads as decorative or structural. Get either wrong and even the best reclaimed brick will look stagey.
For an authentically old result, mortar should be a warm gray or buff color, never bright white. Bright white mortar is a contemporary builder-grade choice that screams 21st century, while warm gray and buff replicate the lime-rich mortars used before the widespread adoption of Portland cement in the early 20th century. Specify a custom-tinted mortar mix from your supplier, or add a small amount of dry pigment (raw umber, yellow ochre, or burnt sienna) to a standard Type N mortar mix until you reach the right tone. Mix a sample, let it cure for 48 hours, and look at it dry, wet mortar always looks darker than dry.
For joint style, avoid the concave tooled joint that dominates modern brick construction. That clean recessed curve is a 20th-century innovation. For genuine old-look results, use either a flush joint (mortar troweled flush with the brick face) or a squeeze joint (mortar deliberately allowed to ooze out beyond the brick face and partially struck off, leaving irregular blobs and ridges). The squeeze joint, sometimes called a "sloppy joint" or "weeping joint," is the single most powerful authenticity move available. It transforms even budget manufactured brick into something that reads as ancient.
Installation Substrate, Adhesion, and the Hidden Structural Decisions
An interior brick veneer wall weighs roughly six to twelve pounds per square foot depending on the product, which is well within the load capacity of standard wood-framed walls but requires the right substrate to hold over time. The standard professional installation runs over either cement backer board (HardieBacker, Durock, or equivalent) screwed directly to the studs through the existing drywall, or over a metal lath nailed to the studs with a scratch coat of mortar. Backer board is faster and cleaner; metal lath gives a more authentic mortar-on-mortar feel that masons prefer.
Avoid installing thin brick veneer directly onto drywall with construction adhesive. The internet is full of tutorials suggesting this approach for budget projects, and the bricks will absolutely stay on the wall, but the joints crack within two years as the drywall flexes, and any future attempt to remove or modify the wall destroys the drywall behind. The marginal cost of proper backer board is $1.50 to $2.50 per square foot installed, and it is the single best insurance policy for the project.
Ventilation matters too, especially in kitchens and bathrooms where brick will absorb cooking grease, steam, and water splash. Sealing the finished wall with a breathable masonry sealer (not a film-forming sealer, which makes brick look plasticky) protects the surface without trapping moisture. Apply two thin coats with a brush, working sealer into joints as well as faces. Have you checked whether your accent wall location has any plumbing or electrical that would need to be relocated before the substrate goes up?
Aging Techniques That Make New Brick Look Inherited
Even with reclaimed brick and warm-tinted mortar, a freshly installed wall looks too clean for the first six months. Professional aging techniques close that gap on day one. The most powerful is selective whitewashing: a thin slurry of diluted white paint or limewash brushed selectively onto random bricks, partially wiped off while wet, and left to dry irregularly. This replicates the residue of paint that aged structural walls carry from a century of being painted and stripped. The slurry should be 4:1 water-to-paint at most, applied with a chip brush and immediately worked with a damp rag.
The second technique is smoke staining, which replicates fireplace residue and decades of indoor air quality. A thin wash of black or umber acrylic glaze, heavily diluted with water and applied selectively to upper portions of the wall and around any ceiling-line transitions, creates the gradient that real old walls develop. Use sparingly: too much smoke staining tips the wall into haunted-mansion territory. The third technique is mortar splatter, where small amounts of mortar are flicked from a brush onto random brick faces during installation and left to dry partially, replicating the mason's accidents of a less-precise era.
Finally, edge softening on individual bricks, particularly at corners and around any cut bricks, using a wire brush, a small chisel, or a multi-tool with a grinding attachment, breaks the factory crispness that screams "new." Real old bricks have rounded corners from a century of contact, settling, and minor damage. Replicating this on 10 to 15 percent of the visible bricks (never every brick) creates the irregularity the eye is looking for.
Cost Breakdown by Product, Square Footage, and Labor
For a typical 60-square-foot accent wall (roughly 10 feet wide by 6 feet tall, behind a sofa or framing a fireplace), here is what to expect across the four product categories. Manufactured concrete brick veneer runs $4 to $8 per square foot for materials, plus $6 to $12 per square foot for installation labor by a tile setter or finish carpenter, totaling roughly $600 to $1,200 for the wall.
Standard thin clay brick veneer runs $7 to $14 per square foot for materials, plus $10 to $18 per square foot for installation labor (which often requires a mason rather than a tile setter due to mortar work), totaling roughly $1,020 to $1,920 for the wall. Reclaimed thin brick veneer runs $14 to $28 per square foot for materials depending on age and provenance, plus $12 to $20 per square foot for skilled mason installation, totaling roughly $1,560 to $2,880 for the wall.
Add 10 to 15 percent for backer board, fasteners, mortar, sealers, and waste, plus another 5 to 10 percent for any electrical relocation or trim work at edges and ceiling line. A custom-tinted mortar adds $50 to $150 to material costs, and professional aging treatments add either two to four hours of designer time at $75 to $150 per hour, or a fixed $300 to $800 markup if your installer offers aging as a finishing service. Ask about aging in your initial bid conversation, many installers will quote it as included if you mention it upfront, but as an extra if you ask afterward.
Where Brick Veneer Walls Work Best in a Home
Brick veneer accent walls succeed in spaces where the brick has a logical structural reason to exist, even when it is purely decorative. Behind a kitchen range or stovetop reads as inevitable because brick was the original chimney material. Surrounding a fireplace reads as honest because brick was the original firebox surround. Framing a stairwell reads as historical because brick was the original load-bearing material in 19th-century row houses. The American Society of Interior Designers publishes case studies of residential projects that consistently locate brick walls in these high-justification zones rather than scattered randomly. Project archives at Architectural Digest reinforce the same pattern across decades of residential photography.
Brick walls struggle in spaces with no structural narrative, a random bedroom wall, the side of an open-plan kitchen island, a hallway. Without the visual logic of fire, structure, or chimney, the brick reads as a designer choice rather than an architectural reality, which is exactly the impression authentic old brick is supposed to avoid. If you find yourself justifying the location with phrases like "for visual interest," reconsider whether brick is the right material for that wall at all. Wood paneling, plaster texture, or a richly painted color may serve the design intent better without the authenticity tightrope.
Lighting matters too. Brick reads richest under warm 2700K lighting (the color temperature of incandescent and warm LED), and washes out or looks gray under cool 4000K and above. Direct downlights cast harsh shadows that exaggerate every joint irregularity, while wall-washer fixtures positioned 18 to 24 inches off the wall and angled to graze the surface bring out the texture beautifully. Plan the lighting before you finalize the wall location, because a beautifully installed brick wall under bad lighting still looks bad.
Conclusion: The Wall That Looks Like It Has Always Been There
The difference between a brick accent wall that reads as authentic and one that reads as decorative comes down to small decisions that compound. Reclaimed or carefully selected new brick. Warm-tinted mortar in a flush or squeeze joint. Proper substrate. Selective aging treatments applied with restraint. Warm lighting positioned to graze the surface. Get most of these right and the wall reads as inherited even when every component is brand new. Get most of them wrong and even genuinely 150-year-old reclaimed brick will look like a Pinterest project.
The financial commitment is real but not extreme, a fully-finished 60-square-foot accent wall runs $800 to $3,000 depending on choices, which is roughly the cost of a midrange sofa and arguably more durable. The emotional return is significant: brick walls anchor rooms, signal permanence, and accept decades of furniture rearrangement and styling changes without losing their character. They are one of the few interior treatments that genuinely improve with time and use rather than degrading.
Before you commit, visit at least three completed brick wall projects in your area, most masons and tile contractors will arrange this if you ask, and pay specific attention to the mortar color and joint style at close range. Photograph the joints with your phone and bring those photos to your design conversation. Ready to start your own brick wall project? Begin with a sample board: have your contractor mock up a two-by-two-foot panel using your selected brick, mortar, and aging treatments, install it temporarily in your space for a week, and live with it before approving the full installation. The hour spent on a sample saves the regret of a full wall that misses the mark.
More Articles You May Like
Comments
Post a Comment