Rainwater Barrel Connection to Downspouts for Garden Irrigation
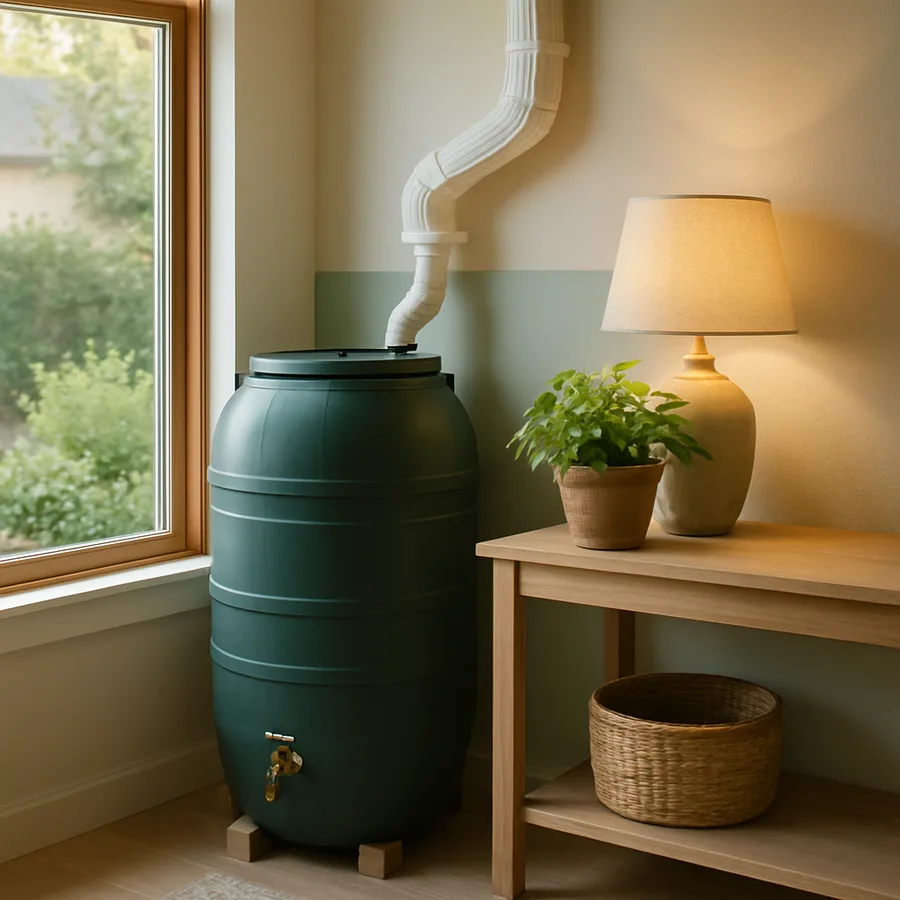
Every year, the average roof in the United States sheds tens of thousands of gallons of clean rainwater straight into stormwater systems, where it carries pollutants into rivers and oceans and contributes to municipal water treatment costs that ultimately show up on every homeowner's utility bill. A rainwater barrel connected to a downspout intercepts a meaningful fraction of that runoff and stores it for use in the garden, turning what was once a liability into a renewable irrigation resource. The setup is technically simple, surprisingly affordable, and one of the highest-leverage sustainability moves a homeowner can make on a single afternoon of work.
According to the U.S. Environmental Protection Agency, roughly 30 percent of household water consumption goes to outdoor uses, with landscape irrigation alone accounting for nearly 9 billion gallons of water per day across the country during peak summer months. Even modest residential rainwater capture can offset a significant share of that demand, particularly for households that maintain vegetable gardens, ornamental beds, or thirsty lawns. This guide walks through the planning, hardware, installation, and maintenance of a downspout-connected rain barrel system that actually works, with attention to the details that distinguish a successful long-term setup from a barrel that fills once and sits stagnant.
Why Rainwater Capture Has Become Standard Practice in Residential Sustainability
For much of the twentieth century, residential downspouts had a single job: move water away from the foundation as quickly as possible. That logic still holds for the foundation itself, but the broader hydrologic picture has shifted dramatically. Cities are now grappling with combined sewer overflows during heavy storms, aging stormwater infrastructure is being asked to handle climate-amplified rainfall events, and homeowners are facing rising water rates that make irrigation a meaningful line item in the household budget.
The rain barrel is the simplest, most accessible response to all of these pressures. A standard 50 to 55 gallon barrel installed under a typical residential downspout will fill completely from roughly half an inch of rainfall on a 1,000 square foot roof section, and it can be emptied on demand into garden beds, container plants, or lawn irrigation. Multiply that across a few barrels distributed around the house, and you can capture hundreds of gallons per rain event, easily covering a week or more of midsummer irrigation for a typical garden.
The EPA WaterSense program has explicitly endorsed residential rainwater capture as a recognized water conservation practice, and many states and municipalities now offer rebates or tax incentives for rain barrel installation. Their resources at EPA WaterSense include detailed guidance on residential water efficiency, with rain barrels appearing as one of several recommended outdoor strategies. Some jurisdictions still have legacy water rights laws that affect rainwater capture, so a quick check with your local water utility before purchasing equipment is always a smart first step.
Sizing, Siting, and Catchment Area Calculations
Before buying any hardware, sketch your roof and identify which downspouts will become collection points. The fundamental capture equation is straightforward: every 1 inch of rainfall on 1,000 square feet of roof yields roughly 600 gallons of water. A typical suburban home with 2,000 square feet of footprint distributed across four downspouts will deliver about 300 gallons per downspout per inch of rain, which means a single 55-gallon barrel will overflow after the first 20 minutes of any moderate storm.
The sizing implication is that one barrel is rarely enough. Households serious about meeting their irrigation needs from rainfall typically install multiple barrels, either distributed across several downspouts or linked together in a daisy-chained array beneath a single high-volume downspout. A bank of three 55-gallon barrels under one downspout captures 165 gallons per fill cycle, and during a wet spring can refill several times per week, easily covering a substantial garden.
Siting matters almost as much as sizing. Place barrels on the uphill side of garden beds whenever possible, so gravity does the work of distributing water through soaker hoses or simple gravity-fed drip systems. Elevate each barrel on a sturdy base, typically a stack of cinder blocks or a purpose-built wooden platform, to provide enough head pressure for a garden hose to flow naturally. A barrel sitting directly on the ground will deliver only a slow trickle, while a barrel raised 18 inches will produce useful flow rates for most home irrigation needs. The USDA Natural Resources Conservation Service publishes detailed guidance on residential rainwater system design that covers these sizing and siting considerations in depth.
Diverters, First Flush, and Keeping the System Clean
The connection point between the downspout and the barrel is where most amateur installations either succeed or quietly fail. The simplest approach is to cut the downspout, redirect it into the top of the barrel through a screened opening, and accept that the barrel will overflow during heavy rain. This works but creates two problems: the barrel cannot be bypassed for cleaning, and the first flush of dirty rooftop runoff, which contains accumulated dust, pollen, bird droppings, and asphalt particles, ends up in your storage tank.
The professional solution uses a downspout diverter, a clever piece of plastic or metal hardware that sits inline with the downspout and routes water sideways into the barrel until the barrel is full, then automatically returns the overflow to the downspout proper. Diverters cost $30 to $80 and dramatically improve system reliability. They can be closed during winter to prevent freeze damage, opened in spring without modifying the downspout itself, and they include a flexible hose connection that handles any minor misalignment between the downspout and the barrel.
For households serious about water quality, a first-flush diverter takes the system one step further by capturing the initial 1 to 5 gallons of runoff, which contains the highest concentration of contaminants, in a separate chamber that can be drained periodically. The remainder of the rain event flows clean into the storage barrel. First-flush systems are particularly valuable if you plan to use captured water for vegetable gardens, where any improvement in water quality translates directly to food safety. The USDA generally recommends that captured rainwater used on edible crops be applied to the soil rather than directly onto the leaves of food plants, particularly leafy greens, as a sensible precaution against any residual contamination.
Mosquito Control and Stagnation Prevention
The single most common failure mode of residential rain barrels is becoming an inadvertent mosquito breeding site. Standing water with even a few millimeters of organic debris can support mosquito reproduction within a week, and a poorly sealed barrel quickly becomes a public health nuisance to the entire neighborhood. The good news is that mosquito control in a rain barrel is straightforward when designed in from the start.
The first line of defense is a tight-fitting screen on every opening of the barrel, including the downspout inlet, the overflow outlet, and any access lid. A fine mesh, typically 1/16-inch hardware cloth or finer, blocks adult mosquitoes from entering the barrel to lay eggs in the first place. The second line of defense, used by many municipalities and water utilities, is the addition of a Bti dunk, a small biological larvicide tablet containing Bacillus thuringiensis israelensis bacteria that target mosquito larvae specifically without harming pets, plants, or beneficial insects. One dunk lasts roughly 30 days and costs about a dollar.
The third strategy is simply to use the water regularly. A barrel that empties every few days during the growing season has no time to develop a mosquito population, while a barrel that sits full for weeks between heavy rains is at risk regardless of how well it is screened. Designing the irrigation system to draw consistently from the barrel, perhaps through a slow drip line running to a thirsty bed, keeps the water moving and the mosquitoes at bay. Have you considered which garden beds are closest to your downspouts and how you might route a permanent soaker hose to them?
Distribution: Soaker Hoses, Drip Lines, and Watering Cans
A full rain barrel is only useful if you have a reliable way to get the water onto your plants. The simplest distribution method is a watering can, which works fine for container gardens and small bed maintenance but becomes tedious for any garden larger than a few square meters. The next step up is a standard garden hose connected to the barrel spigot, which provides flexibility but depends entirely on the head pressure your elevated barrel can provide.
For larger gardens, the most efficient distribution is a gravity-fed soaker hose system. A soaker hose is a porous rubber tube that weeps water along its entire length, applying moisture directly to the soil where plant roots can absorb it without losses to evaporation or wind drift. Connected to a barrel spigot through a simple valve, a soaker hose can run for hours on a slow gravity feed and deliver deep, even watering across a whole bed. The U.S. Department of Energy and the EPA both note in their irrigation efficiency materials that soaker hoses and drip systems can reduce outdoor water use by 30 to 50 percent compared to overhead sprinklers, which makes the combination of rain barrel plus soaker hose particularly impactful.
For households willing to invest a bit more, a dedicated rain barrel pump can pressurize the system enough to support standard drip irrigation lines or even short pop-up sprinkler runs. Small 12-volt pumps suitable for residential rain barrels cost $40 to $120, draw modest power, and can be paired with simple battery-and-solar setups for fully off-grid garden irrigation. This is the configuration favored by serious vegetable gardeners and small-scale homesteaders who want maximum independence from municipal water during the growing season.
Winterizing, Maintenance, and Long-Term Reliability
A rain barrel system is durable but not maintenance-free. The single most important seasonal task is winterization in any climate where temperatures drop below freezing. Water expanding as it freezes can split barrel walls, crack diverters, and damage spigots, leading to expensive replacements come spring. The standard winterization sequence is to drain the barrel completely, disconnect it from the downspout, switch the diverter to its bypass position so winter precipitation flows directly through the regular downspout, and either invert the barrel in place or store it in a garage or shed.
Spring reactivation is the reverse: clean the barrel interior with a mild bleach or vinegar solution, rinse thoroughly, replace the inlet screen if damaged, reinstall on its base, and reconnect the diverter. The whole process takes about 30 minutes per barrel and dramatically extends the equipment's useful life, with quality barrels easily lasting 10 to 15 years when properly maintained.
Mid-season maintenance includes periodic inspection of screens, removal of any leaves or debris that have made it past the inlet filter, and inspection of the spigot and overflow connection for leaks. A small amount of fine sediment will accumulate at the bottom of the barrel over time and is generally harmless, but a deeper clean every couple of years using a stiff brush and rinse keeps the system performing at its best. The EPA publishes seasonal maintenance guidance for residential stormwater management equipment, and rain barrels fit naturally into that broader framework.
Conclusion
Connecting a rain barrel to a downspout is one of the most accessible, highest-impact sustainability moves available to a residential homeowner. The hardware is inexpensive, the installation requires no specialized skills, and the operational return shows up immediately in lower water bills and healthier plants nourished by chlorine-free, naturally soft rainwater. Beyond the household savings, the broader environmental benefits include reduced stormwater runoff, less load on municipal treatment systems, and meaningful contributions to neighborhood-scale water resilience.
The keys to a successful installation are correct sizing for your roof catchment area, proper diverter selection to manage overflow and enable easy disconnection, vigilant mosquito control through screens and biological larvicides, and an irrigation distribution system that actually puts the captured water to use. Households that approach the project with this level of intention end up with systems that run reliably for a decade or longer, while those who simply place a barrel under a downspout and walk away often abandon the practice within a season.
The sustainability story here is real and worth taking seriously. Every gallon of captured rainwater is a gallon that does not have to be pumped, treated, and pressurized by your municipal utility, and a gallon that does not contribute to combined sewer overflow events during heavy rains. Across millions of households making the same modest investment, the cumulative impact is enormous, and the practice becomes a cornerstone of climate-resilient residential design.
To get started this season, walk around the perimeter of your house and identify the downspout closest to your most water-intensive garden bed. Measure the available space, check that you have at least 2 feet of vertical clearance for an elevated barrel base, and order a starter kit including the barrel, a downspout diverter, an elevated stand, and a soaker hose. Plan to spend about three hours on a Saturday morning installing everything, and by the next moderate rain you will be capturing your first hundred gallons of free, clean irrigation water.
More Articles You May Like



Comments
Post a Comment