Pet Door Installation in Existing Doors and Walls Step by Step
A well-installed pet door does more than save the human household from acting as a doorman. It changes the relationship between the home and the yard, gives pets the autonomy to follow their own rhythms, and removes one of the small daily frictions that accumulate quietly in any pet-owning household. Yet a poorly installed pet door creates problems out of all proportion to the time saved: drafts, water intrusion, security weaknesses, and the slow erosion of trust that comes when a pet finds the new opening confusing or scary.
This guide walks through the actual process of installing pet doors in three settings: a standard exterior door, an exterior wall, and a sliding glass door. The aim is to give a clear technical roadmap that produces a clean, weather-tight, secure installation rather than the cobbled-together result that pet doors often become when treated as a quick afternoon project. Each setting has its own challenges and the right approach varies, but the underlying principles of careful measurement, appropriate hardware, and proper sealing apply to all of them.
Choosing the Right Door for the Right Pet
Pet door selection starts with the pet, not the catalog. Measure the largest pet that will use the door at the shoulder and at the chest, because these are the dimensions that determine flap height and width respectively. Add at least one inch to the shoulder height for clearance, and two inches to the chest width. The American Veterinary Medical Association notes that pets forced through undersized doors can develop reluctance to use them and even chronic stress around the doorway, which defeats the purpose of installation.
Beyond size, the question of single-flap versus double-flap matters more than most homeowners realize. Single-flap doors are simpler and cheaper but provide minimal insulation against winter cold or summer heat. Double-flap doors create an air gap between the two flaps that significantly reduces conductive heat loss. For climates with meaningful winter or summer extremes, a double-flap design pays back its higher cost in a single heating or cooling season through reduced energy waste at the opening.
Electronic and microchip-activated doors add a layer of security and selectivity that mechanical flaps cannot match. These doors only open for the specific pet whose chip or collar tag is registered, excluding wildlife, neighborhood cats, and unfortunately some determined raccoons that have learned to defeat conventional flaps. The added cost ranges from one hundred to several hundred dollars over a basic model, but for pets that go in and out frequently, the security benefit is substantial. The American Animal Hospital Association supports microchip identification for pets generally, and the same chip can serve double duty for door access.
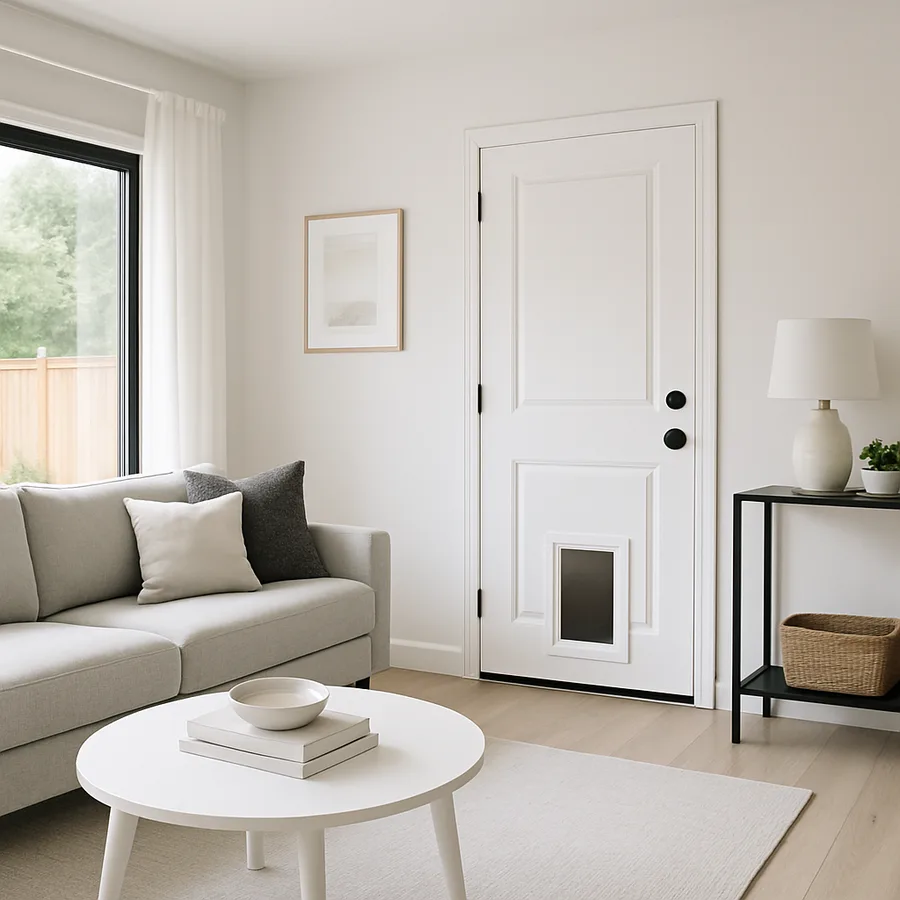
Step-by-Step: Installation in a Standard Exterior Door
Installing a pet door in a wood, fiberglass, or steel-faced exterior door is the most common scenario and the most approachable for a competent DIY homeowner. The process takes two to four hours depending on door material and the precision of the cuts, and requires basic tools: a drill, a jigsaw, a measuring tape, a level, and a sealant gun.
Begin by marking the cutout location. The bottom of the flap opening should sit one to two inches above the bottom of the dog's chest at standing height, which is typically four to eight inches above the floor for medium dogs and one to three inches for cats. Use the template provided with the pet door, taping it precisely level on the door surface. Drill pilot holes at each corner of the template, then connect them with the jigsaw to create the opening. Cut slowly and let the saw do the work, particularly on steel-faced doors where forcing the blade can deflect the cut and produce a non-square opening.
Once the opening is cut, deburr the edges with sandpaper or a file. Insert the interior frame of the pet door from one side, and the exterior frame from the other. Most quality pet doors include weatherstripping integrated into the frame, but applying a bead of exterior-grade silicone sealant around the frame perimeter before final tightening creates a waterproof seal that will last years longer than the seal alone. Tighten the frame screws gradually in a star pattern to apply even pressure, the same way a wheel is tightened on a car. Test the flap action with the dog or cat present, rewarding the first few passes through to build positive association with the new opening.
Step-by-Step: Installation Through an Exterior Wall
Wall installation is a more involved project but produces a result that is more durable, more weather-resistant, and architecturally cleaner than a door installation. The work crosses through framing, sheathing, insulation, and exterior cladding, which means it requires more planning and more attention to weatherproofing details. Most homeowners hire this work out, though experienced DIY builders can complete it.
The first decision is location. Pick a spot in an exterior wall that is convenient to the yard, free of structural obstructions, and away from electrical wiring and plumbing. Check the location from inside and outside for stud spacing, electrical outlets, and any signs of pipes or vents in the wall. A stud finder, an outlet locator, and ideally an inspection camera through a small test hole in the drywall can confirm that the chosen location is clear before any major cuts begin. Wall pet doors typically require a tunnel-style frame to span the wall thickness, and most manufacturers offer extension kits for thicker walls.
Cut the interior drywall first to expose the wall cavity. Remove insulation in the cutout area, then cut the exterior sheathing and siding. The opening must be framed with a header above and king studs on each side to maintain structural integrity, particularly in load-bearing walls. Consult a structural engineer or follow the framing guidance in the pet door manufacturer's instructions. The National Association of Home Builders publishes general framing standards that apply, and many local jurisdictions require permits for any exterior wall penetration of significant size.
Step-by-Step: Installation in a Sliding Glass Door
Sliding glass door pet doors are the rental-friendly, no-cutting solution for homeowners who do not want to modify their primary door or wall. These pet doors come as a tall panel that fits into the slider track, occupying the space the slider would otherwise close into. The panel includes the pet door at the bottom, with glass or solid material above. Installation takes thirty to ninety minutes and requires no permanent modifications.
Measure the slider opening height precisely from the bottom track to the top of the door frame. Pet door panels are adjustable in height through a telescoping design that accommodates a range of door sizes; choose a model whose adjustment range covers the measured height. Place the panel in the track and extend it to fit, then lock it in place using the included locking mechanism. Adjust the bottom seal so the panel sits firmly without gaps, and verify that the slider can still close securely against the panel for security.
The principal limitation of sliding door panels is that they reduce the effective slider opening, which can be inconvenient if the slider is also a primary path for moving furniture or large items in and out. They also introduce a thermal weak point at the top and bottom seals, which leak more air than a properly installed door or wall mount. For a temporary or rental solution, the trade-off is acceptable. For a long-term primary pet door, a permanent installation in a door or wall almost always serves better.
Weather Sealing, Security, and Climate Considerations
The single most important quality marker of a pet door installation is how well it seals against weather. Air leakage through a poorly installed pet door can equal or exceed the leakage through a typical mid-quality window, which represents real money in heating and cooling costs over years. Weather sealing depends on three factors: the quality of the door itself, the precision of the installation, and the maintenance of the seals over time.
Choose a door rated for the local climate. Insulated double-flap doors with magnetic seals on the bottom edges hold up well in cold-winter regions. In hot climates, the priority shifts to ultraviolet-resistant materials that do not degrade in summer sun, and to flap designs that minimize hot air infiltration. Apply silicone or polyurethane sealant around the frame perimeter at installation, and inspect the seal annually for cracking or pulling away from the surface. Replace flaps when they show wear; a worn flap that no longer seals adds significantly to the home's energy load.
Security concerns around pet doors are real but often overstated. Most pet doors are too small for an adult human to fit through, and the locking mechanisms on quality doors prevent intrusion when activated. Electronic doors that respond only to the registered pet's chip or tag eliminate the wildlife and neighborhood pet intrusion concerns that bother many owners. For doors large enough to admit a person, an interior locking panel that slides over the opening when not in use provides an additional layer of security at night or when the home is unoccupied.
Training the Pet and Living With the Door
Even the best installation fails if the pet refuses to use the door. Most dogs adapt within a few days of consistent positive reinforcement, but cats sometimes take weeks. The training process is straightforward but requires patience. Hold the flap fully open initially, calling the pet through with treats or food. Gradually lower the flap as the pet gains confidence, until the pet is pushing the flap open independently. The American Society for the Prevention of Cruelty to Animals publishes detailed training guides for pet door introduction that work for most situations.
Avoid forcing the pet through. Negative experiences in the early days can produce lasting reluctance that takes months to undo. If a pet shows persistent fear or refusal, slow down and break the training into smaller steps: getting comfortable approaching the door, comfortable touching the flap, comfortable being near the door when it is in use, and finally going through. Some pets benefit from watching another pet use the door first, which can short-circuit the entire training process.
Long-term living with a pet door involves a few ongoing considerations. The flap collects dirt and debris that should be wiped clean periodically. The seals around the frame benefit from annual inspection. In areas with significant wildlife pressure, an electronic door or a manual lock during nighttime hours prevents unwanted visitors. According to surveys collected by pet industry organizations, households with pet doors report higher satisfaction with their pets' behavior and exercise levels, attributing the improvement to the autonomy the door provides.
Conclusion
Pet door installation, done correctly, is one of the higher-leverage modifications available to a pet-owning household. The benefits compound daily across the years the door is in use: less interruption to work and sleep, more autonomous outdoor time for the pets, and a small but real reduction in the household chore load. The investment of a few hundred dollars and a few hours of installation labor returns value for as long as the pet remains in the household.
The success factors are well understood. Choose a door sized correctly for the largest pet that will use it, with a flap design and insulation level appropriate for the local climate. Install it precisely, with attention to weatherproofing details that often get rushed in DIY projects. Train the pet patiently and positively, accepting that some animals take longer to adapt than others. Maintain the seals and hardware over time so the door continues to perform as designed.
What makes the difference between a pet door that delights and one that becomes a source of regret? In almost every case, it comes down to the care taken at installation. A perfectly chosen door installed sloppily produces drafts, leaks, and security concerns. An average door installed carefully performs well for years. The cost difference between rushing the installation and doing it right is often nothing more than time and attention, both of which pay back many times over in the lived experience of the home.
Ready to install one? Start by measuring the largest pet in the household at chest and shoulder height, surveying candidate installation locations for structural and weather considerations, and reading the manufacturer's instructions for the specific model under consideration before purchasing. A weekend of careful work produces a result that quietly improves household life for the next decade or more.
For additional guidance on pet behavior, training around new home features, and renovation planning, consult the resources published by the ASPCA, the American Veterinary Medical Association, and the National Association of Home Builders, which together cover the behavioral, health, and construction dimensions of a successful pet door installation.
More Articles You May Like


Comments
Post a Comment