Pendant Light Cluster Over Kitchen Island For Drama
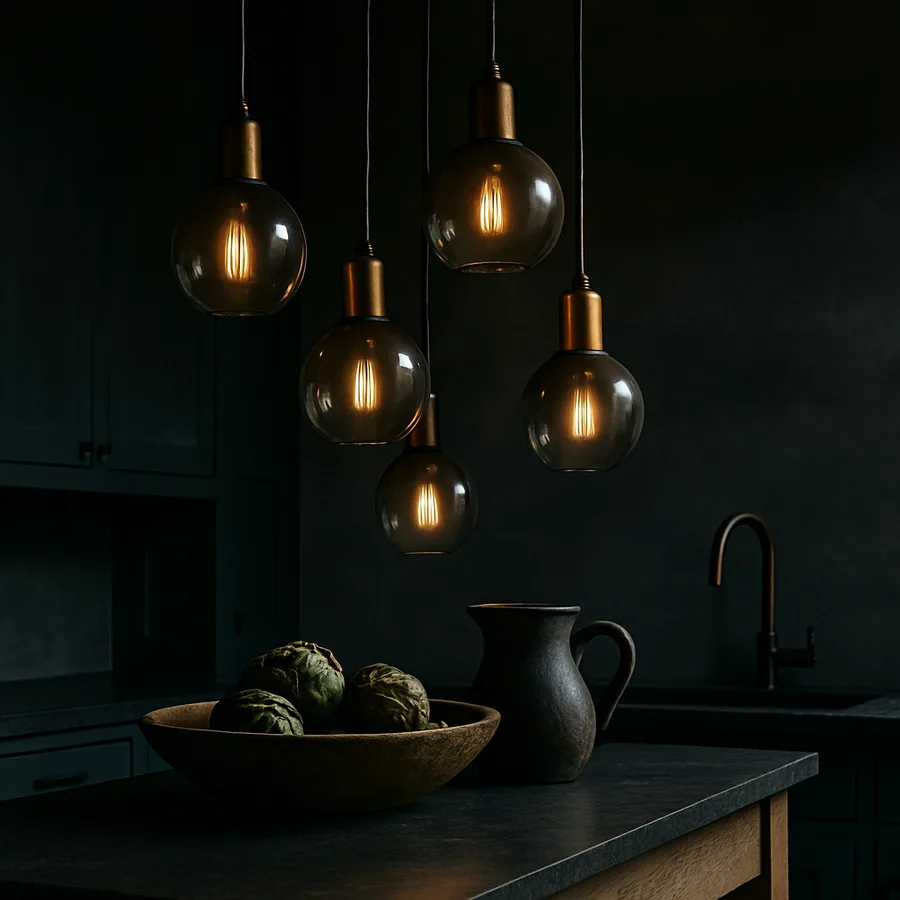
A single pendant over a kitchen island is a utility. Three matching pendants in a row are a habit. A genuine cluster, designed with intention and tuned to the architecture beneath it, is a moment. Cluster lighting transforms an island from a workspace into a centerpiece, drawing the eye, anchoring the room, and creating the kind of theatrical focal point that distinguishes a designed kitchen from a furnished one.
Yet for all the visual power they offer, pendant clusters are surprisingly easy to get wrong. Too small and they look fussy; too large and they overwhelm. Hung at the wrong height, they cast shadows on faces or block sightlines across the island. Wired with the wrong color temperature, they flatten food, age skin tones, and undermine the very drama they were meant to create. This guide walks through the principles that distinguish a confident cluster from a confused one, with the measurements, materials, and lighting concepts you need to make the call.
Why Clusters Work When Single Pendants Fall Flat
The visual logic of a cluster is fundamentally different from a row of identical pendants. A row repeats. A cluster composes. Repetition reads as orderly but inert; composition reads as deliberate and alive. The eye lingers on a cluster because there is more to look at, more relationship between the parts, more sense that someone made choices.
Designers often borrow from the language of art curation when they describe pendant clusters. The same principles that govern a salon-style picture wall apply to a chandelier of independent pendants: vary the size, vary the height, find a unifying material or color, and trust the asymmetry. The Illuminating Engineering Society notes in its residential lighting design guidance that layered light sources, including clustered pendants, produce more visually interesting and functionally effective kitchen lighting than single-source solutions, particularly in islands longer than six feet.
A cluster also distributes light more evenly across the island surface. A single oversized pendant can create a hot spot at center and shadows at the edges. Three to seven smaller fixtures spread the illumination, eliminating the dim corners where prep work tends to happen.
Sizing The Cluster To The Island
The first principle is proportion. A cluster should occupy roughly two-thirds of the island's length, leaving one-sixth of the slab unlit on each end. For a ten-foot island, that means the cluster spreads across roughly seventy-two to eighty inches. Compress the cluster too tightly and it looks lonely; stretch it too wide and individual pendants start to feel orphaned.
Within that footprint, the number of pendants depends on their individual size. The American Lighting Association suggests that the combined diameter of all pendants in a cluster should equal roughly half the width of the island for visual balance. A forty-two-inch-wide island therefore wants pendants that, summed across their diameters, total around twenty inches. That math could be three seven-inch globes, five four-inch cylinders, or a mixed arrangement of two larger and three smaller fixtures.
Mixed sizes almost always read as more sophisticated than uniform sizes. A pair of larger statement pendants flanked by smaller satellites creates rhythm and hierarchy in a way that three identical fixtures rarely achieve. Have you sketched your island in elevation and tested two or three sizing options on paper before ordering?
Hanging Heights That Flatter Faces
The single most-violated rule in kitchen pendant design is hanging height. The bottom of each pendant should sit roughly thirty to thirty-six inches above the countertop in most installations. Lower than thirty inches and the fixtures intrude on sightlines across the island; higher than thirty-six inches and the pendants float disconnected from the surface they are meant to illuminate.
For a cluster, vary the heights deliberately. A spread of three to six inches between the lowest and highest pendant introduces visual energy without violating sightline safety. The lowest pendant should still clear the heads of seated guests and the line of sight between people seated on opposite sides of the island. A standing eight-foot ceiling allows roughly forty-eight to fifty-four inches of pendant drop space; vaulted or two-story ceilings allow much more, but the same thirty-to-thirty-six inch above-counter rule still governs the bottom of the lowest fixture.
The Illuminating Engineering Society also recommends accounting for sitter eye height. At a counter-height island with twenty-five-inch stools, seated eyes sit roughly forty-six inches above the floor. Pendants hanging below sixty-four inches off the floor will block face-to-face conversation across the island. Most cluster failures trace back to a designer or homeowner ignoring this geometry.
Asymmetry, Material, And Color Cohesion
A successful cluster usually unifies through one consistent element while varying everything else. The unifying element might be the metal finish of the canopy and cord, the glass color, the bulb shape, or the basic silhouette family. Everything else, size, exact form, hanging height, becomes a variable that creates interest within the constraint.
One reliable formula is to choose three pendants of the same family in three different sizes, all in the same finish, hung at three different heights along an asymmetric axis. The asymmetric grouping reads as more contemporary and more confident than a perfectly centered, symmetrical arrangement. Another formula is to mix two contrasting fixture types, perhaps blown glass globes and slim metal cylinders, that share only a common metal accent. The contrast carries the drama; the shared accent provides the visual glue.
Architectural Digest has covered numerous award-winning kitchens that exemplify both approaches, and the common thread is restraint at the level of unifying detail combined with permission to vary almost everything else. The undisciplined cluster, with mismatched finishes, wildly different families, and no unifying thread, looks like a flea market rather than a composition.
Color Temperature, Bulbs, And Dimming
The drama of a pendant cluster lives or dies on its bulbs. The American Lighting Association strongly recommends 2700K to 3000K for residential kitchen pendants, the warm-white range that flatters food, skin, and natural materials. Anything cooler than 3500K shifts the kitchen toward a clinical, commercial feel that undermines the warmth of an entertaining space. Studies referenced by lighting researchers suggest that warmer color temperatures meaningfully improve the perceived appetite appeal of food, which is part of why nearly all restaurant lighting sits in the 2400K to 2700K range.
Equally important is the dimming behavior. Pendants should be on a dedicated dimmer, separate from any recessed cans or under-cabinet strips, so that the cluster can be tuned independently from the rest of the kitchen. The most dramatic moments in a kitchen, an evening cocktail hour, a candlelit dinner, an early-morning coffee, all benefit from pendants dimmed to twenty or thirty percent while other layers fade to near zero.
LED dimming requires a compatible driver and a compatible dimmer. Many homeowners install beautiful pendants only to discover that their dimmer flickers, buzzes, or refuses to dim below fifty percent. The American Lighting Association maintains compatibility databases with over twenty thousand pendant-dimmer combinations, and consulting them before purchase can save weeks of frustration.
The bulb inside the pendant also matters at least as much as the pendant itself, and bulb selection layers directly onto the dimming and color temperature decisions above. Exposed-filament bulbs, often used in clear glass pendants, deliver a warm sparkle but can produce direct glare against seated eye lines if not carefully positioned. Frosted globe bulbs scatter light more evenly and reduce glare at the cost of some sparkle. Reflector-style bulbs concentrate light downward onto the countertop and minimize spill, ideal for task-focused islands but visually colder for entertaining contexts.
Beam spread is a specification rarely discussed by homeowners but constantly considered by lighting designers. A narrow beam spread of twenty-five to forty degrees produces a tight pool of light directly under each pendant; a wide beam spread of seventy to one hundred twenty degrees produces a softer, overlapping wash of light across the entire island. The Illuminating Engineering Society recommends overlapping beam coverage of roughly thirty percent between adjacent pendants for even task illumination, which usually means choosing wider beam bulbs in clusters with three or more fixtures. Glare is the enemy of every dramatic pendant cluster, and a bare bulb visible from the seated position will fatigue the eye within minutes no matter how beautiful the fixture, which is why visual cutoff matters as much as raw lumen output.
Wiring, Junction Boxes, And Installation Reality
Cluster installations almost always require more electrical planning than a simple row of pendants. Each pendant typically needs its own canopy connection, which means either multiple junction boxes in the ceiling or a single multi-port canopy that gathers several cords through one ceiling penetration. The multi-port approach is cleaner visually and easier to install, though it limits the spread and asymmetry you can achieve.
For maximum flexibility, plan for individual junction boxes during the framing or rough-in phase of construction. Retrofitting cluster wiring into an existing ceiling means cutting drywall, fishing wires, and patching ceiling finishes, work that doubles or triples the installation cost. If you know a cluster is in your future, the smartest move is to rough in a pattern of five to seven boxes during construction, then cap the ones you do not use.
Confirm that the ceiling structure can support the combined weight of the cluster. Several large blown-glass pendants can easily weigh forty pounds or more once installed, and many ceiling boxes are rated for only fifty pounds. Have you consulted a licensed electrician about your specific cluster weight, ceiling structure, and circuit capacity before finalizing the design?
Conclusion
A pendant cluster is the closest thing a kitchen has to jewelry. It draws the eye, signals intention, and transforms an everyday workspace into a room that wants to be photographed. When the proportions, heights, materials, and lighting quality all align, the result is the kind of architectural moment that elevates the entire ground floor of a home. When any of those elements is wrong, the cluster reads as a missed opportunity at best and a visual irritation at worst.
The most successful clusters share a few simple traits. They occupy roughly two-thirds of the island length, sum to half the island width across their combined diameters, hang thirty to thirty-six inches above the counter at their lowest point, unify through one consistent element while varying others, and live on warm-white bulbs paired with high-quality dimming. None of these principles are arbitrary; each one solves a specific functional or visual problem that recurs across thousands of kitchens.
If you are designing a new kitchen, plan the cluster wiring during construction so that the electrical infrastructure does not constrain your aesthetic choices later. If you are upgrading an existing kitchen, work within the junction boxes you have, consider multi-port canopies to gather multiple pendants through a single ceiling penetration, and remember that fewer well-chosen fixtures almost always beat more mediocre ones.
Sit down with a measuring tape, an elevation sketch, and a cup of coffee this weekend, and start drafting your cluster on paper before you spend a dollar in the showroom. The hour you invest in proportion and height before purchase will save you the years you would otherwise spend living with a cluster that does not quite work. Lean on the American Lighting Association guides for sizing, the Illuminating Engineering Society for layered lighting principles, and a licensed electrician for the wiring that brings the whole composition to life.
Above all, treat the pendant cluster as the single most architecturally significant lighting choice in the kitchen, more important than the recessed cans, the under-cabinet strips, or even the natural light from the windows. Recessed lighting and task lighting can be adjusted, replaced, or supplemented with relative ease. A pendant cluster is the visual signature of the room, and changing it later means dealing with ceiling patches, electrical reroutes, and the disruption of a finished space. Get it right the first time, with the proportions, materials, and bulb quality your kitchen actually deserves, and the room will reward you every morning when you walk in to make coffee.
More Articles You May Like



Comments
Post a Comment