Bathroom Pendant Lights Over Vanities for Boutique Hotel Style
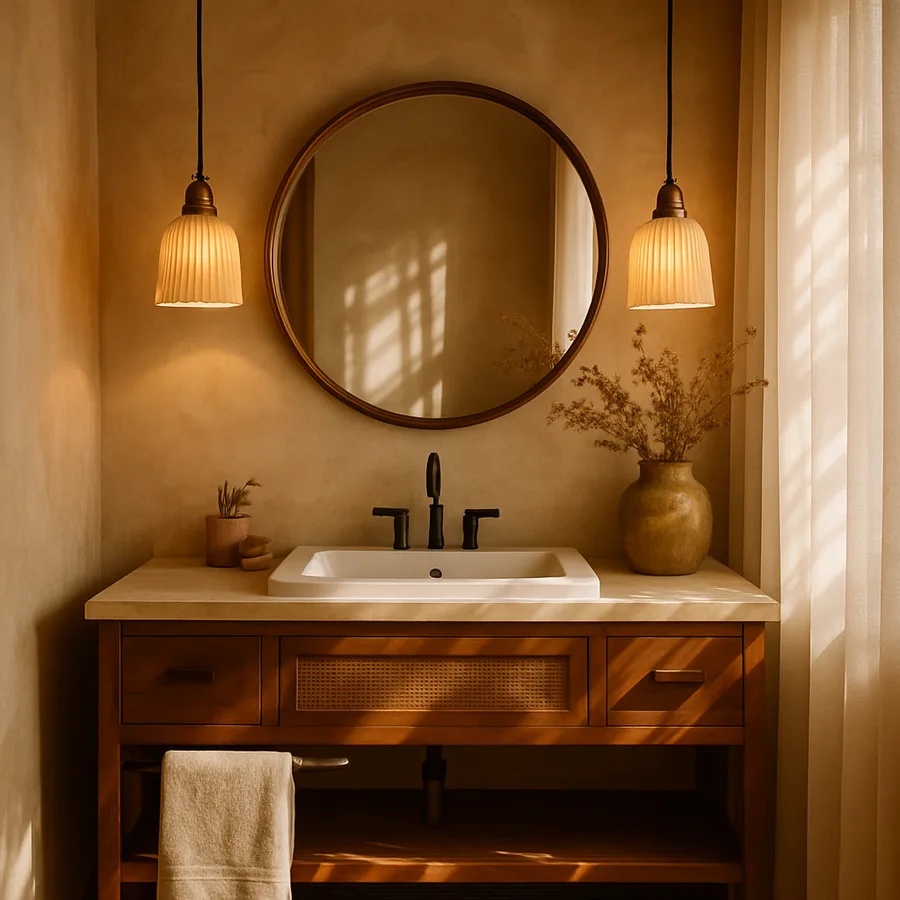
Walk into a well-designed boutique hotel bathroom and you will almost always notice the same detail: a pair of small pendants hanging over the vanity, dropped from the ceiling like punctuation marks framing the mirror. They look effortless. They are not. The pendant-over-vanity move is one of the most-imitated and most-misunderstood gestures in residential bathroom design, because the heights, the proportions, and the layering that make it work are almost never visible in the final photo.
This article walks through the anatomy of the look. Where the pendants hang in the room. How they relate to the mirror, the sink, and the user. Which fixture shapes work and which fight the geometry. How to wire them into a layered scheme that includes ambient ceiling fill and reflective surfaces. And how to do it all without violating National Electrical Code (NEC) requirements or the layered-lighting principles published by the National Kitchen and Bath Association (NKBA) and the Illuminating Engineering Society (IES).
Why Pendants Work So Well Over a Vanity
The pendant-over-vanity move solves several problems at once. It provides task light at the right height for face-level grooming. It draws the eye upward, making the bathroom feel taller and more generous. It introduces a sculptural object into a room that is otherwise dominated by hard, flat surfaces. And it borrows visual language from dining rooms and entryways, importing a sense of intentional design into a space that often defaults to purely functional fixtures.
Functionally, a pendant hung in front of a mirror at the right height delivers light to the user's face from a forward-and-above angle, similar to a side sconce. This is closer to the cross-fill geometry that the IES recommends for grooming tasks than a single ceiling fixture or a top-mounted bath bar. With a properly diffused shade, the light wraps the face evenly, fills under-eye shadows, and makes morning routines easier on every user in the household.
The aesthetic argument is even stronger. Pendants are inherently decorative in a way that flush-mount ceiling fixtures rarely are. A pair of small glass globes, woven shades, or slim metal cylinders becomes the focal point of the bathroom, the way a chandelier becomes the focal point of a dining room. The American Society of Interior Designers (ASID) has consistently identified statement lighting as one of the top three drivers of perceived value in residential bathroom renovations, alongside stone surfaces and freestanding tubs.
Have you ever wondered why a hotel bathroom photographs so well even when the room itself is small? Often it is because the lighting is layered and the focal point is held by a small decorative fixture rather than a flat overhead. Pendants do exactly that work in a residential context. They turn a utility room into a designed room with no other change to the architecture.
Mounting Height and Position Above the Vanity
The most important pendant decision is the bottom-of-fixture height above the countertop. Too high and the pendant becomes part of the ceiling, losing its task lighting role. Too low and it blocks the user's view of the mirror or hangs into the vanity workspace. The right number sits in a narrow window: 30 to 36 inches above the countertop for the bottom of the pendant, with the centerline of the visible bulb roughly at the user's forehead height when standing.
This puts the pendant at roughly 70 to 76 inches AFF in a standard bathroom with a 36-inch vanity. Tall users and standing tasks generally want the higher end of the range. Lower ceilings (under 8 feet) and seated tasks (a vanity stool) favor the lower end. If the ceiling is unusually high, do not extend the cord to follow it; pendants over a vanity should hold the same proportional relationship to the user, not to the architecture above.
Horizontal position is determined by the mirror and the sink. For a single sink, a single pendant centered on the sink works well, but a pair flanking the mirror often looks more deliberate. For a double vanity, two pendants centered on the two sinks are the classic move. The pendants should hang slightly forward of the wall, typically with their centerline roughly at the front edge of the countertop, so they sit in the user's natural sight line and do not crowd the mirror.
Spacing between pendants in a pair should reflect the spacing between sinks. For a 60-inch double vanity, the sinks are typically 30 inches apart on center, and the pendants should match that exact spacing. For a single mirror flanked by two pendants, space them so the inside edges of the fixtures are 28 to 36 inches apart, the same range used for side sconces. The geometry is the same; only the visual language changes.
Choosing Fixtures That Read as Boutique Hotel
Not every pendant works over a vanity. The boutique hotel look depends on a few specific fixture qualities. The first is scale. A pendant designed for a dining table is almost always too large for a bathroom. Aim for a pendant with a shade or globe diameter of 5 to 8 inches for a single sink and up to 10 inches for a large double vanity. Anything bigger crowds the mirror and the user's head.
The second is shade transparency. Clear glass globes with exposed bulbs have a vintage feel and work well in modern industrial or eclectic bathrooms, but they are also glare sources at face level. Opal glass, frosted glass, or fabric shades diffuse the light and prevent the bulb from becoming a hot spot in the user's vision. For a true boutique hotel feel, opal or alabaster shades are usually the safer bet.
The third is finish coordination. The pendant metalwork should relate to the other metals in the room: faucets, drawer pulls, towel bars, sconce hardware if any. Unrelated metals fight each other visually and undermine the cohesion that makes the hotel look feel intentional. Brushed brass, antique brass, matte black, brushed nickel, and unlacquered brass are all popular and read as elevated. Polished chrome can work in a clean, modern scheme but is harder to integrate with warm wood tones.
The fourth is cord or stem treatment. The cord or rod from which the pendant hangs is part of the design. Cloth-wrapped cords in brass canopies feel curated and bespoke. Plain plastic cords from chrome canopies feel utilitarian. Adjustable rod-mount pendants give you precise height control but read more modern; cord-mount pendants have a softer, more residential feel. According to the American Lighting Association, decorative pendant sales in the bathroom segment grew 33% in 2024, with cord-mount opal glass styles leading the category.
Lumens, Color Temperature, and Bulb Choice
A pendant pair over a vanity needs to deliver task lighting, not just ambience. Each pendant should produce roughly 800 to 1,200 lumens of output, for a combined total in the IES-recommended 1,600 to 2,400 lumen range at the vanity. With a 6 to 8 inch opal shade and a standard A19 LED, this typically means a 75-watt-equivalent bulb (around 1,100 lumens) in each pendant.
Color temperature should land at 2700K to 3000K for the warm, residential, hotel-bathroom feel. Cooler temperatures push the room toward office or hospital aesthetics, which is the opposite of the boutique hotel intent. If the rest of the bathroom uses tunable lighting, match the pendants to the same range and confirm that all bulbs read consistently warm when on.
CRI matters here too. With a frosted shade softening the light, the source quality is even more important because the diffuser hides the bulb but does not improve its color rendering. CRI 90 or higher is the minimum, and CRI 95+ is preferable for a vanity application. The cost difference per bulb is usually a few dollars and is immediately visible in the mirror, particularly on skin tones.
Dimming is essential. A vanity pendant pair at full brightness is welcome at 6 a.m. and harsh at 11 p.m. A dimmable LED bulb in a dimmable fixture, controlled by a wall dimmer compatible with both, gives you the full range from candle-soft to fully bright. Confirm dimmer and bulb compatibility before installing. The most common reason a pendant install flickers or buzzes is mismatched dimmer and LED driver, and the fix is almost always the dimmer rather than the bulb.
Layering Pendants With the Rest of the Lighting
The boutique hotel effect is rarely achieved with pendants alone. The pendants are the focal point, but they sit inside a layered scheme that typically includes ambient ceiling fill (recessed cans or a flush mount), accent lighting (toe-kick LED, niche lighting, or a backlit mirror), and sometimes task lighting in addition to the pendants (such as a backlit mirror or recessed downlight directly over the sink).
The pendants should be on their own switched circuit, independent of the ceiling fixture. This is the difference between a generic install and a designed one. At night, the ceiling stays off and only the dimmed pendants are on. In the morning, the ceiling provides full ambient fill while the pendants deliver task light at face level. The combination feels different from any single layer, and the independent control is what makes it possible.
If the bathroom has a freestanding tub, consider a third lighting layer: a small accent fixture or a chandelier-style pendant over the tub. NEC requires fixtures within the tub zone (3 feet horizontal and 8 feet vertical from the tub threshold) to be wet rated, and the chandelier must be specifically listed for wet locations. The boutique hotel chandelier-over-tub move is dramatic but requires careful spec selection. The NEC and your local inspector will both have opinions.
Reflective surfaces amplify the pendant effect. A backlit or beveled mirror, polished stone surfaces, glass shower enclosures, and metallic finishes all bounce the pendant light around the room, making a smaller fixture feel larger and the light feel more generous. Have you considered how much of the pendant's apparent brightness comes from reflections rather than direct output? In a heavily mirrored bathroom, a 1,100-lumen pendant can feel like a 2,000-lumen fixture because of the bounce.
Wiring, Code, and Working With an Electrician
Pendant installation requires a ceiling junction box rated for the weight of the fixture, located at the exact horizontal position needed for the pendant to hang over the correct point on the vanity. This means planning the box location during rough-in, before drywall and ceiling finish go up. Retrofitting a junction box into an existing ceiling is possible but expensive, particularly if there is limited attic access above.
Per the NEC, the circuit feeding the pendants must be GFCI-protected because the bathroom is a wet location. The pendants themselves must carry a damp rating at minimum, and pendants installed within the tub or shower zone must be wet rated. Most decorative pendants designed for dining rooms or entryways are not damp rated, so confirm the rating on the spec sheet before ordering. A surprisingly large number of pendants sold at general lighting retailers are not bathroom-rated.
The control side typically uses a single switch for the pendant pair, with a dimmer compatible with the chosen LED bulbs. If you want to switch each pendant independently (rare in practice, but possible), you will need separate circuits and a multi-gang switch box. Most installs use a single dimmer for the pair and a separate switch for the ceiling fixture, giving the homeowner two-layer control without complexity.
If you are renovating an existing bathroom and the ceiling has no existing junction box at the right location, ask your electrician about swag-mount pendants, which use a decorative cord routed across the ceiling from an existing box to a hook above the desired pendant location. This is the boutique hotel solution to a constrained existing layout, and it can look intentional and elegant when the cord is high-quality and the hook is well-placed. According to the American Lighting Association, swag-mount installations now account for roughly 18% of decorative pendant installs in retrofit projects.
Conclusion
Pendant lights over a bathroom vanity are one of the highest-leverage moves in residential bathroom design. The hardware cost is moderate, the install is achievable with a competent electrician, and the visual return is immediate and lasting. The room reads as designed rather than utilitarian, and the lighting performs as well as it looks. Boutique hotels have used this move for decades because it works.
The decisions that matter most are the geometric ones. Bottom of pendant 30 to 36 inches above the countertop. Spacing matched to sinks or to the mirror. Shade size in the 5 to 10 inch range. Diffused or opal shade rather than exposed bulb. Damp-rated fixture on a GFCI-protected circuit. Dimmable on an independent switch from the ceiling. Pendants in a finish that coordinates with the other metals in the room. Get those right and the look comes together almost automatically.
If you are renovating, plan the pendant locations at the same time as the vanity layout, not after. The junction box positions are essentially fixed once drywall is up, and moving them later is the kind of small mistake that erodes the entire effect. If you are retrofitting, consider a swag-mount approach, and accept that you may need to live with the existing ceiling box position unless you are willing to open the ceiling.
Ready to plan your boutique hotel vanity? Measure your vanity, mark the proposed pendant centerlines on the ceiling with painter's tape, and stand at the vanity to confirm the heights and positions feel right. Pull spec sheets on at least three candidate fixtures and confirm they are damp rated, dimmable, and proportioned for the space. Bring all of that to a licensed electrician before ordering, and you will end up with a bathroom that looks like it costs three times what it did.
More Articles You May Like


Comments
Post a Comment