Painted Kids Floor Murals Like Roads or Hopscotch Grids
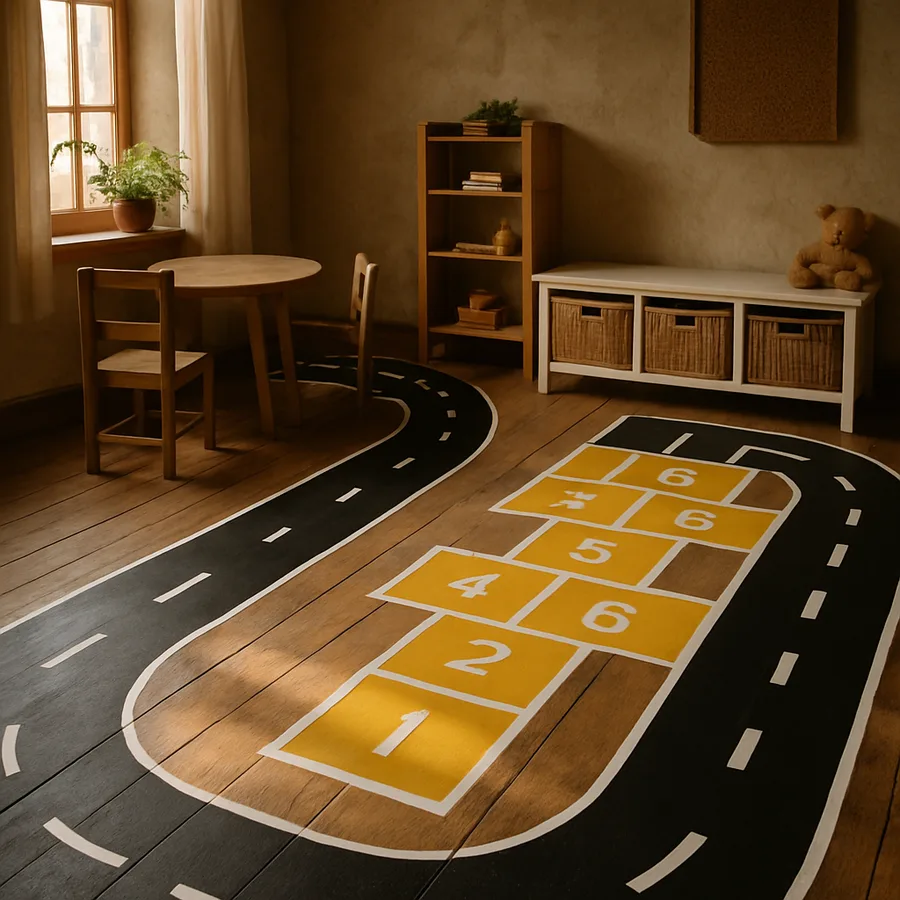
A painted floor mural is one of the highest-leverage design moves you can make in a child's bedroom, playroom, or basement. For the cost of a quart of paint and a weekend of work, you transform an ordinary plywood, concrete, or vinyl floor into a permanent invitation to play. Painted roads turn a single car into an afternoon of imaginative city-building. A hopscotch grid in a hallway turns a transit space into an active one. A compass rose at the center of a playroom orients everything else in the room and makes the floor read as designed rather than incidental.
Done well, a painted floor mural lasts five to ten years with normal wear and serves children from toddlerhood into pre-teen. Done badly, it chips within months, looks amateurish, and becomes a project you regret. The difference is preparation, paint selection, sealing, and design choices that suit how the floor is actually used. This guide walks through each, drawing on guidance from professional muralists, the Master Painters Institute, and the durability research published by the major coatings manufacturers.
Choosing the Right Floor Surface for Painting
Not every floor accepts paint equally, and the wrong substrate dooms the project regardless of effort. The most reliable surfaces are unfinished or lightly finished plywood, properly prepped concrete, and primed hardwood in good condition. The most challenging surfaces are vinyl tile, laminate, and any floor with an active wax or polish layer.
Plywood subfloor is the muralist's dream. It accepts primer evenly, takes detail well, and can be sanded and repainted later if the design needs to change. A 3/4-inch plywood subfloor in a playroom or basement is ideal for a mural. If you are designing a new room, consider explicitly choosing a sanded-grade plywood subfloor (such as Sande or birch ply) and finishing it with a painted mural rather than installing carpet or laminate over it. The cost saving is meaningful and the play value is dramatically higher.
Concrete works well for basements and garages converted to play space. Test the concrete first: tape a 12-by-12 inch piece of plastic to the floor and leave it 24 hours. If moisture beads on the underside, the slab is too damp to paint and needs a moisture barrier first. The National Association of Home Builders notes that an estimated 15 percent of basement slabs in U.S. homes have moisture levels too high for direct paint application without sealing. Hardwood floors can be painted, but doing so in a finished living space is a substantial commitment; existing finish must be sanded off, primer applied, and the project is harder to reverse than on plywood or concrete.
Preparation: The Step Most People Skip
The single greatest predictor of mural longevity is the quality of surface preparation. A flawless top coat over an inadequately prepped substrate will chip, peel, and fail within a year. A modest design over a properly prepped substrate will look fresh in five.
For plywood, fill all knots and seams with paintable wood filler, sand smooth, and vacuum thoroughly. Apply a high-quality bonding primer; shellac-based primers seal knots and prevent bleed-through, while latex bonding primers work well over previously primed surfaces. Two thin primer coats outperform one thick coat. For concrete, etch the surface with a phosphoric acid concrete etcher or rent a floor grinder to open the pores, then prime with a concrete-specific bonding primer. Skipping the etch on a smoothly troweled slab guarantees adhesion failure.
The clean floor matters as much as the prep. Vacuum, then damp-mop, then let dry completely (24 hours minimum) before primer. Any dust, hair, or debris becomes a permanent inclusion in the final finish. Designers we know use a tack cloth as the final pre-primer step to lift residual particulate. Painters tape for masking should be applied to fully cured primer, not damp paint, and removed at a 45-degree angle while the paint is still slightly tacky to produce clean edges. The Master Painters Institute publishes specific surface preparation standards (MPI 04 for concrete, MPI 06 for wood) that professional muralists follow; the principles are accessible to a careful DIY painter as well.
Paint Selection: Durability Versus Color
The paint choice determines wear life, color brilliance, and safety. The two main categories are floor and porch enamels and artist acrylics sealed under a clear topcoat. Each has trade-offs.
Floor and porch enamels (Benjamin Moore Floor & Patio, Sherwin-Williams Porch & Floor, Behr Premium Plus Porch & Patio) are formulated specifically for foot traffic. They cure to a hard, abrasion-resistant finish and require no separate topcoat for moderate use. The downside is limited color range; you are typically choosing from 30 to 50 standard colors per brand, and custom tinting is constrained. For large color blocks (a road bed, a hopscotch grid background, a base color for a play rug area), enamel is the right choice.
Artist acrylics (Golden, Liquitex, Chroma) offer essentially unlimited color and detail capability but must be protected by a separate clear topcoat. They are the right choice for the detail layer of a mural: the road lines, the numbers in a hopscotch grid, illustrative elements, lettering, and any custom illustration. Apply acrylics over a fully cured enamel base, allow at least 48 hours of drying, then seal everything under a water-based polyurethane topcoat. Use low-VOC paints certified by GREENGUARD Gold or Green Seal whenever possible, particularly given that children will spend extended time in direct contact with the floor. The American Academy of Pediatrics has published specific guidance on minimizing VOC exposure in children's spaces, recommending water-based paints and adequate ventilation during cure.
Designing Roads, Tracks, and Vehicle Play Floors
Painted road systems are the most popular floor mural type and for good reason: they provide years of unstructured play with minimal toy investment. Designing a successful road system, however, requires more thought than just painting a winding line.
The road width should accommodate the toy vehicles your child actually uses. A typical Hot Wheels or Matchbox car is about 1.25 inches wide; a road bed of 4 to 5 inches gives ample passing room and accommodates two cars side by side. For larger vehicles (Tonka trucks, larger toy fire engines), scale up to 6 to 8 inches. The road centerline should be a contrasting yellow or white dashed pattern, painted with a stencil for consistency. Road edges can be painted with a thin solid line or left as the boundary between the road color and the surrounding floor.
Plan the route topology before painting. The most successful road systems include a closed loop (so cars can travel continuously), at least two intersections, a parking area, and a destination feature like a gas station, a building footprint, or a roundabout. Avoid dead ends, which kill imaginative play. Sketch the layout on graph paper at 1/4-inch-per-foot scale, or mock it up full-size with painters tape on the actual floor and live with it for several days before committing. Add features that invite extension: a railroad crossing, a bridge marked with a contrast color, a school zone with a stop sign painted on the road. Better Homes and Gardens has featured several professional kids' road floors in recent years; the consistent feature is layered detail that rewards repeated discovery.
Hopscotch Grids, Game Boards, and Active Play Layouts
Hopscotch grids and other active-play floor markings work best in transitional spaces: hallways, basement landings, garage floors, and the perimeter zones of playrooms. The active jumping motion requires clear floor space without obstacles.
The classic 10-square hopscotch grid measures roughly 24 inches per square, with the grid 24 inches wide for single squares and 48 inches wide for the double square at positions 4-5 and 7-8. Adjust scale to your child's stride: a 4-year-old needs smaller squares (16 to 18 inches), an 8-year-old does well with the standard 24-inch squares. Number the squares clearly with a contrasting paint color and a stencil; freehand numbers wear quickly and look amateurish. Place the grid where there is at least 36 inches of clear space at each end for the start and end of play.
Beyond hopscotch, consider other game floor designs: a four-square grid (a 12-foot square divided into four 6-foot quadrants, numbered 1 through 4), a tic-tac-toe grid for a small floor zone, a balance line (a 10 to 15-foot painted line for tightrope walking), or a target pattern for beanbag games. The CPSC has noted that active play floor markings increase indoor activity in children by 20 to 35 percent compared to plain floors, and the American Academy of Pediatrics has consistently advocated for environmental design that supports daily physical activity in children. A painted floor that invites movement is doing real work.
Sealing, Maintenance, and Long-Term Care
The topcoat is what stands between your mural and oblivion. Choose a high-quality water-based polyurethane (Bona Traffic HD, Varathane Floor Finish, Minwax Polycrylic for Floors) and apply at least three thin coats over the fully cured paint. Each coat should be sanded lightly with 320-grit between applications to ensure adhesion. Apply with a microfiber pad applicator, not a brush or roller, to minimize streaks and bubbles.
For high-traffic areas, four to five topcoats meaningfully extends life. Allow the final coat to cure for at least 7 days before allowing heavy use; full cure for water-based polyurethane is typically 21 to 30 days. The cured surface should be cleaned with a damp microfiber mop and pH-neutral floor cleaner; avoid ammonia, vinegar, and abrasive cleaners, which degrade the finish. The Master Painters Institute recommends touching up a sealed mural every 3 to 5 years with a fresh topcoat, sanding the existing surface lightly before reapplication.
Inevitable wear and chips can be touched up. Keep small jars of each paint color used in the mural, labeled and stored in the basement or utility room. A small chip can be cleaned, lightly sanded, touched up with the original color, and resealed with a small amount of polyurethane. The Better Homes and Gardens editorial team has consistently noted that the perceived longevity of any painted floor is more about touch-up discipline than about initial paint selection. Spend an hour twice a year on touch-ups and the mural will last a decade.
Involving Children in the Design Process
A mural designed with the child rather than for the child sees significantly higher long-term engagement. This does not mean handing a four-year-old a brush and letting them paint freehand; it means treating their preferences and play patterns as design inputs. Ask which toy vehicles they use most often (this determines road width), where they actually want to play (this determines mural location), and what features they would add to their dream play floor (this surfaces destinations and landmarks worth including).
For older children (ages 7 and up), invite them to sketch or place stickers on a scaled paper plan. They can choose colors within a curated palette, name landmarks ("Daisy's Cafe," "Owen's Garage"), and decide where the start and finish lines of the hopscotch grid should sit. This co-design process often surfaces preferences that adults would miss, and it produces a floor the child treats as theirs rather than as a parent's project.
Manage scope. Children will propose elaborate features that exceed the painter's skill or the floor's capacity. The right adult role is to translate enthusiasm into achievable elements: "I cannot paint a working drawbridge, but I can paint a bridge that crosses a blue river, and we can use a small block as a draw section." The result is a mural the child feels ownership of without burdening the painter with impossible commitments.
Conclusion: A Floor That Plays Back
A painted floor mural is one of the few design moves in a child's room that genuinely pays back daily. Unlike furniture that is used in fits and starts, the floor is in play every time the child walks into the room. A road system invites cars; a hopscotch grid invites jumping; a compass rose invites pretend exploration. The floor stops being neutral background and starts being an active participant in the room.
The main mistakes we see are inadequate prep (the project chips within a year), the wrong paint (artist acrylics with no topcoat, or wall paint on a floor), and overly ambitious designs that the painter cannot maintain. The best murals are simple in concept, executed cleanly, and properly sealed. A weekend of careful work produces years of play value, and the design becomes one of the room's most-loved features. Children form strong attachments to floor murals because they imprint on them at exactly the developmental moment when symbolic play emerges.
Have you tested your floor surface for moisture and confirmed it will accept paint? And do you have a route topology that includes a closed loop, multiple intersections, and a destination feature? Join our newsletter for downloadable mural templates, including a printable road-and-hopscotch grid you can chalk onto the floor before painting. The right floor mural, designed for how your child actually plays and built to last, is a small project with outsized returns. Get the prep right, choose the right paint and sealer, and your floor will play back for years.
More Articles You May Like


Comments
Post a Comment