Lighted Stair Railings With Hidden LED Strips Underneath
Lighted Stair Railings With Hidden LED Strips Underneath
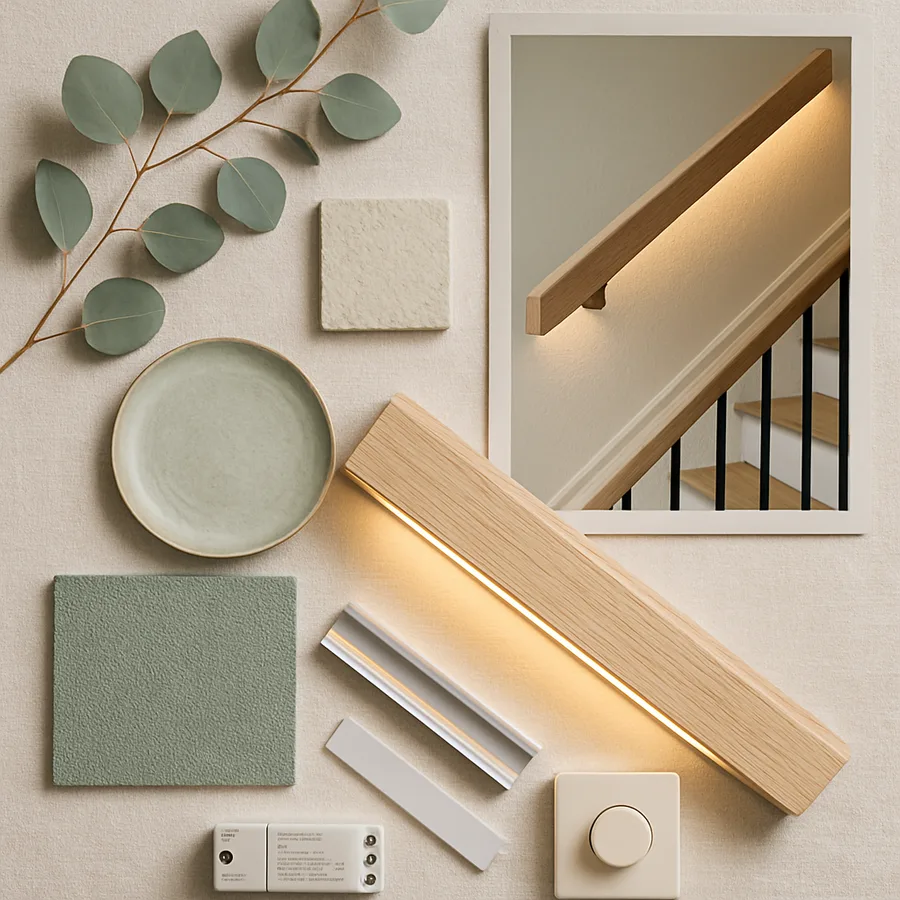
A staircase glowing with quiet light along the underside of its railing is one of the most evocative details in contemporary residential design. The effect, achieved by integrating hidden LED strips into a continuous channel beneath the handrail, transforms a functional element into a soft architectural feature that improves nighttime navigation and elevates the entire stairwell. Done correctly, the light source remains entirely invisible, and only the warm wash on the treads and walls reveals its presence. Done poorly, the strip betrays itself with hot spots, color inconsistencies, or unsightly drivers, so this is a project that rewards careful planning more than raw mechanical skill.
This article walks through the design and installation of a hidden LED handrail system, from concept through the final test, with an emphasis on the details that distinguish a professional result from a hobbyist effort. The guidance touches on lighting design principles published by the Illuminating Engineering Society, the leading authority on quality lighting practice in North America, and on safety considerations from the residential electrical code that govern any low-voltage wiring run within a home. Whether you plan to do the work yourself or hire a licensed contractor, understanding the principles will help you specify the system intelligently.
Why Underrail Lighting Belongs in the Modern Stair
The staircase is one of the few interior elements that must function safely in the dark. Children rise to use the bathroom, adults descend for a midnight glass of water, guests return from a late evening, and pets traverse the stairs on their own schedule. Conventional overhead stair lighting either blinds the user with overhead glare or requires a wall switch that is awkward to reach mid-flight. A continuous wash of low-level light beneath the handrail solves both problems by lighting the treads directly without confronting the eye.
From a design standpoint, the linear glow draws the eye through the staircase as a single sculptural gesture. It elongates the visual rhythm of the handrail and ties the lower landing to the upper landing in a way that punctuated wall sconces or recessed step lights cannot. In open-plan homes where the staircase is visible from a living area, the lit handrail becomes a quiet design feature that registers in peripheral vision throughout the evening hours.
Energy use is negligible. A typical handrail run draws a few watts per meter, which means an entire two-story staircase consumes less power than a single incandescent bulb. The American Institute of Architects has emphasized energy-efficient lighting integration in residential projects, and an LED handrail is one of the most efficient ways to add ambient illumination in a home. Are you currently lighting your stairwell with a bright overhead fixture that you switch on briefly each night, only to find it too harsh? A hidden strip provides a gentler alternative that can stay on indefinitely at minimal cost.
Specifying the LED Strip and Power Supply
Strip selection is the most consequential decision in the entire project. Choose a high-quality, high-density strip with at least one hundred twenty light-emitting diodes per meter, because lower densities produce visible dotting when the strip is mounted close to a reflective surface. Color temperature should suit the home's vocabulary. Warm white, around twenty-seven hundred Kelvin, reads as residential and flattering, while neutral white around three thousand to thirty-five hundred Kelvin reads as more contemporary and clinical. Avoid anything cooler than thirty-five hundred Kelvin on a residential staircase, because it will feel institutional.
Color rendering index, abbreviated CRI, matters as much as color temperature. A strip with a CRI of ninety or above renders wood, fabric, and skin tones faithfully, while a budget strip with a CRI of seventy or eighty will make wood look muddy and skin look ill. The price difference between mid-grade and premium strips is modest at the linear footages involved in a single staircase, and the higher-CRI choice repays itself every evening.
Power supply selection is governed by total strip length and wattage per meter. Calculate the total wattage of your run, then choose a constant-voltage driver rated for at least twenty percent more capacity than your calculated load. Place the driver in a ventilated, accessible location, never in a sealed cavity, and remember that drivers produce a small amount of heat and an audible hum at certain dimming levels. A linen closet, a basement utility wall, or a vented millwork compartment all serve well.
Designing the Channel and Diffuser
The aluminum channel that houses the LED strip serves three purposes. It dissipates heat, which extends LED lifespan considerably, it provides a clean mounting surface that hides the strip itself, and it carries a frosted polycarbonate or acrylic diffuser that softens the light output into a continuous line rather than a row of dots. Channels are widely available in profiles designed for under-cabinet, under-stair, and under-rail applications.
For a handrail integration, choose a recessed channel that fits into a routed groove on the underside of the rail. The channel should sit flush with the wood surface so that only the diffuser face is visible, and the diffuser should be set back slightly from the lower edge of the rail to keep the strip itself invisible at any viewing angle. A common dimension is a channel about three quarters of an inch wide by one quarter inch deep, routed into a handrail at least one and a half inches thick.
End caps on the channel finish the run cleanly and protect the strip terminations. Use solid end caps where the rail terminates against a wall or a newel post, and use cable-passthrough end caps where the strip continues around a corner via a flexible connector. Plan the path of the strip carefully at every transition, because each connector adds a small dark spot that must be hidden behind a structural element.
Routing the Handrail and Wiring the Run
Mill the channel groove into the handrail before final installation, because cutting it after the rail is mounted is far more difficult. A plunge router with a straight bit and an edge guide produces clean, consistent grooves, and a few practice passes on scrap stock will calibrate your setup. Test-fit the channel and diffuser in the groove and adjust the depth until the diffuser sits flush with the surrounding wood.
Run the low-voltage wiring through the wall framing or through hollow channels in the newel posts and handrail brackets. The strip end nearest the driver receives the supply wires, and the strip should be cut only at the manufacturer's designated cut marks to preserve circuit continuity. Solder the supply leads where possible for the most reliable connection, and protect the solder joints with heat shrink tubing. Use professional-grade strip-to-wire connectors only as a fallback, because the pressure-fit varieties are prone to failure over time.
If your staircase has multiple flights, you may need to run separate channels with their own short flexible connectors at each landing. Plan the connector locations so they hide beneath newel posts or behind balusters where they will not be visible. Most installers prefer one continuous logical run wired in parallel from a single driver, with each physical channel jumped using concealed wiring.
Dimming, Controls, and Code Compliance
A staircase strip should always be dimmable, because the brightness appropriate for a guest descending after a dinner party is very different from the brightness appropriate for navigating in the small hours of the morning. Choose a driver compatible with the dimming protocol used in the rest of the home. Trailing-edge phase dimming, zero-to-ten-volt dimming, and digital DALI dimming each have their advocates, and the right choice depends on whether the system is integrated with a broader smart home network or operates as a standalone circuit.
Consider an occupancy sensor or an astronomical timer to drive the system automatically. A sensor at the top and bottom of the staircase can fade the lighting up gently when someone approaches and fade it down again after a programmable delay. An astronomical timer turns the strip on at sunset and off at sunrise without any user intervention. Either approach removes the cognitive load of remembering to switch the lighting on each evening.
All low-voltage wiring must comply with local electrical code, and the driver must be installed in a manner that complies with the National Electrical Code. The International Code Council publishes residential model codes that most jurisdictions adopt with local amendments. Recent code surveys suggest that more than ninety percent of residential LED strip failures trace back to driver overload or incorrect wire gauge rather than to the strip itself, so paying careful attention to these details produces a system that lasts a decade or more.
Installation, Testing, and Long-Term Care
With wiring run and the channel routed, set the LED strip into the channel and press it firmly against the adhesive backing. Work from one end to the other, smoothing the strip as you go to avoid air pockets that produce uneven contact and hot spots. Snap the diffuser into the channel, install end caps, and connect the supply leads to the driver. Test before final installation of the handrail.
If the test reveals dark zones, color shifts, or flickering, troubleshoot before mounting the rail permanently. Common causes include voltage drop on long runs, which is solved by feeding power from both ends rather than one, and damaged strip sections, which require cutting and resoldering. Once the strip lights uniformly along its full length and dims smoothly, mount the handrail in place using concealed brackets that hide the wiring.
Long-term care is minimal. Wipe the diffuser occasionally with a soft microfiber cloth to remove dust that would otherwise dim the output, and replace the strip if a section eventually fails, which on a quality product can be a decade or more after installation. Keep the driver accessible so that future replacement is straightforward, and document the strip part number and driver specifications for reference.
Conclusion
An LED-lit handrail is a project that demands planning and patience but rewards both qualities with a result that few residential interventions can match. The light becomes a quiet companion through the evening hours, the safety improvement is real and measurable, and the design statement is subtle enough to coexist gracefully with any architectural vocabulary. The work is well within the reach of an experienced do-it-yourself homeowner, though many will choose to hire an electrician for the final wiring and code compliance.
The components are available through specialty lighting suppliers and online retailers that cater to architectural lighting, and prices have dropped substantially over the past several years as LED technology has matured. Spend the extra money on a high-CRI strip and a quality driver, because the cost difference is small relative to the overall project and the experience difference is significant. A cheap strip is the single most common reason a homeowner is dissatisfied with this kind of installation.
Before you order anything, walk your staircase at night with only the planned ambient sources in operation and ask yourself how much light you actually need on each tread. Often the answer is far less than you might think. The eye adapts remarkably well to low ambient light, and a strip running at twenty percent of its rated output is usually more pleasant than one running at full brightness. Plan accordingly when sizing the system, because there is no penalty for overspecifying brightness and dimming it down, but there is a clear penalty for underspecifying and finding the result too dim.
Sketch the run on graph paper this week, note the locations of newel posts, brackets, and walls, and you will be far better prepared to specify the system that fits your home. The investment in planning at this stage saves rework, frustration, and money once installation begins, and it produces a staircase that becomes one of the quiet pleasures of every evening for many years to come.


Comments
Post a Comment