Hallway Lighting Layout For Long Narrow Spaces
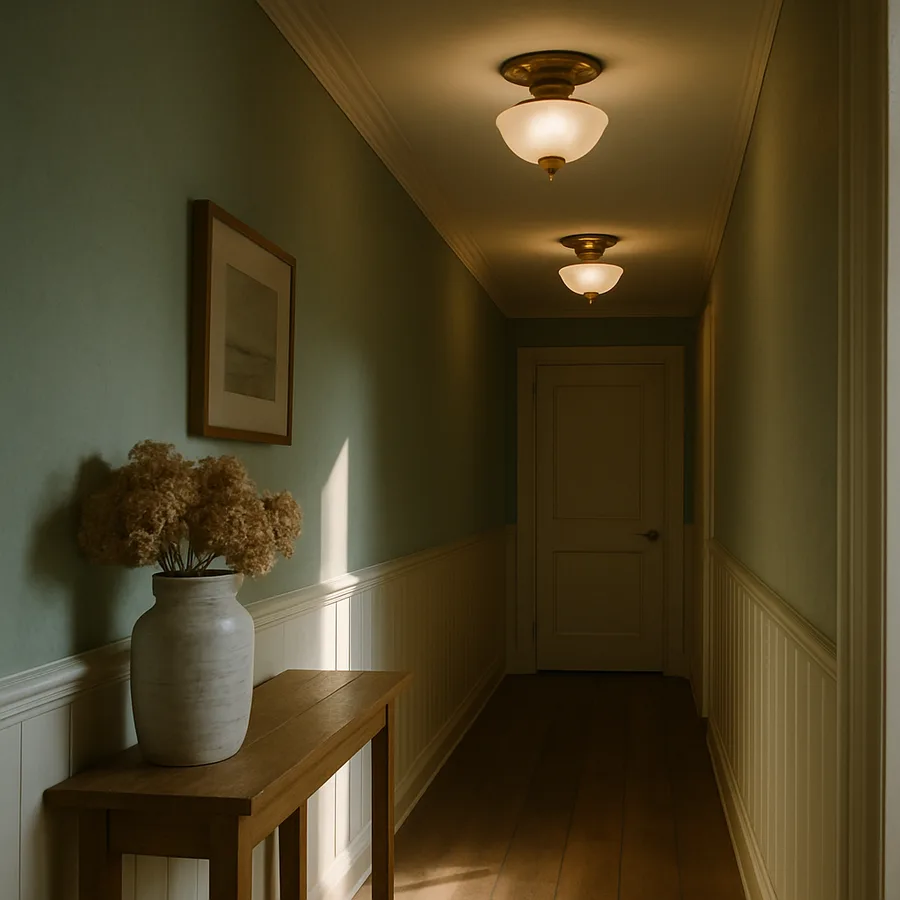
A long narrow hallway is one of the trickiest rooms in any home to light well. The space is usually short on natural daylight, the walls feel close together, and a single ceiling fixture in the middle almost always leaves dim pools at each end. The solution is not a brighter bulb, but a smarter layout, one that respects spacing math, scale of fixtures, and the way the eye travels down the corridor. Done right, a corridor stops feeling like a tunnel and starts feeling like a deliberate transition between rooms.
The Illuminating Engineering Society (IES) classifies hallways as a low-activity transitional zone, and recommends an average illuminance of roughly 50 lux at the floor for residential corridors, with higher levels near stairs or step changes. The American Lighting Association (ALA) further notes that more than 60 percent of homeowners under-light their hallways during a renovation, leading to safety complaints within the first year of move-in. A thoughtful layout fixes both problems at once.
Start With The Geometry Of The Hallway
Before you choose a single fixture, measure the hallway accurately. Note the length wall-to-wall, the width between the side walls, and the ceiling height to the finished surface. Sketch any doors, returns, niches, and openings, because each one will influence where you can and cannot place a fixture. A typical residential hallway runs between 36 and 48 inches wide, and anything narrower will feel even tighter under a poorly chosen fixture.
The single most common mistake is treating the hallway as one big room. Instead, think of it in zones. There is usually an entry zone where the corridor meets the main living area, a middle run where doors open off the sides, and a termination zone where the hall dead-ends at a closet, window, or bedroom. Each zone needs its own answer for ambient light, accent light, and any task light at door thresholds. Architectural Digest has profiled several award-winning renovations where designers treated the corridor as a sequence of moments rather than a single room, and the lighting plan reflected that.
Have you ever walked down a hallway and felt your eyes constantly readjusting between bright pools and dark gaps? That happens when fixtures are spaced too far apart for the beam spread. The fix is to align fixture spacing to the photometric data of the actual fixture, not a rule of thumb pulled from a forum. A four-inch downlight with a 60-degree beam at 8-foot ceilings illuminates a circle on the floor roughly 9 feet wide, and overlap between circles should be at least 30 percent for a smooth wash.
The Spacing Math That Actually Works
For a balanced corridor wash, the IES suggests fixture-to-fixture spacing roughly equal to the mounting height for general-purpose downlights, and half the mounting height from any wall. In an 8-foot-ceiling hallway, that translates to about 8 feet between fixture centers and 4 feet from the end walls. For a 16-foot-long hallway, that gives you two fixtures, evenly spaced, with smooth overlap at the middle.
Longer corridors need more careful planning. A 24-foot hallway under that same rule wants three fixtures, each spaced 8 feet apart, with the first and last 4 feet from the end walls. If you have an obstruction, like a smoke detector or HVAC vent, in one of those positions, shift the entire row by a foot or two, but keep the spacing consistent. An uneven row immediately reads as amateur work, even to a casual visitor.
Width matters as much as length. In a hallway narrower than 42 inches, a single row of downlights down the centerline reads cleanly. In a hallway 48 inches or wider, you can either keep a single row down the center or run two parallel rows about a third of the width in from each side wall. Two rows give a more even wall wash and reduce the harsh shadow effect on faces, which the American Society of Interior Designers (ASID) specifically calls out as a quality-of-light issue in residential corridors.
Choosing Between Recessed, Surface, And Linear Fixtures
Once the spacing is set, the fixture type defines the character of the hallway. Recessed downlights disappear into the ceiling and produce a calm, contemporary corridor. Surface-mounted flush mounts add visual texture and work well in older homes where ceiling penetration is limited by joist depth. Linear fixtures, including LED slot lights and architectural coves, blur the line between lighting and architecture and are the current favorite of high-end residential designers.
The trade-offs are real. Recessed cans require ceiling depth, usually a minimum of 4 to 6 inches above the finished surface, which rules them out in some retrofits. Surface fixtures preserve the ceiling but project downward, sometimes uncomfortably so in a low corridor. Linear strips give the cleanest look but demand careful detailing at corners and end caps, and they require a quality driver to avoid flicker, which the National Association of Home Builders (NAHB) has flagged as a top complaint in newly built homes with low-cost LED retrofits.
What about color temperature? For a residential hallway, 2700K to 3000K is the warm, welcoming range that flatters wall colors and skin tones. Cooler temperatures like 4000K can feel clinical in a home corridor, even though they read as crisp in a commercial setting. Choose lamps with a color rendering index of 90 or higher, especially if the hallway will display artwork or photos.
Layering With Wall And Accent Light
Ceiling light alone makes a hallway functional, but it does not make it feel like part of the home. The next layer is wall light. Sconces mounted between doorways at roughly 60 to 66 inches above finished floor add vertical brightness, soften the shadows on faces, and break up the rhythm of closed doors. They also give you a fallback ambient layer if you ever need to dim the overheads for late-night navigation.
Accent light is the third layer. If the hallway runs gallery-style with framed art, picture lights or carefully aimed adjustable downlights highlight each piece without flooding the corridor. The IES recommends that accent light on artwork be roughly three times the ambient level for a noticeable but not jarring contrast. A fully layered hallway with general, wall, and accent light reads as designed rather than merely lit.
How do you know when the layering is right? Walk the hallway at night with all the layers on, then again with only the accents, then again with only the ceiling. Each scene should feel intentional, not deficient. If any scene feels broken, an additional fixture or a dimmer can usually solve it. Architectural Digest recently featured a Brooklyn townhouse renovation where the hallway used four distinct lighting scenes controlled from a single keypad, and it transformed a previously dead corridor into a favorite path through the home.
Wiring, Switching, And Smart Controls
A long hallway almost always needs three-way or four-way switching, with a switch at each end and sometimes one in the middle. Plan this on the electrical drawing before any wires are pulled, because retrofitting a missing three-way later is messy and expensive. Place each switch on the latch side of the doorway at standard 44-inch height, and keep the plate finishes consistent with the rest of the home.
Dimming is no longer optional in a quality hallway. A simple incandescent dimmer with LED loads will often hum or flicker, which the American Lighting Association reports as the single biggest source of dissatisfaction with new LED installations. Specify drivers and dimmers from the same manufacturer compatibility list, and confirm the minimum dimming level is 1 percent or lower for true mood control.
Smart controls open additional possibilities. A motion sensor at each end of the hallway can trigger a dim path light at night, then a brighter scene during the day, then full off when no one is present for a set duration. The energy savings are modest, perhaps 10 to 20 percent on hallway loads, but the comfort improvement is significant. Pair the motion sensor with a vacancy override so guests can take manual control without learning the system.
Special Cases: Low Ceilings, Dark Walls, And Stair Adjacency
Not every hallway is a clean rectangle with white walls. A low-ceiling corridor under 7 feet 6 inches needs flush fixtures with broad beam spreads to avoid scallops on the wall and harsh shadows on the floor. A dark-wall hallway, popular in moody contemporary design, absorbs dramatically more light, sometimes 40 to 60 percent more, and your fixture count or lumen output should rise to match.
Hallways adjacent to stairs deserve special attention. The IES recommends elevated illuminance at the top and bottom landings, ideally 100 lux or higher, to reduce the risk of missteps. A dedicated downlight directly over the top tread and another over the bottom landing solves this without a major redesign. Add low-level step lights along the stair stringer for nighttime navigation without waking the household.
Have you considered what happens when a guest visits at night? A well-designed hallway lighting layout includes a low-level scene that costs nothing to add but feels luxurious. A 5-percent dim setting on the existing fixtures, combined with a recessed step light or two, provides safe wayfinding without the harshness of full bright. The American Institute of Architects (AIA) highlighted exactly this kind of nighttime scene in its recent residential interiors design awards.
Putting The Layout Into Practice
Translating the principles into a real plan starts with a one-line diagram. Draw the hallway in plan, mark the centerline, and place fixtures at the calculated spacing. Add sconces between doorways and accent fixtures over any art or feature wall. Mark switch locations at every entry point to the hallway, and confirm three-way or four-way wiring will reach. Finally, label each fixture with its lamp wattage, beam spread, color temperature, and CRI on the drawing.
Bring this plan to your electrician before rough-in. A 30-minute conversation up front saves hours of rework later, especially around blocking for fixture support, fire-rated penetrations, and conduit pathways. If you are doing a deeper renovation, add the lighting layout to the architect's reflected ceiling plan so it coordinates with HVAC, sprinklers, and structural elements.
Once installed, take the time to aim, focus, and dim. Small adjustments at this stage make a large difference. A 10-degree rotation on an adjustable downlight can shift a wall scallop into a crisp art highlight. A 5-percent change in the dimmer setpoint can move the scene from clinical to inviting. Walk the hallway at three times of day and adjust until each scene feels right.
Conclusion
A long narrow hallway will never be the most-used room in a home, but it is one of the most-traveled and the most-visible. Investing in a thoughtful lighting layout, with careful spacing math, layered fixture choices, and quality dimming controls, transforms it from a forgotten passage into a deliberate part of the architecture. The total cost is usually a small fraction of any larger renovation, but the daily payoff is enormous.
Begin with the geometry, then work outward through fixture choice, layering, controls, and the special cases that apply to your home. Lean on the published guidance from the IES, the ALA, and the ASID, and confirm any code-driven decisions with a licensed electrician familiar with your jurisdiction. Most hallway projects can be completed in a weekend if the planning is solid, and the result lasts for the life of the lamps.
If you take only one habit from this guide, make it the practice of walking the hallway at every stage, with every scene active, and trusting your eyes. Good lighting is verified by experience, not by a spreadsheet. The numbers get you close, but the final adjustment is always made on site, after sunset, with the door closed and the dimmer in your hand.
Ready to start your own hallway lighting plan? Pull a tape measure, sketch the corridor on paper, and use the spacing rules in this article as your starting point. If you want a professional second opinion, ask a member of the American Lighting Association or a residential lighting designer through the ASID directory to review your plan before you cut into any drywall. The investment is small, and the result will last for decades.
For deeper reading, consult the Illuminating Engineering Society recommended practices, the American Lighting Association consumer resources, and the American Society of Interior Designers design guides.
More Articles You May Like



Comments
Post a Comment