Recessed Lighting Layout for Living Rooms Without Harsh Glare
Understanding Why Most Recessed Lighting Creates Glare
Recessed lighting is one of the most popular ceiling-mounted fixture types in residential living rooms, yet it is also one of the most frequently botched. The problem is not the technology itself but the way it is typically planned and installed. Builders and electricians often default to a simple grid pattern of equally spaced cans across the entire ceiling, treating recessed lights like overhead sprinklers that need to cover every square inch of floor space. The result is a room that feels like a retail showroom or a commercial office, with bright spots of light directly beneath each fixture and harsh contrasts between illuminated and shadowed areas. This approach ignores the fundamental reality that a living room is a place for relaxation, conversation, and visual comfort, not a space that needs flat, even industrial illumination.
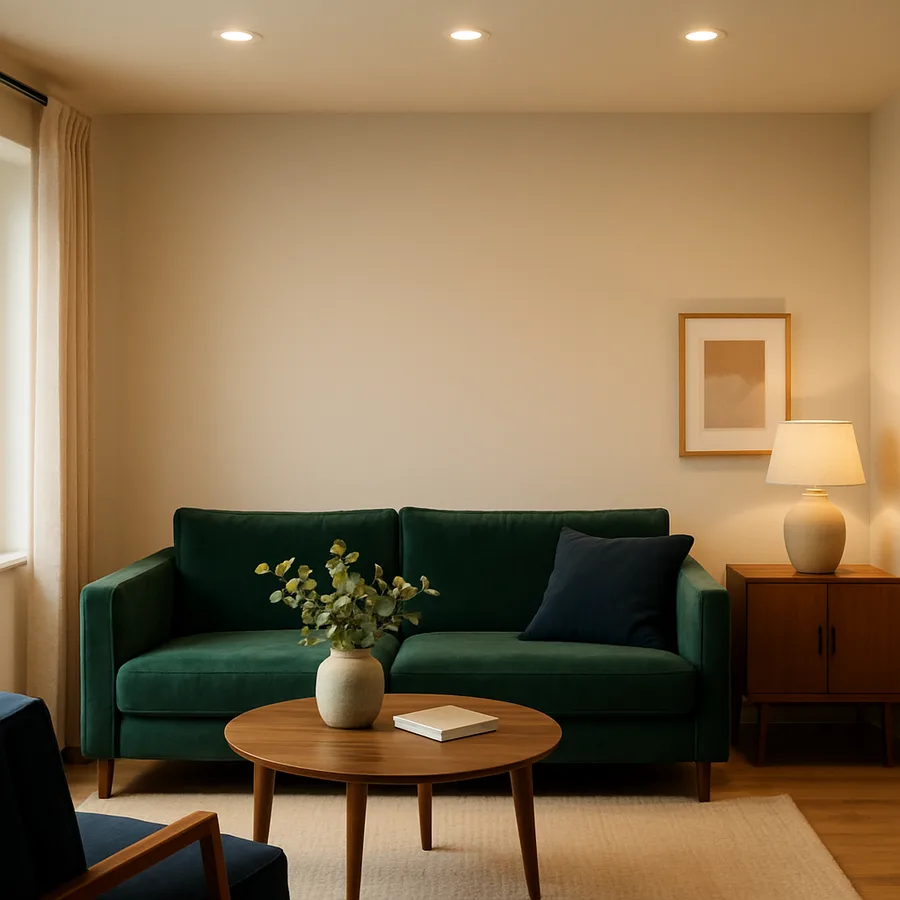
Glare from recessed lighting occurs when the light source is visible to the occupant's eye from their normal seated or standing position. In a living room where people spend most of their time seated on sofas and chairs, a recessed fixture positioned directly overhead or within a narrow angle from the line of sight can produce a persistent bright spot in the peripheral vision that causes eye fatigue over time. The Illuminating Engineering Society (IES) defines visual comfort probability as the percentage of people who would find a given lighting configuration acceptable when looking directly at it, and their research shows that recessed fixtures with wide beam angles and no baffling produce comfort ratings below 60 percent in residential settings. That statistic means nearly half of all people in the room find the lighting uncomfortable, which is a remarkable failure rate for a system that is supposed to enhance the space.
The underlying issue is that many homeowners and contractors conflate brightness with good lighting. A living room does not need to be uniformly bright to be well lit. In fact, the most attractive and comfortable living rooms use a layered lighting approach where recessed fixtures provide ambient background illumination, supplemented by task lights for reading areas and accent lights for artwork or architectural features. When recessed lights are asked to do everything, they inevitably do everything poorly. Understanding this distinction is the first step toward a recessed lighting layout that feels sophisticated rather than oppressive. Have you ever walked into a living room and immediately felt at ease without being able to pinpoint exactly why? The answer is almost always thoughtful lighting design.
The good news is that achieving a glare-free recessed lighting layout does not require exotic technology or an enormous budget. It requires a thoughtful plan that considers fixture placement in relation to seating positions, appropriate trim selection to control light direction, correct color temperature for warmth, and dimmer controls that allow the light level to match the activity. The American Lighting Association (ALA) reports that homeowners who invest in a deliberate lighting plan before installation report satisfaction rates above 85 percent, compared to under 50 percent for homeowners who leave placement decisions entirely to the electrician on installation day. Planning is the variable that separates a living room that glows from one that glares.
Spacing Formulas That Actually Work
The most reliable spacing formula for recessed lighting in living rooms is based on ceiling height divided by two, which yields the maximum recommended distance between fixtures. In a room with standard 8-foot ceilings, this means fixtures should be spaced no more than 4 feet apart. For 9-foot ceilings, the maximum spacing extends to 4.5 feet, and for 10-foot ceilings, 5 feet. This formula ensures that the light cones from adjacent fixtures overlap at the work plane, which is typically about 30 inches above the floor in a living room where most activity occurs at seated height. Overlap prevents the dark spots between fixtures that create the cave-like effect of poorly spaced recessed lighting.
Wall distance is equally important and frequently overlooked. The first row of recessed fixtures should be positioned approximately half the fixture-to-fixture spacing distance away from the wall, which means 24 inches from the wall in a room with 4-foot spacing. This placement washes the walls with light, which is critical because illuminated walls make a room feel larger and more open, while dark walls create a tunneling effect that shrinks the perceived space. The ASID residential design guidelines emphasize that wall brightness contributes more to the perception of a well-lit room than ceiling brightness does, which is a counterintuitive finding that directly contradicts the instinct to load the center of the ceiling with fixtures.
The total number of fixtures needed depends on both room size and the output of each individual light. A common residential guideline suggests 1 to 1.5 watts of LED power per square foot for ambient living room lighting, which translates to approximately 10 to 15 lumens per square foot. A standard 6-inch recessed LED fixture producing 800 to 1000 lumens can effectively illuminate approximately 50 to 80 square feet when properly positioned, meaning a 300-square-foot living room typically needs between 4 and 6 ambient recessed fixtures. This number may seem lower than what you see in many homes, and that is precisely the point. More fixtures is not synonymous with better lighting, and fewer well-placed fixtures on a dimmer outperform a dense grid of fixed-brightness cans every time.
Asymmetric layouts often produce better results than perfectly symmetric grids in living rooms with distinct functional zones. Rather than centering a uniform grid over the entire ceiling, consider clustering fixtures over the primary seating area with slightly tighter spacing, using wall-wash trim types along display walls, and leaving the ceiling above secondary zones like a reading nook or window seat less densely populated. This zoned approach allows you to light the areas that need it most while maintaining softer, more atmospheric illumination elsewhere. The room feels layered and considered rather than flatly and uniformly lit from above.
Choosing Trim Types That Control Light Distribution
Baffle trim is the most effective option for eliminating glare in living room recessed lighting. The interior of a baffle trim features concentric ridges or grooves that absorb stray light and prevent it from reflecting off the cone walls and into the room at sharp angles. A deep baffle in matte black virtually eliminates the bright ring of light that surrounds a standard open reflector trim, producing a softer, more focused beam that illuminates the surfaces below without creating a visible hot spot on the ceiling. Black baffles with white trim rings are the standard choice for white ceilings, but matching the trim ring to the ceiling color and using a black baffle provides the least obtrusive, most glare-free result.
Adjustable or gimbal trim types allow the light to be aimed at a specific surface rather than projecting straight down, which opens up valuable design possibilities for living rooms. A gimbal trim can direct light at a piece of wall art, a textured stone fireplace, or a built-in bookshelf, transforming a general ambient fixture into a targeted accent light. This directional capability means fewer fixtures can serve more purposes, reducing the total number of ceiling penetrations needed. The National Electrical Manufacturers Association (NEMA) classifies adjustable trims as specialty fixtures that require slightly larger ceiling cutouts, so it is important to specify them during the planning phase rather than trying to retrofit them into standard-sized housings after installation.
Wall-wash trim types are specifically designed to throw light asymmetrically toward an adjacent wall rather than directly downward. A single row of wall-wash recessed fixtures placed 24 to 30 inches from a wall creates a smooth, even gradient of light from ceiling to floor that makes the wall glow without producing any visible bright spots on the ceiling or wall surface. This technique is particularly effective for living rooms with textured walls, display shelves, or large windows where the wall itself becomes a reflective surface that distributes light back into the room. Wall washing is one of the most sophisticated lighting techniques available and produces results that feel expensive and deliberate, even though the fixtures themselves are standard recessed cans with specialized trim.
The pinhole trim takes the anti-glare philosophy to its extreme, reducing the visible aperture of the fixture to a small circular opening that emits a tight, concentrated beam. Pinhole trims are not well-suited for general ambient lighting because their narrow beam angle, typically 15 to 25 degrees, creates defined pools of light rather than broad coverage. However, they excel as accent lights for specific objects, artwork, or architectural features within the living room. When combined with broader-beam ambient fixtures, pinholes add a layer of focused drama that elevates the room's lighting from functional to theatrical. A living room with three types of trim, baffle for ambient, gimbal for accent, and pinhole for drama, achieves professional-quality lighting that most homeowners associate only with magazine photographs.
Color Temperature and Its Effect on Comfort
Color temperature, measured in Kelvins, determines whether your recessed lighting casts a warm, yellowish glow or a cool, bluish white light. For living rooms, the American Lighting Association strongly recommends staying within the 2700K to 3000K range, which produces a warm white light that flatters skin tones, makes fabrics and wood surfaces look their best, and promotes the relaxed atmosphere that a living room is meant to provide. Lights rated at 3500K and above shift toward a neutral or cool white that feels energizing and alert, qualities that benefit kitchens and home offices but work against the calming function of a living room.
The consistency of color temperature across all fixtures in the room is just as important as choosing the right Kelvin rating. Mixing bulbs or fixtures of different color temperatures creates a patchwork effect where some areas of the room appear warmer and others cooler, making the overall lighting feel disjointed and unplanned. This mismatch is especially noticeable in rooms with light-colored walls and ceilings, which reflect the color of the light source with minimal filtering. When purchasing recessed fixtures or replacement LED modules, verify that all units come from the same color temperature bin, and be aware that some LED manufacturers allow a plus-or-minus tolerance of up to 200K, which means a nominally 2700K fixture could actually measure anywhere from 2500K to 2900K. Specifying fixtures with a tighter tolerance, or purchasing all units from the same production lot, minimizes visible variation.
The Color Rendering Index (CRI) is a related metric that measures how accurately a light source reproduces the colors of objects compared to natural daylight. A CRI of 90 or above is considered excellent for residential applications, and most quality LED recessed fixtures now meet or exceed this threshold. High-CRI lighting makes your furniture, rugs, artwork, and wall colors look true and vibrant, while low-CRI sources can make even expensive materials look flat and grayish. The difference between CRI 80 and CRI 95 is visible to most people in a side-by-side comparison, and since the cost premium for high-CRI LEDs has become negligible, there is little reason to accept anything below CRI 90 for a living room installation.
Do you find that your living room feels perfectly comfortable during the day but becomes uncomfortably bright or sterile feeling in the evening? This common complaint almost always traces back to recessed lights that are either too cool in color temperature or too bright for the reduced ambient light conditions after sunset. The human visual system adapts to lower light levels as the day progresses, and lighting that feels appropriate at 5 PM can feel aggressive at 9 PM. Dimmer switches address the brightness component, but color temperature is fixed in standard LED fixtures. Tunable white LED recessed lights, which allow the color temperature to shift from 2700K down to 2200K as the dimmer is lowered, replicate the natural behavior of incandescent bulbs and create an evening atmosphere that feels genuinely warm and restful.
Layering Recessed Lighting With Other Sources
Recessed lighting performs best in a living room when it is treated as the ambient foundation layer rather than the sole source of illumination. A well-designed living room lighting plan typically includes three layers: ambient light from recessed fixtures that provides overall room brightness, task light from table lamps or reading lights that illuminates specific activity areas, and accent light from directional fixtures or picture lights that highlights decorative elements and creates visual depth. Each layer operates on a separate switch or dimmer circuit, giving the homeowner the ability to adjust the room's character from bright and functional to soft and atmospheric as needs change throughout the day and evening.
The interaction between recessed ceiling lights and table or floor lamps creates a vertical distribution of light that eliminates the top-heavy feeling of ceiling-only illumination. Recessed fixtures light the upper half of the room, washing walls and ceiling surfaces, while lamps illuminate the lower half where people actually sit and interact. This vertical balance is what makes a room feel fully illuminated without any single source being excessively bright. According to research published by the Lighting Research Center at Rensselaer Polytechnic Institute, occupants rate rooms with multiple light source heights as significantly more comfortable and attractive than rooms illuminated exclusively from ceiling-mounted fixtures, even when the total light output is identical.
Accent lighting aimed at artwork, bookshelves, or architectural features like a stone fireplace surround adds the third dimension that transforms a living room from merely well-lit to genuinely designed. Adjustable recessed gimbal trims can serve this accent function, directing narrow beams at specific targets, or dedicated picture lights and shelf-mounted strip lights can handle the task independently. The key principle is contrast: accent-lit objects should be approximately three to five times brighter than the ambient background to create visual emphasis without the accent light itself becoming a source of glare. This contrast ratio draws the eye toward the room's most interesting features and creates the layered depth that professional lighting designers consider essential.
A practical approach to achieving this layered effect is to plan the recessed fixtures on two or three separate dimmer circuits. One circuit controls the ambient fixtures in the central ceiling area, another controls the wall-wash fixtures along the perimeter, and a third, if applicable, controls any accent-aimed gimbal fixtures. This three-circuit approach means you can have full ambient light during a party, dimmed ambient with bright wall washing during a quiet evening, or low ambient with accent lighting only for watching a movie. The ability to sculpt the room's lighting to match the occasion is what separates a thoughtfully designed system from a row of switches that simply turns everything on or off. Architectural Digest consistently identifies layered lighting control as one of the highest-impact upgrades in residential living rooms.
Planning Your Layout Before Installation Day
The most cost-effective time to get your recessed lighting layout right is before any holes are cut in the ceiling. Moving a recessed fixture after installation requires patching the original hole, running new wiring, cutting a new opening, and repainting, a process that costs five to ten times more than placing the fixture correctly the first time. Start your planning process by creating a scaled floor plan of your living room that includes furniture placement, the location of windows and doors, and any architectural features like fireplaces, built-in shelving, or accent walls. This drawing becomes the canvas on which you map your lighting zones and fixture positions.
Mark the primary seating area on your floor plan and identify the sightlines of people sitting in each position. Recessed fixtures should be positioned outside the cone of vision that extends from each seated position at approximately 45 degrees from vertical. In practical terms, this means avoiding fixtures directly above the sofa or chairs and instead placing ambient cans slightly forward or to the sides, where their light reaches the surrounding surfaces rather than shining directly into seated occupants' eyes. This single adjustment, moving fixtures out of the direct overhead position relative to seating, eliminates the majority of glare complaints in living room recessed lighting installations.
Consult with a qualified electrician during the planning phase rather than only at installation. An experienced residential electrician can identify potential complications like joist locations, HVAC ductwork, and existing wiring runs that may conflict with your planned fixture positions and can suggest alternative locations that achieve the same lighting effect while avoiding structural obstacles. The National Electrical Code (NEC) governs clearance requirements between recessed fixtures and insulation, which affects both fixture type selection, IC-rated versus non-IC-rated, and placement options in insulated ceilings. Learning about these constraints before finalizing your plan prevents frustrating compromises on installation day.
If your budget permits, consider engaging a lighting designer for a one-time consultation. Many lighting professionals offer layout planning services for residential projects at a flat fee that typically ranges from 200 to 500 dollars, and the plan they produce specifies exact fixture positions, trim types, beam angles, and circuit assignments. This document gives your electrician a precise installation blueprint and eliminates the guesswork that leads to problems. For a living room that you will use every day for years or decades, the cost of professional planning is negligible compared to the long-term benefit of lighting that consistently delivers comfort and beauty without a trace of harsh glare.
Conclusion: Designing Light That Feels Invisible
The goal of a well-designed recessed lighting layout is not to make you aware of the fixtures on your ceiling but to make you aware of the beauty and comfort of the room around you. When recessed lights are correctly positioned, properly trimmed, dimmed to appropriate levels, and supplemented by other light sources, they produce an ambient glow that illuminates without drawing attention to itself. The light feels natural and effortless, as if the room simply happens to look this way, and the fixtures themselves recede into the ceiling plane where they belong.
Achieving this requires a deliberate departure from the default approach of evenly spacing identical fixtures across the entire ceiling. Instead, it asks you to think about your living room as a collection of zones with different lighting needs, to select trim types that control where light goes and where it does not, to choose warm color temperatures that support relaxation, and to install dimmer controls that let you adjust the atmosphere to match the moment. Each of these decisions is straightforward on its own, and together they produce a result that is qualitatively different from standard recessed lighting.
Take the time to plan your layout before any work begins, even if that means delaying the project by a week to draw a proper floor plan and research fixture options. Walk through your living room at different times of day, sit in every seat, and notice where light currently falls and where it does not. This observational exercise will inform your fixture placement more effectively than any formula or guideline, because it is based on how you actually use the room. A recessed lighting layout built on that foundation will serve you well for as long as you call this living room home.
More Articles You May Like


Comments
Post a Comment