Garden Spotlight Aiming for Tree Uplighting Drama
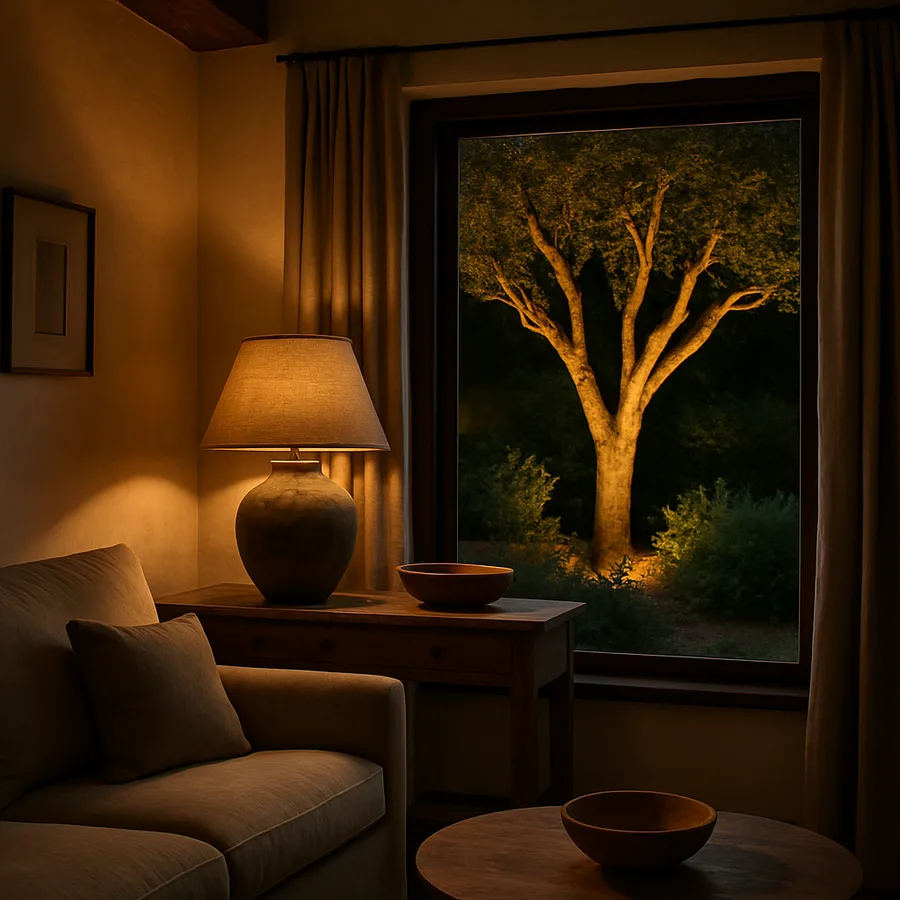
Walk through any well-designed residential landscape at night and the first feature your eye lands on is almost always an uplit tree. Done well, tree uplighting transforms an ordinary specimen into a sculptural focal point that reads as deliberate architecture rather than incidental greenery. Done poorly, uplighting either flattens the tree into a glowing blob or floods the canopy with such uniform brightness that all texture disappears. The difference between the two outcomes is rarely about budget. It is almost entirely about how the spotlights are aimed, which is a craft skill most homeowners have never been taught.
This guide walks through the principles that professional landscape lighting designers use to create dramatic tree uplighting effects, translated into specific aiming decisions you can apply to your own oaks, maples, palms, magnolias, or any other specimen tree on your property. We will cover beam angle selection, distance from trunk, fixture count, color temperature considerations, and the layering techniques that distinguish merely lit trees from genuinely dramatic ones. By the end, you should be able to walk your own yard with a flashlight after dark and identify exactly where each fixture should sit and how it should be tilted.
Reading the Tree Before You Buy Any Fixtures
Every tree has a personality that determines how it should be lit. A columnar Italian cypress wants tight beam angles and lights placed close to the trunk to graze the vertical form. A spreading live oak wants wider beams and lights placed further out to capture the full canopy spread. A multi-trunk crepe myrtle benefits from multiple fixtures aimed at each major trunk to reveal the sculptural branching. The first step in any uplighting project is sitting with the tree at night with a single handheld flashlight and walking around it, observing how light from different positions reveals or hides the tree's character.
According to the Illuminating Engineering Society, the most effective landscape lighting designs respond to the specific architecture of each plant rather than applying uniform treatment across all specimens. A mature deciduous tree with strong horizontal branching reads completely differently than a young columnar conifer, and lighting that flatters one will flatten the other. Spend time noticing the bark texture, the branch density, the canopy shape, and the seasonal changes the tree goes through before committing to a lighting approach.
Pay attention to viewing angles as well. Where will the tree most often be seen from? The dining room window, the front entry approach, the back patio? The lighting design should optimize for those primary viewpoints rather than trying to be perfectly symmetrical from all angles. A tree that looks magical from the kitchen window may look flat and over-lit from the side yard, and that is acceptable trade-off if the kitchen window is the primary view. Reader question: which trees in your yard do you most often look at from inside the house, and from which specific window?
Beam Angle Selection and Why It Matters Most
Beam angle is the single most consequential specification on any uplighting fixture, and it is also the spec most homeowners ignore. A typical landscape spotlight comes in beam angles ranging from ten degrees to sixty degrees. The narrower the beam, the more concentrated and dramatic the light column. The wider the beam, the more even and ambient the wash. Choosing the wrong angle for your tree produces predictable disappointment regardless of fixture quality.
For tall, narrow trees like cypress, redwood, or columnar maple, use ten to twenty degree beam angles. The narrow beam keeps light tight to the trunk and travels far up the height of the tree before spreading. For medium spreading trees like Japanese maple, dogwood, or young oak, twenty-four to thirty-six degree beams offer good coverage of canopy and trunk together. For wide spreading trees like live oak, sycamore, or mature elm, thirty-six to sixty degree wide beams capture the canopy spread without leaving dark patches at the edges. The American Lighting Association estimates that more than 60 percent of unsatisfactory residential uplighting installations involve incorrect beam angle selection.
Many quality fixtures now include interchangeable lenses or snap-on glare shields that adjust the beam angle in the field. This is a significant practical advantage because the actual best angle for any specific tree is often only revealed after testing at night, and the ability to swap a lens without replacing the entire fixture saves both cost and labor. If you are buying new fixtures, prioritize models with adjustable beam optics over fixed-beam units even at modest price premium.
Distance from Trunk and Fixture Count
The distance between the spotlight and the tree trunk dramatically affects the visual character of the result. Lights placed close to the trunk, within one to three feet, produce intense vertical light columns that emphasize bark texture and create strong shadows in the canopy above. Lights placed further out, six to ten feet from the trunk, produce more even canopy washing and reveal the full silhouette of the tree against the sky. Neither distance is universally correct; the choice depends on what you want the tree to look like.
For dramatic specimen trees where you want the gnarled trunk to be a focal point, place lights close. For trees where the canopy shape is the primary visual feature, pull lights back. A mature live oak with a magnificent spreading canopy generally looks best with lights five to eight feet out from the trunk on multiple sides, while a young dogwood with delicate spring blooms benefits from lights placed close enough to push light all the way through the flowering branches.
Fixture count scales with tree size. A small ornamental tree under fifteen feet tall typically needs only two fixtures placed on opposite sides for balanced lighting. A medium tree fifteen to thirty feet tall benefits from three fixtures arranged in a triangle around the trunk. A large mature tree above thirty feet usually requires four or five fixtures to achieve genuinely dramatic results without dark zones. According to the American Society of Landscape Architects, the most common professional installation pattern for mature shade trees uses three to five MR16-format spotlights at four to six feet from trunk in an arc covering the primary viewing angles.
Color Temperature and the Mood of Light
Color temperature transforms the emotional character of an uplit tree as dramatically as any other variable. Warm light at twenty-two hundred to twenty-seven hundred Kelvin makes deciduous trees look golden and inviting, especially on autumn specimens with red or orange foliage. Neutral light at three thousand Kelvin reads as natural and balanced, working well across most plant types and architectural styles. Cool light above thirty-five hundred Kelvin produces a moonlit silver effect that suits evergreens and modernist landscapes but can look harsh or institutional on warmer-toned plantings.
The most effective designs often layer multiple color temperatures within a single property. A warm twenty-seven hundred Kelvin uplight on the magnolia near the entry signals welcome and traditional warmth. A cool four thousand Kelvin uplight on the distant pine grove suggests moonlight and depth. The contrast between zones creates visual hierarchy and prevents the entire yard from reading as one uniform color wash. The Illuminating Engineering Society notes that color temperature variation across a landscape is one of the most underused tools in residential lighting design.
Be cautious with colored or RGB landscape lights for trees. Saturated colors like deep blue or red may look striking initially but often photograph badly, age poorly, and clash with the natural environment. White light in varying temperatures almost always ages better than colored light, and any color effect tends to feel forced after the first season. Save chromatic effects for special occasions controlled through smart fixtures, and keep the everyday lighting in white tones.
Layering Light, Shadow, and Negative Space
The most sophisticated tree lighting uses light not just to illuminate the tree but to create deliberate patterns of shadow and negative space that reveal architecture. A single spotlight aimed straight up the trunk produces a flat, evenly lit tree that lacks depth. Multiple lights aimed from different angles produce overlapping pools of light and intentional dark zones that read as dimensional and sculptural. The goal is contrast within the tree itself, not just contrast between the lit tree and the surrounding darkness.
One classic technique is grazing light, where a fixture is placed close to the trunk and aimed almost vertically up the bark surface. This produces strong horizontal shadow lines that emphasize bark texture, particularly effective on trees with characterful bark like sycamore, oak, or birch. Combine grazing light at the trunk with a wider canopy wash from further out, and the tree gains both close-up texture and overall silhouette in the same composition.
Negative space matters as much as lit space. A tree where every branch and leaf is fully illuminated reads as flat and unconvincing. A tree where some areas are bright while others fall into deliberate shadow reads as three-dimensional and alive. Resist the temptation to add more fixtures until every dark spot is filled in; the dark spots are where the drama lives. Reader question: have you ever noticed that the most beautiful uplit trees in professional landscapes have entire sections of canopy in shadow? That is intentional, not a fixture failure.
Practical Installation, Wiring, and Long-Term Adjustment
Almost all residential tree uplighting uses low-voltage twelve-volt systems running through a transformer at the house. The National Electrical Code provides specific guidance for low-voltage landscape circuits, generally requiring a transformer connected to a GFCI-protected outdoor outlet, with twelve or ten gauge cable buried at least six inches deep along fixture runs. Local jurisdictions may add additional requirements, but the basic infrastructure is similar across most of the United States.
Each fixture should be on an adjustable stake or knuckle joint that allows aiming changes after installation. The reality of any new uplighting installation is that the perfect aim is only discovered through testing at night, and fixtures that lock in factory positions become a liability when you realize the angle needs to shift by ten degrees. Quality landscape fixtures from professional manufacturers nearly always include full-range knuckles for this reason.
Plan to revisit your aiming annually. Trees grow, and a fixture aimed perfectly at a young magnolia ten years ago is now lighting empty air below a much-taller canopy. Each spring, walk the yard at night with a hex wrench and adjust each fixture to account for new growth, fallen branches, and any changes in the surrounding landscape. According to the American Society of Landscape Architects, professionally maintained landscape lighting systems are reaimed and retuned every twelve to eighteen months on average, and homeowners who follow the same rhythm get noticeably better long-term results.
Conclusion
Tree uplighting that genuinely creates drama is not about expensive fixtures or extensive automation. It is about a small number of well-aimed lights, chosen for the right beam angle, placed at the right distance, and layered to produce contrast within the tree itself. A homeowner with three quality fixtures and a careful eye produces better results than a homeowner with twelve fixtures aimed at random. The aiming is where the design lives, and the aiming is entirely under your control regardless of equipment budget.
The transformative moment in any uplighting project comes when you walk outside after dark for the first time after final adjustment, see the tree as a sculpted three-dimensional form against the sky, and realize how dramatically the entire character of your yard has shifted. A previously ignored corner becomes the focal point. The view from the dining room window suddenly has depth and intention. Guests arriving in the evening notice the trees before they notice the house, in a good way. These are the rewards of taking aiming seriously.
Start with one tree, your most architecturally interesting specimen, and master the aiming on that single subject before expanding. Buy two or three quality adjustable fixtures, set up a low-voltage circuit with room for expansion, and spend a full evening at night dialing in the angles. Test narrow versus wide beams. Try lights close to the trunk and lights further out. Add a third fixture and watch what happens. The skills you develop on the first tree transfer directly to every subsequent tree on the property.
Once you have one tree right, the rest of the landscape lighting plan unfolds naturally. Layer in pathway lighting that reads quieter than the focal trees. Add downlighting from larger specimens to wash the seating areas in moonlight. Use color temperature variation to create zones of warmth and cool depth. Take the time to study your trees, choose the right beam angles, and aim each fixture with intention, and you will create the kind of evening landscape that turns ordinary homes into destinations guests remember. Resources from the Illuminating Engineering Society, the American Society of Landscape Architects, and the American Lighting Association offer deeper guidance for ambitious projects.
More Articles You May Like


Comments
Post a Comment