Garage Workbench Drawer Storage for Tool Organization Systems
The workbench is where a garage either becomes a workshop or stays a glorified parking pad. The bench surface gets all the attention, but the drawers underneath are what separate a hobbyist who fights tools out of a pile from a builder who reaches without looking. Drawer storage compresses what an open shelf or pegboard can hold into a fraction of the footprint, protects metal from humidity, and makes a project feel deliberate from the first cut.
The trouble is that most off-the-shelf workbenches arrive with drawers that were designed by someone who has never actually worked at a bench. Slides bottom out under a moderate load. Drawer depths trap rolling sockets behind a lip. Pulls sit at heights that hit the apron of an apron-front cabinet. This guide treats drawers as a system, walks through the mechanical specifications that matter, and gives you a practical framework for organizing what goes inside.
Choosing the Right Slide Hardware for Heavy Tools
Drawer slides are the single component that decides whether a tool drawer feels like a Swiss watch or a sticky desk drawer. Full-extension ball-bearing slides rated for at least one hundred pounds per pair are the practical minimum for any workbench drawer that will hold metal hand tools. A typical mid-grade tool drawer loaded with sockets, wrenches, and a few clamps weighs close to seventy-five pounds before you add the drawer box itself, so headroom on the rating is not a luxury.
Soft-close slides, once a kitchen-cabinet feature, are now standard on premium tool storage and worth specifying for a workshop. They prevent the slam that loosens fasteners and dislodges small parts after years of daily use. For drawers holding precision instruments like dial calipers or torque wrenches, soft-close is the difference between a tool that calibrates true and one that drifts a few thousandths every season. Plan for around two inches of side clearance on each side of the drawer box to accommodate the slide hardware, which catches first-time builders by surprise.
If your bench will see automotive use with battery and tool weight pushing past one hundred fifty pounds in the lower drawers, step up to over-travel slides rated at two hundred pounds. Over-travel slides extend an extra inch beyond full-extension, which seems trivial until you are reaching for the box at the very back of an eighteen-inch drawer. The Family Handyman publishes useful slide-selection guides at FamilyHandyman.com if you want to compare ratings across brands.
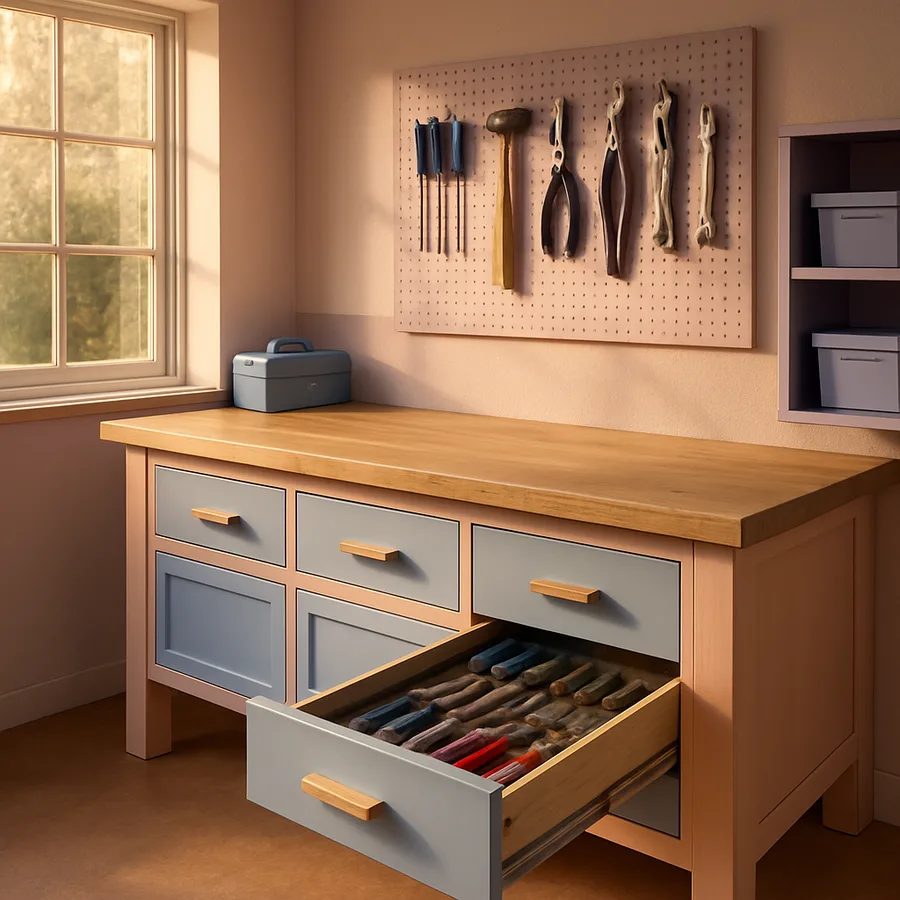
Drawer Depth Strategy from Top to Bottom
A workbench cabinet works best when drawer depths step down as you move up the stack, with the deepest drawers at the bottom and shallow trays at the top. The bottom drawer typically lives at eight to ten inches of internal depth and holds power tools, large clamps, and bulk consumables. The middle drawers run four to six inches and absorb the bulk of hand tools. The top drawer, the one you open thirty times a project, should be no more than two and a half inches deep so that nothing hides beneath anything else.
Have you noticed that the tools you reach for fifty times a day are also the ones you constantly misplace? That happens because they live in a drawer too deep for their size, where they roll under larger tools every time the drawer opens. The fix is a shallow top drawer dedicated to the daily five: tape measure, utility knife, marker, square, and a multi-bit screwdriver. This Old House has covered the daily-tools concept extensively at ThisOldHouse.com in their workshop reorganization features.
Drawer width follows a different logic. Wider drawers hold more, but they also flex more across the front, leading to slide bind under heavy loads. For shop applications, drawers wider than thirty inches should be split into two slide rails or built as side-by-side units rather than a single span. The result looks more like a tool chest and less like a kitchen island, which matches how the space actually gets used.
Foam Inserts and Drawer Liners That Keep Tools Honest
An empty drawer is an invitation to chaos. The fastest way to impose order is a two-color foam insert, often called shadow foam, where a high-contrast underlayer reveals a missing tool at a glance. The military and aviation industries have used shadow foam for decades to prevent foreign-object debris in equipment, and the same logic prevents a missing socket from showing up later embedded in a project.
Custom-cut foam runs about thirty to fifty dollars per drawer in DIY kits, or ten times that for laser-cut commercial kits sized to specific tool brands. The DIY route is more flexible, especially if your tool collection is mixed across brands, but it does demand an afternoon with a sharp utility knife and a steady hand. The Occupational Safety and Health Administration documents that proper tool organization measurably reduces hand injuries and time loss in shop environments, with citations available at OSHA.gov for anyone configuring a serious workspace.
Rubber drawer liner, the kind sold in rolls at hardware stores, is the lower-cost alternative for drawers that will see frequent reorganization. It dampens sound, prevents tools from sliding when the drawer opens, and protects the drawer bottom from scratches. The trade-off is that loose liner does not enforce a specific arrangement, so the system depends on the user putting tools back where they belong rather than into the empty cutout that demands them. According to the National Institute for Occupational Safety and Health, organized storage cuts retrieval time by thirty to fifty percent in repetitive task environments.
Labeling and Visual Systems That Survive Years of Use
Labels seem like an afterthought until you watch a friend hunt through six drawers looking for a specific drill bit. A workbench drawer system without labels degrades steadily; one with labels stays organized almost indefinitely. The trick is choosing a labeling method that survives oil, solvent, and the occasional tool dropped on the front of the drawer.
Engraved metal plates screwed to the drawer face are the long-life choice and look appropriate on a heavy-duty bench. Inkjet-printed paper labels behind a clear plastic window are more flexible because you can revise them as your tool collection evolves. Avoid handwritten masking tape; it falls off, smudges, and signals to future-you that the system is temporary, which becomes a self-fulfilling prophecy.
Inside the drawer, color-coded foam cutouts can extend the labeling logic. Red sections for cutting tools, blue for measuring, yellow for fastener drivers. The color cue is read faster than text and works even when the drawer is barely cracked open. Have you ever rebuilt a system after a long break and realized you forgot what your own labels meant? Color codes survive that gap better than abbreviations.
Climate Control for the Workbench Itself
Garages swing through wide humidity ranges, and metal tools rust in drawers far faster than most owners expect. Vapor-corrosion inhibitor strips, often called VCI emitters, are small paper strips that release a rust-preventing vapor inside an enclosed space. One strip per drawer, replaced every twelve months, dramatically slows oxidation on hand tools, especially in humid coastal climates or unheated garages in the north.
Silica gel desiccant packs are the lower-cost alternative and work well for shallow drawers, but they need to be reactivated in an oven every few months or they saturate and stop pulling moisture. For a serious tool collection, a small dehumidifier inside the workbench cabinet, vented through a louvered back panel, can hold the cabinet interior at thirty-five to forty-five percent relative humidity year-round. That target range is tight enough to prevent rust without being so dry that wooden handles crack.
If the garage is shared with a vehicle, expect periodic exhaust intrusion that adds acidic compounds to the air around the workbench. A simple wall-mounted carbon-monoxide detector and a habit of opening the garage door for a few minutes after running an engine will protect both the tools and anyone working at the bench. For air-quality guidance specific to home workshops, the National Institute for Occupational Safety and Health hosts useful summaries at CDC.gov/NIOSH.
Building a Modular System That Grows With You
The single most expensive mistake in workbench planning is buying a fixed cabinet sized for the tools you own today. Tool collections grow predictably; the bench that fit last year's project list will be cramped within twelve months. A modular base cabinet system, built around a standard width like twenty-four or thirty inches per module, lets you add cabinets as the collection expands without replacing what you already own.
Standardize on a single drawer slide brand and a single drawer-box width across the modules. That way, drawers can be swapped between cabinets when project priorities shift. A drawer of automotive tools that lived in the corner cabinet last spring can move to the central cabinet when you start a winter engine rebuild, with no remounting and no resizing. The mental model is closer to a server rack than to a kitchen, which feels strange at first and obvious after a year.
Plan one empty drawer in every cabinet. New tools arrive every project, and an empty drawer absorbs them gracefully while you decide on a permanent home. A bench with no slack in the system forces every new acquisition into a compromise location, and within two years the careful organization is gone.
Pull hardware and drawer faces deserve a second look as part of the modular plan. Solid bar pulls in stainless steel or aluminum survive garage temperature swings far better than plastic alternatives, and the visual upgrade reads as professional rather than residential. Drawer face thickness should be three-quarters of an inch or more, because thinner faces flex around the pull screws and eventually loosen with daily use. Powder-coated steel faces survive solvents and oil better than painted MDF, which swells if any drawer takes on humidity. Standardize the pull style across all modules so future cabinets blend with the originals rather than looking like a mismatched expansion.
Electrical integration is the modular feature most builders forget until the bench is in service. Plan a continuous outlet strip along the back of the cabinet line at bench height, and run dedicated circuits for the heavier tools that may eventually live on the surface. Adding power after the cabinets are installed is far harder than installing a generous strip during the build phase, and the difference between a workshop with two outlets and one with twelve is night and day for tool usability.
Conclusion
A garage workbench is only as functional as the drawers underneath it, and drawers are only as functional as the slides, depths, inserts, and labeling that turn them into a system. Spend the money on quality slides first, because slides that bind or sag will frustrate every other decision you make later. From there, work down through drawer depth, foam organization, and visual labeling in roughly that order of impact.
Treat humidity and air quality as part of the storage spec, not a separate concern. A tool collection worth organizing is worth protecting from rust and acidic exhaust, and the interventions are inexpensive when planned at build time. A vapor inhibitor in every drawer, a small dehumidifier in the cabinet, and a habit of ventilating the garage after engine work will preserve the financial and emotional value of the tools through decades of use.
Modularity is the long-game advantage. Build a system that can grow, swap, and reconfigure without throwing anything away, and you will spend the next ten years upgrading rather than replacing. The bench that started as a single cabinet becomes a wall, then a U-shape, then the heart of a small fabrication shop, all without a single piece becoming obsolete.
If you are starting from scratch this weekend, sketch the cabinet first, then list the drawer contents, then specify the slides. Build the system around the work you actually do, not around catalog photos, and the result will look custom because functionally it is. Open the top drawer next Saturday morning and the day's project will start a little faster, which is the real return on a well-built workbench.
More Articles You May Like


Comments
Post a Comment