Workbench Designs for a Two-Car Garage Workshop at Home
A two-car garage is the Goldilocks space for a home workshop. It is large enough to hold a serious workbench, a few stationary power tools, and a vehicle, but small enough that every square foot of bench design matters. Make the bench too big and you cannot park. Make it too small and you are constantly clearing projects off it. Pick the wrong top material and you will sand and re-flatten it every year. Choose a height that fights your back and you will abandon the shop within six months. The good news is that thousands of makers have already stubbed their toes on these decisions, and the consensus designs that have emerged are remarkably consistent. According to a National Association of Home Builders buyer preference survey, more than 80 percent of recent home buyers want a usable garage workshop space, which means this question now drives remodeling decisions in millions of homes.
This guide walks through the core design choices in the order you should actually make them, not in the order tool manufacturers would like you to make them. We will start with footprint, then move to height and top material, then to storage integration, mobility, and finally lighting and power. By the end you will have a clear blueprint for a bench that fits your garage, your projects, and your body, and you will know which shortcuts are safe and which ones cost you later.
Step One: Size the Footprint Against Your Parking Plan
Measure your garage before you read another word about bench tops. The typical American two-car garage, per figures published by This Old House, runs 20 by 20 feet at the small end and 24 by 24 feet at the large end. Subtract 16 to 17 feet of width for two parked vehicles plus door-opening clearance, and you are left with a working zone that is usually either along the back wall (a shallow bench of 24 to 30 inches deep running 10 to 16 feet wide) or in a bump-out corner (a deeper bench of 36 inches running 8 feet wide). The back-wall layout is far more common because it preserves walking clearance around both cars.
Depth is the variable most homeowners get wrong. A 24 inch deep bench feels generous until you set a miter saw on it, at which point you discover you have 8 inches of useful workspace left in front of the tool. A 30 to 36 inch deep bench is dramatically more functional, because it keeps stationary tools at the back wall while leaving real estate for actual work. The tradeoff is that every extra inch of depth steals an inch from vehicle clearance, so measure your longest vehicle including mirrors before you commit. Have you actually pulled into the garage and measured where the bumper lands? If not, do it tonight. It is the single most useful measurement in this whole project.
Step Two: Set the Height to Match Your Dominant Work
Bench height is personal, and the industry averages hide the truth. A standard kitchen counter sits at 36 inches. A standard cabinet shop bench sits at 34 inches. A handtool-focused bench for planing and chiseling often sits as low as 32 inches so the woodworker can get their shoulder over the work. A metalworking or assembly bench often sits at 38 to 40 inches to keep the work closer to the eyes. The Family Handyman guidance is to stand relaxed, let your arms hang, and then set the bench at the height of the crease inside your wrist, which for most adults lands between 34 and 38 inches.
If you cannot decide because you do multiple kinds of work, build the bench at 36 inches and add a removable 2 to 4 inch riser for tasks that benefit from a higher surface. Many seasoned makers keep an auxiliary sub-top for fine assembly work and store it under the bench when not in use. Do not build a bench taller than 40 inches unless you are extremely tall or you exclusively do fine assembly, because heavier work like planing, drilling downward, and clamping all benefit from lower heights. Getting this wrong costs you shoulder and back comfort every single time you use the shop.
Step Three: Choose a Top That Matches Your Projects
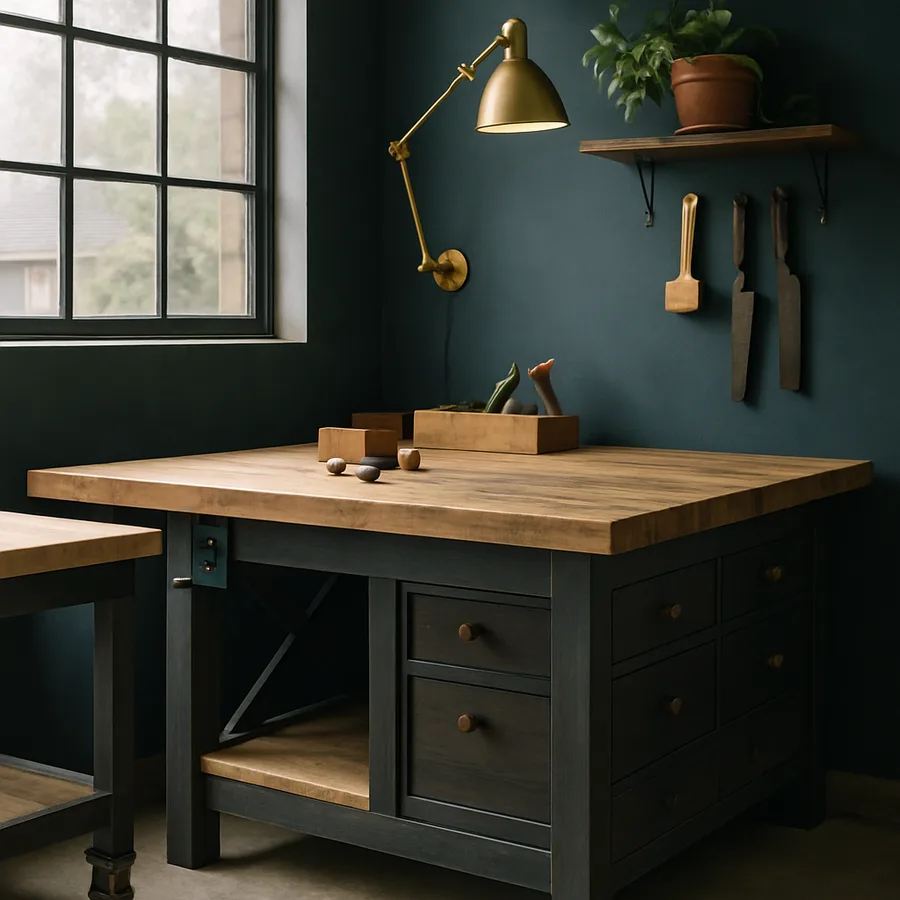
The workbench top is the hardest-working surface in your entire house, and it deserves more thought than people give it. The four realistic choices for a garage shop are a torsion-box MDF top, a laminated hardwood top (typically maple or beech), a solid-core door repurposed as a top, and a steel or steel-clad top. Each has a specific personality.
A torsion-box MDF top, built by sandwiching a grid of 3/4 inch plywood ribs between two layers of 3/4 inch MDF, is the most affordable path to a genuinely flat, stable, heavy bench top. It costs around $100 to $160 in materials for an 8 foot bench and stays flat for many years in a conditioned garage. A laminated hardwood top is the classic choice and the one profiled in most Fine Homebuilding shop tours, but retail maple tops now run $400 to $900 for a 6 foot section. A solid-core door from a building recycler can be had for $30 to $80 and makes a surprisingly good starter top. Steel tops, popular in metal shops and increasingly featured by Popular Mechanics, resist solvents and heat but scratch and dent under woodworking use. Match the top to the dominant work, not to Instagram aesthetics.
Step Four: Integrate Storage Without Strangling the Workspace
Every inch of the bench is valuable, and under-bench storage is where most two-car garage shops either thrive or fall apart. The three common approaches are open shelves, full-depth drawers, and a hybrid. Open shelves are the cheapest and easiest to build, but they collect sawdust and hide clutter. Drawers cost more and take more build time, but they protect tools, isolate fasteners by size, and dramatically reduce the visual chaos that discourages people from working in their own shops.
The NARI (National Association of the Remodeling Industry) garage survey consistently shows that homeowners who install drawer banks under their workbenches use the shop two to three times more often than those who leave the understructure open. That is a huge behavioral delta from a relatively small investment. A reasonable compromise is to build a drawer bank on one end of the bench, typically the end closest to your assembly zone, and leave the far end open for tall items like trash cans, shop vacuums, or a table saw dust collection cart. Add a simple tool well at the back of the bench, 4 inches wide and recessed 2 inches, and you will stop losing chisels and screwdrivers inside your workpiece.
Step Five: Decide on Mobility and Modularity
A permanent bench bolted to the wall is rock solid, perfect for heavy work, and will never roll out of the way when you need to park a second vehicle. A mobile bench on locking casters can be repositioned for big projects, rolled out of the way when you have guests, and even pulled into the driveway on sunny days. Which one is right depends entirely on how much you share the garage with cars, bikes, and storage.
If you park two vehicles every night, a mobile bench is almost always the right call. Buy heavy-duty locking casters rated for at least 300 pounds each, install them at the four corners, and accept that your bench will lose a small amount of stiffness compared to a wall-mounted design. A four-caster bench loaded with 400 to 600 pounds of tools and fixtures is still plenty rigid for most woodworking and assembly. For homeowners who rarely park inside, a wall-attached bench offers superior rigidity and lets you add a proper face vise and tail vise without worrying that the bench will walk under heavy planing. The OSHA guidance on workbench stability for professional shops translates directly to the home garage: the bench must not move under the forces you apply, or you are fighting the bench instead of the work.
Step Six: Plan Power and Lighting Before You Build
A beautifully built bench in a dim, underpowered corner is a sad bench. Lighting and power belong in the design phase, not after the glue dries. Target at least 50 to 75 foot-candles of task light at the bench surface, which for a typical 6 foot bench means two 4 foot LED shop lights overhead plus an under-cabinet light strip above the bench if it sits against a wall. The Illuminating Engineering Society recommends 75 foot-candles for detailed workshop tasks and as much as 100 for very fine work. Most homeowners significantly under-light their garages and blame the bench when the problem is the fixture count.
Power at the bench should include a mix of 120 volt 20 amp circuits for power tools and 120 volt 15 amp circuits for lighting and small tools. A power strip clamped to the bench edge is acceptable for low-draw loads but a code-compliant wall outlet or a surface-mount raceway is far safer for heavy tools. Per National Fire Protection Association statistics, electrical failure is a leading cause of home workshop fires, often traced to daisy-chained extension cords. Spend the $200 to $400 to have an electrician add one or two dedicated 20 amp outlets above your bench, or do it yourself if you are qualified and your jurisdiction permits homeowner electrical work. It is the single best non-bench investment you can make in the shop.
Conclusion: Build the Bench You Will Actually Use
The best workbench for a two-car garage is not the one on the magazine cover. It is the one sized to the space you have, set at the height your body wants, topped with the material your projects demand, storage-integrated enough to stay organized, mobile enough to share the garage with cars, and lit and powered well enough to make working in it a pleasure. Every one of those decisions compounds. A bench that nails five of the six points but fails on the sixth will frustrate you until you fix the weak link.
Start with the footprint, because it constrains everything else. Then set the height, because it determines comfort. Then the top, storage, mobility, and services in that order. Sketch your design on paper before cutting a single board, and show the sketch to a friend who will push back on the dumb parts. Small design errors caught on paper cost nothing. The same errors caught after you have glued up a 6 foot hardwood top cost a weekend and a chunk of your self-respect.
Budget realistically. A solid, long-lasting bench with a hardwood top, integrated drawers, and good casters will land somewhere between $600 and $1,500 in materials depending on your choices and your local lumber prices. You can absolutely build a capable starter bench for $200 to $300 using MDF, plywood, and open shelves, and many fine woodworkers started exactly there. What you cannot do is build a bench you will love using if you skip the planning. Block out a weekend to design on paper, a weekend to buy materials, and two weekends to build, and commit to those dates on the calendar now.
For worked examples and detailed plans, consult This Old House, Fine Homebuilding, and the shop safety resources published by OSHA. Between those three you will find every detail you need, and a surprising amount of pushback against the social media trend of building show benches that never actually get used. Consider also whether a single long bench or two shorter benches at right angles will serve you better, because an L-shape turns two adjacent walls into useful storage and gives you a corner assembly zone without giving up depth on either leg. If you plan to add a miter saw station later, leave a 14 inch wide dedicated pocket at one end of the bench with outfeed support wings that fold flat when not in use, because retrofitting that pocket after the bench is built is always more painful than planning for it from day one.
More Articles You May Like


Comments
Post a Comment