Floating Wood Shelves in Kitchens: Bracket Types and Weight Limits
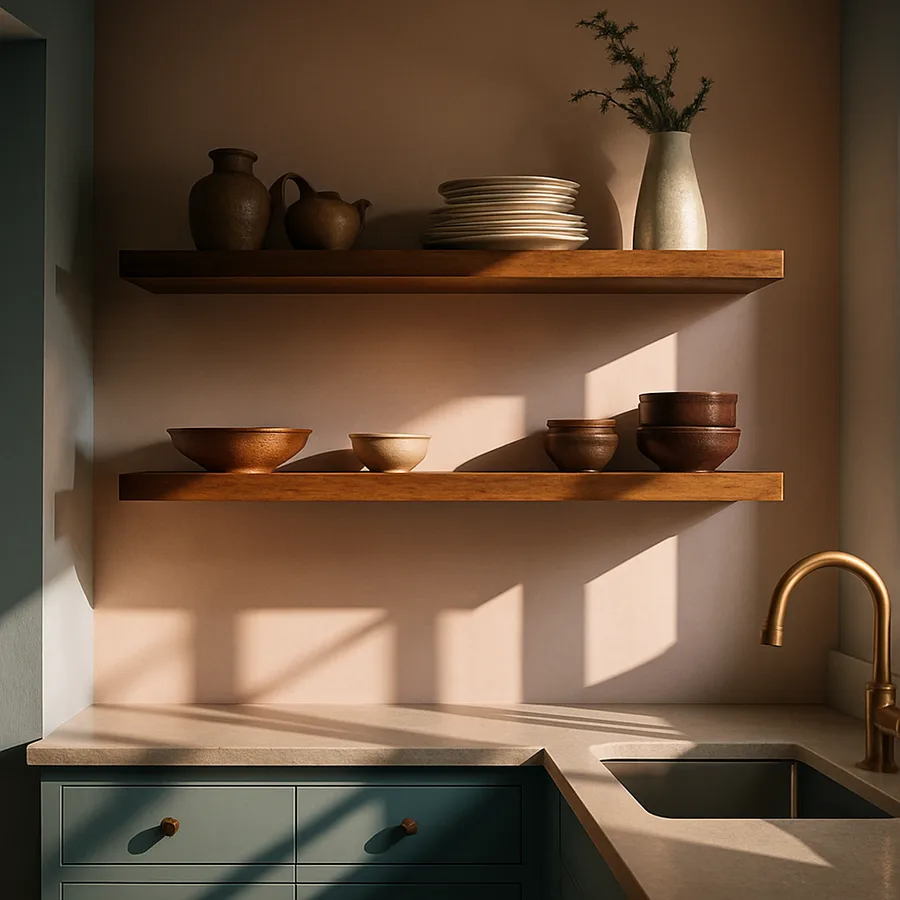
A floating wood shelf is one of the few interior elements where physics is louder than aesthetics. Get the bracket spec wrong and you will hear it crash at 2 a.m., usually onto a stack of heirloom dishes. Get it right, and you have a sculptural plank that appears to defy gravity while quietly carrying 80 pounds of stoneware. The difference between those two outcomes lives almost entirely in the hardware you do not see.
This guide is the conversation you should have with yourself, your contractor, or the help-desk associate at your home center before you buy a single board. According to the National Association of Home Builders (NAHB), kitchen-related shelf and storage failures account for roughly 6 percent of homeowner-reported insurance claims tied to interior fixtures, and a large share of those failures trace back to undersized brackets or missed stud connections. The fix is not exotic engineering. It is a clear-eyed match between the bracket type, the wall structure, and the load you actually plan to put on the shelf.
What "Floating" Actually Means in Engineering Terms
A true floating shelf has no visible support. The plank cantilevers out from a hidden bracket buried inside or behind it. There are essentially three families of hidden hardware that make this possible, and each one behaves differently under load.
The first and most common is the steel rod and back-plate system. A flat steel plate mounts to the wall, and one or more rods project horizontally outward. The shelf itself has matching holes drilled into its back edge, and the shelf slides onto the rods like a sleeve. The second is the concealed angle bracket, essentially a heavy L-shaped piece of steel that bolts to the wall studs and gets hidden behind a face-mounted shelf. The third is the French cleat with a hollow shelf, where a beveled wall strip catches a matching beveled rail inside a hollow box.
Each system has its own failure mode. Rod systems fail at the weld where the rod meets the plate. Angle brackets fail at the lag bolt that pulls out of soft drywall when no stud was caught. French cleats fail when the cleat is screwed into drywall anchors instead of framing. The American Wood Council publishes load tables for residential wood members, and even the most generous interpretation assumes proper anchorage to dimensional lumber, not gypsum board.
Choosing the Right Bracket System for Your Wall
Before you pick a bracket, you need to know your wall. Open up an inspection plate or use a quality stud finder to confirm three things: stud spacing (almost always 16 inches on center, occasionally 24), stud material (dimensional lumber versus light-gauge steel), and the presence of any blocking already installed by a previous remodeler.
For dimensional lumber studs, rod-and-plate systems work beautifully because the plate can span two studs and distribute the load. For steel-stud walls, which are increasingly common in newer construction and condominiums, you need a heavier-duty toggle system specifically rated for metal framing. The National Kitchen and Bath Association (NKBA) warns explicitly against relying on standard plastic anchors in kitchen applications, where vibration from cabinet doors, drawer slams, and routine reaching can fatigue an undersized fastener over years.
If your studs do not align with where you want your shelf, the right move is to add blocking - a horizontal 2x6 or 2x8 lag-bolted across two studs behind the drywall. This is a one-hour job during a remodel and a several-hour job after the fact, but it is the single best investment you can make in shelf longevity. Architectural Digest kitchen profiles routinely highlight this hidden detail in projects by high-end builders.
Real-World Weight Limits, Not Marketing Claims
Manufacturers love big numbers. You will see brackets rated for "150 pounds per pair" in the same product listing that quietly notes "when properly installed into solid framing." That qualifier is doing enormous load-bearing work. The honest, real-world capacity of most consumer floating shelf systems is closer to half the marketing number once you account for the shelf's own weight, the lever arm of items placed near the front edge, and the dynamic load of someone leaning on or accidentally yanking the shelf.
A useful planning rule from the American Society of Civil Engineers (ASCE) residential design guidelines is to derate published bracket capacity by 50 percent for any cantilevered application where the load is not centered over the support. So a "100 pound" bracket pair becomes a 50 pound working budget. From that 50 pounds, subtract the shelf weight itself - a 36-inch white oak plank at 1.5 inches thick weighs roughly 14 pounds - and you have about 36 pounds of usable dish capacity per pair of brackets.
How much is 36 pounds in real kitchen terms? Roughly twelve heavy stoneware dinner plates and four mugs, or eight wine glasses with a small ceramic pitcher, or a single cast iron Dutch oven with no room for anything else. Have you actually weighed what you intend to put on each shelf, or are you guessing? Houzz install reports note that the most common cause of post-installation regret is loading shelves with cookbook collections or cast iron, both of which exceed typical bracket budgets in a single stack.
Wood Species, Thickness, and Span
The shelf itself is a structural element, not just a decorative top layer. Wood species affects both weight and stiffness. White oak at 47 pounds per cubic foot is a stiff, hard, beautiful default for kitchens. Walnut is lighter and slightly less stiff but reads as more luxurious. Maple is the workhorse of cabinet shops - affordable, light-colored, and quite stiff. Reclaimed pine or fir is much softer, more prone to dent, and significantly less stiff per inch of thickness.
For a typical kitchen application, plan on 1.5 to 2 inches of shelf thickness for any span over 30 inches. Thinner shelves will visibly sag over time even when the bracket itself is rated correctly, because the wood between brackets bends elastically under sustained load. The American Wood Council publishes deflection charts that predict roughly L/360 deflection (a 36 inch span will sag 0.1 inch) for properly sized members, which is the threshold most designers consider invisible to the eye.
Span between brackets matters as much as bracket capacity. A single bracket pair can comfortably support a shelf up to 36 inches wide. From 36 to 48 inches, plan a third center bracket. Above 48 inches, treat the project as two separate shelves with a deliberate visual joint, or step up to commercial-grade hardware. Have you mapped where every bracket will land relative to your studs, or are you hoping to figure it out on installation day? That single planning decision separates a clean install from a wall full of patched holes.
Installation Steps That Prevent Future Failure
The actual installation is the easiest part if the prep work is done. Start by transferring the bracket hole pattern to the wall using a paper template or a level and tape measure. Confirm every fastener location lands on a stud or in your blocking. Drill pilot holes that match the lag bolt diameter minus the thread depth, never larger.
Drive lag bolts with a socket and ratchet rather than an impact driver where possible. Impact drivers can over-torque and strip the wood inside a stud, leaving you with a fastener that feels tight but pulls out under modest load. The Building Performance Institute training materials specifically call out over-torquing as a leading cause of hidden fastener failure in residential remodels.
Once the bracket is mounted, test the install before you load it. Hang on the bracket with your full body weight if it is mounted at chest height. If it shifts, creaks, or shows any movement, stop and reassess. A bracket that fails the body-weight test will absolutely fail under a stack of dishes plus the impact of a closing cabinet door over months of use.
When to Call a Pro and What to Ask
If your wall is plaster over lath, if you have steel studs, if you are spanning more than 48 inches, or if the shelf will hold a stand mixer or other heavy small appliance, the cost of a licensed handyman or carpenter is trivial compared to the cost of a failed install. Expect to pay between $150 and $400 per shelf for professional installation depending on region and wall complexity.
When you interview installers, ask three specific questions. First, what bracket system do you recommend for my wall type and load, and why? An installer who answers with a brand name rather than an engineering rationale is guessing. Second, will you add blocking if my studs do not align with the shelf location? An honest answer should include a labor estimate and a willingness to open and patch drywall. Third, what is your warranty on the install, and does it survive a homeowner adding additional weight later?
For a directory of certified kitchen designers and remodelers who routinely spec floating shelf hardware, the NKBA professional finder is the most reliable starting point. The National Association of Home Builders also maintains a remodeler directory searchable by certification level. For published examples of well-engineered floating shelf installations in real residential kitchens, the project archives at Architectural Digest's kitchen section include detail photography that often shows the bracket hardware in cutaway or pre-finish condition.
The reverse is also worth noting: be wary of installers who lead with price rather than method. A bid that is dramatically lower than the others almost always reflects either undersized hardware, missed stud connections, or a plan to use drywall anchors where blocking is required. The cost difference between a poor install and a good one on a single shelf is rarely more than $200, and that is a trivial premium relative to the difference in lifespan and safety.
Conclusion: Buy the Bracket Before You Buy the Wood
Most floating shelf failures begin with the wrong purchase order. Homeowners fall in love with a slab of figured walnut at the lumber yard, bring it home, and then discover that the only brackets that fit their budget are also the ones rated for half the load they need. The professional sequence is the opposite: confirm your wall structure, calculate your real load, select a bracket system that comfortably exceeds it, and only then choose your wood species and thickness.
The reward for doing this in order is a shelf that disappears into the wall visually while quietly outperforming any cabinet you replaced. The penalty for doing it backwards is, in the best case, a wall full of patched holes during a do-over, and in the worst case, broken dishes and a damaged countertop. The NKBA, NAHB, and American Wood Council all converge on the same fundamental advice: respect the load path from dish to bracket to fastener to stud, and the rest of the project takes care of itself.
One additional discipline worth adopting is the load journal. Keep a small note inside a kitchen drawer recording the original calculated capacity of each shelf and any major loading changes you make over the years. Five years from now when you are tempted to add the heavy ceramic bowl your aunt gifted you, you will have an honest reference for whether the shelf can absorb it without compromising the safety factor. This is the kind of low-effort discipline that prevents the slow drift from a properly engineered installation into an overloaded one - a drift that is responsible for the majority of multi-year shelf failures, according to incident data tracked informally by remodeling associations across the country.
Download the Interior Bliss Floating Shelf Load Calculator from our resource library to size your brackets, blocking, and species before your next visit to the lumber yard. It is a free spreadsheet, and it has saved more than a few weekend projects from becoming Monday-morning insurance claims.
More Articles You May Like


Comments
Post a Comment