Door Sweep Replacement For Drafts Under Exterior Doors
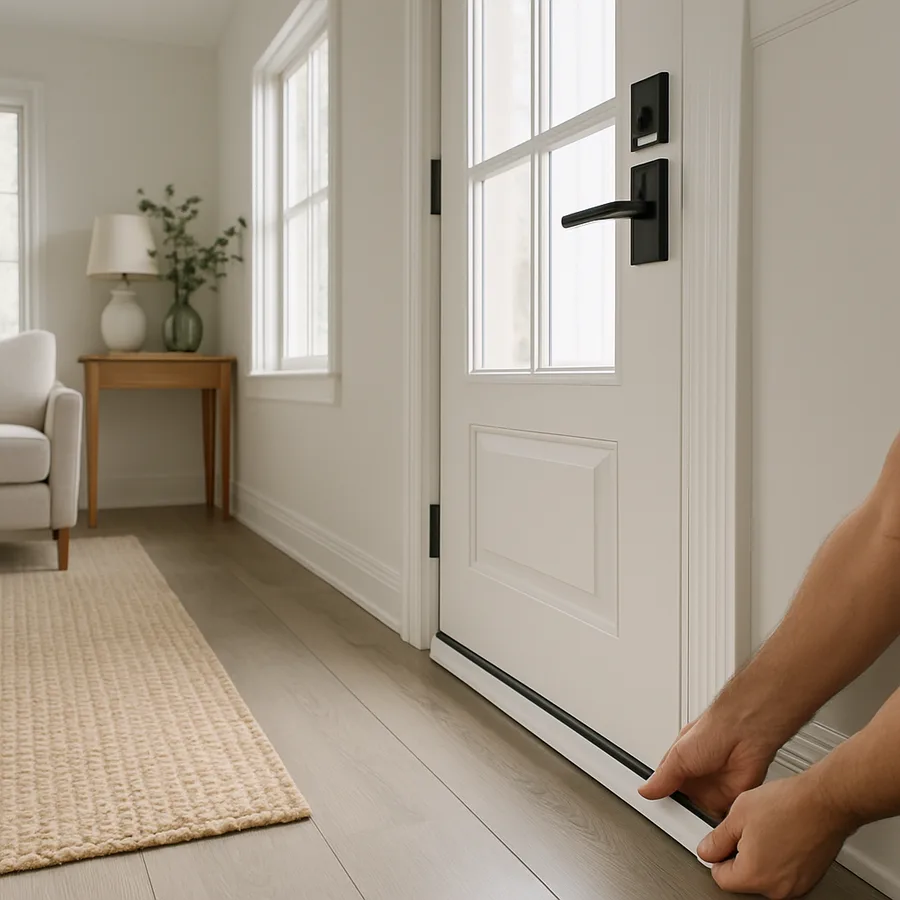
The Hidden Energy Cost of a Tired Door Sweep
The narrow gap under an exterior door is one of the most consistently underestimated energy leaks in residential construction. A standard thirty-six-inch entry door with a one-eighth-inch gap at the threshold leaks roughly the same volume of conditioned air per hour as a four-and-a-half square inch hole in the wall. According to the U.S. Department of Energy, air leakage at doors and windows accounts for between fifteen and thirty percent of total heating and cooling load in a typical American home, and the under-door gap is the single largest contributor at most exterior thresholds.
The mechanism is unforgiving. Cold outside air is denser than warm interior air and naturally pools at floor level, then slides under the door whenever the indoor-outdoor temperature differential creates a stack effect. In summer, the direction reverses: hot exterior air infiltrates and forces the air conditioner to work overtime. The door sweep, that small flexible strip attached to the bottom of the door, is the only thing standing between this exchange and your utility bill.
Have you noticed your floor feels colder near the front door than in the middle of the room? That temperature gradient is direct evidence that your sweep is failing. ENERGY STAR publications emphasize that sweep failure is one of the easiest infiltration issues for homeowners to diagnose and fix without specialized tools, yet it remains one of the most commonly ignored causes of comfort complaints.
How to Tell Your Sweep Has Failed
Sweep failure rarely happens dramatically. The vinyl or rubber blade gradually compresses, cracks, or detaches from its aluminum or steel carrier, and the homeowner adapts to the slow degradation without noticing. Several diagnostic tests will reveal failure in under five minutes.
The visual test is the simplest. Open the door and inspect the sweep from below. A healthy sweep has a continuous, flexible blade that contacts the threshold along its full length without gaps, tears, or compression-set kinks. A failed sweep shows curling at the ends, a permanent flat spot in the middle, separation between the blade and the carrier, or visible daylight at the contact line.
The paper test is more rigorous. Close the door on a sheet of standard printer paper at multiple points along the threshold: left edge, center, right edge. Try to pull the paper out. If it slides freely, the sweep is not contacting the threshold at that point. A properly functioning sweep grips the paper firmly enough that it tears before sliding cleanly.
The candle or incense test reveals the actual airflow. On a windy day, hold a lit candle or smoking incense stick six inches above the threshold on the interior side. If the flame or smoke deflects horizontally, you have measurable infiltration. RESNET auditors use this method as a quick qualitative check before deploying a blower door, and it is precise enough to distinguish a working sweep from a marginally failed one.
Types of Door Sweeps and When Each Belongs
The market offers four primary sweep configurations, each suited to a specific door and threshold combination. Choosing the wrong type is the most common reason a sweep replacement fails to fix the original problem.
The surface-mounted sweep, also called a U-channel or strip sweep, screws or adheres to the interior face of the door at the bottom edge. A flexible vinyl, rubber, or silicone blade extends below the door and presses against the threshold. This is the most common residential sweep, the easiest to replace, and the most forgiving of imperfect threshold heights. It is appropriate for doors with at least three-eighths of an inch of clearance to the floor.
The door bottom sweep, sometimes called a wraparound sweep, slides over the bottom edge of the door like a sleeve and is fastened through the door faces with screws. It provides better wear resistance because the blade is captured in a stiff aluminum extrusion, and it works on doors that scrape the threshold because it adds minimal thickness. Installation requires removing the door and trimming the bottom slightly to accommodate the wrap.
The automatic door bottom uses a spring-loaded mechanism that drops a sealing strip when the door closes and retracts it when the door opens. This is the gold standard for accessibility-compliant entries and for thresholds with significant height variation, because the seal contacts the floor only when needed and never drags. Cost runs three to five times higher than a basic sweep.
The threshold-mounted sweep, often integrated into a replacement threshold assembly, attaches to the floor rather than the door. The door's bottom edge contacts the upward-facing seal when closed. This configuration is common on commercial entries and on residential doors that have been retrofitted with adjustable thresholds.
Tools and Materials You Need on Hand
A sweep replacement is a one-hour project for an intermediate DIYer with the right tools. Showing up at the door with the wrong saw blade or no measuring tape doubles the time and increases the chance of a poor outcome.
The minimum toolkit includes a tape measure, a permanent marker or pencil, a hacksaw with a fine-toothed blade (32 teeth per inch), a flat metal file, a Phillips and flat-head screwdriver, and a cordless drill with a 1/8-inch bit. For wraparound sweeps, add a hand plane or block plane in case the door bottom needs to be trimmed. For automatic sweeps, add a block of scrap hardwood for a tapping block during installation.
Material-wise, the most critical decision is the sweep itself. Measure the door width to within an eighth of an inch and add a quarter-inch for cutting tolerance. Buy the sweep in the next size up from the door width and cut to fit. NAHB remodeling guides note that buying a sweep that exactly matches the nominal door width almost always produces a too-short final installation because the sweep loses material at both ends during cutting.
Sweep blade material matters for longevity. Silicone blades outlast vinyl by roughly three to one in cold climates because vinyl loses flexibility below twenty degrees Fahrenheit and develops compression set faster. EPDM rubber sits between the two on cost and performance. Brush sweeps with nylon bristles are excellent for uneven thresholds but have higher air leakage than blade sweeps and are best reserved for garage-to-house doors where dust exclusion matters more than air sealing.
Step-by-Step Replacement of a Surface-Mount Sweep
A surface-mount sweep replacement breaks down into six discrete steps, each of which has its own failure mode if rushed.
Step one: remove the old sweep. Open the door fully, brace it against a wedge or doorstop, and locate the screws or adhesive holding the existing sweep. Surface-mount sweeps typically use four to six small Phillips screws into the door face. Adhesive-mounted sweeps require a putty knife to peel them off, and any residual adhesive should be removed with mineral spirits. Photograph the existing sweep before removal as a reference for the new orientation.
Step two: measure and mark. Measure the door width at the bottom edge with the door closed. Measure the same dimension with the door open, because some doors are slightly out of square. Use the smaller of the two measurements. Subtract one-sixteenth of an inch on each end to allow clearance from the jamb stops. Mark the cut line on the new sweep with the door fully open and the sweep held in installation position.
Step three: cut the sweep. Clamp the sweep in a miter box or against a workbench edge and cut with a fine-toothed hacksaw. Cut slowly to avoid kinking the blade. After cutting, file the cut end smooth and round the corners slightly so the sweep does not catch on the jamb when the door swings.
Step four: dry-fit. Hold the sweep in position with the blade just touching the threshold. Close the door and observe the contact pattern. The blade should compress slightly along its full length. If one end gaps or the middle bunches, the door bottom is not parallel to the threshold and the sweep position needs to be biased to compensate.
Step five: drill and fasten. Most surface-mount sweeps have slotted holes that allow vertical adjustment. Drill pilot holes one-sixteenth of an inch undersized for the supplied screws. Drive the screws in the middle of the slots to allow later adjustment. Tighten only enough to hold the sweep, do not crush the carrier against the door.
Step six: test and adjust. Close the door and run the paper test at three points. If any point fails, loosen the screws on that end and slide the sweep down until contact improves. Re-tighten and re-test. A properly adjusted sweep grips paper firmly across the entire threshold without binding when the door swings.
Threshold Adjustment and the Hidden Geometry of Door Bottoms
A sweep cannot compensate for a misadjusted threshold or a warped door bottom. Many sweep replacements fail because the underlying geometry was wrong before the sweep was ever installed. Most modern entry doors sit on adjustable aluminum thresholds with four to six adjustment screws hidden under removable plastic caps. Turning these screws raises or lowers the threshold by up to a quarter inch.
The correct adjustment procedure is iterative. Start by lowering the threshold fully, then close the door and check sweep contact at the center. Raise the threshold uniformly, two flats per screw at a time, until the sweep just contacts the threshold along its full length without binding when the door swings. The American Architectural Manufacturers Association, now part of the Fenestration and Glazing Industry Alliance, publishes guidelines for threshold height that suggest a maximum quarter-inch step from interior floor to threshold for accessibility.
If the door itself is warped, which is common in solid wood entries that have absorbed moisture, sweep replacement alone cannot solve the air leakage. The door must be either re-flattened with weights and humidity control, or replaced. A bowed door produces a sweep contact pattern that is heavy at the center and light at the ends, or vice versa, and no amount of sweep adjustment will fully close the gap.
When to Replace the Whole Threshold Assembly
Sometimes the sweep is the wrong intervention. A threshold that has been gouged by years of dragging sweeps, corroded by salt and moisture, or split by foundation movement needs full replacement, not a new sweep on top of failed bottom-line geometry. The signs are unmistakable: visible rust on the aluminum, soft wood under the threshold cap when probed with an awl, or daylight visible between the threshold and the subfloor.
Threshold replacement is a half-day project that involves removing the door, prying out the old threshold, cutting and fitting a new one, and reinstalling the door. The materials run forty to one hundred fifty dollars; the labor, if hired, runs three hundred to seven hundred dollars. The economics favor full threshold replacement whenever the existing assembly is more than twenty years old or shows any structural deterioration, because installing a new sweep on a failing threshold is a temporary fix that will require redoing within a season.
Are you weighing a sweep replacement against a full door upgrade? In most cases, a working sweep on a structurally sound twenty-year-old door delivers eighty percent of the air-sealing performance of a new ENERGY STAR-certified door at less than one percent of the cost. The new door wins on aesthetics, security, and very-long-term durability, but the sweep wins decisively on dollars-per-CFM-reduction.
Conclusion
The under-door gap is the single highest-leverage air-sealing fix available to most homeowners. A twelve-dollar sweep installed correctly delivers measurable comfort improvement within a single heating season and pays back its installed cost in saved energy within twelve to eighteen months in any climate with meaningful winter heating loads.
The keys to a successful replacement are diagnosis before purchase, accurate measurement before cutting, and iterative testing during adjustment. Skip any of these and you end up with a sweep that looks installed but does not actually seal, the most common outcome of a rushed weekend project. Take the extra fifteen minutes to do the paper test before and after, and you will know with certainty that the work was worth doing.
The replacement project also creates a natural moment to inspect the rest of the door system. Check the weatherstripping at the jamb, the strike plate seating, and the threshold adjustment while you have the door open. Many homeowners discover that a single coordinated maintenance pass, sweep, weatherstripping, threshold, and hinges, restores the performance of a fifteen-year-old door to nearly new condition for under fifty dollars.
This weekend, walk to your front door with a sheet of paper and an incense stick. Do the paper test, the visual test, and the smoke test, then write down which thresholds fail. Order the right sweep type for each, set aside ninety minutes per door, and watch your floor temperature near the entry rise within a week. For deeper guidance on weatherization, consult the ENERGY STAR seal-and-insulate resources, the NARI remodeling library, and the This Old House weatherproofing archive.
More Articles You May Like


Comments
Post a Comment