Cove Crown Molding LED Strip Hidden Light Installation
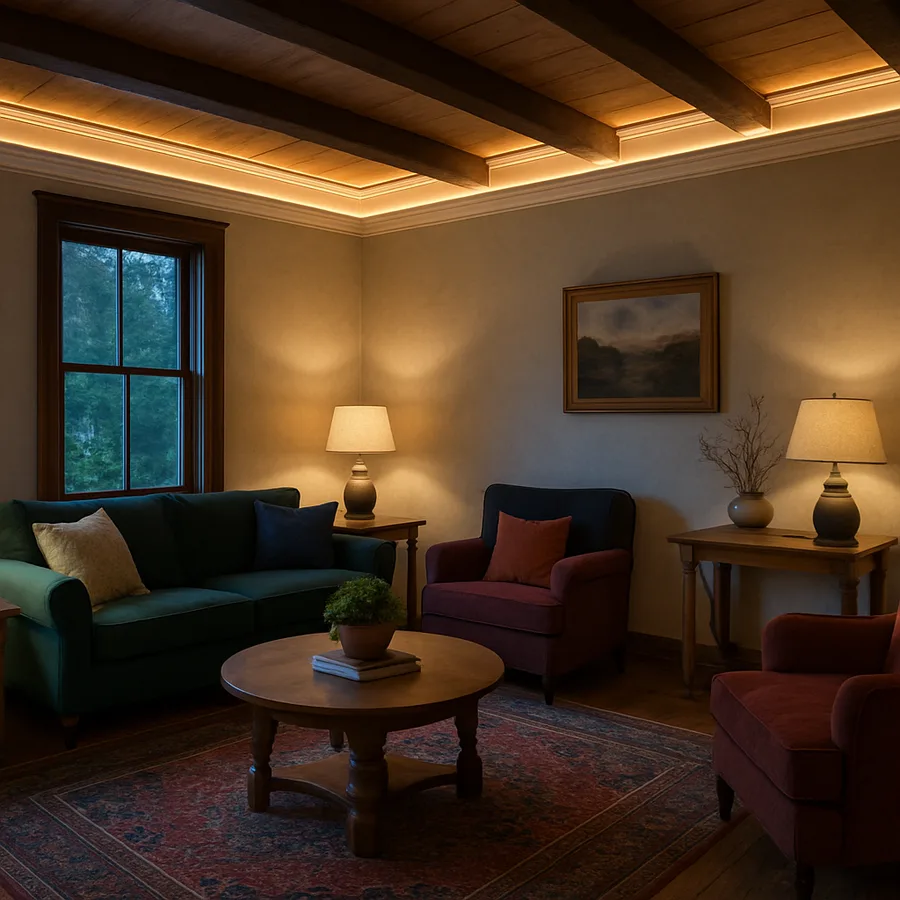
Cove crown molding with hidden LED strip lighting is one of the most powerful architectural moves in modern residential design. The technique uses a built-up wood or polyurethane crown profile that floats slightly below the ceiling, with a continuous LED strip tucked into the channel above. The light bounces off the ceiling and washes the entire room in soft, diffused glow, with no visible source. Done well, the result is unforgettable.
The American Lighting Association reports that cove and indirect lighting installations have grown by more than 80 percent in residential renovation projects over the past five years, driven by the availability of high-quality, dimmable LED strips at accessible prices. The American Institute of Architects regularly highlights cove lighting in its residential interiors awards as a defining gesture of contemporary luxury design. This guide walks through the entire process, from concept to commissioning.
Why Cove Lighting Transforms A Room
Cove lighting works because it changes the way the eye perceives a space. A flat ceiling lit only by recessed downlights reads as low and pressing, even when the actual height is generous. The same ceiling with a perimeter cove of indirect light reads as floating, lifted, and dramatically taller. The trick is the light bouncing off the ceiling plane, which makes the ceiling itself read as a luminous surface rather than a dark cap.
The Illuminating Engineering Society describes cove lighting as a form of indirect ambient illumination, ideal for living rooms, bedrooms, and dining rooms where atmosphere matters more than task brightness. The technique adds roughly 20 to 40 lumens per square foot of soft general lighting, which is enough on its own for casual occupancy and serves as the foundation for layered lighting design when paired with downlights, sconces, and accents.
Have you walked into a room with hidden cove lighting and felt that the room itself was glowing from within? That is the design intent. The light source is invisible, the shadow lines are soft, and the ceiling becomes a luminous architectural element. Architectural Digest regularly features projects where cove lighting is the single most memorable design move, transforming otherwise ordinary rooms into refined, atmospheric spaces.
Designing The Cove Profile
The cove profile itself is the architectural element that conceals the LED strip. The simplest version is a single piece of crown molding installed slightly below the ceiling, creating a small channel between the top of the molding and the ceiling plane where the LED strip sits. The molding hides the strip from view at all normal viewing angles, while the ceiling above receives and reflects the light.
Profile depth matters. The taller the molding face, the more light is captured and reflected, and the deeper the cove gap, the more effectively the strip is hidden. A typical residential cove uses a 4 to 6-inch tall crown profile, set 1.5 to 2 inches below the ceiling. The LED strip mounts on the top edge of the molding, facing upward and slightly outward, with the wires routed back through the wall.
Material choices range from solid wood to MDF to polyurethane. Wood is traditional and beautiful but moves with humidity, which can open joints over time. MDF is dimensionally stable and accepts paint perfectly, making it ideal for painted coves. Polyurethane is lightweight, easy to install, and resistant to moisture, ideal for bathrooms or kitchens where humidity is a factor. The National Association of Home Builders notes that polyurethane has become the dominant choice for new cove installations because of its consistency and ease of installation.
Choosing The Right LED Strip
The LED strip is the heart of the system, and quality varies enormously across the market. For a residential cove, look for a strip with at least 60 LEDs per foot, which produces a nearly continuous line of light without visible dot pattern. A higher density of 120 LEDs per foot delivers an even smoother line and is preferred for high-end installations. Lumen output should be at least 300 lumens per foot for a noticeable effect, and 500 lumens per foot or more for a brighter installation.
Color temperature should match the rest of the room. For most residential applications, 2700K to 3000K provides a warm, welcoming glow. Some homeowners specify tunable white strips that adjust from 2200K to 4000K via a smart controller, allowing the cove temperature to shift throughout the day. Color rendering index of 90 or higher is essential, since the light will be reflecting off and revealing the colors of the ceiling and upper walls.
What about RGB or color-changing strips? These add the option for accent colors during parties or holidays, but the daily-use white temperature of an RGB strip is often noticeably weaker than a dedicated white strip of the same wattage. The American Lighting Association recommends choosing dedicated white strips for primary cove use and adding RGB only as a separate, secondary system if color play is important to the homeowner.
Power Supply, Drivers, And Dimming
An LED strip needs a properly sized low-voltage power supply, typically 12 or 24 volts DC. The supply must match the strip's voltage and have enough wattage capacity for the total run length plus a 20 percent safety margin. A 100-foot strip drawing 4 watts per foot needs a power supply rated for at least 480 watts. Most installations use multiple smaller power supplies distributed along the run rather than a single large one, to minimize voltage drop and improve reliability.
Voltage drop is the most common cause of inconsistent light along a long cove. A 24-volt strip can typically run 30 to 50 feet from a single power injection point before drop becomes visible. Beyond that distance, additional power injection or a higher-voltage system is required. Plan power supply locations during the design phase, with a dedicated junction box hidden inside a closet or behind a removable access panel for maintenance.
Dimming is essential for residential cove lighting. The dimmer must be compatible with the specific driver, and the American Lighting Association warns that mismatched dimmer-driver pairings are the single most common cause of cove lighting complaints. Specify a TRIAC or 0-10 volt dimming system from the same manufacturer as the driver, and confirm the minimum dimming level is 1 percent or lower for true mood control. Smart dimmers from major brands integrate with whole-home control systems for scene-based operation.
Installation Sequence And Best Practices
Installation begins with planning the cove location, typically 1.5 to 2 inches below the ceiling on every wall that will receive the molding. Snap a level chalk line around the perimeter at that height, and verify the line is consistent on every wall by measuring down from the ceiling at multiple points. Old houses often have unlevel ceilings, in which case the cove follows the ceiling rather than a true level line, to maintain a consistent gap.
Install blocking behind the drywall where the molding will fasten, ideally during a renovation when walls are open. In retrofit conditions, you can use construction adhesive plus brad nails through the drywall into studs where they exist. Polyurethane molding is light enough that adhesive alone often suffices, but always add mechanical fasteners for long-term reliability.
Mount the LED strip on the top edge of the molding before installing the molding on the wall, if possible. Pre-mounting allows clean adhesive application and tidy wire routing. The strip should face upward and slightly outward, aimed at the ceiling 8 to 12 inches away. Run the power wires through pre-drilled holes in the molding back-side, and route them through the wall cavity to the nearest junction box. Test the strip before final installation to confirm full function.
Code, Safety, And Permitting Considerations
Low-voltage LED strip lighting is generally a Class 2 wiring system, which simplifies code compliance compared to line-voltage installations. The strip and its driver still must be UL-listed for the application, and any line-voltage portion of the system must be installed by a licensed electrician in compliance with the National Electrical Code as adopted by your local jurisdiction.
Heat dissipation is a real concern for high-output LED strips. Always mount the strip on a heat-dissipating surface such as an aluminum channel or a wide flat profile, never directly on a wood molding face without a thermal break. The National Association of Home Builders reports that the most common cause of premature LED strip failure in residential coves is inadequate heat dissipation, with strips overheating and failing within the first three years.
Permitting requirements vary by jurisdiction. Most municipalities require a permit for any new electrical circuit, including the line-voltage feed to the cove driver. The low-voltage strip itself usually does not require a separate permit, but local rules vary. Always check with your local building department before starting work, and document the installation with photos for future reference if the system ever needs servicing.
Layering Cove With Other Light Sources
Cove lighting alone is beautiful but rarely sufficient as the only source in a room. The technique works best as the ambient layer in a multi-source design, paired with downlights for task brightness, sconces for accent and vertical interest, and table or floor lamps for the warm, intimate scenes of evening occupation. The Illuminating Engineering Society consistently emphasizes that layered lighting is the foundation of comfortable residential design.
Each layer should be on a separate dimmer, and ideally on a scene controller that can recall preset combinations. A morning scene might use the cove at 30 percent and the downlights at 80 percent for crisp working brightness. An evening dinner scene might use the cove at 60 percent, the downlights off, and the sconces and table lamps at moderate levels for warmth. The cove provides the underlying glow that ties every scene together.
Have you considered how the cove will read against your wall colors and ceiling finish? A flat white ceiling reflects 85 to 90 percent of the cove light back into the room. A satin white ceiling reflects slightly less but with more directional sparkle. A colored or stained ceiling absorbs significant light and reduces the perceived brightness of the cove dramatically. Test a small section before committing the entire room, and adjust strip output to match the actual reflectance of the surfaces.
Conclusion
Cove crown molding with hidden LED strip lighting is one of the most rewarding lighting projects available to homeowners and designers. The visual transformation is dramatic, the energy consumption is modest, and the installation is approachable with the right planning and quality components. The technique elevates rooms from ordinary to architectural, with the kind of soft luminous quality that defines premium contemporary residential design.
Begin with careful design of the cove profile, including molding selection, installation height, and gap dimensions. Specify a quality LED strip with adequate density, lumen output, color temperature, and color rendering. Plan the power supply and dimming system as carefully as the strip itself, since these determine the daily user experience. Install with attention to heat dissipation, level alignment, and clean wire routing for long-term reliability.
The result is a room with a luminous ceiling perimeter that reads as floating, refined, and unmistakably designed. Combined with appropriate downlighting, accent lighting, and decorative fixtures, cove lighting becomes the foundation of a sophisticated lighting plan that performs beautifully day after day. The total project cost for a typical residential room ranges from 400 to 1,500 dollars depending on profile choice and strip quality, a modest investment for an architectural feature that lasts decades.
Ready to plan your own cove lighting installation? Sketch the room in plan and elevation, mark the proposed cove location on the existing walls with painter's tape, and verify the visual proportion at full scale before purchasing materials. Consult a licensed electrician for the line-voltage portion of the system, and consider engaging an ALA-certified lighting designer for the strip selection and dimming specification. The investment in professional input pays for itself in the daily satisfaction of the finished space.
Reference resources are available from the Illuminating Engineering Society, the American Lighting Association, and the American Institute of Architects.
More Articles You May Like


Comments
Post a Comment