Trim Carpentry Tools You Need For DIY Crown Installation
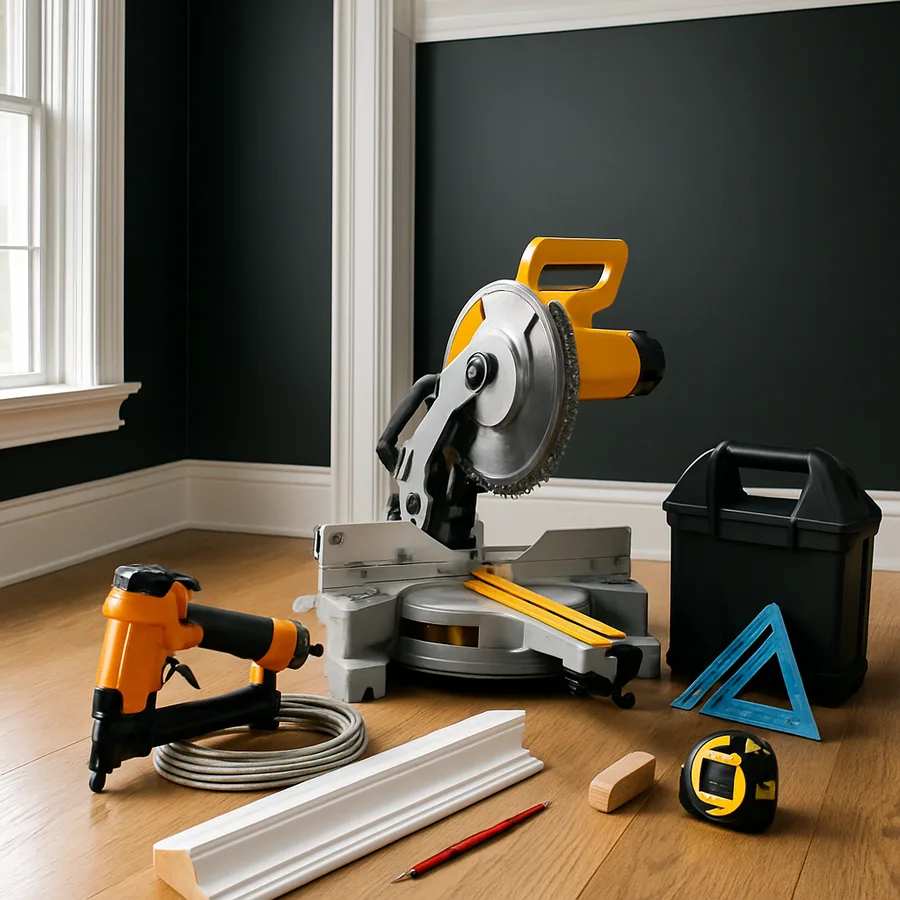
The right toolkit can be the difference between a crown molding project that becomes a source of lifelong satisfaction and one that becomes a cautionary tale told at family dinners. Trim carpentry sits in an interesting middle ground between rough framing and fine furniture making, and the tools required reflect that hybrid nature. You need cutting equipment precise enough for furniture-grade joinery, fasteners and adhesives sturdy enough to hold heavy molding overhead, and measuring tools accurate enough to reveal the dozens of small irregularities every wall and ceiling contain. Assembling this kit is one of the smartest investments a homeowner can make, because the same tools that handle crown molding also handle baseboard, casing, wainscoting, and a hundred other interior projects.
Industry estimates from the National Association of Home Builders suggest that homeowners save between 60 and 75 percent on labor costs when they tackle their own trim installation, with crown molding representing one of the highest-ROI DIY projects in terms of perceived home value gained per dollar spent. That savings, however, depends entirely on having the right tools to do the job correctly. A poorly equipped attempt at crown molding can cost more than hiring a professional, because mangled molding has to be replaced, gaps must be filled and refilled, and the finished result still looks amateur. This guide walks through every category of tool you actually need, separating the genuinely essential from the nice-to-have.
The Cutting Tools That Form the Backbone of the Kit
The compound miter saw is the single most important tool in any trim carpenter's arsenal, and the choice of saw shapes everything else about the workflow. For crown molding specifically, you want a sliding compound miter saw with at least a 10-inch blade, though a 12-inch sliding model is the better long-term investment if budget allows. The slide function lets you cut wide crown laid flat against the table, which is faster and more accurate than the traditional sprung-against-the-fence method that smaller saws require. Expect to invest between 350 and 700 dollars for a saw that will deliver consistent, splinter-free cuts across hundreds of pieces.
Equally important is the blade. A factory blade is almost always inadequate for trim work. Look for a fine-tooth finishing blade with at least 80 teeth, ideally 96 to 100 teeth for hardwood molding. The teeth should have an alternating top bevel grind, which produces clean cuts on both the top and bottom faces of the molding. Have you ever seen a crown installation where the cut edges look fuzzy or splintered? That is almost always a blade problem, not a technique problem. Budget another 80 to 150 dollars for a quality blade, and replace or resharpen it after every major project.
For coped joints, you also need a coping saw or a coping accessory. The traditional hand coping saw costs under twenty dollars and remains the most reliable tool for the job in skilled hands. Faster alternatives include an oscillating multi-tool with a fine wood blade, or a coping jig that mounts on a jigsaw. Family Handyman has profiled coping accessories extensively in its tool reviews, and the consensus is that beginners should start with a hand coping saw to develop the feel for the technique before investing in powered alternatives. Expect to spend between 15 and 200 dollars depending on which path you choose.
Fasteners and the Air Tools That Drive Them
Crown molding is a fastener-heavy project, and trying to drive nails by hand is a recipe for cracked molding, sore arms, and uneven results. A pneumatic finish nailer or cordless brad nailer is essentially mandatory for serious trim work. The two main choices are a 16-gauge finish nailer and an 18-gauge brad nailer. The 16-gauge tool drives thicker, longer nails suitable for heavy crown and structural attachment, while the 18-gauge tool drives smaller nails that leave less visible holes and are ideal for thin moldings or for tacking pieces in place before finish nailing.
Most pros carry both. A typical crown molding installation uses 18-gauge brads to tack pieces in position and 16-gauge finish nails to lock them down through the molding into the framing or backing. Cordless models from major brands have improved dramatically in the last five years and now rival pneumatic performance for most residential applications, with the convenience of no compressor or hose. Expect to spend 200 to 400 dollars for a quality cordless finish nailer, plus another 150 to 250 dollars for a brad nailer. If you go pneumatic, add a small portable compressor in the 150 to 300 dollar range.
Construction adhesive is the unsung hero of crown installation. A bead of polyurethane construction adhesive on the back of every piece, applied just before nailing, dramatically reduces the long-term tendency of joints to open up. The adhesive bonds the molding to both the wall and ceiling and absorbs small movements that would otherwise telegraph as gaps. Brands like Loctite PL Premium and Liquid Nails Heavy Duty are specifically formulated for this application. A single tube costs under ten dollars and covers roughly forty linear feet of crown.
Measuring, Marking, and Layout Tools
Crown molding installation lives or dies by accurate measurement and layout, which means investing in measuring tools that go beyond what a typical homeowner already owns. Start with a quality 25-foot tape measure with a stand-out blade strong enough to extend across a room without buckling. A laser distance measurer is a worthwhile upgrade for crown work because it lets you measure ceiling-to-ceiling diagonals and long wall runs accurately from a single position. Quality models from Bosch, Leica, or DeWalt run between 60 and 200 dollars and pay for themselves on the first project.
An angle finder or digital protractor is essential for measuring corner angles, which as This Old House has documented in numerous trim articles, are almost never the perfect 90 degrees that builders intend. A digital angle finder displays the actual corner angle, which you then divide by two to get the proper miter setting. This single tool eliminates more crown molding heartache than any other accessory in the kit. Expect to pay 30 to 80 dollars for a quality digital model.
Layout tools include a four-foot level, a torpedo level, a chalk line, a stud finder, and a sharp pencil with a fine point. The stud finder deserves special mention because crown molding must be nailed into solid backing, and finding studs and ceiling joists accurately is non-negotiable for a long-lasting installation. A quality multi-sensor stud finder runs 30 to 60 dollars. A simple magnetic stud finder in the 10 to 20 dollar range works as a backup or verification tool. Together these layout tools are inexpensive but transformative; have you ever wondered why pro installations look so straight and even? It comes from disciplined layout, not from talent.
Jigs, Sleds, and Specialty Crown Accessories
The crown molding sled or crown stops are the accessories that separate occasional DIYers from people who actually get good at this work. A crown sled is a fixture that holds the molding at the correct spring angle on the miter saw table, allowing you to cut crown sprung against the fence without complicated compound angle settings. Commercial models from companies like Bench Dog and Kreg cost 60 to 150 dollars, but a perfectly functional shop-made version can be built from scrap plywood in an afternoon.
An alternative approach is to use crown stops, which are small plastic or metal accessories that mount to the miter saw fence and hold the crown at its proper spring angle. These are inexpensive (typically 20 to 40 dollars per pair) and let you make accurate cuts on a saw that does not have enough capacity to lay the crown flat. The National Association of the Remodeling Industry notes in its trim guidance that crown stops are particularly valuable for installers working with smaller 8-inch or 10-inch miter saws who would otherwise be limited to narrow crown profiles.
Other specialty accessories worth considering include a stud finder with deep scan capability for finding ceiling joists through thick drywall, a laser level for transferring level lines around the room, and a small pry bar for removing old molding without damaging the wall. None of these are strictly required, but each one solves a specific problem that occurs frequently enough to justify the investment if you plan to do trim work on more than one project. The total investment in specialty accessories typically runs 100 to 300 dollars depending on which tools you select.
Finishing Supplies That Pros Always Have on Hand
The cutting and fastening tools get the headlines, but the finishing supplies are what give crown molding its polished, professional look. Caulk is the most important item in this category. Use a paintable acrylic latex caulk with silicone for the joint between molding and wall and between molding and ceiling, and use a flexible color-matched wood filler for nail holes and small joint gaps. Avoid cheap caulk; it shrinks, cracks, and yellows. Brands like DAP Alex Plus, Sherwin-Williams 950A, and Sashco Big Stretch are professional standards.
A quality caulk gun makes the difference between clean caulk lines and frustrating mess. Drip-free caulk guns with smooth pressure release run 25 to 50 dollars and are worth every penny. Combine the gun with a damp rag and a small spray bottle of water for tooling caulk lines into smooth, consistent profiles. The technique of caulking is a skill in itself, and there is no substitute for practice on scrap before tackling visible joints in the actual installation.
Sandpaper, putty knives, a small detail brush, and primer round out the finishing kit. Pre-primed MDF crown molding speeds up the finishing process considerably compared to bare wood, but even pre-primed molding benefits from a final coat of primer at all cut edges and joint lines before the topcoat. According to material specifications referenced by the American Institute of Architects, properly primed and caulked trim joints can extend the maintenance-free life of an installation by five to ten years compared to uncaulked or poorly primed work. Are these supplies glamorous? Not at all. Do they determine the final appearance of your work? Absolutely.
Safety Equipment and the Setup You Cannot Skip
Crown molding work involves overhead cutting, ladder use, pneumatic tools, and dust generation, all of which create real safety risks that homeowners frequently underestimate. A good pair of safety glasses is mandatory for every cut and every nail driven. Hearing protection becomes essential the moment a miter saw or compressor starts running. Both items can be acquired for under thirty dollars combined and should be considered as essential as the saw itself.
A reliable ladder or scaffold is the next essential. For most residential ceiling heights, a six-foot fiberglass step ladder with a paint shelf is the right starting point. For higher ceilings or longer runs, a small scaffold or work platform allows you to move along a wall without constantly climbing up and down. Scaffolds in the 200 to 500 dollar range last for decades and pay for themselves in efficiency on the first major project. According to data tracked by the U.S. Bureau of Labor Statistics, falls from ladders consistently rank among the top five sources of home improvement injuries, so this is not a category to skimp on.
A respirator or dust mask is essential when cutting MDF or hardwood crown, both of which produce fine dust that can irritate lungs over time. An N95 mask is the minimum acceptable standard, and a half-mask respirator with replaceable cartridges is better for sustained work sessions. Add a shop vacuum with a fine dust filter to manage the inevitable mess, and consider a small dust collection attachment for the miter saw to capture sawdust at the source. The total investment in safety equipment is modest, typically under 200 dollars all-in, but it protects the most valuable tool in your shop, which is you.
Conclusion
Building out a complete crown molding toolkit is a meaningful upfront investment, but it is one that pays back across countless future projects. A reasonable starter kit including a quality miter saw, a finish nailer, a coping saw, measuring tools, a stud finder, fasteners, adhesives, and finishing supplies can be assembled for between 800 and 1500 dollars depending on brand choices and how much you already own. Compare that to the cost of professional installation, which can run 8 to 15 dollars per linear foot for crown work in most U.S. markets, and the math favors the DIY approach quickly for homeowners with multiple rooms to address.
The key insight is that tools are not interchangeable. A cheap miter saw with a dull blade will frustrate you regardless of your skill level, while a quality saw with a sharp finishing blade will reward even modest technique with tight, clean cuts. Spend the money where it matters most, which is on the cutting tools, the fasteners, and the measuring instruments. Save money on the categories where premium options offer marginal benefit, like basic hand tools, sandpaper, and consumables. The pros do exactly this, and the result is a kit that punches above its weight.
Are you ready to start building your trim carpentry kit? Begin with the miter saw and a quality blade, add a finish nailer and a digital angle finder, and pick up the rest piece by piece as your projects demand. Within a year or two of regular weekend work, you will have a complete professional-grade toolkit and the skills to use it. Pick one room in your home, make a list of the tools you need, and start your shopping. The crown molding you install with these tools will outlast you, and the satisfaction of pointing to a perfectly executed corner that you cut, coped, and nailed yourself is one of the great pleasures of owning a home.
More Articles You May Like



Comments
Post a Comment