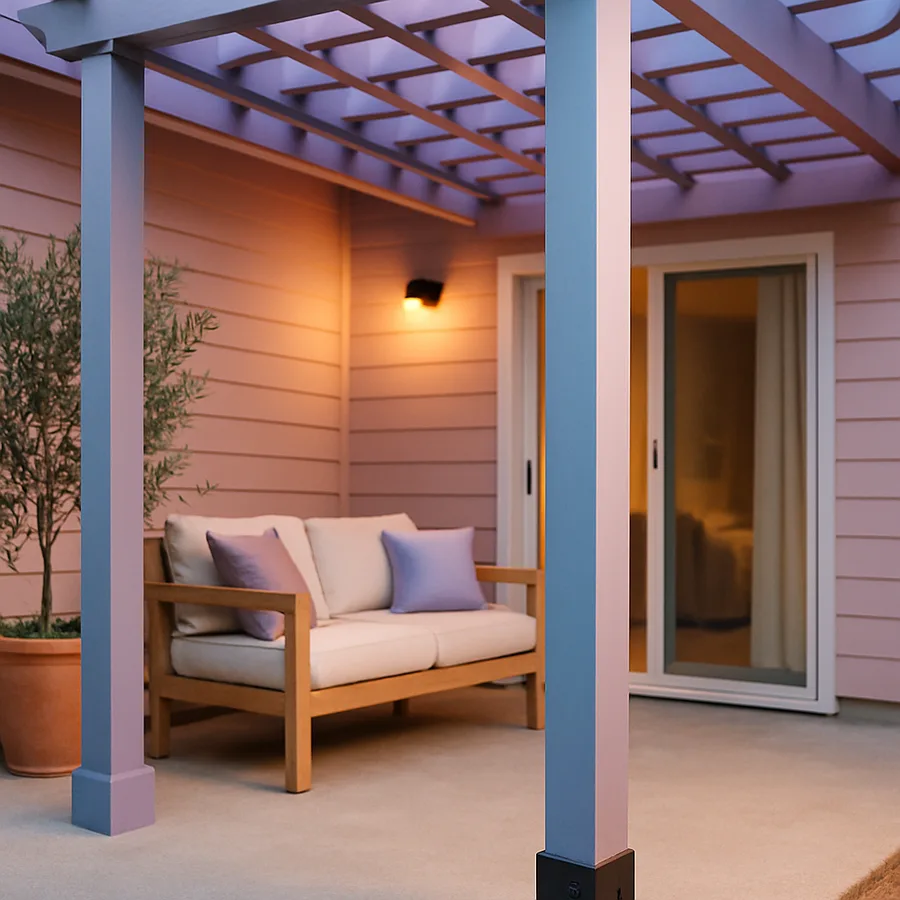
Building a Pergola Over an Existing Concrete Patio Without Footings
Most pergola tutorials assume bare ground and shovels in hand, which is the wrong starting point for thousands of homeowners who already have a perfectly good concrete patio in place. Tearing up that patio to dig footings is destructive, expensive, and almost always unnecessary. With the right hardware and a careful approach to anchoring, a properly engineered pergola can sit on top of existing concrete and last for decades without ever needing a single dug footing.
This guide explains how to build a freestanding or attached pergola over an existing concrete slab, what hardware is appropriate for the job, the structural and code considerations that govern the work, and the specific failure modes you need to design against. The approach covered here is suitable for typical residential patios; commercial installations and structures over a certain size still require engineered footings, and we will discuss where that line is drawn.
Why Surface-Mount Anchoring Works on Existing Concrete
The instinct to dig footings comes from buried-post construction, where the ground has to do two jobs: support the vertical weight of the structure and resist the horizontal forces that try to tip it over in wind. A correctly designed slab already provides much of this capacity, and the rest can be supplied by surface-mounted hardware that transfers loads through the slab into the ground beneath without breaking the slab itself.
A typical residential concrete patio is poured at a thickness of 4 to 6 inches over a compacted gravel base, with steel reinforcing mesh embedded in the slab. According to the International Code Council, the IRC permits surface-mounted attachment of light residential structures when proper anchors are used and the substrate is verified as sound. The slab acts as a distributed footing, spreading point loads from the post bases over a much larger area than a buried post ever could.
Wind uplift is the primary concern, not gravity. A 12x14 pergola with a slatted roof in a typical residential setting experiences vertical loads from its own weight that any reasonable slab can handle, but a strong gust can generate uplift forces of several hundred pounds per post trying to pry the structure off the patio. The hardware and anchoring strategy must specifically address uplift, and that is where surface-mount installations most often go wrong.
Lateral loads from wind pushing sideways against the structure are the third consideration. A tall, open pergola behaves like a sail in strong wind, and the connection between post and slab must resist sliding as well as overturning. Properly specified anchors handle all three forces simultaneously, but generic hardware from a big-box store often only addresses one or two of them adequately.
Inspecting the Slab Before You Commit
Before any post base touches concrete, the slab itself needs an honest inspection. Not every patio is a suitable foundation for a pergola, and the cost of discovering this after the structure is built can be significant. A few simple checks will tell you whether to proceed, repair, or rethink the project.
Walk the entire slab and look for visible cracks. Hairline cracks are normal in any concrete and are not a structural concern, but cracks wider than the edge of a credit card, especially those showing vertical displacement between the two sides, indicate a slab that has lost integrity. Cracks that pass through the location of a planned post are a particular problem because the anchor will load both sides of the crack and tend to widen it under stress.
Tap the slab with a hammer in several locations, especially near the planned post positions. A solid slab returns a clean, ringing tone; a hollow or dull thud suggests delamination or voiding under the surface that will not support concentrated point loads. The American Concrete Institute publishes detailed guidance on visual and acoustic inspection of slabs, and any homeowner planning a pergola installation can apply the same simple principles.
Slab thickness can be verified at any visible edge, such as where the patio meets a planting bed or steps down to a lower level. If the visible thickness is less than four inches, or if the slab was poured directly over poorly compacted soil, surface-mounted post anchoring is risky and you should consult a structural engineer. For thinner slabs, an alternative is to core through the slab and drop a concrete pier at each post location, which adds work but preserves the rest of the patio.
Choosing the Right Surface-Mount Post Bases
Hardware selection is where this kind of project either succeeds or fails. The market is full of post bases that look similar but have very different load ratings, corrosion protection, and installation requirements. The hardware appropriate for a 4x4 mailbox post is wholly inadequate for a 6x6 pergola post that has to resist real wind forces.
Look for post bases specifically rated for pergola or arbor use, with published uplift, lateral, and gravity load capacities. Reputable brands such as Simpson Strong-Tie publish detailed engineering data for each base, and the rating should be matched to your local design wind speed. As a general guideline, residential pergolas in 110 to 130 mph design wind zones typically require post bases rated to at least 1,500 pounds of uplift, while higher-wind coastal zones require correspondingly heavier hardware.
The base itself should be hot-dip galvanized or stainless steel, not plain or zinc-plated, because it will sit in standing water during every rainstorm and will rust through within a few years if the coating is inadequate. The G185 galvanized rating, which specifies coating thickness, is the minimum for outdoor structural hardware. Stainless steel costs more but is the best choice in coastal salt-air environments where even galvanized hardware eventually corrodes.
The connection between the base and the slab uses concrete wedge anchors or epoxy-set threaded rods, not lag bolts driven into plastic shields, which is the failure pattern that causes most surface-mount pergolas to come loose in storms. Wedge anchors mechanically expand against the concrete when tightened and provide pull-out resistance approaching the tensile strength of the bolt itself. Epoxy-set anchors bond chemically to the concrete and offer the highest pull-out strength of any common method, but require more careful installation and a clean drilled hole.
Layout, Drilling, and Setting the Post Bases
Accurate layout is the foundation of a square pergola, and getting this right on existing concrete is harder than it sounds because you cannot simply stake out the corners and pull strings. Start by establishing the long axis of the pergola in line with the most visually significant reference, usually the back wall of the house or the long edge of the patio. From that line, measure out the post positions and mark each one with a pencil cross on the slab.
Verify squareness with the 3-4-5 triangle method: measure three feet along one axis, four feet along the perpendicular axis, and the diagonal between those two points should measure exactly five feet. Any multiple of those numbers works the same way, and the longer the legs you can use, the more accurate the result. For a 12x14 pergola, work with 9-12-15 measurements to maximize accuracy. Once you have a single square corner established, the rest of the layout flows from it.
Drilling into existing concrete requires a hammer drill or rotary hammer with a carbide bit sized to the anchor specification. Drill the hole at least one-half inch deeper than the anchor embedment depth so debris from the drilling can settle below the anchor. Vacuum or blow out the hole completely before inserting the anchor; loose dust dramatically reduces holding power and is the most common installation error.
Set the post bases with the saddle aligned to the post layout, then tighten the wedge anchors to the manufacturer's specified torque. Overtightening can crack the concrete around the anchor and reduce holding power; undertightening leaves the anchor loose and prevents the wedges from setting properly. A torque wrench is the right tool for this step. Once all post bases are set, run a string from corner to corner across the diagonals to confirm the layout is still square before proceeding to post installation.
Post and Beam Assembly Strategies for Surface-Mount Pergolas
The post-and-beam framing for a surface-mounted pergola is no different from any other pergola in structural principle, but the connections at the base and at the top of the post deserve extra attention because the entire structure depends on them. The post itself bears on the post base, fastened with through-bolts at minimum and ideally with a combination of through-bolts and structural screws for redundancy.
Use standoff post bases rather than flush-mounted ones whenever possible. A standoff base lifts the bottom of the post one to two inches above the slab, which dramatically reduces moisture wicking into the end grain of the post and extends the useful life of the lumber by years. The visual gap reads as intentional and is consistent with high-quality outdoor construction. For pressure-treated lumber, the standoff is functional; for cedar, redwood, or other naturally durable species, it is essential.
Post height is determined by the desired clear ceiling height plus the depth of the beam and rafter assembly. Most residential pergolas use a clear ceiling height of 8 to 9 feet, which feels generous without making the structure read as oversized. Cut all posts to identical length using a single reference cut, then verify each post is plumb in two directions during installation with temporary diagonal braces. The braces should remain in place until the beams are installed and bolted, which provides the lateral stability the structure needs.
Beam-to-post connections should use structural through-bolts of at least 1/2 inch diameter, with washers on both sides, rather than relying on lag screws or pocket screws. The National Association of Home Builders publishes prescriptive guidelines for residential outdoor structures that recommend specific bolt patterns for various pergola sizes. For a 12x14 pergola, two 1/2-inch through-bolts per beam-to-post connection is a reasonable minimum, with steel knife-plate connectors providing additional capacity for larger structures.
Permits, Codes, and When You Need an Engineer
The legal landscape around surface-mounted pergolas varies dramatically by jurisdiction, and the worst time to discover that your project required a permit is after the inspector drives by and sees a finished structure. A short call to your local building department before starting work clarifies what is required and prevents costly retroactive fixes.
In most residential jurisdictions, freestanding pergolas under a certain size, often 120 to 200 square feet, fall below the threshold for permits when not attached to the house. Attached pergolas, those that share a beam with the house structure, almost always require a permit because they affect the house framing and roof. The dividing line between freestanding and attached can be subtle: a pergola whose roof simply touches the house wall but is fully self-supporting may still be considered freestanding, while one that depends on the house ledger for any structural load is attached.
Wind speed and seismic design category determine whether your jurisdiction will accept a prescriptive plan or require engineered drawings. Areas in hurricane zones along the Atlantic and Gulf coasts, in earthquake-prone regions of the West Coast, and in high-snow regions often require an engineer's stamp on any permanent outdoor structure regardless of size. Members of the National Society of Professional Engineers can provide site-specific calculations that satisfy local requirements at modest cost.
Have you checked whether a permit is required in your jurisdiction? And are you confident your slab is in adequate condition to serve as the foundation? If the answer to either question is no, those are the two things to resolve before any other work begins. The investment in early due diligence is small compared to the cost and frustration of building a pergola that has to be rebuilt or removed.
Conclusion: A Solid Pergola on Solid Concrete
Building a pergola on existing concrete is well within the reach of a careful homeowner with the right hardware and an honest assessment of the slab condition. The keys to success are matching post-base capacity to local wind loads, drilling and setting anchors correctly, using standoff bases to extend post life, and connecting beams to posts with structural through-bolts rather than lighter fasteners. Each of these steps is straightforward in isolation but compounds when one is done poorly.
The benefit of working with an existing slab is significant. You preserve the concrete, avoid the cost and disruption of demolition and re-pour, eliminate the cure time that delays footing-based projects, and end up with a finished result that looks identical to a footing-supported pergola from any normal viewing distance. For most residential applications, this is the smart approach when a sound slab is already in place.
The risks are real but manageable. Inadequate hardware, poor anchor installation, or an unsuitable slab can produce a pergola that fails in the first significant storm. Address each of these concerns systematically, do not substitute lighter hardware for the rated specification, and do not skip the slab inspection. If you are uncertain at any point, consult a structural engineer before proceeding; the cost of a one-hour consultation is trivial compared to the cost of a structural failure.
Ready to start your project? Begin with a slab inspection and a call to your local building department to confirm permit requirements. Order hardware that is specifically rated for your design wind speed, and plan your layout carefully before drilling the first hole. With a sound slab, the right hardware, and methodical execution, your pergola will stand securely on the patio you already have, ready to host years of evenings under string lights and summer skies.
More Articles You May Like


Comments
Post a Comment