Wood Slat Headboard Wall Panels for a Scandinavian Bedroom
Few design moves transform a bedroom as efficiently as a vertical wood slat accent wall behind the bed. The look is simultaneously calming and architectural, drawing from the timber-forward traditions of Denmark, Sweden, and Norway while borrowing the minimalist discipline that defines modern Scandinavian interiors. A recent market report from the Architectural Digest AD100 Trend Review identified slatted wood paneling as the single fastest-growing bedroom finish for the third consecutive year, with searches for the term rising over 340% in the past several years. This guide walks through every decision - wood species, slat dimensions, spacing math, finishes, and mounting - so the wall you build looks intentional rather than trend-chasing.
Before committing to any slat wall, spend a few minutes asking yourself the questions serious designers ask: How does morning light hit this wall, and how will the slat shadows fall across the bed as the sun moves? A north-facing wall will render the slats flat and graphic, while a south or east exposure will paint the wall with a rhythm of moving shadows throughout the day. Both can be beautiful; neither is automatic.
The Design Logic Behind Scandinavian Slat Walls
Scandinavian design is not just minimalism. It is functional warmth, a philosophy that wants every surface to do double duty - beautiful and useful, visual and tactile, modern and human. Wood slats accomplish this balance better than almost any other finish. They read as architectural rather than decorative, they soften acoustics the way upholstered walls do, and they introduce organic grain without feeling rustic. The Scandinavian Institute of Architecture notes that vertical timber cladding has been used in residential interiors across the region since the mid-twentieth century, long before it became a global trend.
The technical reason slat walls feel so grounded is rhythm. The human eye is wired to find repeating patterns soothing, and an evenly spaced run of 2-inch or 3-inch slats creates a subconscious rhythm that reads as order. This is the same principle that makes bookshelves, piano keys, and fence pickets visually satisfying. Applied to a headboard wall, that rhythm anchors the bed without requiring a physical headboard at all.
There is also an ergonomic argument. The International Interior Design Association (IIDA) has highlighted biophilic design elements - natural materials, visible grain, warm tones - as measurable contributors to reduced cortisol levels in the bedroom environment. A slat wall delivers biophilia at scale without adding clutter.
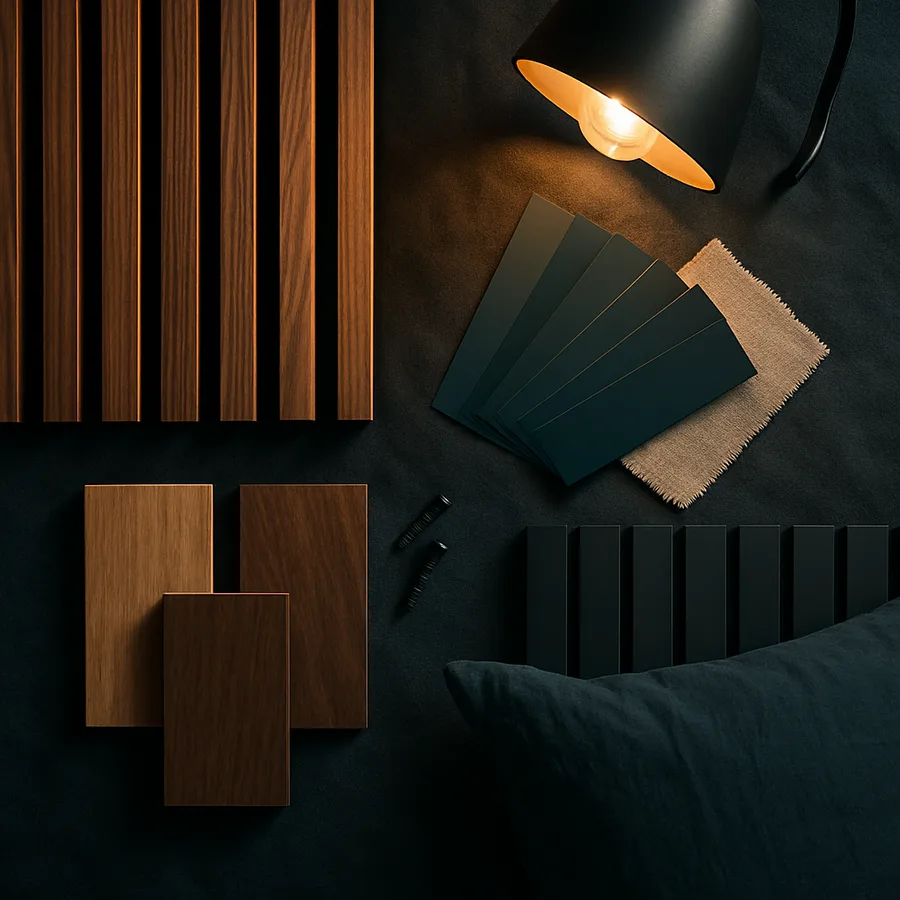
Choosing the Right Wood Species for Your Palette
Your wood choice drives 70% of the finished look. White oak is the current darling for a reason - it carries a warm honey tone, takes stain beautifully, and reads as authentically Scandinavian because the species is native to northern Europe. However, white oak runs $6 to $9 per linear foot for dimensional slats, which adds up quickly across an 8-foot wall.
Poplar is the budget hero. At roughly $2 per linear foot, it is affordable enough for a full wall, and it paints beautifully if you plan to finish in a color. Many of the most photogenic slat walls on Better Homes & Gardens are actually painted poplar, not stained hardwood. If your palette is sage, warm white, clay, or charcoal, poplar is probably your best move.
Other species worth considering include pine (cheapest, knottier, expect character), walnut (dark, dramatic, expensive), and MDF slats (cheapest of all, paintable, but not suitable if you plan to apply a clear finish). A recent survey by the National Wood Flooring Association (NWFA) found that 52% of interior accent wall projects now use paint-grade lumber rather than hardwood, a shift driven entirely by cost.
The Spacing Formula That Separates Pro Work from Amateur
Slat spacing is where most DIY projects go wrong. Too tight and the wall reads as a solid panel; too wide and it looks like an unfinished fence. The reliable formula designers use is a slat-width-to-gap ratio between 2:1 and 4:1. That means a 2-inch wide slat should have a gap of 1/2 inch to 1 inch between each slat. A 3-inch slat pairs well with a 3/4-inch to 1-1/2-inch gap.
Before cutting anything, lay painter's tape on your wall in the exact slat and gap pattern you are considering. Live with it for 24 hours. Ask yourself: Does this rhythm feel calming or busy at 7am? Does it still feel calming at 10pm? Lighting changes dramatically shift how a slat pattern reads, and the painter's tape test costs nothing.
For mounting, the cleanest method is attaching a painted plywood backer board to the wall first, then gluing and nailing slats onto the backer. This approach hides any drywall imperfections and guarantees even spacing because you can draw guide lines on the backer. Paint the backer the same color as your slats if you want a monolithic look, or paint it black for a dramatic shadow-gap effect.
Finishes, Stains, and the Scandinavian Color Story
Scandinavian palettes are quiet. Think bone, warm white, oat, mushroom, sage, dusty blue, and soft charcoal. Avoid yellow-toned honey stains, orange-toned pine finishes, and anything that reads as suburban oak cabinetry from twenty years ago. Those are the finishes that make slat walls look dated within a year.
For natural wood, a water-based polyurethane in a matte or satin sheen preserves the raw color without adding yellowing. If you want to soften the grain further, a white wash or limed finish will mute the natural orange undertones of pine and poplar while still letting the grain show. Rubio Monocoat and Osmo Polyx-Oil are two hard-wax oil finishes favored by designers because they enhance grain without building a plastic-looking film.
For painted slats, choose a matte or eggshell finish rather than satin or semi-gloss. The flatter sheen keeps the slats from competing with the rhythm of the shadow gaps. Benjamin Moore's Simply White, Farrow & Ball's Pigeon, and Sherwin-Williams' Accessible Beige are three reliable choices for Scandinavian palettes.
Mounting Methods for Different Wall Types and Budgets
Three mounting approaches cover almost every scenario. The first, and most professional, is the backer board method described earlier. You screw a 1/4-inch or 1/2-inch plywood panel to your wall studs, paint it, then use construction adhesive plus 18-gauge brad nails to attach each slat.
The second method skips the backer and attaches slats directly to the drywall using construction adhesive. This works for lightweight slats under 3/4-inch thick but does not allow you to hit studs with nails, which means the wall is trusting adhesive alone. Acceptable for rentals where you will eventually remove and patch, but not ideal for long-term installs.
The third method, favored in higher-end builds, uses a French cleat system or Z-clips attached to each slat, letting the entire wall lift off in sections. This is overkill for most bedrooms but worth knowing exists if you are a perfectionist or expect to move. According to Apartment Therapy, the backer board method has become the default recommendation for DIY slat walls because it forgives uneven drywall and guarantees alignment.
Styling the Scandinavian Bedroom Around the Slat Wall
A slat wall is loud in the quietest possible way, which means the rest of the room should hum rather than shout. Keep the bed low to the ground - a platform frame 8 to 12 inches tall will echo the horizontal calm of Scandinavian design. Dress the bed in linen, heavy cotton, or brushed flannel in ivory, oat, or pale gray. Skip throw pillows in saturated colors and instead layer tonal neutrals with varied textures.
Flank the bed with matching nightstands in warm wood or matte black. A single oversized pendant light hung off-center can replace nightstand lamps if your wiring allows. Paper lanterns, rice paper pendants, and unlacquered brass sconces all feel appropriate; glass and chrome generally do not. Consider adding a single floor-to-ceiling linen curtain panel in the corner to soften the geometry.
Plants matter. A single tall specimen - a fiddle-leaf fig, a bird of paradise, or a rubber tree - grounds the room and reinforces the biophilic story. Avoid cluttering with small plants; one statement plant does more than five small ones. The American Horticultural Society consistently ranks the rubber plant and snake plant among the easiest bedroom plants for low-light environments.
Conclusion: A Wall That Does More Than You Expect
A wood slat wall behind the bed is not a decoration; it is architecture. It changes the proportions of the room, softens the acoustics, anchors the bed without a bulky headboard, and signals a level of design intention that no store-bought headboard can match. The project is approachable for any intermediate DIYer, rewards patience with crisp alignment, and costs a fraction of a custom millwork quote.
The quiet gift of a slat wall is how it ages. Unlike painted accent walls that feel trendy after two years, a well-executed slat wall has been relevant in Nordic interiors for decades. The material, the rhythm, and the proportions are classical in the same sense that a paneled library is classical - the style predates trends and will outlast them. If anything, the patina of natural wood improves with time as the slats deepen slightly and the finish settles.
If you are considering this project, start with a single focal wall behind the bed rather than wrapping the whole room. Measure the wall, tape out three spacing options, photograph each, and choose the one your eye returns to. Pick a species that matches your palette rather than chasing the wood that is trending on social media this month. Give yourself a full weekend, invite a second set of hands for the mounting day, and do not rush the finish coats.
The question to sit with is the one every good design project asks: If I walked into this room as a guest, what would make me pause for a second before saying anything? For a Scandinavian bedroom, the answer is almost always a well-executed slat wall - quiet, warm, and built by hand.
Common Pitfalls to Avoid When Planning Your Slat Wall
The difference between a slat wall that looks custom-built and one that looks like a weekend project is almost always in the details. The most frequent mistake is inconsistent gap spacing, which the eye reads as sloppy even from across the room. Solve this by cutting a single reference spacer from scrap wood exactly the width of your intended gap. Use that same spacer for every gap along the wall - never eyeball it. The National Kitchen and Bath Association (NKBA) repeatedly emphasizes that installation consistency is the primary differentiator between amateur and professional millwork.
The second common mistake is ignoring outlets and switches. A slat wall that runs into a light switch or an outlet cover creates an awkward visual interruption. Plan your layout so that switches either fall in a gap (ideal) or are centered on a slat (acceptable) rather than cutting clumsily through one. If you must cut a slat around an outlet, use a template and a jigsaw for a clean result. Ask yourself before starting: Have I mapped every outlet, switch, and vent on this wall?
The third pitfall is scale. A slat wall that is too short (stopping at headboard height) almost always looks unfinished, while one that runs floor-to-ceiling reads as intentional architecture. When in doubt, extend the slats all the way up. If budget is a concern, you can paint the top portion of slats to match the wall, creating a visual cap that saves wood without sacrificing the full-height impression.
Real Cost Breakdown for a Full Queen-Width Slat Wall
Let me share realistic numbers for a standard queen-width slat wall measuring 72 inches wide by 96 inches tall. Using poplar slats cut 2 inches wide by 8 feet long, spaced 3/4 inch apart, you need approximately 30 slats. At $14 per slat (current average retail), materials come to roughly $420. Add a 4x8 plywood backer sheet at $40, paint at $35, construction adhesive at $10, and brad nails at $8 for a total materials cost around $513.
If you switched to white oak for a stained finish, the same wall would run closer to $1,100 in materials - still well below the $3,000 to $6,000 you would pay a contractor to build identical work. The savings scale with wall size; larger installations have steeper material costs but even steeper contractor markups. A recent analysis published by the National Association of the Remodeling Industry (NARI) found that DIY millwork projects return an average labor savings of 68% compared to contractor installations.
Budget also for tools if you do not already own them. A quality 18-gauge brad nailer runs $80 to $150, a compact miter saw $120 to $200, and a level $25. These tools pay for themselves on the first project and are useful for countless future home upgrades. If tools are truly not in the budget, most home improvement stores rent brad nailers for $25 per day.
More Articles You May Like


Comments
Post a Comment