Greenhouse Kitchen Windows That Extend Over the Sink
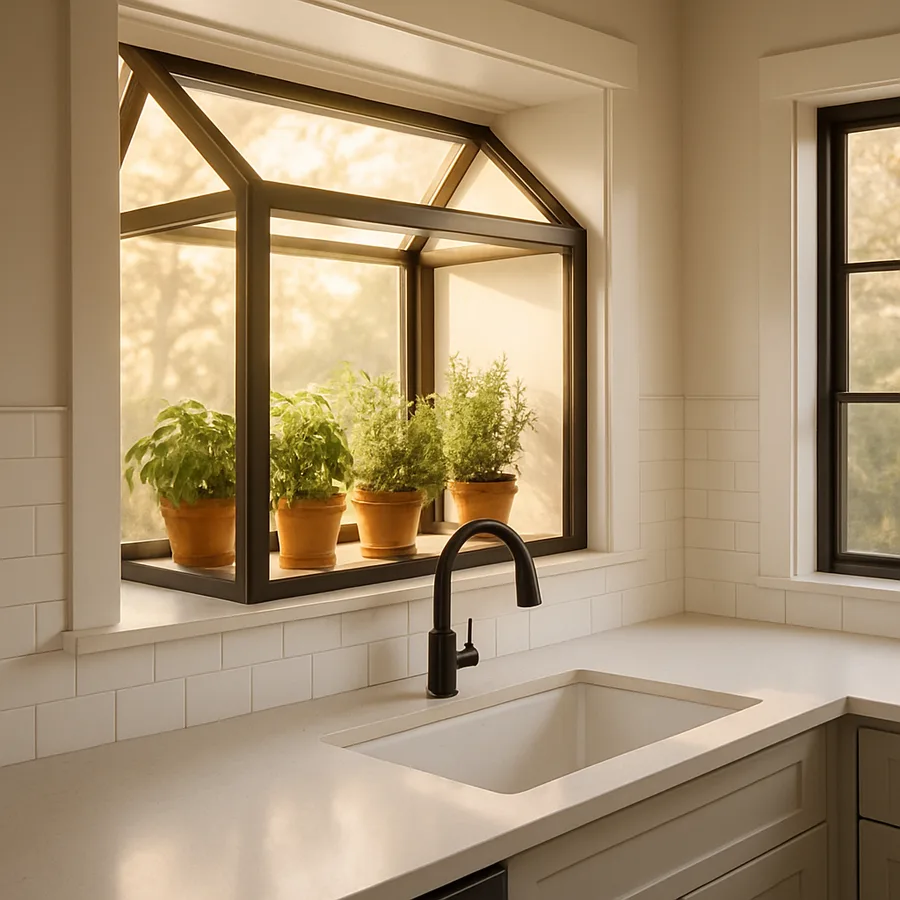
A greenhouse kitchen window is one of those design choices that manages to be practical, beautiful, and slightly old-fashioned all at once. The classic box-out window, sometimes called a garden window, projects four to twenty inches outward from the exterior wall and creates a small glass shelf-filled enclosure above the sink. Homeowners who have lived with one often describe the feeling the same way: the dishwashing chore becomes less of a chore when fresh basil is brushing against the glass. According to the National Association of Home Builders (NAHB) What Home Buyers Really Want report, natural light ranked as an essential or desirable feature for 87 percent of buyers, and few fixtures deliver more light per square foot than a projecting kitchen window.
This guide walks through the structural, aesthetic, and horticultural decisions that go into specifying a greenhouse window above the sink. We will cover framing considerations, glazing options, ventilation, plant selection, lighting, maintenance, and the cost envelope you can reasonably expect to encounter. Whether you are replacing a flat double-hung unit during a remodel or adding a projecting window to a new addition, the choices you make in the first week of planning will shape how the window performs for the next two decades.
What a Greenhouse Kitchen Window Actually Is
The category covers a surprising range of products. At the affordable end sits the pre-manufactured garden window, a factory-built unit typically 36 to 72 inches wide, 36 to 60 inches tall, and projecting 12 to 18 inches from the wall. Those come from manufacturers such as Pella, Andersen, and Milgard, and they ship as a single flanged assembly that a carpenter can set into a standard rough opening in a morning. At the other end sits the custom bay or bump-out, which may project 24 to 36 inches, include a knee wall, and require its own roof and flashing detail. The custom route costs considerably more, but it allows the shelves to be deeper, the plants to be larger, and the view to wrap more dramatically.
Between those two poles you will find a variety of hybrids. A mini-bump-out extends the floor system and sheathing by eighteen inches, giving you a small cantilevered shelf that is framed conventionally and glazed with standard flat windows. That approach avoids the mass-produced garden window look that some homeowners find dated, while still opening up shelf space and relieving the cramped feeling of a flat wall. Which version suits you depends on your home's architecture, the depth you want, your budget, and the climate zone you live in. We will return to the climate question, because it matters more than most people expect.
Framing, Sizing, and Structural Considerations
A projecting window above a sink changes the load path of the wall in ways that many homeowners underestimate. The header above the opening has to carry not only the roof load but also the weight of the window assembly itself, the shelves, and the pots of wet soil that will eventually sit on those shelves. A saturated terra-cotta pot can weigh more than twenty pounds, and six of them on a glass shelf add up quickly. The American Wood Council span tables should be consulted, or better, your structural engineer should sign off if you are widening the existing opening.
Sizing the opening is a conversation between ergonomics, plumbing, and light. The sink base cabinet is usually 33 or 36 inches wide, and it is common to pick a window 6 to 12 inches wider than the cabinet so the casing does not look pinched. Height is trickier. A garden window sill sits level with the countertop, which in a typical kitchen is 36 inches above the finished floor. That leaves roughly 18 inches of wall between the top of the backsplash and the bottom of any upper cabinets, and a projecting unit has to be coordinated with that gap carefully. If you are doing a gut remodel, consider raising the unit's head height by eliminating flanking uppers and switching to open shelving on one side of the window.
- Minimum rough opening width: typically 36 inches for factory garden windows.
- Projection depth: 12 to 18 inches for pre-made units; 24 to 36 inches for custom bumps.
- Header sizing: confirmed by load calculation, often a double 2x10 or engineered beam.
- Exterior support: knee braces, cantilevered floor joists, or a small shed roof above.
Glazing, Energy Performance, and Climate
Because a greenhouse window by definition has glass on five faces, it performs worse thermally than a standard flat window of equivalent size. The ratio of glass to framing is higher, and the unit projects into the exterior air on three sides. In cold climates this matters. The U.S. Department of Energy recommends low-E double-glazing at a minimum for new windows, and argues that high-performance windows can reduce heating bills by 10 to 25 percent compared to single-glazed or older double-glazed units. For a garden window, many specialists push owners toward triple-glazing with two low-E coatings, especially in climate zones 5, 6, and 7.
Solar heat gain cuts in two directions. A south-facing garden window in Minneapolis is a welcome little furnace in February and an unwanted greenhouse in July. Look at the ENERGY STAR performance sticker and study both the U-factor and the solar heat gain coefficient (SHGC). For south-facing kitchens, a moderate SHGC of 0.30 to 0.40 works well. For north-facing installations, prioritize the lowest U-factor you can afford because you are losing heat without any compensating winter sun. Condensation is the other practical headache: the interior glass surface of any projecting window runs cooler than adjacent walls, and in humid kitchens you may see fogging unless the frame and glazing spacer are warm-edge designs.
The ENERGY STAR windows program publishes climate-zone specifications that make the spec sheet much easier to read. If you are specifying a custom unit rather than a factory product, insist that the manufacturer provide NFRC-certified performance numbers; rough figures pulled from a brochure are not good enough for a zoning-compliance conversation with your local building department.
Designing the Interior: Shelves, Herbs, and Light
The shelf arrangement is the part of the project that most homeowners look forward to, and it is also the part that tends to disappoint if it is not thought through. Factory garden windows ship with one or two tempered glass shelves at preset heights. The lower shelf is usually 10 to 14 inches below the head of the window, and the upper shelf divides the remaining space. Consider whether your favorite herbs will actually fit in that vertical bay. A mature rosemary plant tops out at 16 inches indoors; basil wants at least 10 inches of head space; thyme stays low at 6 inches. If you grow a lot of sage and lavender, you may prefer a single deep shelf rather than two shallow ones.
Light is the other half of the plant equation. The USDA Agricultural Research Service points out that most culinary herbs need six to eight hours of direct light per day to stay flavorful, and north-facing windows will not provide that in winter even in temperate climates. A common solution is a discreet LED grow strip tucked under the upper shelf. Horticultural strips draw only 12 to 24 watts and add roughly 50 to 80 dollars per foot installed, and they extend the productive season from late September to early April for most of the country. If you can, get the electrical rough-in done while the wall is open so the strip plugs into a hidden outlet rather than dangling from the ceiling.
Would you rather see a single curated display of three potted herbs or a densely packed miniature garden with eight or ten varieties? That question, which sounds aesthetic, actually drives your shelf depth, your glass clip spacing, and even your sink choice. A big apron-front sink paired with a lush window works visually; a small bar sink paired with the same lush window can feel cramped.
Ventilation, Screens, and Operable Vents
A window above the sink gets used. Cooks open it to vent steam from a pot of boiling pasta, to cool a kitchen on a summer afternoon, and sometimes just to hear the birds. Factory garden windows typically include two narrow operable side vents, awning or casement style, with screens. Those vents are small; their combined free area may be only 1 to 2 square feet. If the kitchen has no other cross ventilation, plan to supplement with a range hood rated by the Home Ventilating Institute. For a typical kitchen, HVI recommends a hood that moves 100 cubic feet per minute per linear foot of cooktop.
Screens are an annoyance on greenhouse windows because they block light, obscure the view, and collect dust. Magnetic or clip-on screens that install from the inside allow you to remove them for the winter when insects are gone. If you live in a mosquito-heavy region, consider fine mesh no-see-um screening, which adds only about 5 percent light loss compared to standard mesh but blocks midges and gnats. A common reader question is whether the side vents can actually be opened when the shelves are full of plants, and the practical answer is yes, if the shelves stop short of the vent hinges and if the pots are sized to the available clearance. Plan for this during specification, not after installation.
Cost, Installation Timeline, and Maintenance
A factory greenhouse window installed in an existing same-size opening typically runs between 1,800 and 4,500 dollars, including labor. The low end of that range buys a basic vinyl unit with double-pane low-E glass and two side vents; the high end buys a clad-wood unit with triple glazing, warm-edge spacers, and a decorative interior shelf bracket. A custom bump-out with its own roof and wider projection runs 7,000 to 18,000 dollars depending on depth, foundation implications, and finish level. Those ranges match the HomeAdvisor True Cost Report, which found the average bay or bow window install costs around 4,800 dollars nationally.
Timelines are usually shorter than owners expect. A factory swap in an existing opening takes a two-person crew 6 to 10 hours, plus finish work the next day. A custom bump-out with foundation and roof can stretch to three or four weeks depending on inspections. If you are remodeling the whole kitchen, sequence the window early so the trim carpenter and tile setter can work around a finished unit rather than a draped opening. And before any of that happens, verify with your local building department whether the projection triggers setback issues; many municipalities allow bay windows to project into side-yard setbacks by a limited amount, but others do not.
Maintenance is modest. Clean the interior glass monthly with a mild solution and dry it with a microfiber cloth to avoid streaks. Inspect the exterior sealant joints annually and re-caulk where the perimeter has cracked. If the unit has wood shelves, oil them once a year; if the shelves are tempered glass, simply wipe them. A well-specified greenhouse window should last 25 to 30 years before glass seals fail and the insulating gas fill is lost; that is the point at which replacement, rather than repair, becomes economical.
Conclusion
A greenhouse kitchen window is one of the highest-impact upgrades a homeowner can make to a small or average kitchen. It increases natural light, opens up the sink area visually, creates a miniature growing environment for culinary herbs, and subtly boosts resale value because buyers respond to the same things every other human responds to: light, greenery, and a moment of calm during the day. Specified carefully, the window pays for itself in quality of life within the first year and in potential resale premium within about five to seven years, based on Remodeling Magazine Cost vs. Value data for minor kitchen upgrades.
The decisions that matter most are framing, glazing, and shelf planning. Undersize the header and you will crack drywall; under-spec the glass and you will pay for it every January on the heating bill; under-plan the shelves and your herbs will never thrive. Work through each of those decisions with your contractor, ideally with a rough sketch of which plants you want to grow and how tall they get. A window is forgiving of a lot of mistakes, but it is not forgiving of a structural shortcut or an SHGC that does not match the climate zone.
Finally, remember that the best greenhouse window is the one you actually use. If your daily routine does not include standing at the sink and pinching off a sprig of rosemary, a full garden window may be overkill, and a simple deep sill with a single row of pots will serve you better for less money. But if you cook every day, if you like the idea of a small growing project, and if your kitchen has a view worth celebrating, this is the upgrade that rewards the decision for decades.
Ready to start? Walk through your kitchen tonight with a tape measure and note three things: the exact width of your sink cabinet, the height from the counter to the underside of any upper cabinets above the sink, and the compass direction the window faces. With those three numbers in hand, you can call two local window dealers for quotes and know within one conversation which tier of greenhouse window makes sense for your project.
More Articles You May Like


Comments
Post a Comment