Curbless Walk-In Shower Ideas for a Seamless Bathroom Look
Why Barrier-Free Showers Are Gaining Popularity
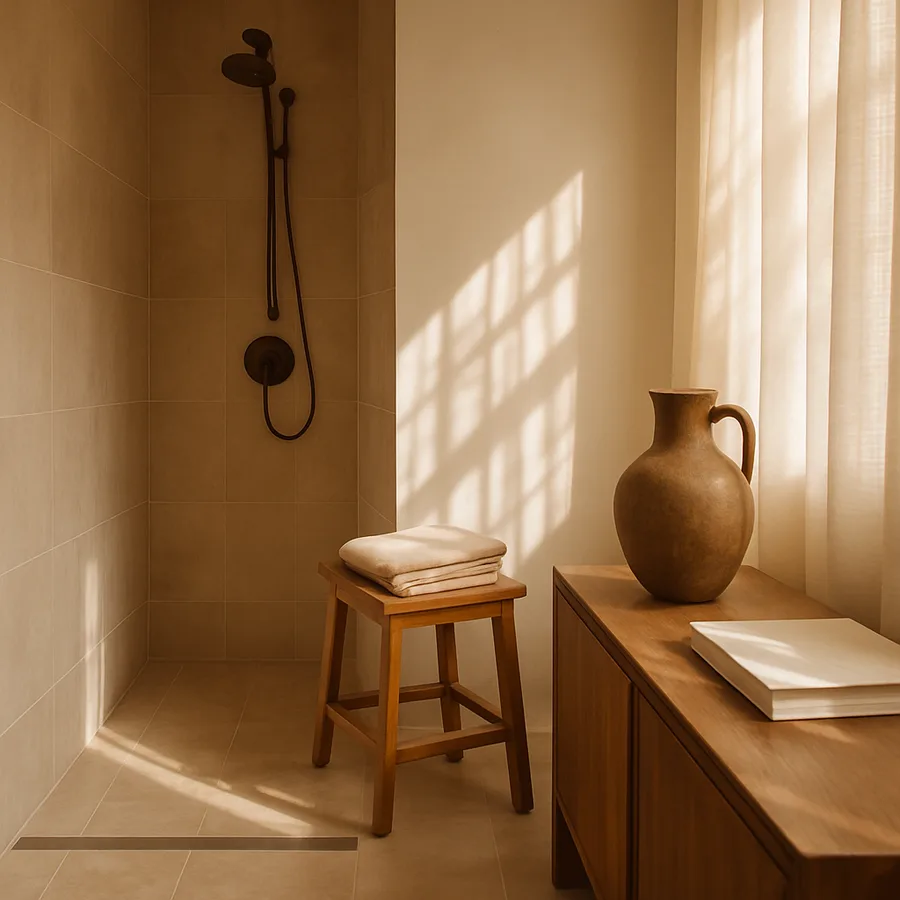
The shift toward curbless walk-in showers represents one of the most significant changes in residential bathroom design over the past decade. Homeowners are discovering that removing the traditional shower curb does far more than create a sleek visual impression. It fundamentally changes how the entire bathroom feels, making even a modestly sized space appear larger and more connected. The absence of a raised threshold allows the eye to travel uninterrupted across the floor, producing a sense of openness that conventional stall showers simply cannot match.
According to the National Association of Home Builders (NAHB), curbless showers ranked among the most desired bathroom features in their annual builder survey, with over 60 percent of respondents expressing interest in barrier-free designs. This popularity is not limited to luxury builds. Mid-range remodels now regularly incorporate zero-threshold showers as a standard feature rather than an upgrade. The result is a trickle-down effect where accessible design has become aspirational design.
The American Society of Interior Designers (ASID) has noted that universal design principles, which include barrier-free showers, are increasingly requested by clients under 40 who are thinking about long-term livability. These homeowners recognize that a curbless shower serves them well now and will continue to do so as mobility needs change over the decades. It is a rare renovation choice that is simultaneously trendy and forward-thinking.
Beyond aesthetics and accessibility, there is a practical cleaning advantage. Without a curb trapping water and soap residue, the shower floor is far easier to squeegee and mop. Grout lines are more accessible, and the absence of a raised lip means fewer places for mold to hide. Have you ever struggled to keep the corners of a traditional shower pan clean? A curbless design eliminates many of those trouble spots entirely.
Planning the Slope and Drainage System
The single most critical element in a successful curbless shower is the drainage system. Without a curb to contain water, the floor must be sloped precisely to guide every drop toward the drain before it reaches the rest of the bathroom. This requires careful planning during the framing stage, because the subfloor typically needs to be recessed to accommodate the slope without creating a noticeable step-down. Most contractors recommend a slope of at least one-quarter inch per linear foot leading to the drain.
Linear drains have become the preferred choice for curbless showers because they allow the entire floor to slope in a single direction. Positioned along one wall, a linear drain collects water across its full length, which means the floor can tilt on just one plane rather than tapering from all four sides toward a center point. This simplifies the tile installation dramatically and produces cleaner sight lines. The National Kitchen and Bath Association (NKBA) recommends linear drains for barrier-free applications specifically because of this simplified grading requirement.
Point drains remain a viable option, especially in smaller showers where the distance from each wall to the center is short enough that the four-way slope stays gentle. However, large-format tiles become more difficult to install over a multi-directional slope because they cannot flex to follow compound curves. If you plan to use tiles larger than 12 inches on any side, a linear drain will save significant labor and reduce the risk of lippage between adjacent tiles.
Waterproofing is non-negotiable and arguably more important in a curbless configuration than in a traditional one. A sheet membrane or liquid-applied waterproofing layer must extend across the entire shower floor, up the walls to at least the showerhead height, and several inches beyond the shower opening onto the main bathroom floor. The Tile Council of North America (TCNA) publishes detailed specifications for waterproofing curbless showers, and following those guidelines is the difference between a durable installation and a costly failure.
Choosing the Right Tile and Surface Materials
Material selection for a curbless shower must balance aesthetics with slip resistance. Large-format porcelain tiles are the most popular choice because they minimize grout lines and create that sought-after seamless look. A single 24-by-48-inch tile can cover a substantial portion of the shower floor, reducing visual clutter and making the space feel expansive. Porcelain is also nearly impervious to water absorption, with rates well below 0.5 percent, which makes it ideal for wet environments.
Slip resistance is measured by the Dynamic Coefficient of Friction (DCOF), and the industry standard set by the ANSI requires a minimum DCOF of 0.42 for wet areas. Many porcelain tiles marketed for shower floors exceed this threshold, but it is essential to verify the rating before purchasing. A beautiful tile that becomes dangerously slick when wet defeats the purpose of an accessible design. Matte and textured finishes generally outperform polished surfaces in DCOF testing.
Natural stone such as marble, travertine, and slate brings warmth and organic character to a curbless shower, but it demands more maintenance. Stone must be sealed regularly to prevent water infiltration and staining, and certain varieties like marble are susceptible to etching from acidic cleaning products. If you choose stone, plan for annual resealing and use pH-neutral cleaners exclusively. The visual payoff can be extraordinary, but the commitment to upkeep is real.
An increasingly popular approach is to use the same tile on both the shower floor and the general bathroom floor, extending the material without interruption across the entire room. This technique maximizes the seamless effect that makes curbless showers so appealing. When the tile, grout color, and layout pattern are identical on both sides of the shower threshold, the boundary between wet and dry zones all but disappears. Would this continuous-floor approach work in your bathroom, or do you prefer a subtle material shift to define the shower zone?
Glass Panels and Enclosure Options
A frameless glass panel is the most common companion to a curbless shower because it contains splash without interrupting the visual flow. A single fixed panel, typically 36 to 42 inches wide, positioned at the shower opening deflects water back toward the drain while leaving a comfortable entry gap. There is no door to swing, no track to collect grime, and no frame to obstruct the view. The panel simply stands as a transparent divider that does its job without calling attention to itself.
For homeowners who want maximum openness, a fully open curbless shower with no glass at all is an option in larger bathrooms where the shower is positioned away from fixtures that could be damaged by occasional overspray. This wet-room concept, long standard in European and Japanese bathrooms, treats the entire bathroom as a waterproofed space. The floor slopes toward a central or wall-mounted drain, and the shower area is defined only by the placement of the showerhead and controls. It is a bold choice that rewards careful planning.
Half-walls or pony walls offer a middle ground between full enclosure and open concept. A 42-inch-high wall built from the same tile as the shower surround provides splash protection for the lower body while keeping the upper portion of the bathroom visible. Topping the half-wall with a narrow glass panel adds further splash control. This combination works particularly well when the toilet or vanity is adjacent to the shower and you want to maintain some visual separation without a full partition.
The hardware that supports glass panels matters more than most homeowners realize. Stainless steel clamps and hinges with brushed or matte black finishes are the most durable options for wet environments. Chrome-plated hardware can develop pitting over time if the plating is thin. When selecting hardware, check that it is rated for the thickness of the glass you have chosen, typically 3/8 to 1/2 inch for fixed panels. Improperly supported glass is a safety hazard, so this is one area where quality should not be compromised.
Design Strategies for Small Bathrooms
A curbless shower can be transformative in a small bathroom precisely because it eliminates the visual barriers that make compact spaces feel cramped. In a bathroom under 50 square feet, every inch counts, and a raised curb followed by a framed glass door creates a series of visual interruptions that fragment the room. Removing those barriers and replacing them with a continuous floor and a single glass panel can make the room feel nearly twice as spacious without adding a single square foot.
Positioning the shower in a corner with two tiled walls and one glass panel is the most space-efficient layout for small bathrooms. The glass panel should be on the side facing the vanity or toilet so that natural light from any window can pass through unobstructed. A Houzz gallery of curbless shower designs demonstrates how corner placements maximize floor area while maintaining a generous shower footprint.
Color and material continuity become even more important in tight quarters. Using the same tile on the floor, shower walls, and possibly even the lower portion of the non-shower walls unifies the room into a single visual volume. Light-colored tiles in the white-to-warm-gray range reflect more light and enhance the sense of space. Dark tiles can work beautifully in larger bathrooms but tend to make small ones feel cave-like unless paired with abundant lighting.
Recessed niches for soap and shampoo eliminate the need for freestanding caddies that clutter the shower floor. In a curbless design where the floor is the star, keeping it clear of objects reinforces the clean, open aesthetic. Build niches into the stud bays during framing and tile them to match the surrounding wall. Two niches at different heights accommodate tall bottles and small items separately, keeping everything organized without sacrificing wall space.
Accessibility Benefits Beyond Aesthetics
While the visual appeal of curbless showers drives much of their popularity, the accessibility benefits deserve equal attention. A zero-threshold entry means wheelchair users, people with walkers, and anyone with limited leg mobility can enter the shower without navigating a raised barrier. The Centers for Disease Control and Prevention (CDC) reports that over 230,000 Americans visit emergency rooms each year due to bathroom-related injuries, with slips and falls accounting for the vast majority. Eliminating the shower curb removes one of the most common tripping hazards in the home.
The Americans with Disabilities Act (ADA) guidelines for accessible showers specify a maximum threshold height of one-half inch, which a properly graded curbless shower easily meets at zero. While residential bathrooms are not required to comply with ADA standards, building to those specifications ensures the space will accommodate any future mobility needs. For aging-in-place renovations, a curbless shower is considered essential by most occupational therapists and certified aging-in-place specialists through ASID.
Grab bars integrate naturally into a curbless shower design and should be included regardless of the current occupants' mobility levels. Modern grab bars are available in styles that double as towel bars or shelf supports, so they enhance the design rather than announcing a medical accommodation. Mount them into blocking installed between studs at 33 to 36 inches above the finished floor on the wall opposite the showerhead and at the entry point.
A fold-down teak bench is another feature that bridges the gap between luxury and accessibility. It provides a comfortable seat for shaving legs, a perch for someone who cannot stand for the full duration of a shower, and a surface for placing toiletries. When folded up, it nearly disappears against the wall. The combination of a curbless threshold, grab bars, and a fold-down bench creates a shower that is fully accessible without any aesthetic compromise.
Cost Considerations and Hiring the Right Contractor
A curbless shower installation typically costs 20 to 40 percent more than a conventional curbed shower of the same size, primarily because of the additional labor involved in recessing the subfloor, grading the slope, and applying comprehensive waterproofing. According to the National Kitchen and Bath Association (NKBA), the average bathroom remodel in the United States costs between $15,000 and $35,000, with the shower accounting for roughly one-third of that budget. Adding a curbless design might increase the shower portion by $1,500 to $4,000 depending on complexity and regional labor rates.
The most important factor in controlling costs is hiring a contractor who has specific experience with curbless installations. A general contractor who has never built a zero-threshold shower may underbid the project and then encounter problems during construction that lead to change orders. Ask for references from previous curbless shower projects and request to see them in person if possible. A well-executed installation should show no signs of water escaping the shower area after years of use.
Material costs vary widely depending on the tile and hardware selected. Porcelain tiles range from $3 to $15 per square foot, while natural stone can reach $30 or more. The linear drain is often the single most expensive component, with quality stainless steel models from manufacturers like Schluter and Infinity Drain costing $300 to $800 depending on length and finish. Skimping on the drain is a false economy, as a failure there means tearing out the entire shower floor.
If you want detailed guidance on selecting bathroom fixtures that complement a barrier-free design, the NKBA consumer resources page provides planning checklists and a directory of certified designers in your area. Working with an NKBA-certified professional adds cost upfront but typically saves money by avoiding mistakes during construction.
Conclusion
A curbless walk-in shower delivers a rare combination of visual sophistication, practical accessibility, and long-term home value. By eliminating the traditional threshold, you create a bathroom that feels larger, cleans more easily, and accommodates occupants of all mobility levels without compromise. The keys to success are precise drainage planning, thorough waterproofing, and materials chosen for both beauty and slip resistance.
Whether you are renovating a compact guest bath or designing a spacious primary suite, the principles remain the same: slope the floor correctly, waterproof aggressively, and let the continuous surface do the visual heavy lifting. The investment is modestly higher than a curbed alternative, but the daily experience of stepping effortlessly into a shower with no barriers is a satisfaction that compounds over years of use.
If you are ready to explore a curbless shower for your next bathroom project, start by consulting with an NKBA-certified designer who can evaluate your existing floor structure and recommend the best drainage and waterproofing approach for your specific situation. The planning stage is where the success of a barrier-free shower is determined, and expert guidance at that point pays for itself many times over.
More Articles You May Like


Comments
Post a Comment