Installing A Pull Down Attic Ladder Safely
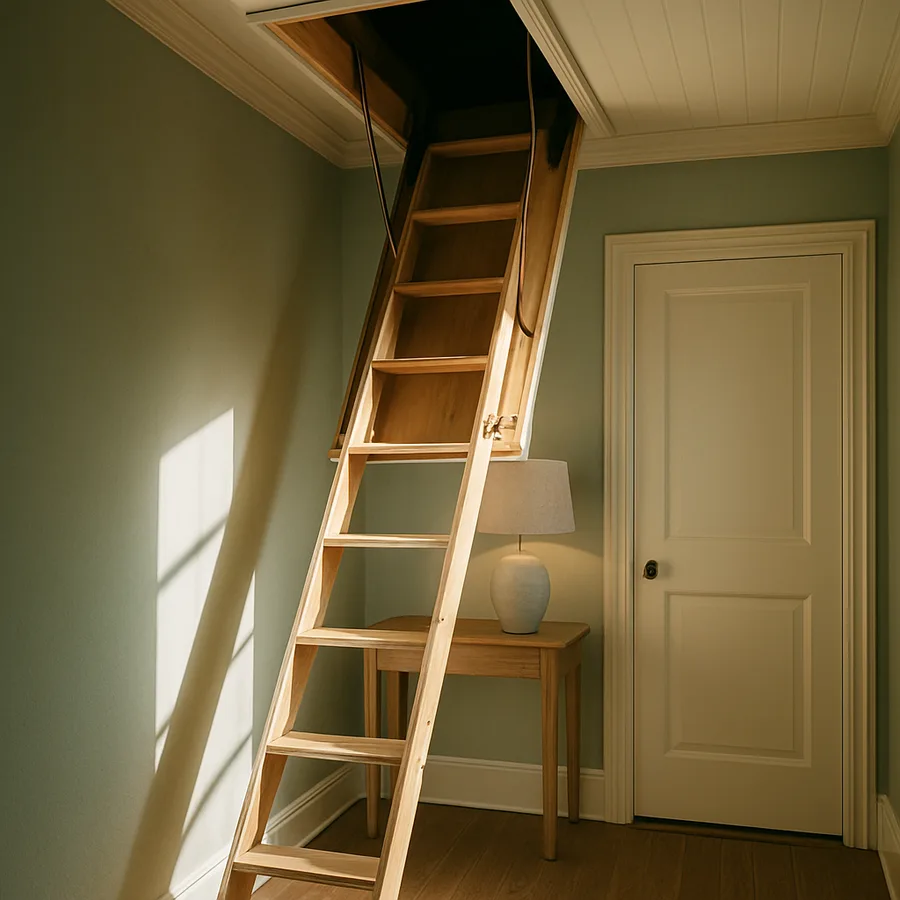
The Consumer Product Safety Commission tracks roughly 4,700 emergency-room visits each year attributable to residential attic ladder incidents, and post-incident inspection reveals two consistent culprits: undersized joist headers and stringers that were never trimmed to the actual floor-to-ceiling dimension of the room. A pull-down attic ladder is deceptively simple, but the assembly hangs a moving mechanical load through a plane in the drywall while carrying an occupant plus tools plus whatever the homeowner is hauling into storage. The engineering demands respect from the moment the box gets opened.
Ladders are rated for one of three duty categories. Type III models handle 200 pounds, Type II handles 225, and Type I handles 250 with an industrial rating going higher. For a normal household, a Type I aluminum or steel ladder in a 22.5 by 54 inch rough opening covers the great majority of situations, mates cleanly with 24-inch on-center joist framing, and delivers a proper 65 to 68 degree unfolded angle. The tools for the install are ordinary - a circular saw, a reciprocating saw, a stud finder, a laser level, and two saw horses. What is not ordinary is the sequence, and getting the sequence right is what makes the difference between a ladder that operates for 30 years and one that racks itself loose in 30 months.
Measure The Rough Opening And Ceiling Height
Confirm your floor-to-ceiling dimension in the room below the planned ladder location. Most residential ladders are engineered for ceiling heights between 7 feet 8 inches and 10 feet, with the exact range printed on the box. If you have an 8 foot 6 inch ceiling, do not buy a ladder rated only up to 8 feet - you will end up with a bottom rail hanging 6 inches above the floor and no safe way to shorten the stringers.
In the attic, verify at least 30 inches of clear height above the intended landing point. The ladder swings through an arc as it unfolds, and the rear pivot needs clearance that many installers overlook. Stand a broomstick vertically at your planned pivot point - if any roof structure interferes with the broomstick within 30 inches, either shift the opening or choose a lower-profile ladder model.
Choose the opening location with the joist run in mind. Ladders install most cleanly when the long dimension of the opening runs parallel to the joists, requiring only two headers cut in and the two long-side joists left continuous. Cross-joist installs require doubled headers on both ends and doubled sistered joists on both sides, doubling the framing labor. If your only viable location runs across joists, plan for that framing complexity from the start.
Frame The Opening Between Joists
Mark the finished opening size on the ceiling below, adding 1/2 inch to each dimension for framing tolerance. Cut through the drywall along the marks with a keyhole saw or an oscillating multitool, then remove the drywall square. Locate the joists exposed above the drywall and confirm they align with your opening plan. A stud finder rarely lies about joist location, but a physical look through the hole beats a signal reading.
From the attic side, mark the joists at your target header locations. Use a speed square to draw plumb cut lines at both ends. Support the joist you are about to cut with a temporary 2x4 sistered underneath and screwed to both remaining joists to prevent ceiling sag during the cut. Cut the joist cleanly with a reciprocating saw held perpendicular to the joist, not at an angle.
Install the headers using joist hangers rated for the joist size. A 2x8 joist takes a 2x8 header supported by Simpson LUS28 or equivalent hangers, fastened with the manufacturer-specified 1.5 inch structural connector nails or #9 by 1.5 inch structural screws. The 2024 International Residential Code Section R502.10 requires framed openings in floor structures to be constructed with headers and trimmer joists sized per code tables - the tables in Chapter 5 tell you when a single header is adequate and when doubled framing is required based on span and opening width.
Once framing is complete, verify the finished rough opening dimensions match the ladder manufacturer's specification within 1/8 inch. Squaring the opening now saves an hour of shimming and reshimming later. Diagonal measurements should match within 1/4 inch.
Position And Support The Ladder Unit
Attic ladder units weigh between 60 and 90 pounds and are awkward to hoist through the ceiling alone. Recruit at least one helper and prepare two 2x4 supports temporarily nailed to the underside of the joists, spanning the opening below the finished ceiling line by 1/2 inch. These supports hold the ladder unit in position while you fasten it, and they can be removed after the permanent fasteners are set.
From the attic, lower the ladder unit through the opening carefully. Guide the assembly with one person above and one below, letting the unit rest on the temporary 2x4 supports. The ladder box must sit flush with the finished ceiling plane - not proud, not recessed. If the drywall thickness varies between rooms, use the temporary supports to control the exact height, then commit to that height with the permanent fasteners.
Check the ladder unit for level side-to-side and end-to-end using a 4-foot spirit level laid across the top edges of the frame. Shim with cedar shakes between the ladder frame and the rough-opening framing wherever needed to bring the unit into level. A ladder installed out of level will bind the folding hinges within a few months and will wear its own lift springs unevenly for the rest of its life.
Fasten The Ladder Frame To Joists
Follow the manufacturer's fastener schedule exactly. Nearly every residential attic ladder ships with a specific pattern of #10 by 3 inch structural screws or 16d common nails, arranged to distribute load across all four sides of the frame. Substituting drywall screws for structural screws is the single most common failure mode after a couple years of use - drywall screws are hardened to the point of brittleness and shear rather than bend when the frame flexes under weight.
Predrill every fastener location through the ladder frame to prevent splitting the wood side rails. Use a bit sized 1/16 inch smaller than the fastener shank. Drive the fasteners in a diagonal pattern - corner to corner rather than one side at a time - to avoid drawing the frame out of square as you tighten. Check the diagonals with a tape measure after every two fasteners.
Once every fastener is set, remove the temporary 2x4 supports and unfold the ladder for the first time. The unfold action should feel smooth and controlled, with the springs taking the majority of the weight. If the ladder drops abruptly or resists reopening, one of the pivot points is binding - usually because a shim moved during fastening. Correct the issue now, not after the trim goes on.
Verify no fastener bit into a hidden electrical cable or plumbing line as you drove it. This is one reason to inspect the joist bay visually from the attic before framing began, and to note where any live wires ran. A screw through a Romex jacket is a slow-motion fire hazard that may not manifest for years.
Trim The Stringers And Test Operation
Unfold the ladder fully and let the bottom stringers hang free above the finished floor. Measure the gap between the bottom of each stringer and the floor at the correct 65 to 68 degree operating angle, marked in the manufacturer's diagram. Both stringers must be trimmed to the same length so the ladder rests evenly on all four feet.
Mark the cut lines with a combination square held against the stringer at the same angle as the stringer meets the floor. Cut with a fine-tooth blade - 60 tooth for aluminum stringers, 40 tooth for wood - and deburr aluminum cuts with a file. A rough cut edge on an aluminum stringer will grip the vinyl foot cap unevenly, which lets the cap creep off within a few months of use.
Reattach the rubber feet caps and confirm the ladder stands solidly on both feet without any rocking. Load-test the ladder gradually. Start with your weight at the bottom rung, then step up to each rung in turn, watching the pivot joints and the ceiling frame for any deflection. Cycle the ladder open and closed 5 to 10 times to verify smooth motion. Occupant safety guidance in the CPSC ladder safety materials covers the three-point-of-contact rule and load posture that applies to every attic ladder use.
Add insulation to the top side of the door panel with 2 inches of rigid foam sealed to the frame with foil tape. An uninsulated attic ladder door leaks conditioned air upward on a scale comparable to leaving a small window cracked. This step turns the ladder from an energy penalty into a neutral component of the attic assembly.
Wrapping Up Your Project
Install the finish trim around the ceiling frame. Standard 1x4 clear pine or MDF trim covers the drywall-to-ladder-frame joint and gives the finished install its clean look from below. Miter the corners at 45 degrees, glue and pin the miters, and caulk the trim-to-drywall seam with paintable acrylic latex. Prime and paint the trim to match the ceiling before you consider the project complete - bare trim looks unfinished no matter how well the ladder itself operates.
Test the operation one more time with a full load. Have your helper hand up a 40 pound tote of holiday decorations while you climb, then lower the tote back down. Any binding in the pivots or any spring hesitation shows up under real load conditions in ways it does not during the empty test. If the operation is not smooth, disassemble the pivot pins, apply a dry lithium lubricant, and reassemble - never use petroleum-based grease near attic insulation, which absorbs and slowly wicks the oil into surrounding materials.
Label the ladder duty rating on the underside of the door with a paint pen or a printed label. Future occupants of the home need to know whether they can safely carry a 175 pound load up the ladder or need to break the trip into two loads. This one-minute step reduces the risk of the ladder being overloaded by someone who did not select and install it.
Register the ladder with the manufacturer if a warranty card is included, and keep the original box or the installation manual with your home records. Some models offer 10 year or lifetime warranties that require registration within 30 days of install. Your ladder now integrates cleanly with the ceiling below and gives you controlled, code-appropriate access to the attic for every trip you will make over the next few decades.
More Articles You May Like



Comments
Post a Comment