
Building A Pull Out Ironing Board Cabinet
Building A Pull Out Ironing Board Cabinet
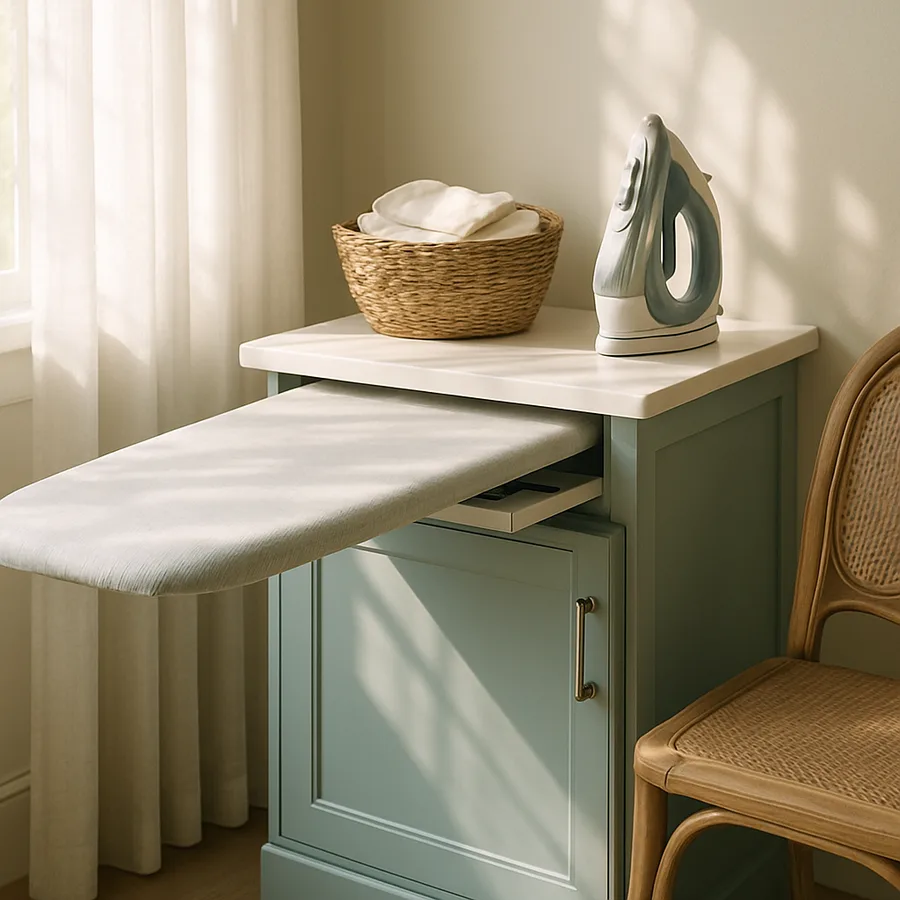
Freestanding ironing boards belong in the same category as folding step stools and yoga mats. Everyone owns one, no one has a great place to store it, and it always seems to be in the way. A built-in pull-out ironing board cabinet solves the problem elegantly. The board lives inside a shallow cabinet or wall cavity, deploys in one motion when needed, and disappears completely when not in use. Homes built between 1920 and 1950 frequently included these built-ins as standard features. They fell out of fashion in the postwar building boom, largely because the freestanding board was cheaper for builders to skip installing.
Building your own pull-out cabinet takes a weekend and about 200 dollars in materials. The mechanism is simple. A commercial pull-out ironing board hardware kit, available from Rockler, Hafele, and several online specialty retailers, provides the pivoting arm, the board itself with a heat-safe pad and cover, and the mounting bracket. Your job is to build or modify the cabinet that houses it, either as a purpose-built shallow cabinet or by retrofitting the mechanism into an existing base cabinet or between wall studs. The build tolerances are forgiving and the tools required are basic. What matters is picking the right location, respecting the mechanism's clearance needs, and finishing the cabinet to match the room it will live in for the next twenty years.
Pick The Location And Confirm Clearances
The ideal location for a pull-out ironing board is a laundry room, a walk-in closet, or a mudroom near the bedrooms. The board needs 60 to 66 inches of horizontal deployment clearance from the mounting face, plus at least 30 inches of standing room beyond that for the person using it. Total swing space works out to roughly 90 inches, or 7.5 feet, measured from the wall. Any location that cannot accommodate that clearance is a nonstarter, no matter how conveniently placed it might seem.
Vertical clearance matters too. The mechanism typically pivots through a 90-degree arc from stored to deployed. During that swing, the tip of the board sweeps through the space in front of the cabinet at a height between 30 and 48 inches. Anything at that height, including door knobs, drawer pulls, or wall-mounted fixtures, becomes a collision hazard. Check the swing path before you commit to a location. Marking the arc with painter's tape on the floor and up the wall makes the geometry immediately obvious.
Consider proximity to power and light. Ironing requires a nearby outlet, preferably at counter height rather than at the baseboard. Extending a 6-foot iron cord across a walkway is a trip hazard and often not long enough anyway. The National Electrical Code (NFPA 70) requires a dedicated 20-amp circuit for laundry areas, so if your target location is in a laundry room, you likely have an appropriate circuit within reach. If not, plan the wiring work as part of the project or choose a different room.
Also think about the wall behind the mechanism. The mounting bracket screws into either studs or solid backing, not into drywall alone. Locate the studs before you finalize the cabinet position. If the studs do not align with the ideal mounting location, either shift the cabinet slightly or install a plywood mounting board across two adjacent studs and mount the mechanism to that.
Select The Hardware And Board Size
Commercial pull-out ironing board kits come in three general sizes. Full-size units feature a 48-inch board and require a cabinet at least 15 inches wide by 55 inches tall. Compact units use a 42-inch board and fit in a 13-inch wide by 50-inch tall cabinet. A few micro units use a 36-inch board suitable for small closets or apartments. Full-size is worth the extra cabinet real estate if you have it. Ironing a dress shirt on a 42-inch board is tolerable, on a 36-inch board tedious.
Look for a hardware kit that includes ball-bearing pivot hardware and a spring-assisted lift. The cheapest kits use plain steel pivots that develop play within a year and need constant adjustment. A quality kit from a name-brand supplier costs 120 to 180 dollars and lasts decades. Check the maximum weight rating too. Steam irons weigh 3 to 5 pounds and generate downward pressure well beyond that during use. A mechanism rated for 20 pounds of static load handles this without issue.
The board itself matters more than the mechanism. Look for a heat-safe cotton or linen cover over a resilient foam pad at least half an inch thick. A thin cover over a hard board produces poor ironing results because there is no give under the fabric being pressed. Some higher-end kits include a built-in electrical outlet, a small task light, and even a spray-bottle holder. Those extras cost more but improve daily usability enough to be worth it if you actually iron regularly.
Verify the mechanism's rotation direction matches your intended user. Most kits deploy with the wide end of the board on the user's right, which suits right-handed ironing. Left-handed users can order a mirrored version, but availability is limited. Confirm before you buy.
Build Or Modify The Cabinet Box
If you are building from scratch, use 3/4-inch cabinet-grade plywood for the sides, top, and bottom. Birch or maple veneer plywood provides a clean finish and takes paint or stain well. Cut the plywood to size based on the mechanism kit's specifications. For a full-size unit, that typically means two side pieces at 55 by 6 inches, a top and bottom at 15 by 6 inches, and a back panel of 1/4-inch plywood at 55 by 15 inches. Adjust dimensions to match your specific kit.
Assemble the cabinet with pocket screws or a rabbet-and-dado joint. Pocket screws are faster and produce joints strong enough for a wall-mounted cabinet that carries only its own weight plus the mechanism. Route pocket hole locations along the top and bottom edges of the side pieces, then join the panels with 1.25-inch pocket screws. Verify the box is square before the glue sets by measuring the diagonals. Equal diagonals means square; a difference greater than 1/8 inch means the box is racked and needs to be pushed back into square before the joints cure.
If you are retrofitting an existing base cabinet, remove the shelves and any drawer hardware, then install a divider panel to isolate the ironing board mechanism from adjacent storage. The mechanism sweeps through the entire cabinet interior during deployment and cannot share space with anything else. Leave a clearance envelope roughly 4 inches deep by the full height of the mechanism, plus 2 inches on each side for the pivot arm's swing.
For a wall-recessed installation, cut a hole between two studs, add horizontal blocking at the top and bottom of the opening, and slide the cabinet into the wall cavity. This produces the cleanest finished look because the cabinet face sits flush with the wall surface, but it requires opening drywall and dealing with any wiring or plumbing you encounter. Verify with a stud finder that the target bay is clear of wires and pipes before cutting. An oscillating multitool works well for a clean drywall cut and stops at the stud without damaging what is behind it.
Install The Mechanism And Board
Mount the mechanism's bracket to the cabinet interior before you hang the cabinet on the wall. Working on a bench is far easier than reaching into an installed cabinet. Follow the manufacturer's template exactly. Hardware kits are engineered for specific mounting positions, and improvising a mounting location by even a half inch can bind the pivot arm.
Attach the bracket with the fasteners provided or with equivalent hardware. Most kits use machine screws through the cabinet wall into threaded inserts on the bracket, which produces a stronger joint than wood screws directly into the plywood side. If your kit uses wood screws, use every hole in the bracket. The mechanism experiences repeated stress cycles as it deploys and stows, and every skipped screw shortens the mounting life proportionally.
Test the mechanism dry before installing the board. The pivot arm should sweep smoothly through its full range without binding or scraping the cabinet interior. If it binds, identify the interference point and shave the offending clearance before proceeding. Common interference points include the back panel where the arm folds against it, and the top of the cabinet where the arm's storage position bumps against the top panel.
Install the board itself once the mechanism moves cleanly. The board typically attaches to the mechanism with two or four bolts through pre-drilled holes. Snug the bolts but do not overtighten. Overtightening deforms the mounting flange and produces a wobble that only gets worse with use. Verify the board deploys to a truly horizontal position. Small adjustments to the arm's stop screw let you fine-tune the deployed angle. A board that tilts even 3 degrees from level produces uneven ironing pressure and frustrates the user.
Finish The Cabinet And Test Under Real Use
Finish the cabinet exterior to match the surrounding cabinetry or wall. If it is going into a laundry room with white cabinets, prime and paint it white. If it is going into a stained-wood mudroom, apply the same stain and topcoat used on adjacent millwork. A carefully matched finish makes the cabinet feel intentional rather than added-on.
Install the cabinet door last. The door should swing at least 100 degrees to clear the mechanism's deployment path. A 90-degree door binds against the pivot arm. Choose Euro-style concealed hinges with a wide swing angle, ideally 110 or 125 degrees. Adjust the hinges after installation until the door closes flush against the cabinet frame with an even gap on all sides.
Consider adding a soft-close mechanism to the door. Ironing board cabinets get opened and closed frequently, sometimes hastily. A soft-close hinge prevents slammed doors and extends the life of the cabinet substantially. Retrofit soft-close adapters cost 5 to 10 dollars per hinge and install without additional tools.
Test the finished installation under normal use. Deploy the board, place a heated iron on the surface for the manufacturer's recommended dwell time, and iron a shirt as you normally would. Watch for any wobble in the mechanism, any deflection of the board under normal pressure, or any smoke or discoloration in the cabinet finish caused by heat exposure. Modern boards include heat shields that protect the cabinet from a resting hot iron, but a truly forgotten iron left face-down on the board for hours can still cause damage. The Consumer Product Safety Commission tracks iron-related residential fires as a small but persistent hazard category, and the mitigation is straightforward. Never leave a hot iron unattended.
Wrapping Up Your Project
A well-built pull-out ironing board cabinet is one of those quiet upgrades that adds daily convenience without demanding attention. It stays out of sight until needed, then presents a proper ironing surface in ten seconds and stows just as quickly. Once installed, most users find themselves ironing shirts they previously would have crumpled into a basket, because the friction of setup and takedown has essentially disappeared.
Before you consider the project complete, run through the final safety and function checks. Confirm the deployed board is level and stable under downward pressure. Verify the door clears the mechanism through its full swing. Test the outlet near the cabinet under load with a heat gun or another 1,500-watt appliance to make sure the circuit handles a steam iron without tripping. Inspect the cabinet finish for any drips or runs and touch them up now while it is easy.
Add the mechanism to your seasonal maintenance list. Once a year, deploy the board and inspect the pivot bearings for wear. A drop of light machine oil on the pivot points every two years keeps the mechanism moving smoothly. Check the board pad and cover for scorching or wear, and replace both when they no longer provide a smooth surface. Replacement covers cost under 20 dollars and take five minutes to swap.
Take pride in the build. A pull-out ironing board cabinet is exactly the kind of built-in that separates a thoughtfully finished home from an average one. It solves a real problem, respects the visual language of the room, and works better than the freestanding alternative in every measurable way. Enjoy the reclaimed floor space, the tidier laundry room, and the small but genuine satisfaction of finishing a project that will still be doing its job decades from now.


Comments
Post a Comment